When it comes to temporarily making any adjustment without affecting the main photo, image masking is one of the best tools. If you are new to the photo editing journey, you might be wondering what is masking in Photoshop and how to use it effectively.
Correctly utilizing this pro technique can help you blend, composite, and make selective adjustments without permanently altering the original photo. This article will share some pro masking methods to take your Photoshop editing skills to the next level.
What is Masking in Photoshop?
Image masking in Photoshop is a process in which you show or conceal some specific parts of the shot after a selection. This compositing technique allows you to edit particular photo areas without affecting the entire original shot. If your captured picture has intricate details or a complex background such as fur, hair, or a transparent background, use image masking in Photoshop for better results. This photo editing technique is mainly used to erase parts of a picture, where tools like quick selection, magic wand, or even a pen tool are inappropriate.
How Beginners Can Use Image Masking in Photoshop?
Being new to Photoshop doesn’t mean you can’t learn advanced image-masking techniques.
The hacks below can help you hone your editing skills and achieve precise and controlled results.
Use Channel Masking for Complex Selection
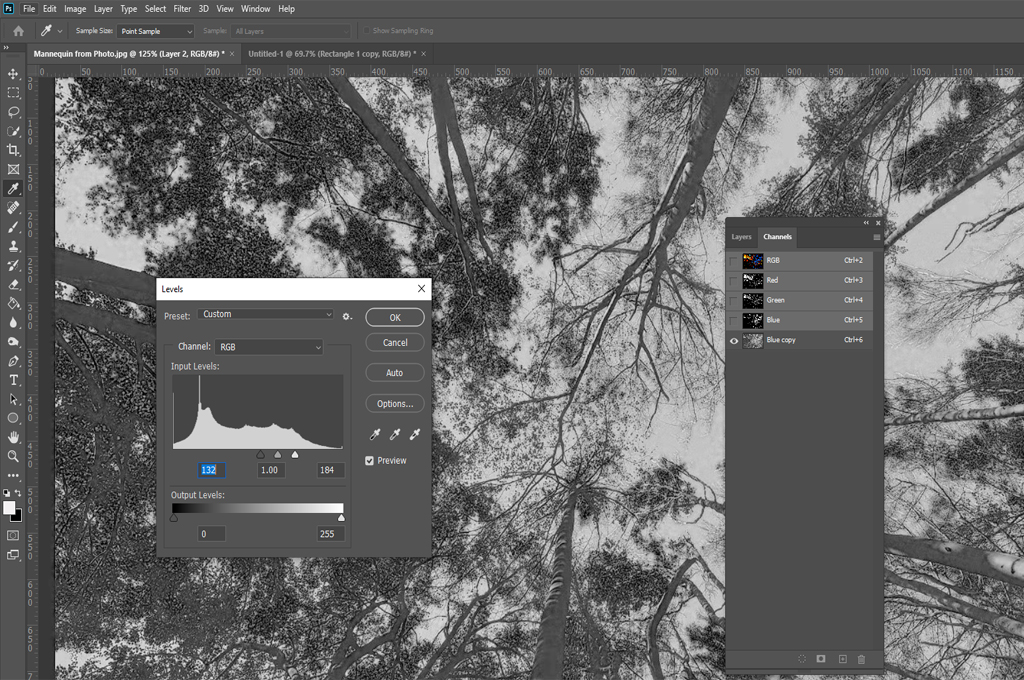
- If you want to isolate difficult objects in a photo, like trees, hair, etc., use the channel-masking technique.
- Regardless of a photo’s brightness and contrast level, channel masking can help you create a precise picture selection.
- Use custom alpha channels for a high-quality selection of complex masks. This advanced editing technique also allows you to store and refine the masks.
- Work with channel mixer adjustment options to individually target and adjust each color channel. You will have better control over the intensity of each color channel.
Automate Tasks with Actions Feature
- You may need to work on some specific parts of a photo repeatedly. Doing the same job again and again will waste your time and effort.
- Use the Actions feature to automate a series of tasks. It comes in handy, especially for applying filters, resizing pictures, adding watermarks, retouching multiple photos, etc.
- When you turn on this feature, the system will record the steps in an ATN file. It enables you to apply the recorded action to other shots.
You may also like to read… Why do Image Editors need Multiple Clipping Path Services?
Remove Fringing or Halo Effect
- If the object and background of a picture don’t match perfectly, it may cause a fringing or halo effect. The main object may have a light border or easily detectable color.
- This mainly occurs from inaccurate color separation, over-sharpening, or high-contrast edges.
- Use the Refine Edge feature to achieve cleaner edges and improve the overall fidelity of the selection.
- Don’t forget to use the Feathering option to perfectly combine a recently added element with the rest of the picture.
Work on Gaps or Unfinished Mask
- Even after editing them for hours, you may see some gaps or unfinished masks. They are only visible when you zoom in on them appropriately.
- Use both Foreground and Background Color options to paint, erase, and make selections.
- Make sure to work on the opacity and flow settings to soften the mask and blend it more naturally with the surrounding areas.
Don’t Overlook Hard Edges or Unnatural Transitions
- A high-hardness brush, mismatched layer blending modes, or improper masking techniques may result in hard edges or artificial transitions.
- Use the Feathering function to smoothen the hard edges. It makes the final result natural and the pixels closest to the edge.
- Apply the Gradient Masks tool to blend multiple colors together and create a smooth transition for background components or interface elements.
Use Vector Mask
- When it comes to achieving sharp and precise edges, Vector Mask is one of the best choices.
- The main advantage of using a Vector Mask is that you can work on each anchor point on the path separately and change the size or shape of the specific selected area.
- Professional editors can use shape or pen tools to create vector masks. If you want better fine-tuning and modifying individual anchor points, use the Direct Selection Tool. It also helps you achieve clean, crisp edges.
Similar Reads for You
Wrapping Up
Mastering Photoshop techniques takes years and hundreds of hours of practice. But you can stay ahead in this competition by learning advanced masking techniques in Photoshop. We have already discussed what is masking in Photoshop and how to use this technique for better professional photo editing.