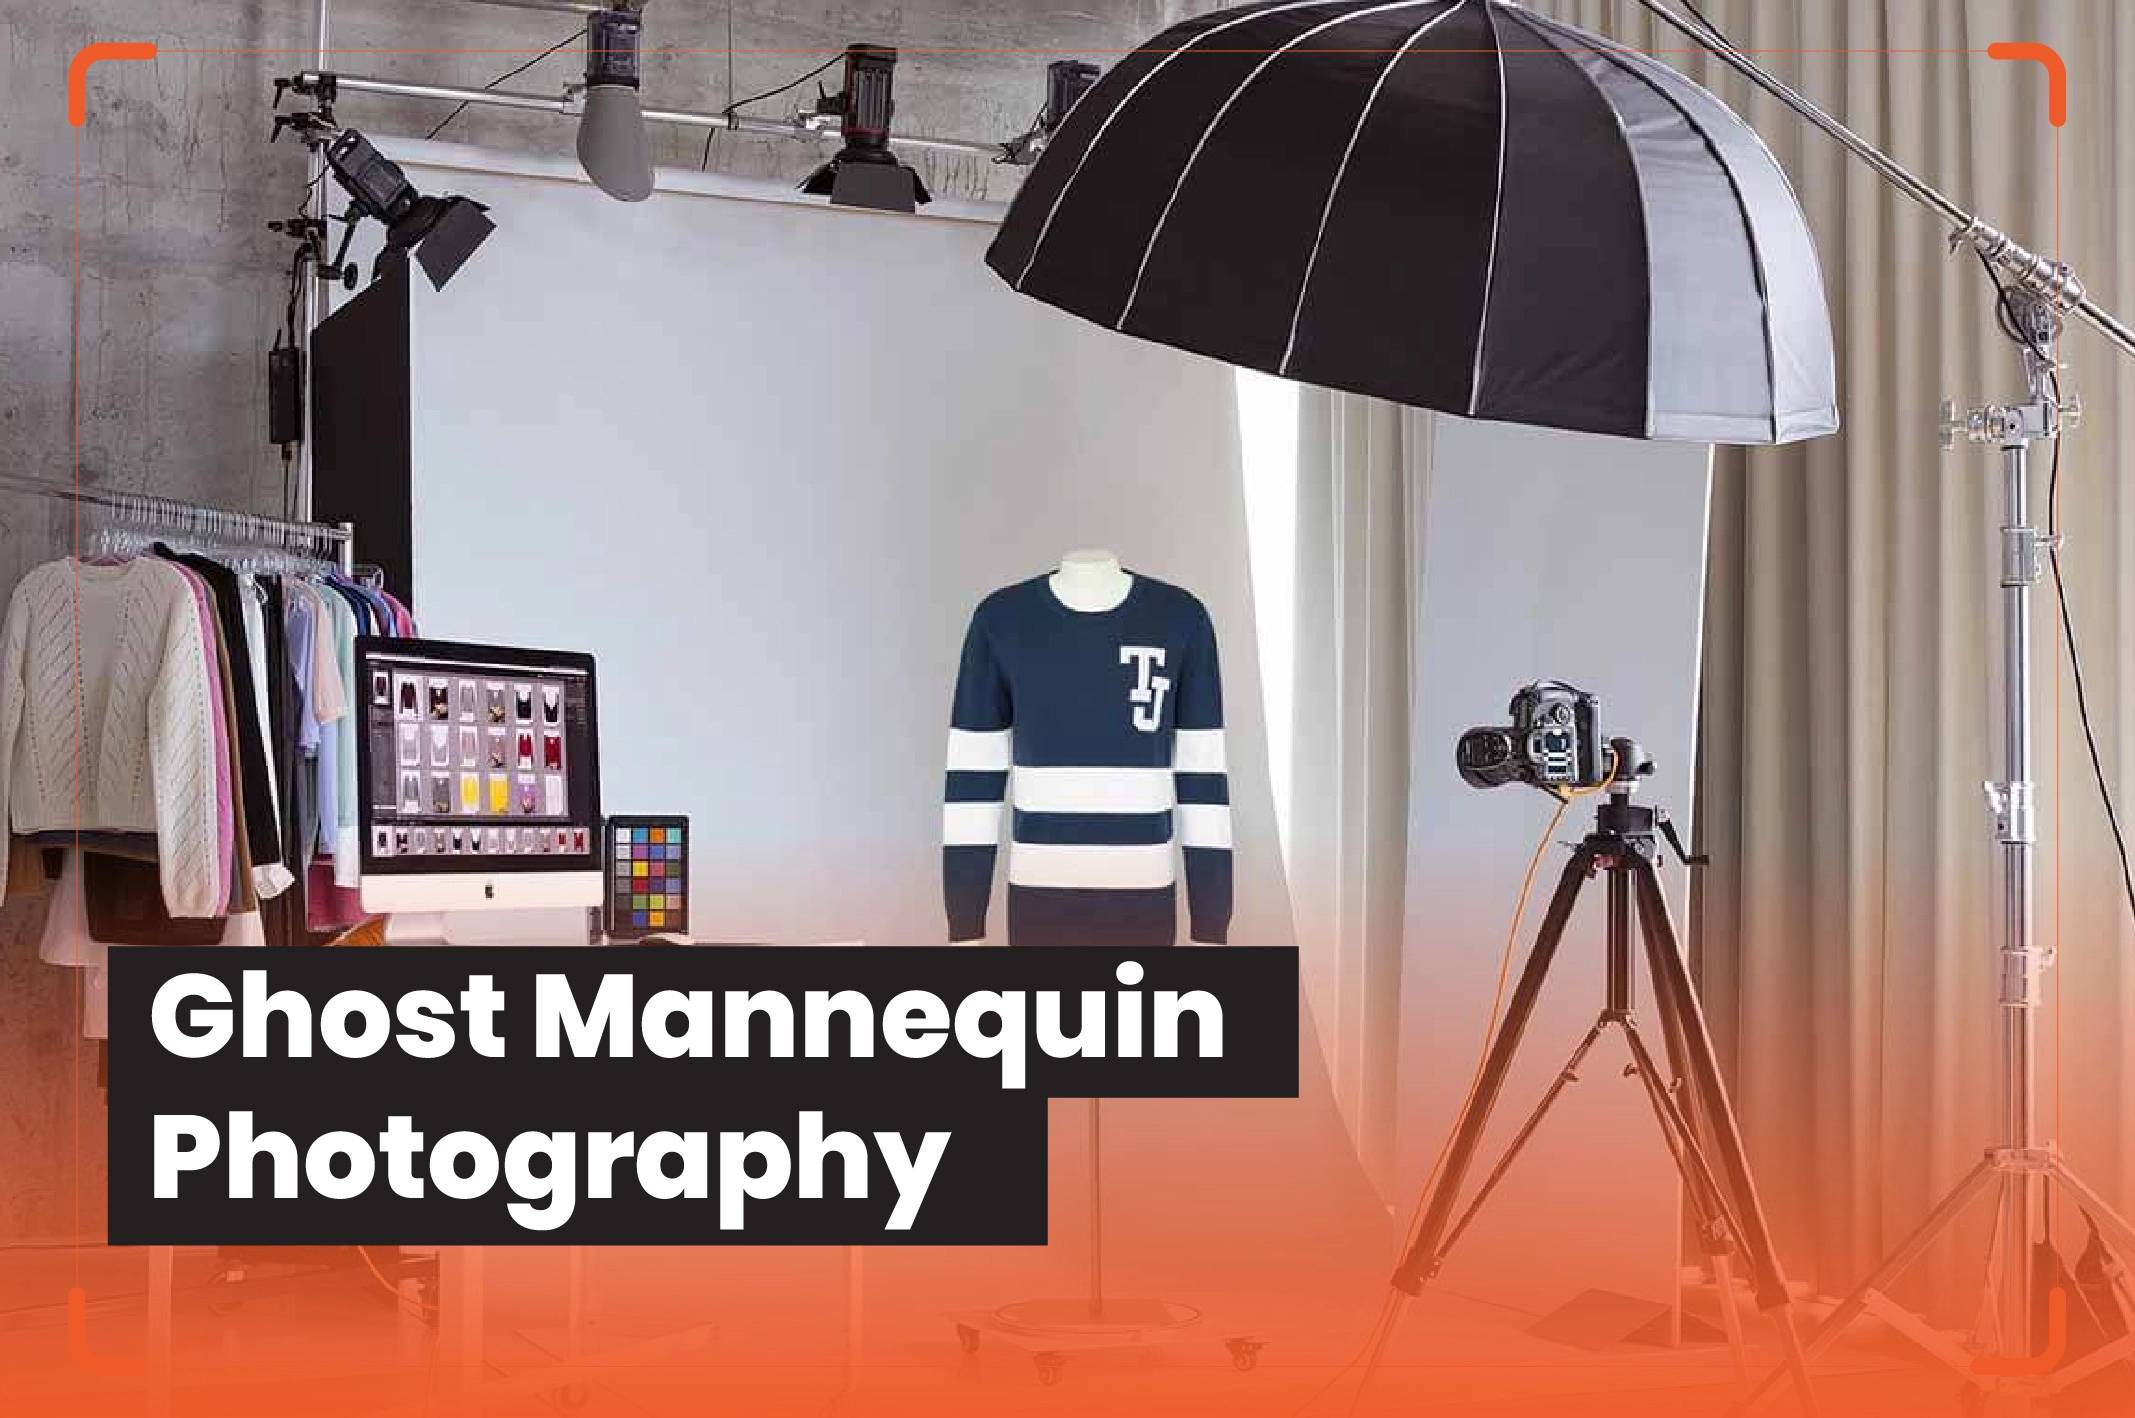
Have you ever faced challenges taking photos of clothing items without a mannequin? Fashion retailers and brands often need this type of photography for their marketing campaigns. It allows them to present their fashion items without distraction, where only the garment item becomes the center of attention. The key objective of this type of photography is to show the clothing item with proper style, avoid distraction, and make it attractive to potential buyers. Let’s discover creative ways how to take pictures of clothes without mannequin or any other background distractions.
Flat-lay Photography
Flay lay is an artistic way of clothing photography that allows you to present your fashion items without needing a mannequin. In this process, you lay your clothing flat on a surface and take photos directly from above. It will provide you with an organized photo composition of the RMG items. Additionally, you can focus on the design and texture of the product. Let’s find a way to take flat-lay of your clothing products.
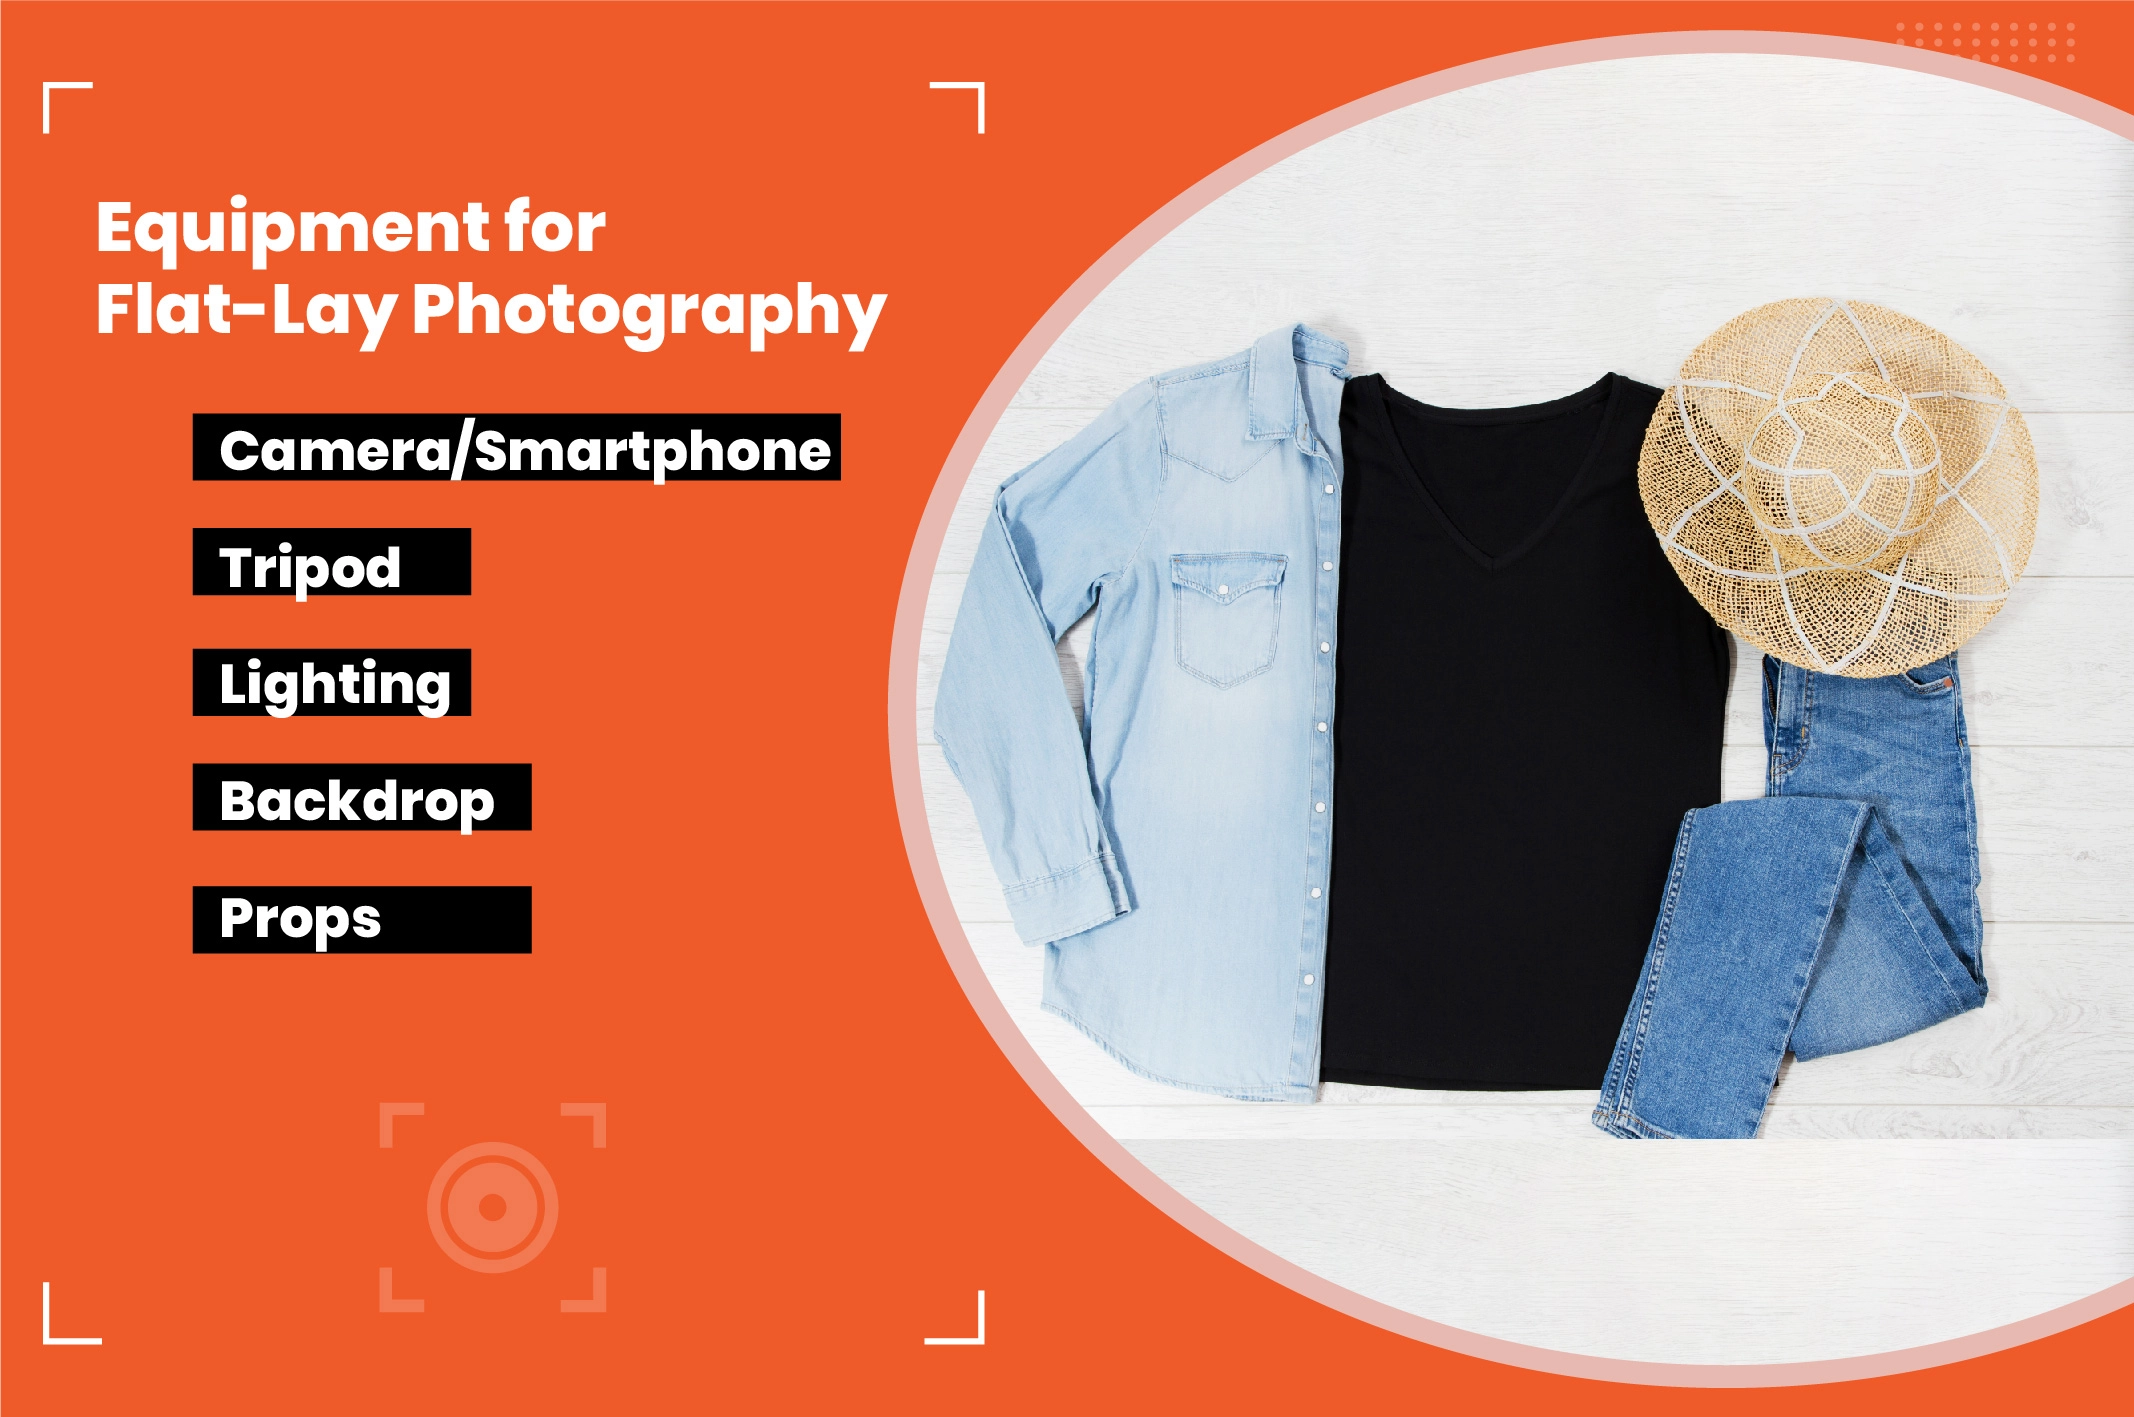
Equipment for flat-lay photography
- Camera/Smartphone: A high-quality DSLR camera with good resolution.
- Tripod: A specialized tripod to capture top-down shots.
- Lighting: Soft natural lighting setup, softboxes, LEDs, etc.
- Backdrop: A clean, solid color or white surface.
- Props: Accessories such as shoes, jewelry, or belts to complement the outfit.
Flay lay clothing photography in 5 steps
Let’s learn how to take flat-lay clothing photos in the simple steps below:
Prepare the background

If you are willing to know how to take pictures of clothes without mannequin, First collect all the necessary equipment, preparing the setup is the first step of flat-lay photography. Choose a flat and clean surface. Your working area can be a table or a floor. While choosing the background, consider a white sheet, paper, cloth, or wooden board. Make sure the background color creates a clear contrast against the clothing you are presenting.
You may also like to read… 5 Pro Tips for Perfect Invisible Mannequin Photography
Style the Clothes
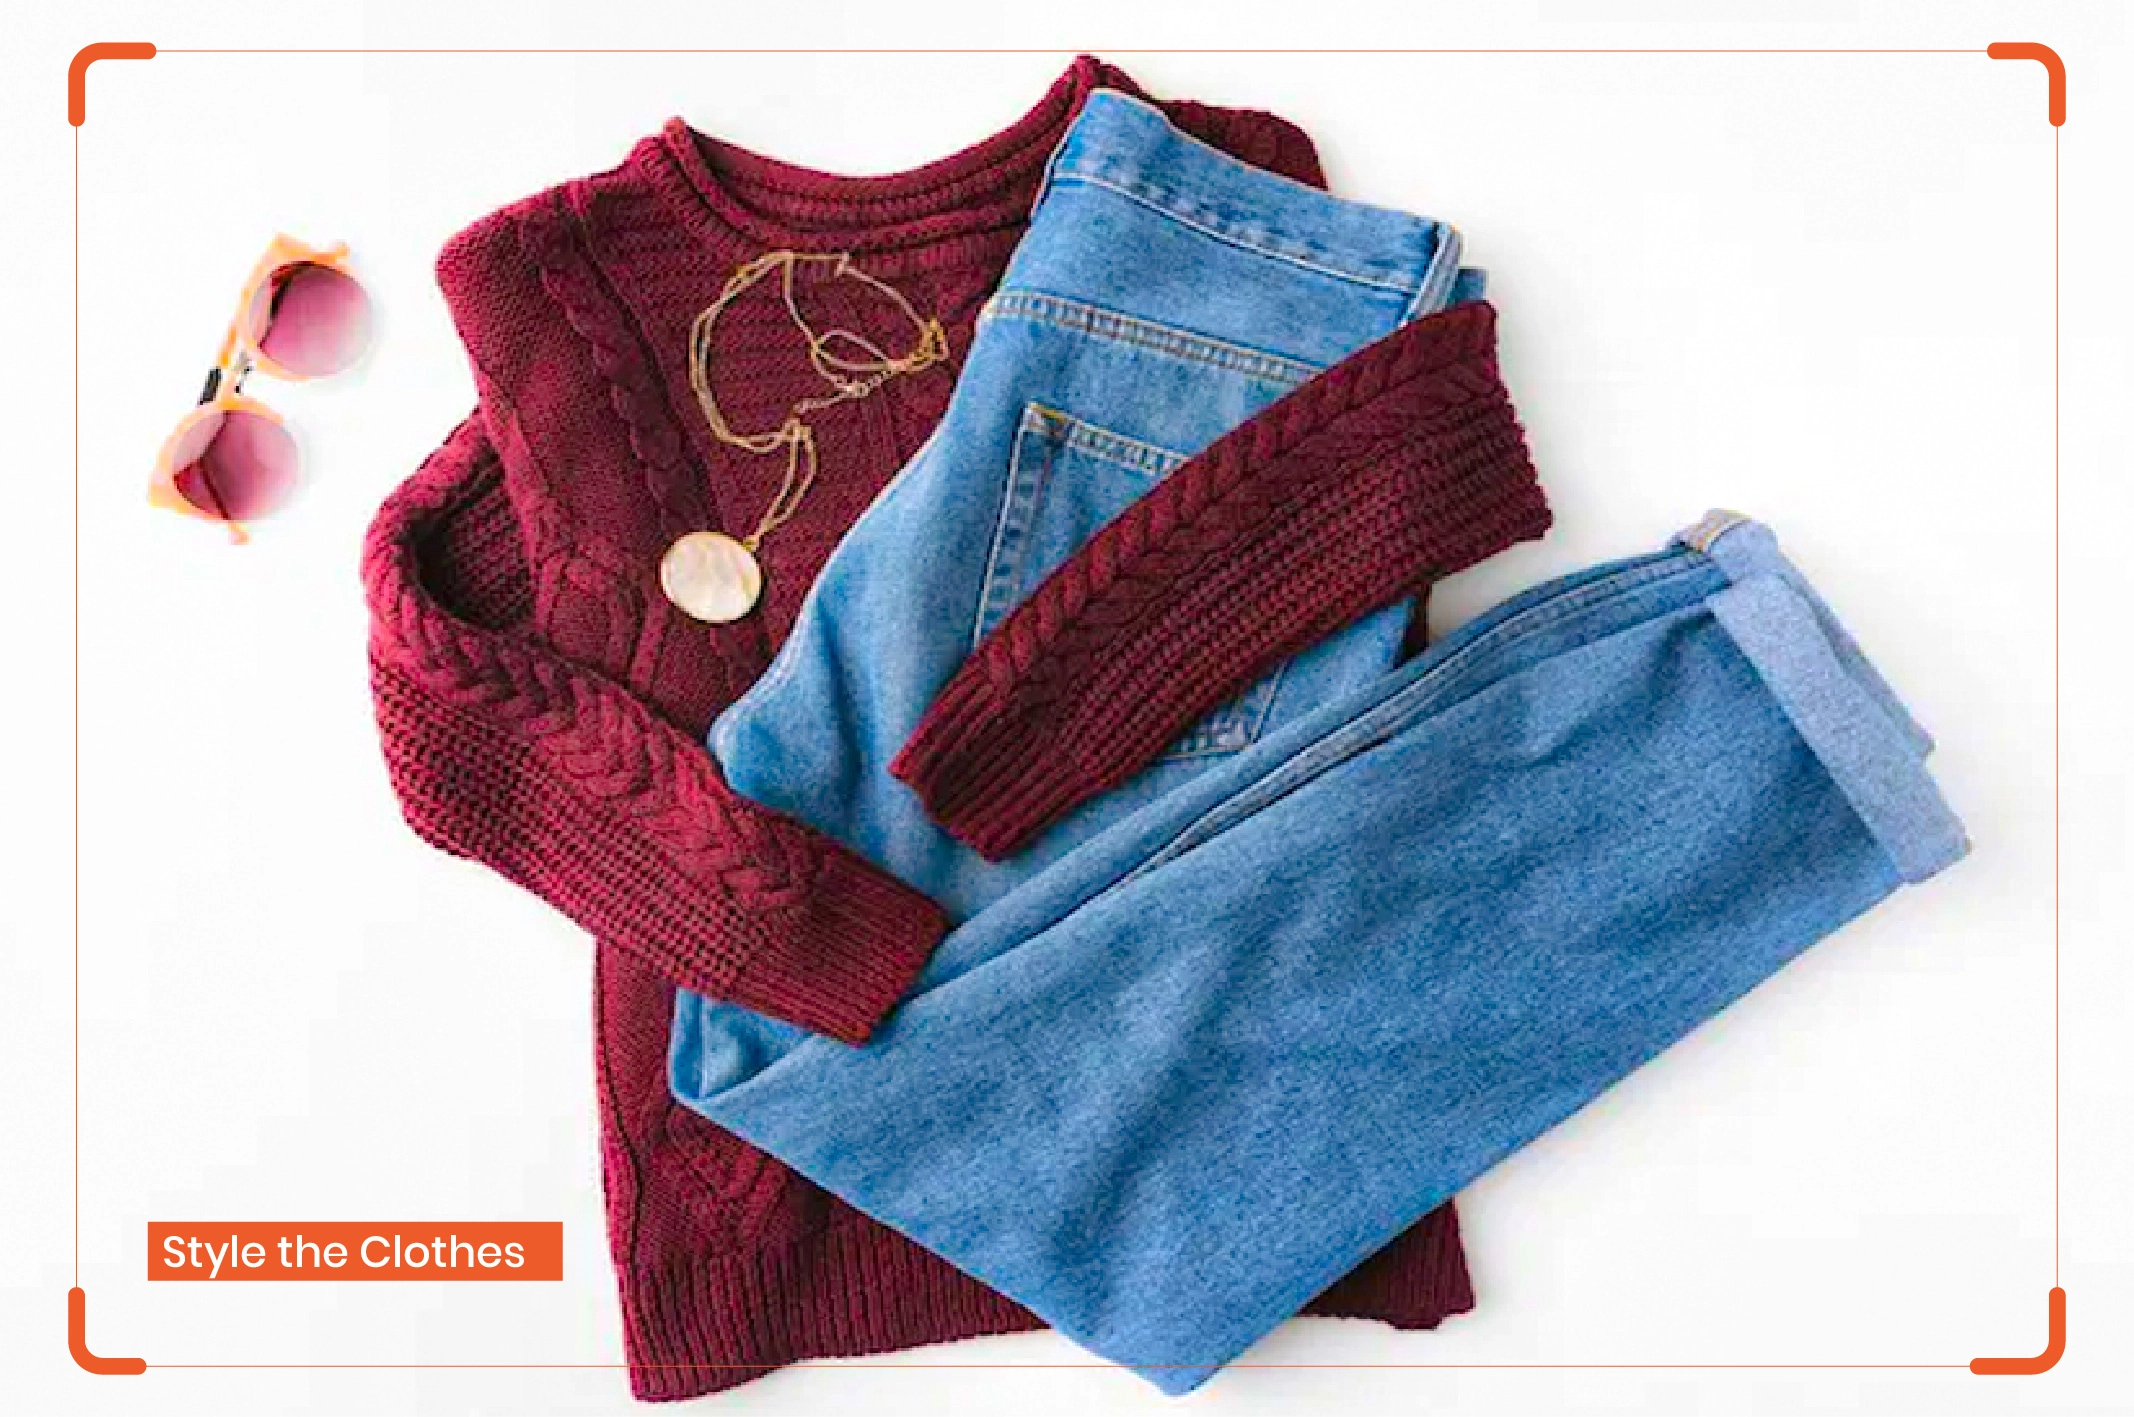
After you have finalized your background, you can place the clothing items on it. Avoid wrinkles on the cloth. Try to focus on the product’s special features.
Add Props
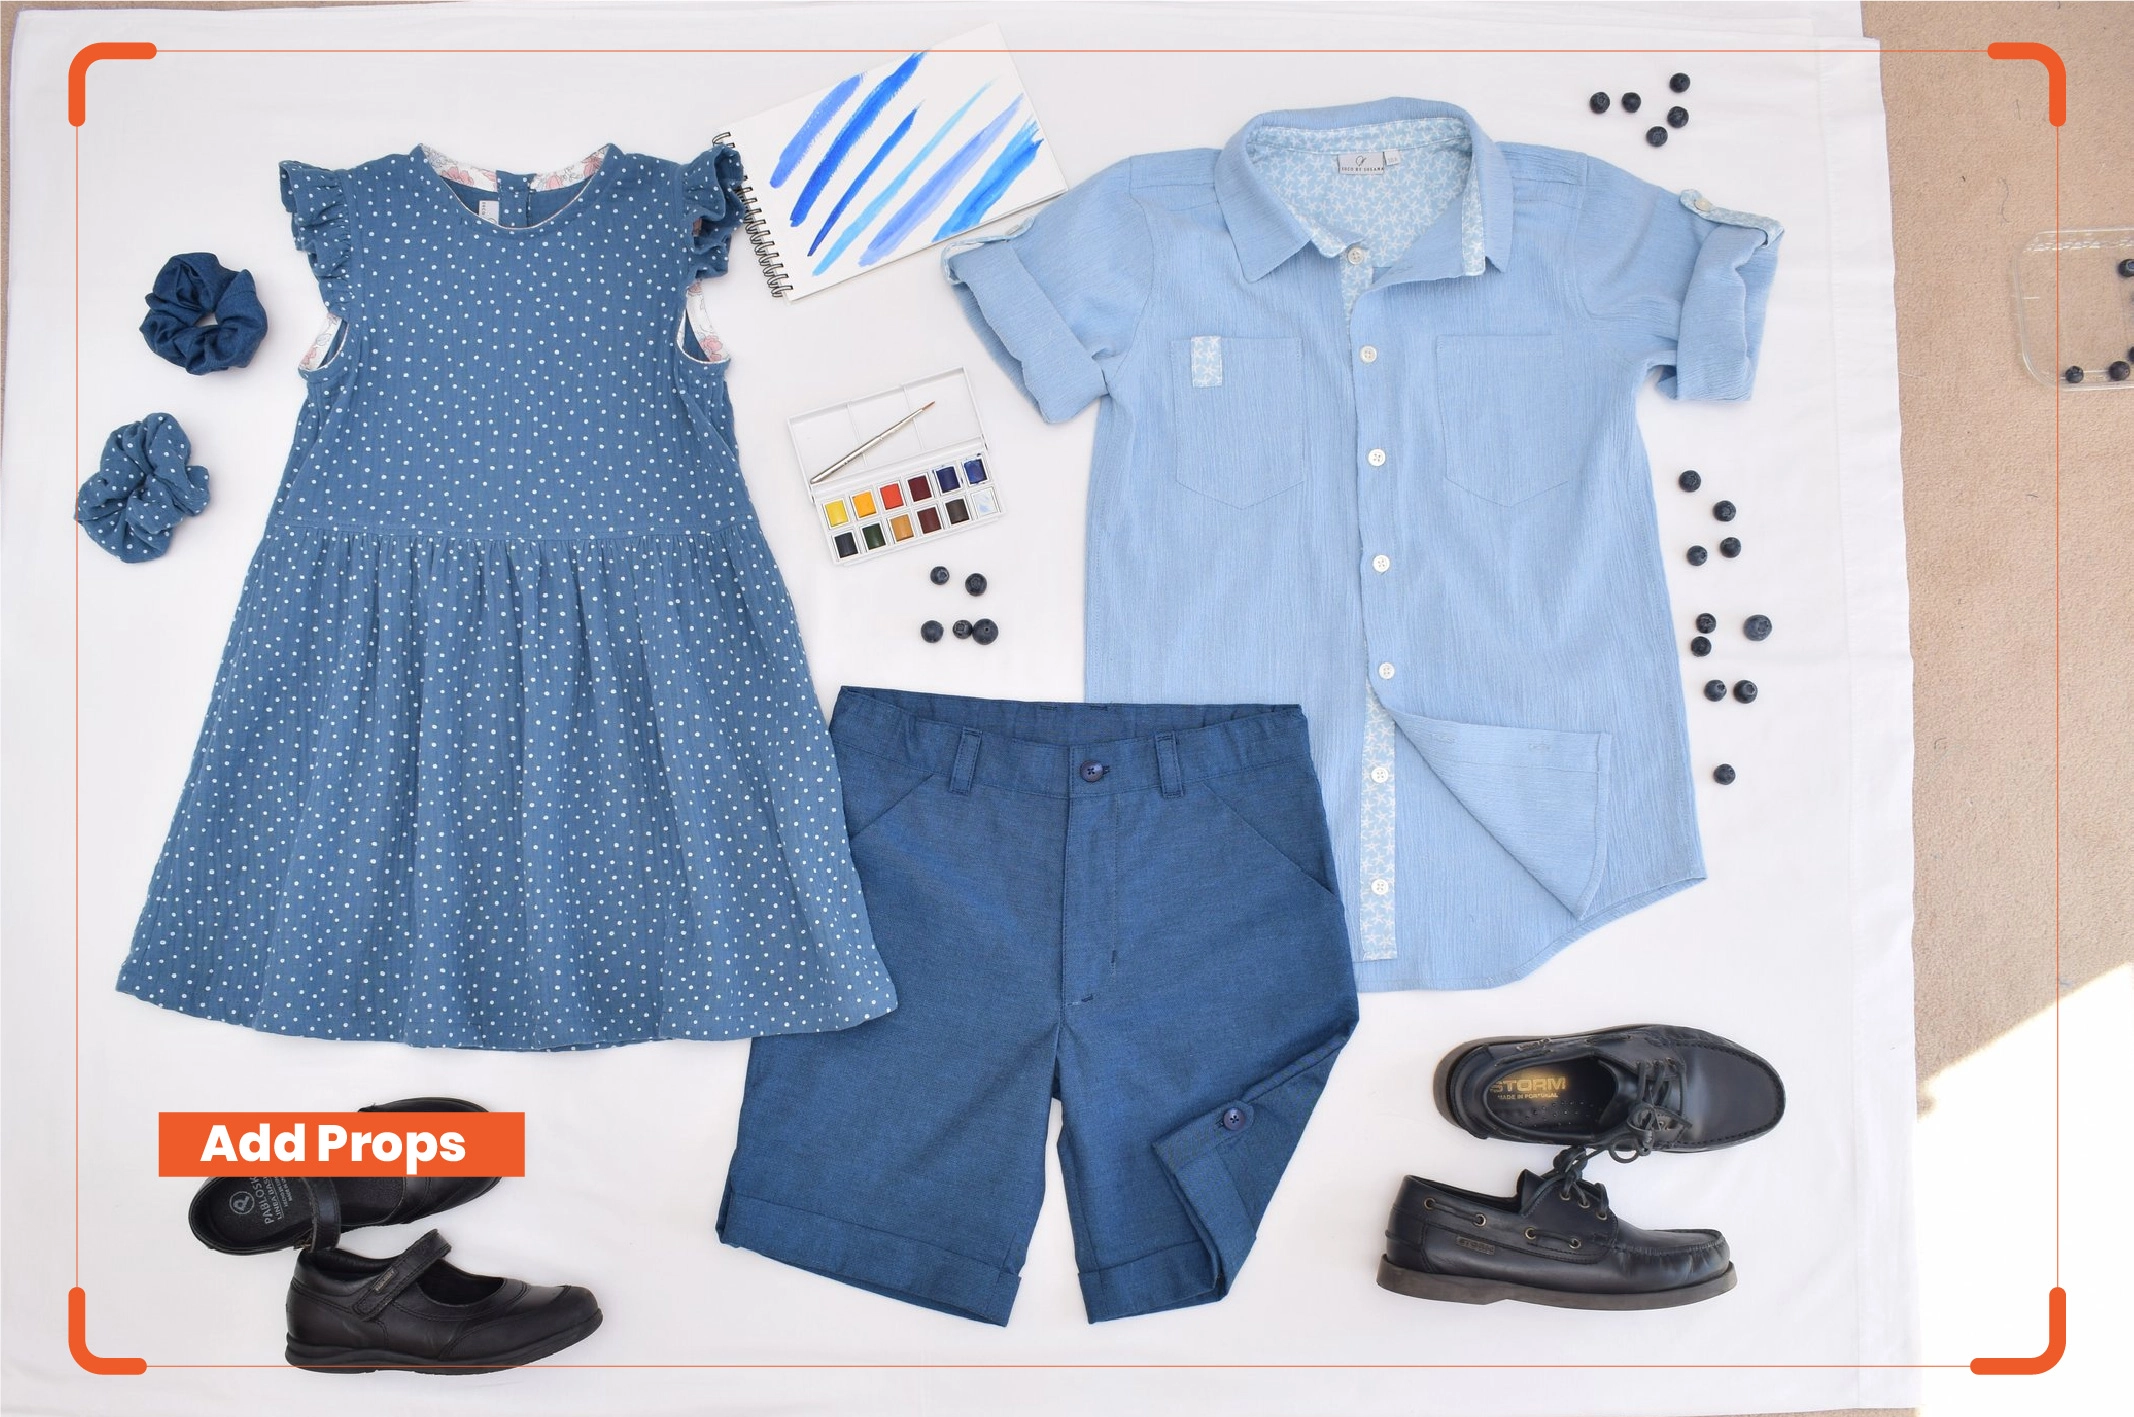
Adding props will increase visual interest. Using accessories such as bags, sunglasses, or jewelry is very common in flat-lay photography. However, do not overuse them and create distractions.
Lighting
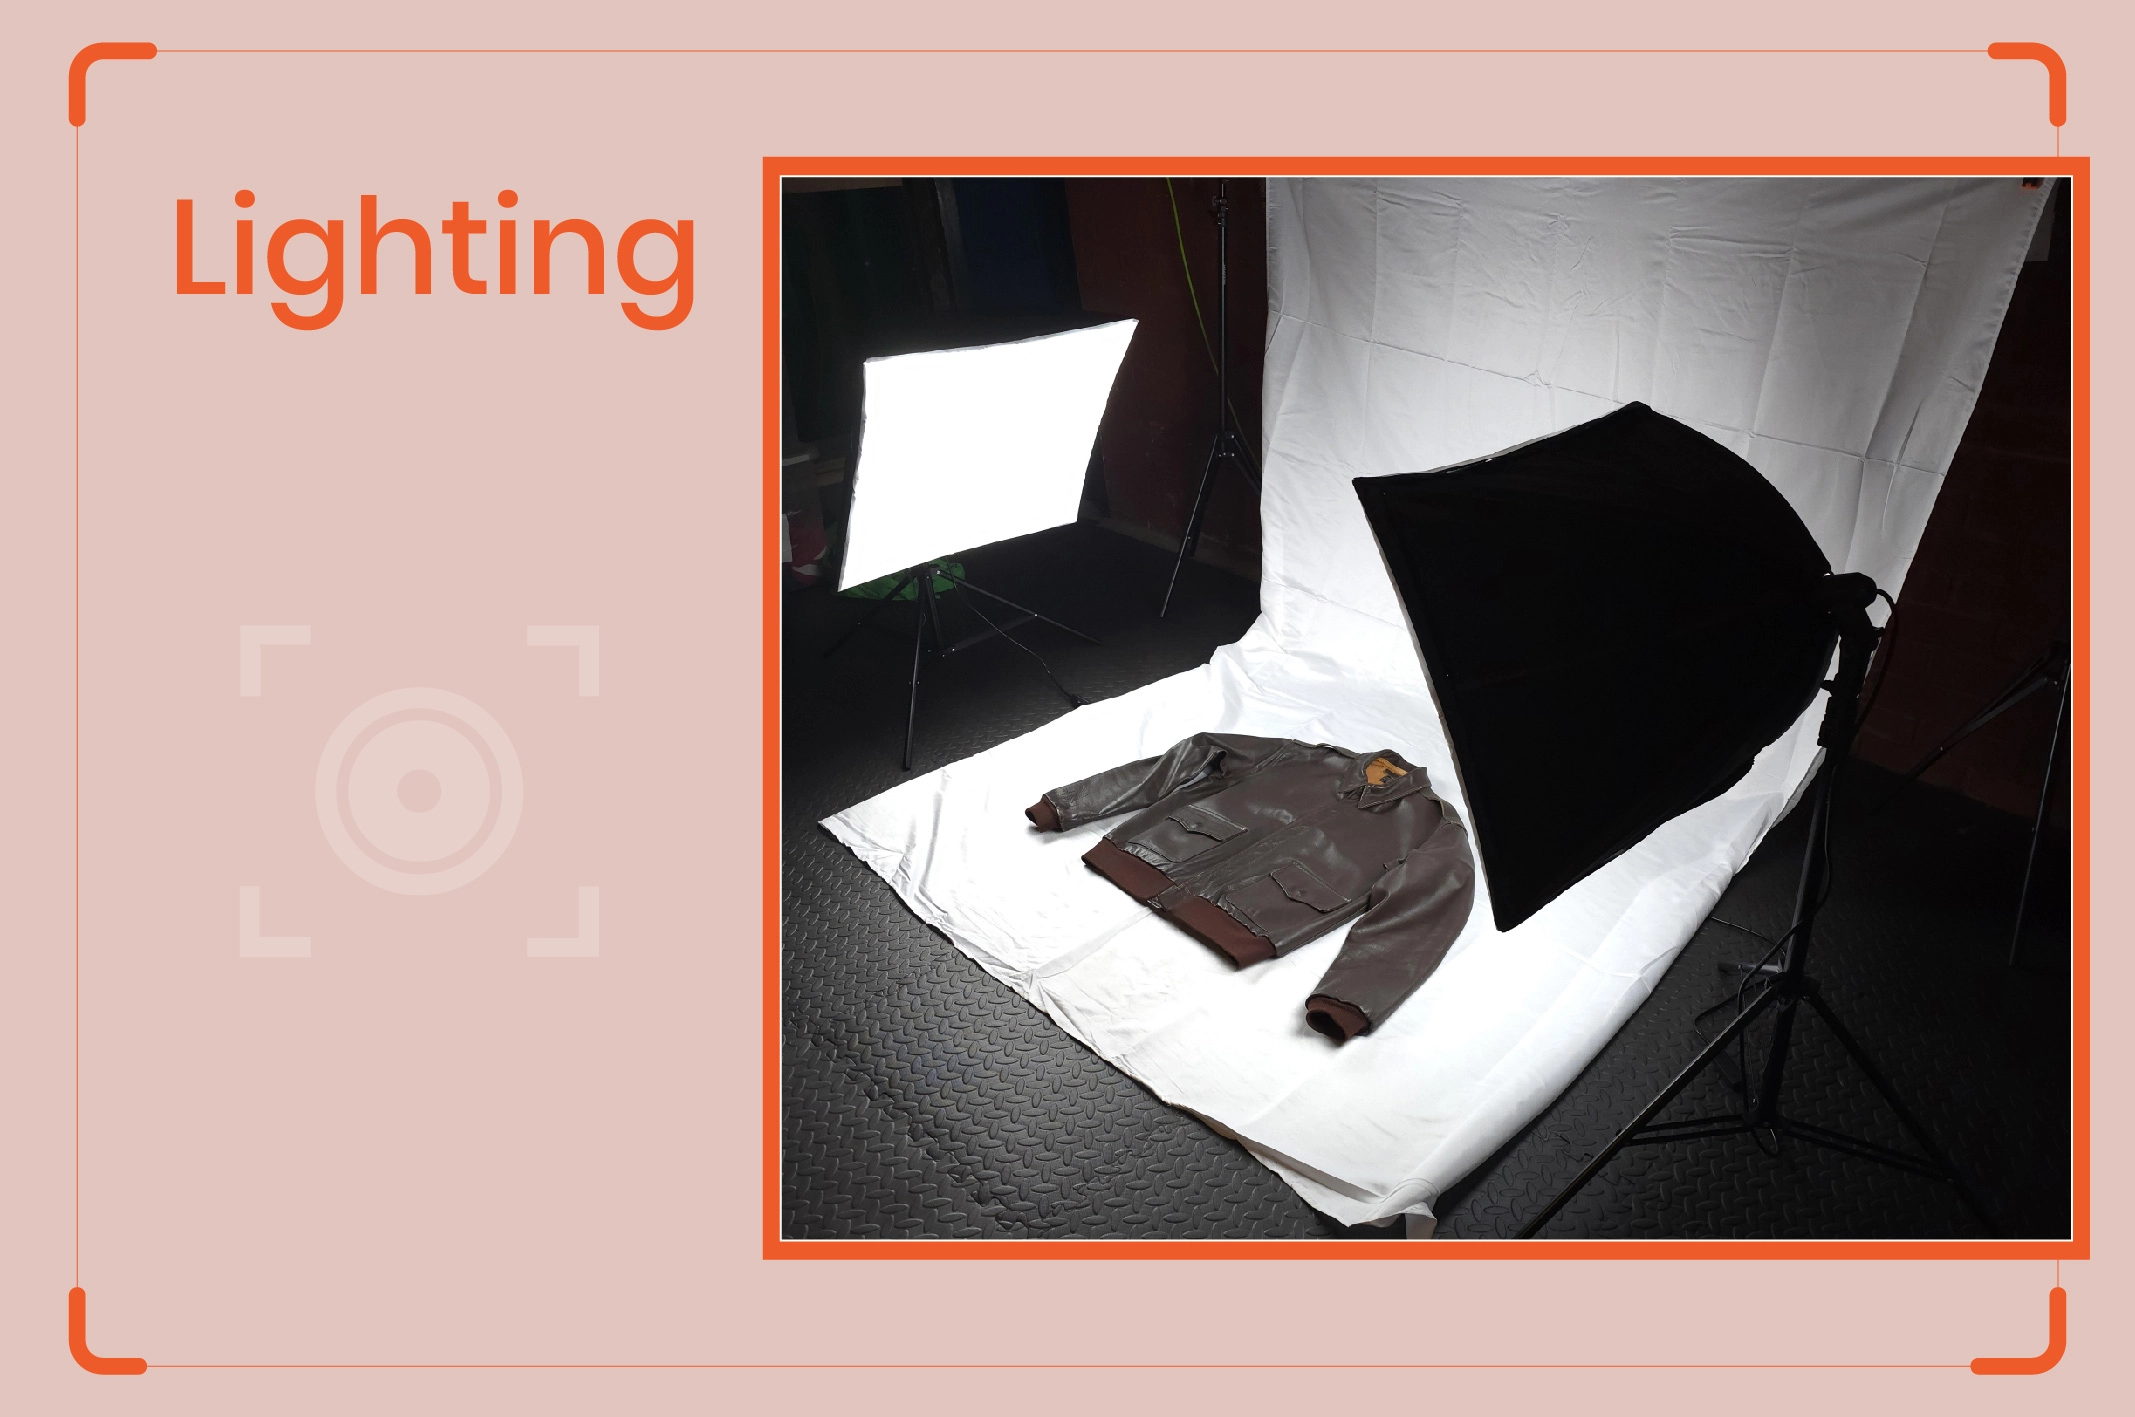
You can take flat-lay photos utilizing both natural and artificial lights. Consider setting them up near a large window when taking pictures using daylight.
Shoot from Different Angel
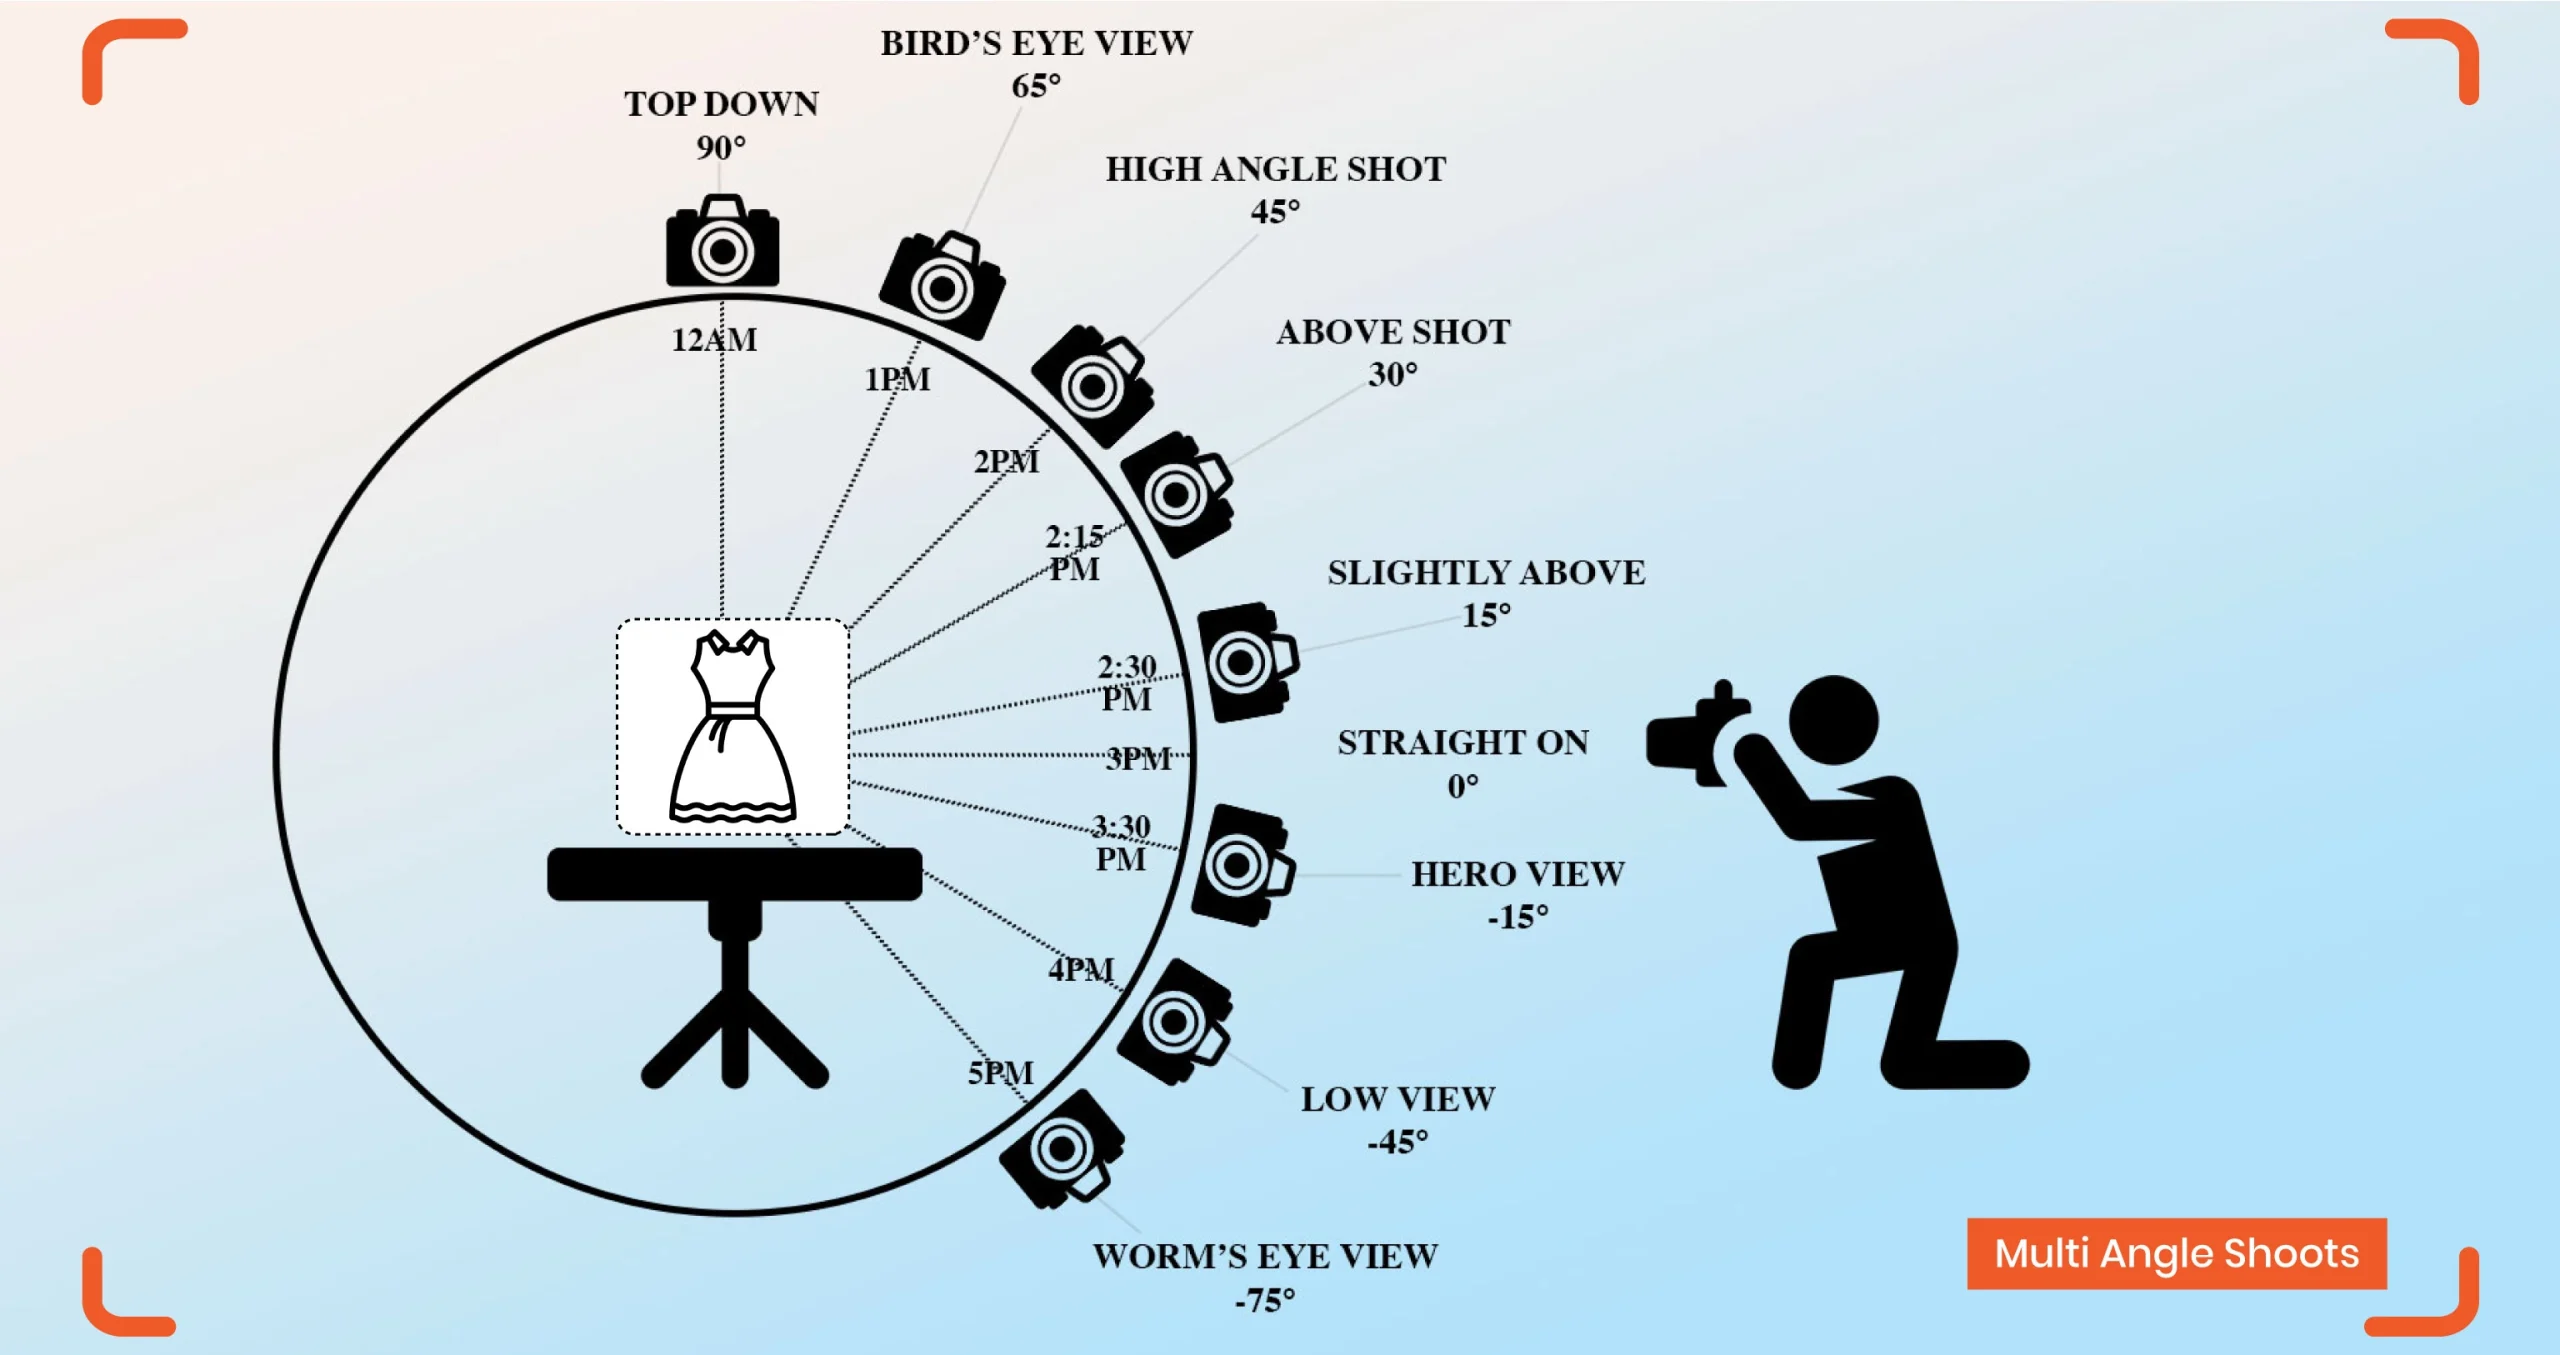
After the setup is ready, it is time to shoot the photo. Use a sturdy tripod to place your camera above the clothing. The lens should be directed straight down. Take your picture from multiple angles and distances to create variations. Take a few close-up shots to capture special features, designs, and clothing patterns.
Edit your photo
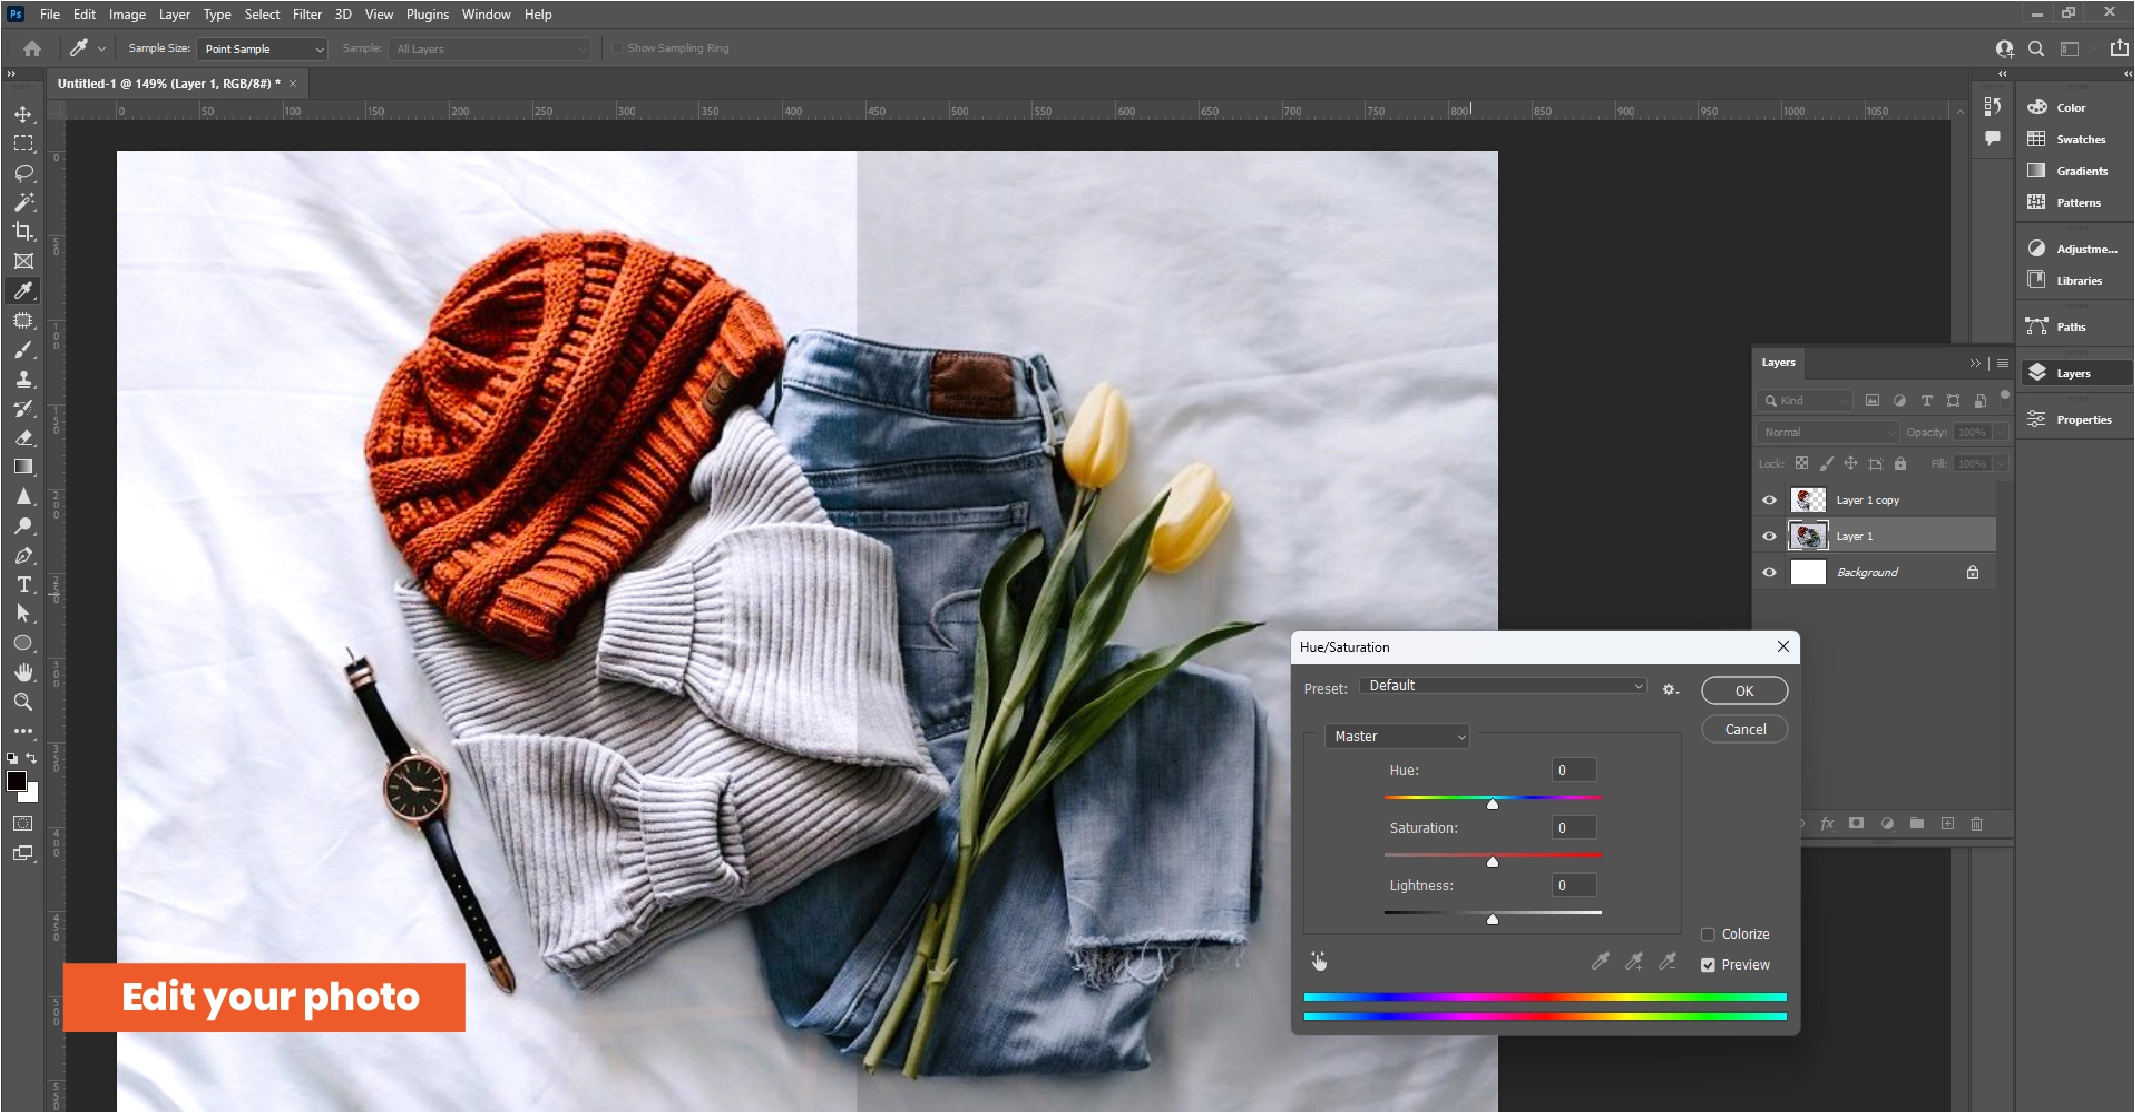
No photo is perfect, even if you took it in good lighting conditions with proper composition. It needs to be edited in post-processing. Professional photo editors will utilize advanced software such as Adobe Photoshop or Lightroom to modify the brightness, contrast, and sharpness settings to give the final photo a natural yet vibrant look.
Pros and cons of flat lay photography
Although you do not need a mannequin to take flat-lay photos, this technique has its own benefits and a few disadvantages that you must keep in mind.
Pros
- The photography setup process is quick and easy.
- You can present the design, pattern, and texture of the clothing.
- Creative arrangement of clothing is possible.
- You can add stylish elements and props to create a luxurious mood.
- There is no need to use a model or mannequin.
- The photo editing process is simple, as no mannequin removal is necessary.
- Suitable for e-commerce and social media platforms.
Cons
- It creates less depth compared to other photography styles.
- Creating proper soft lighting is often challenging for flat lay arrangements.
- The fitness of the clothing can not be presented.
- Taking larger clothing items is challenging in this technique.
Invisible Hanger Photography
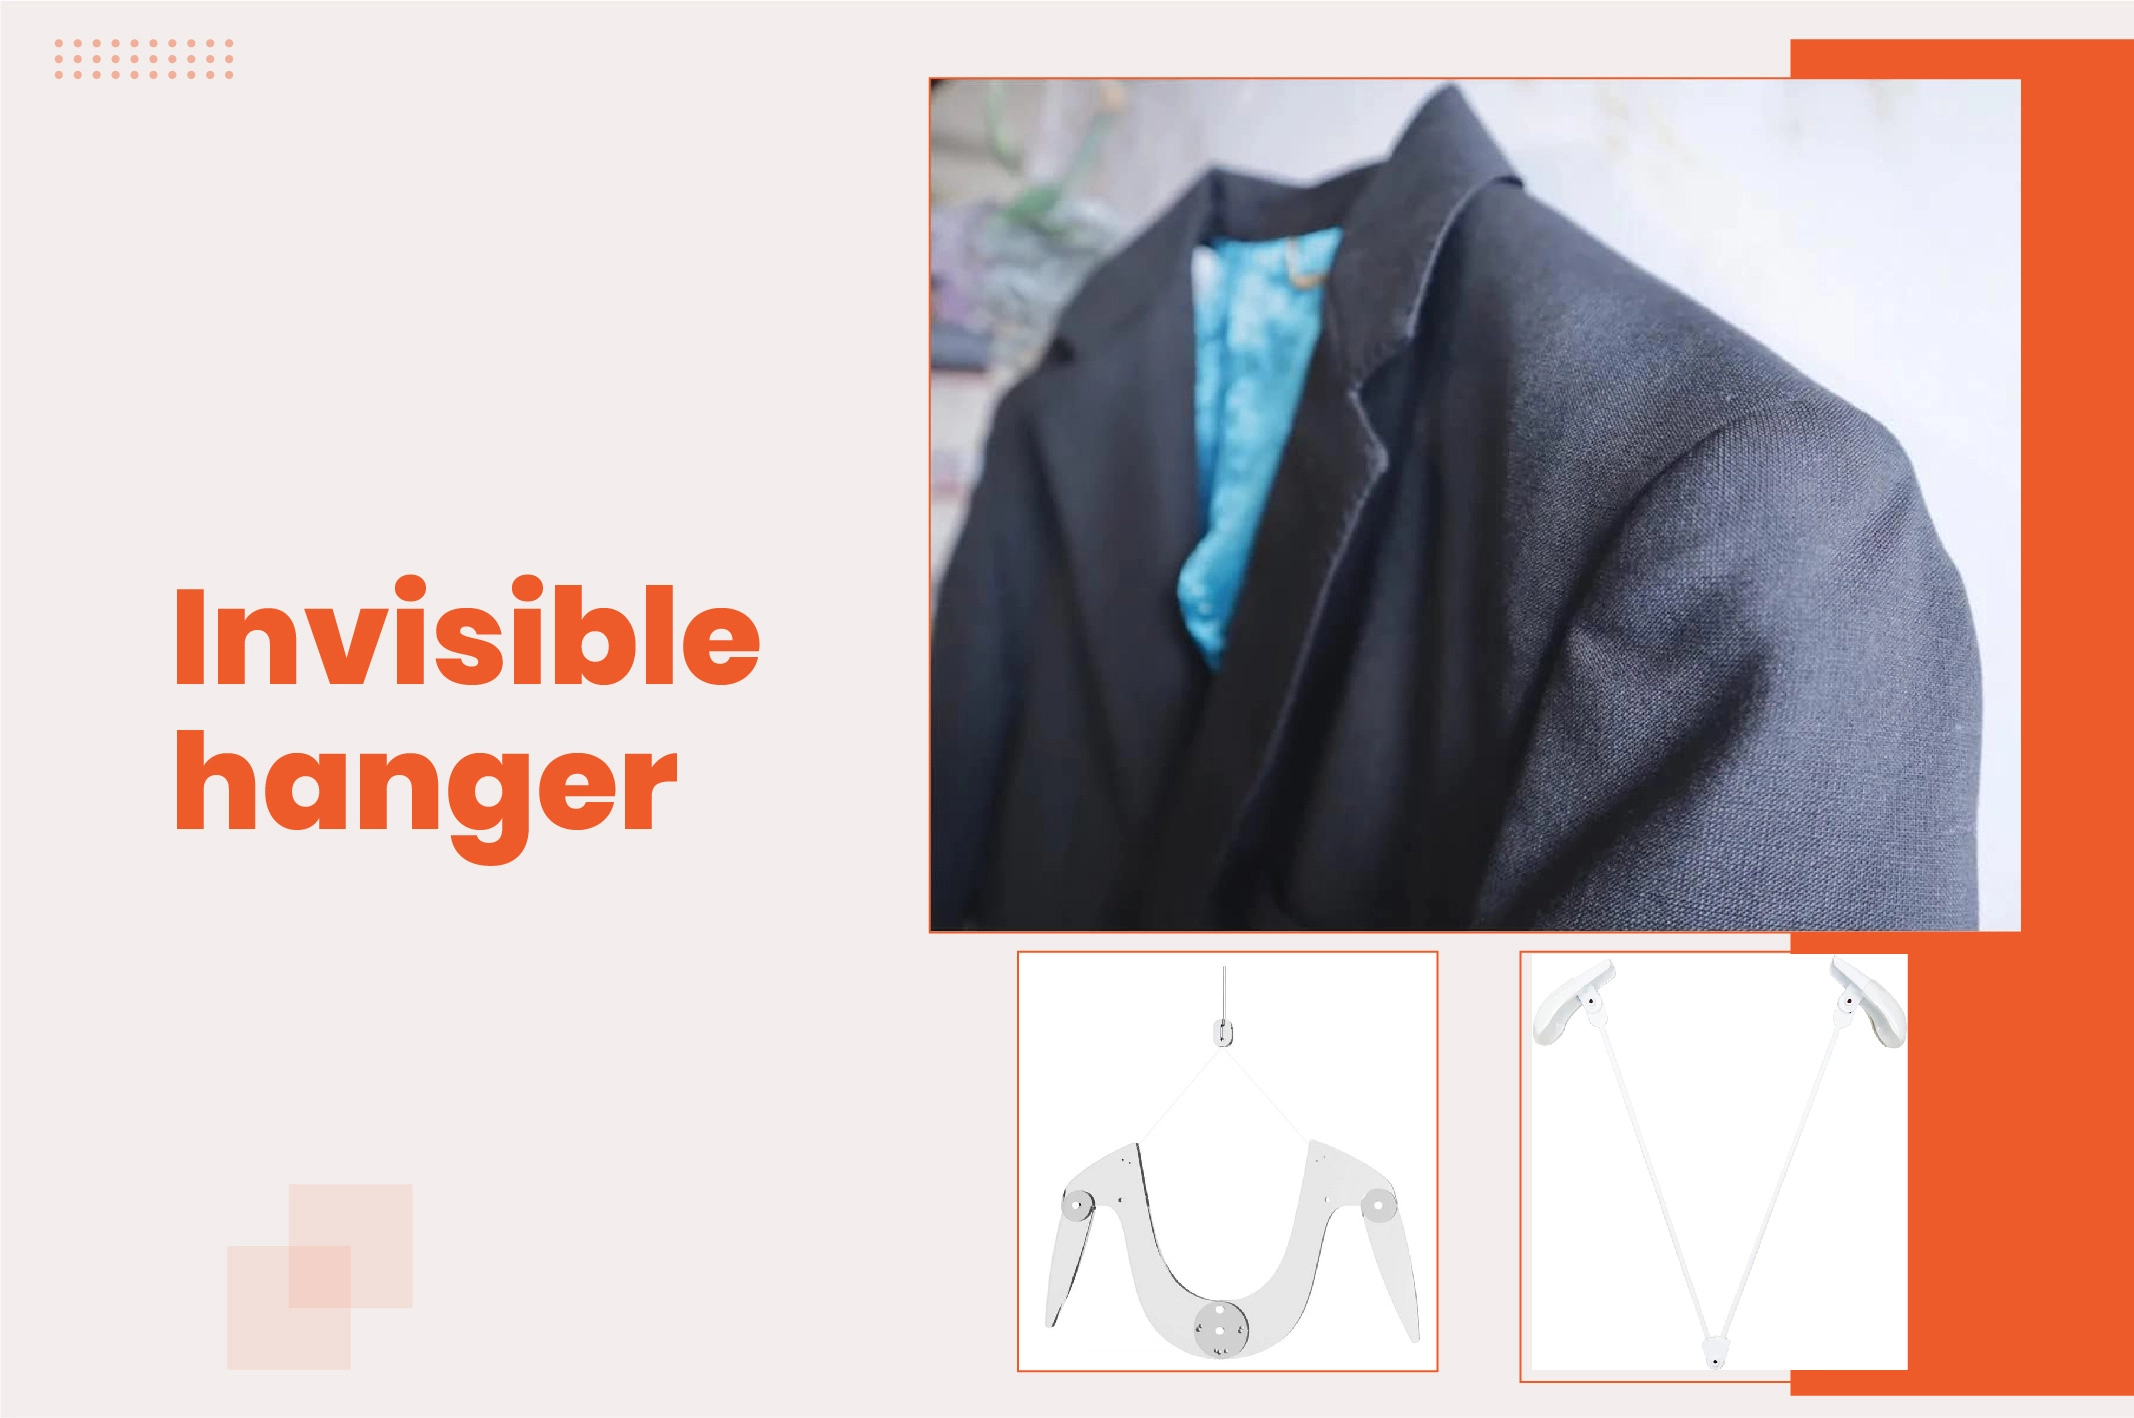
This photography technique involves how to take pictures of clothes without mannequin by taking photos with a hanger where the hanger is hidden inside the garment.
You may also like to read… How to Use Ghost Effect Photography in Product Images
Below are a few simple steps of how you can take your photo with an invisible hanger:
- For this type of photography, you simply need a specialized hanger for clothing photography. The hanger will hide inside the clothing and create an environment as if the clothing is hanging in the air without support.
- The string of the hanger is transparent. Therefore, it will not be visible in the photo.
- To take the photo with this hanger, first put the hanger inside the clothing item. Make sure it is properly hidden inside the product.
- Now hang the clothing with the hanger against a solid wall that creates a clear contrast against the clothing item.
- Take multiple photos of the product from different angles.
- As the string is invisible, heavy post-processing is not necessary. You may adjust the color, brightness, and shadow before using the photo.
Pros and Cons of Invisible Hanger
Below are the advantages and disadvantages of invisible hanger photography:
Pros
- This photography technique is suitable for a variety of fashion products.
- It has a transparent string that is not visible.
- Looks more natural compared to flat-lay photography.
- Three-dimensional shapes of the product can be presented.
- Different sizes of the hanger are available to adapt different clothing items.
Cons
- Hiding the hanger is difficult for RMG with an open shoulder.
- The fitness of the product can not be properly presented.
- The string may often be visible which may need to be removed in the post-processing.
Creating an Invisible Hanger Effect
This is another unique way of taking photos of clothing without a mannequin. Below is the process of this type of photography:
How to Take Pictures of Clothes Without Mannequin
- Take a regular hanger and place the clothing inside it.
- Now hang it in front of a solid color background or wall.
- Make sure the wall creates a clear contrast against the clothing item.
- Now take the photo from different angles.
Remove the hanger in the post-production
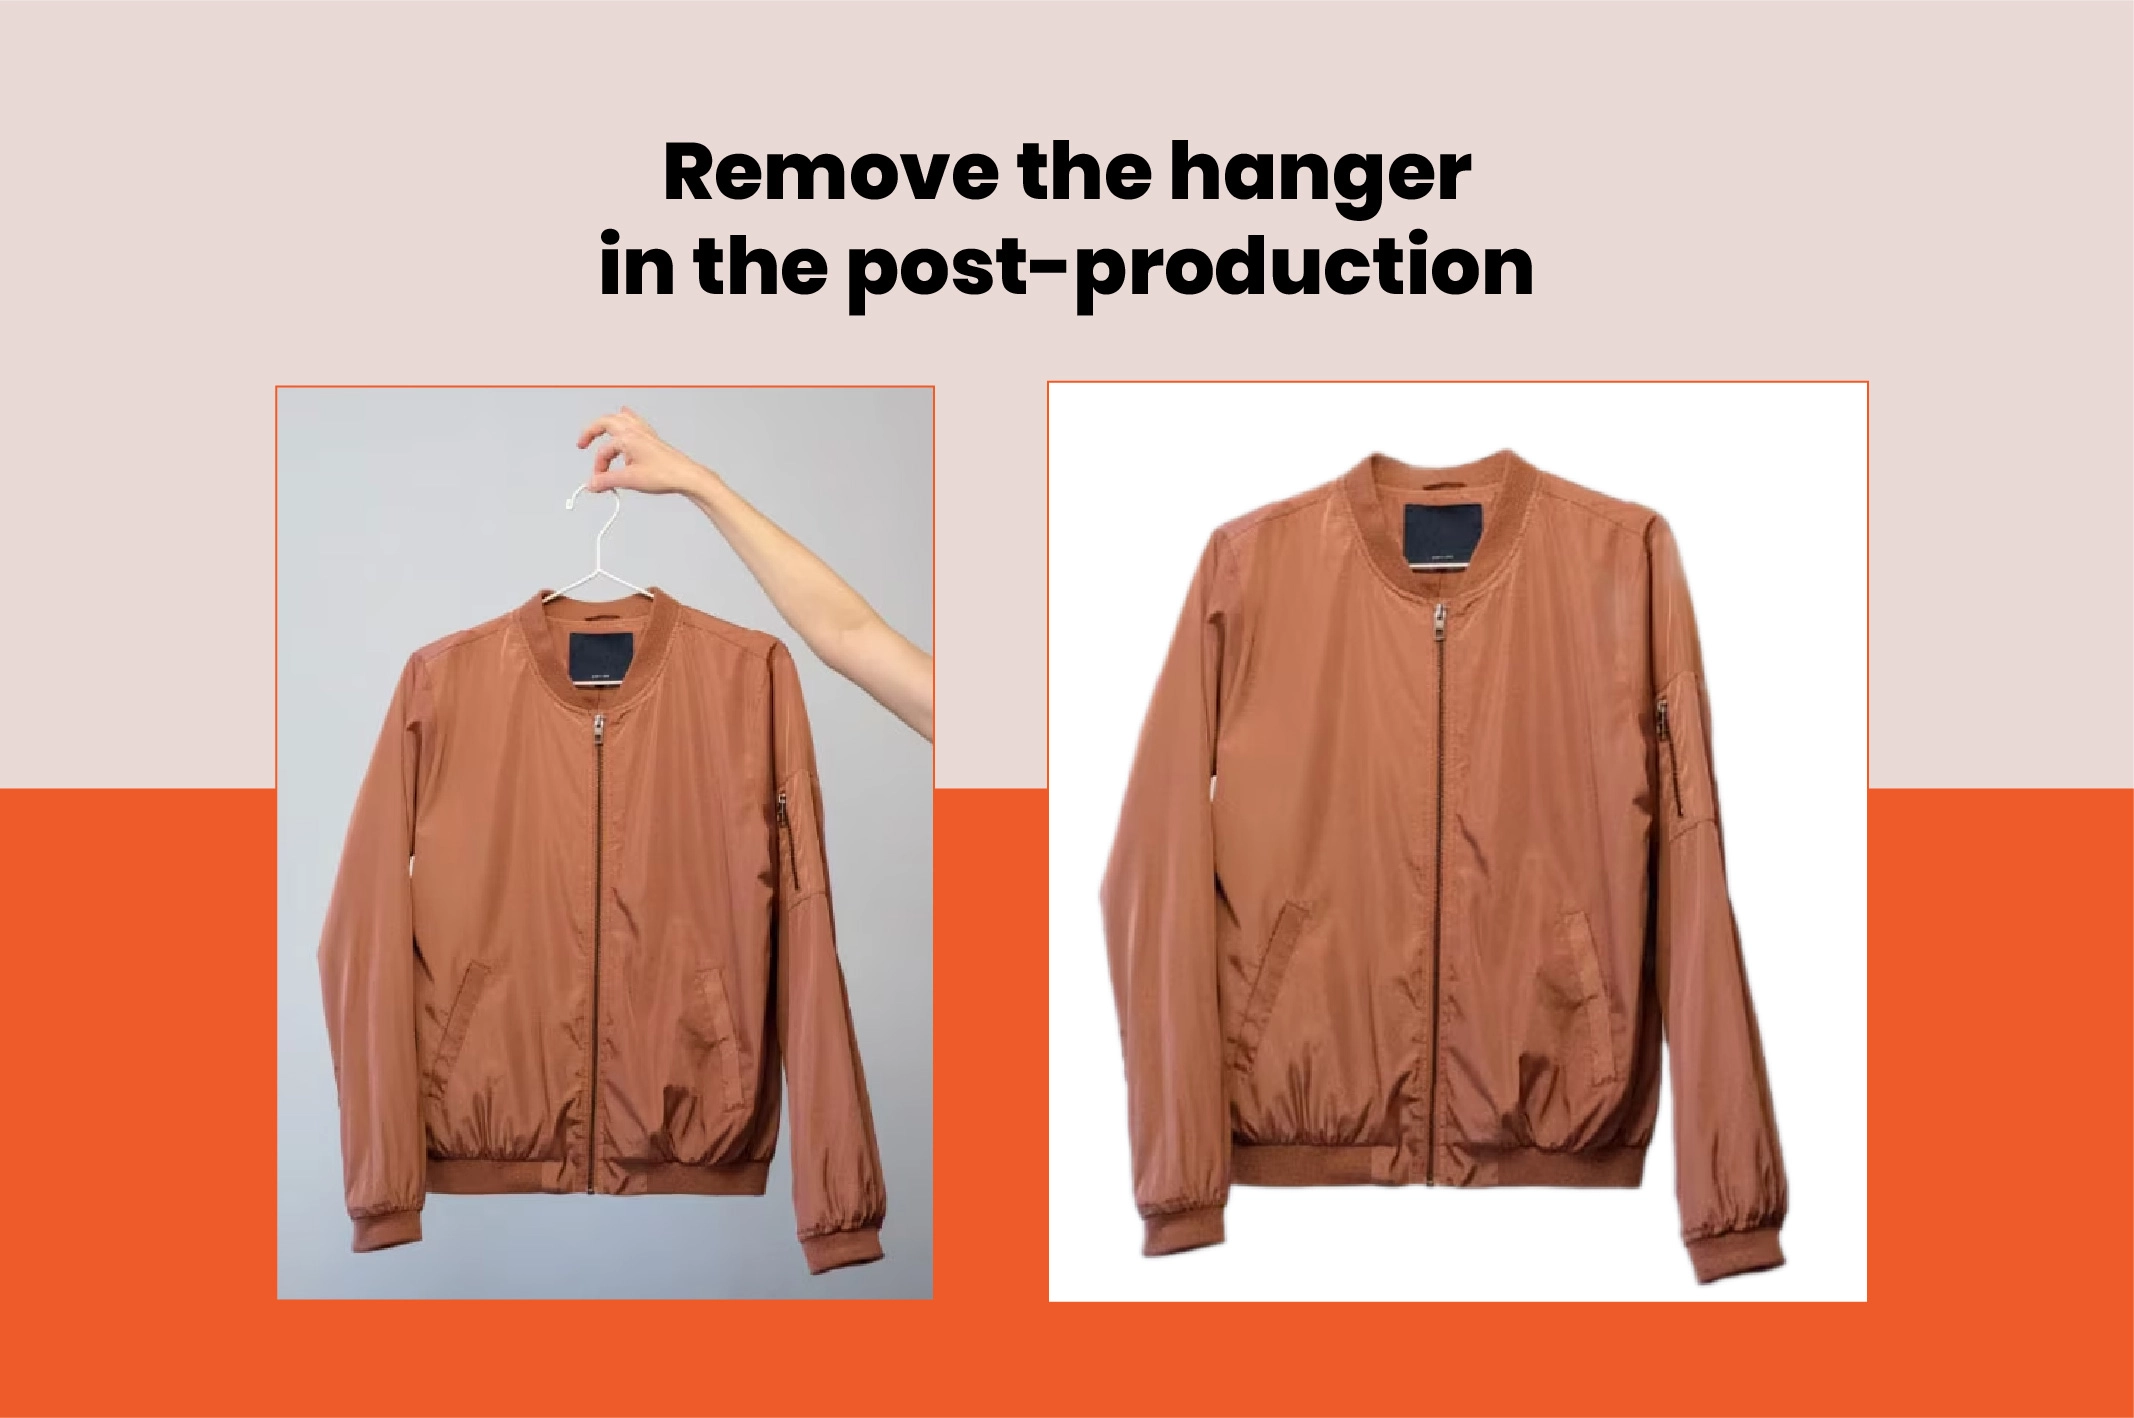
Now you have the photo of the clothing with a visible hanger. You can remove the hanger using photo editing software. Adobe Photoshop has many easy-to-use tools for this job. You can use single or multiple tools such as a spot healing brush, clone stamp, or content-aware fill brush tool to remove the visible part of the hanger.
You may also like to read… A Complete Guide on How to Create Ghost Mannequin Effect DIY?
Ensure you have properly filled and healed the working area to make it look natural. After removing the hanger, you should adjust the photo’s color, lighting, and brightness to make it vibrant and attractive.
Pros and cons of the invisible hanger effect
Below are the advantages and disadvantages of invisible hanger effect photography:
Pros
- You can showcase the clothing in a better way than the flat lay.
- Products can be presented in a three-dimensional way.
- No need for sophisticated tools such as specialized hangers.
- Easy photo editing techniques are required to remove the visible hanger.
- Almost all types of clothing items can be showcased in this technique.
Cons
- The proper fitness of the product can not be shown.
- Post-production is mandatory for this technique.
Clothing on a Stylish Hanger Photography
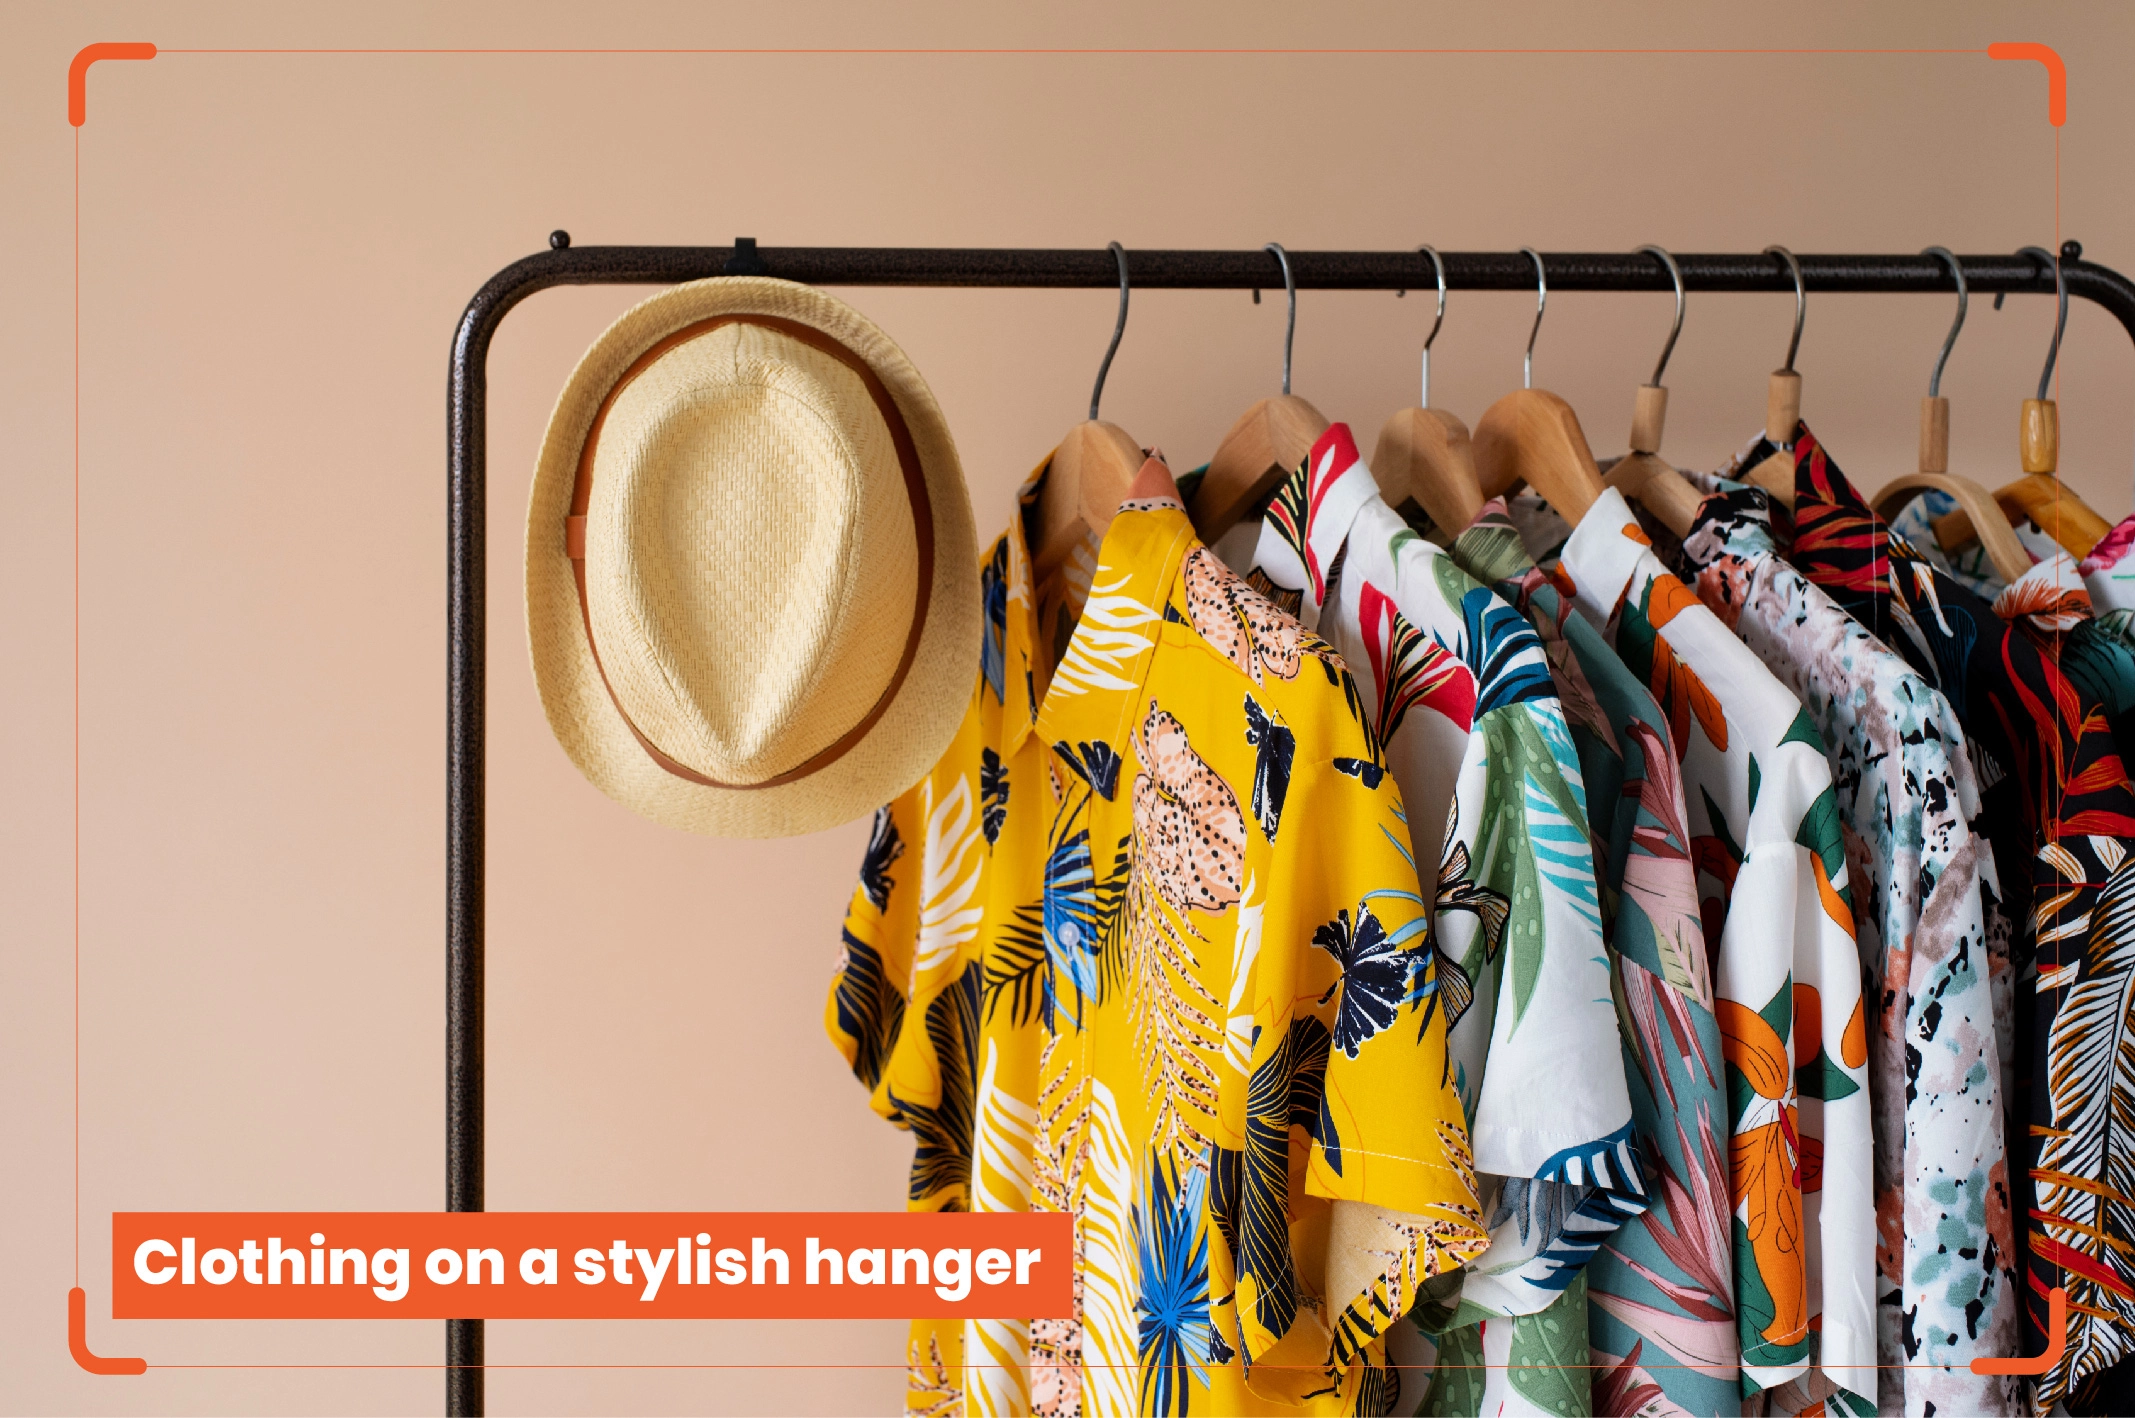
Taking photos on a stylish hanger is a great way to take pictures of clothes without mannequin. Using this technique does not need a model or mannequin. This type of photography is appropriate for any type of clothing products that need to be presented in a stylish way.
How to Take Photos of Clothes Without Mannequin
You can take a photo of the clothes with a hanger in the below simple step:
- At first, you need to choose a hanger that matches the color and style of the clothing. After that, it’s time to plan for the photography setup.
- Select a background as per the photography mood you want. For example, select a plain white background if you want to create a simple environment.
- Next, hang the cloth against the background and illuminate it from different angles and take the photo from different angles.
- Make sure you use multiple light sources to avoid shadows.
- Finally, Adjust the color and other photo elements in the post-production.
Different Ideas for clothing on a hanger Photography
Below are a few creative ideas for taking clothing photos on a hanger:
Display in a simple way: You can use a simple wooden hanger to take the photo. Use a plain white background to keep the simplicity.
Relaxed environment: Take the photo against a brick or wooden wall. It will create an artistic environment and a relaxed vibe.
Use accessories: Using accessories along with the clothing is also a great idea. You can use bags, scarves, and hats in the photo setup to give it an artistic presentation.
Outdoor setup: Take the photo outdoors against a natural background. Consider this only if the clothing item is suitable for the outdoor environment.
You may also like to read… How Ghost Mannequin Effect Can Boost Your Sales
Pros and Cons of taking the photo on a hanger
Pros:
- Photography in this process is quite simple.
- There’s no need for extensive post-production.
- It can showcase the product in a better way compared to flat lays.
- This technique is ideal for displaying the luxury of the product.
- You can take the photo in different indoor and outdoor environments.
- No extensive photo editing is required.
Cons:
- The fitness of the product can not be showcased.
- Careful lighting is necessary for better output.
Ghost Mannequin Photography
Ghost mannequin photography is a technique where photographers take clothing photos with the model or mannequin. After taking the picture, they will remove the visible area of the mannequin in the post-production. The final image creates a feel like the clothing has been photographed without the mannequin. Below is the process of ghost mannequin photography:
How to Take Pictures of Clothes Without Mannequin
Choosing the right mannequin: Not all mannequins will perfectly fit your clothing. Therefore, it is essential to select the right one for the product you are working on. Additionally, do not position the mannequin in an awkward pose. Ensure the clothing looks professional.
Preparing the garment: Make sure the clothing item is clean and properly pressed. Before taking the photo, give extra attention to the collar and button area.
Set up the lighting and background: Choose a background that creates a clear contrast against the product. Use soft and even illumination from multiple angles.
Capture the photo: Use a tripod to ensure the camera is stable. Capture the picture from different angles, including the front, back, and sides.
Take photos of the missing part: Image editors will need images of the inner area of the neck, sleeve, and bottom of the fashion item for mannequin removal. Take these photos separately.
Removing the mannequin in the post-production
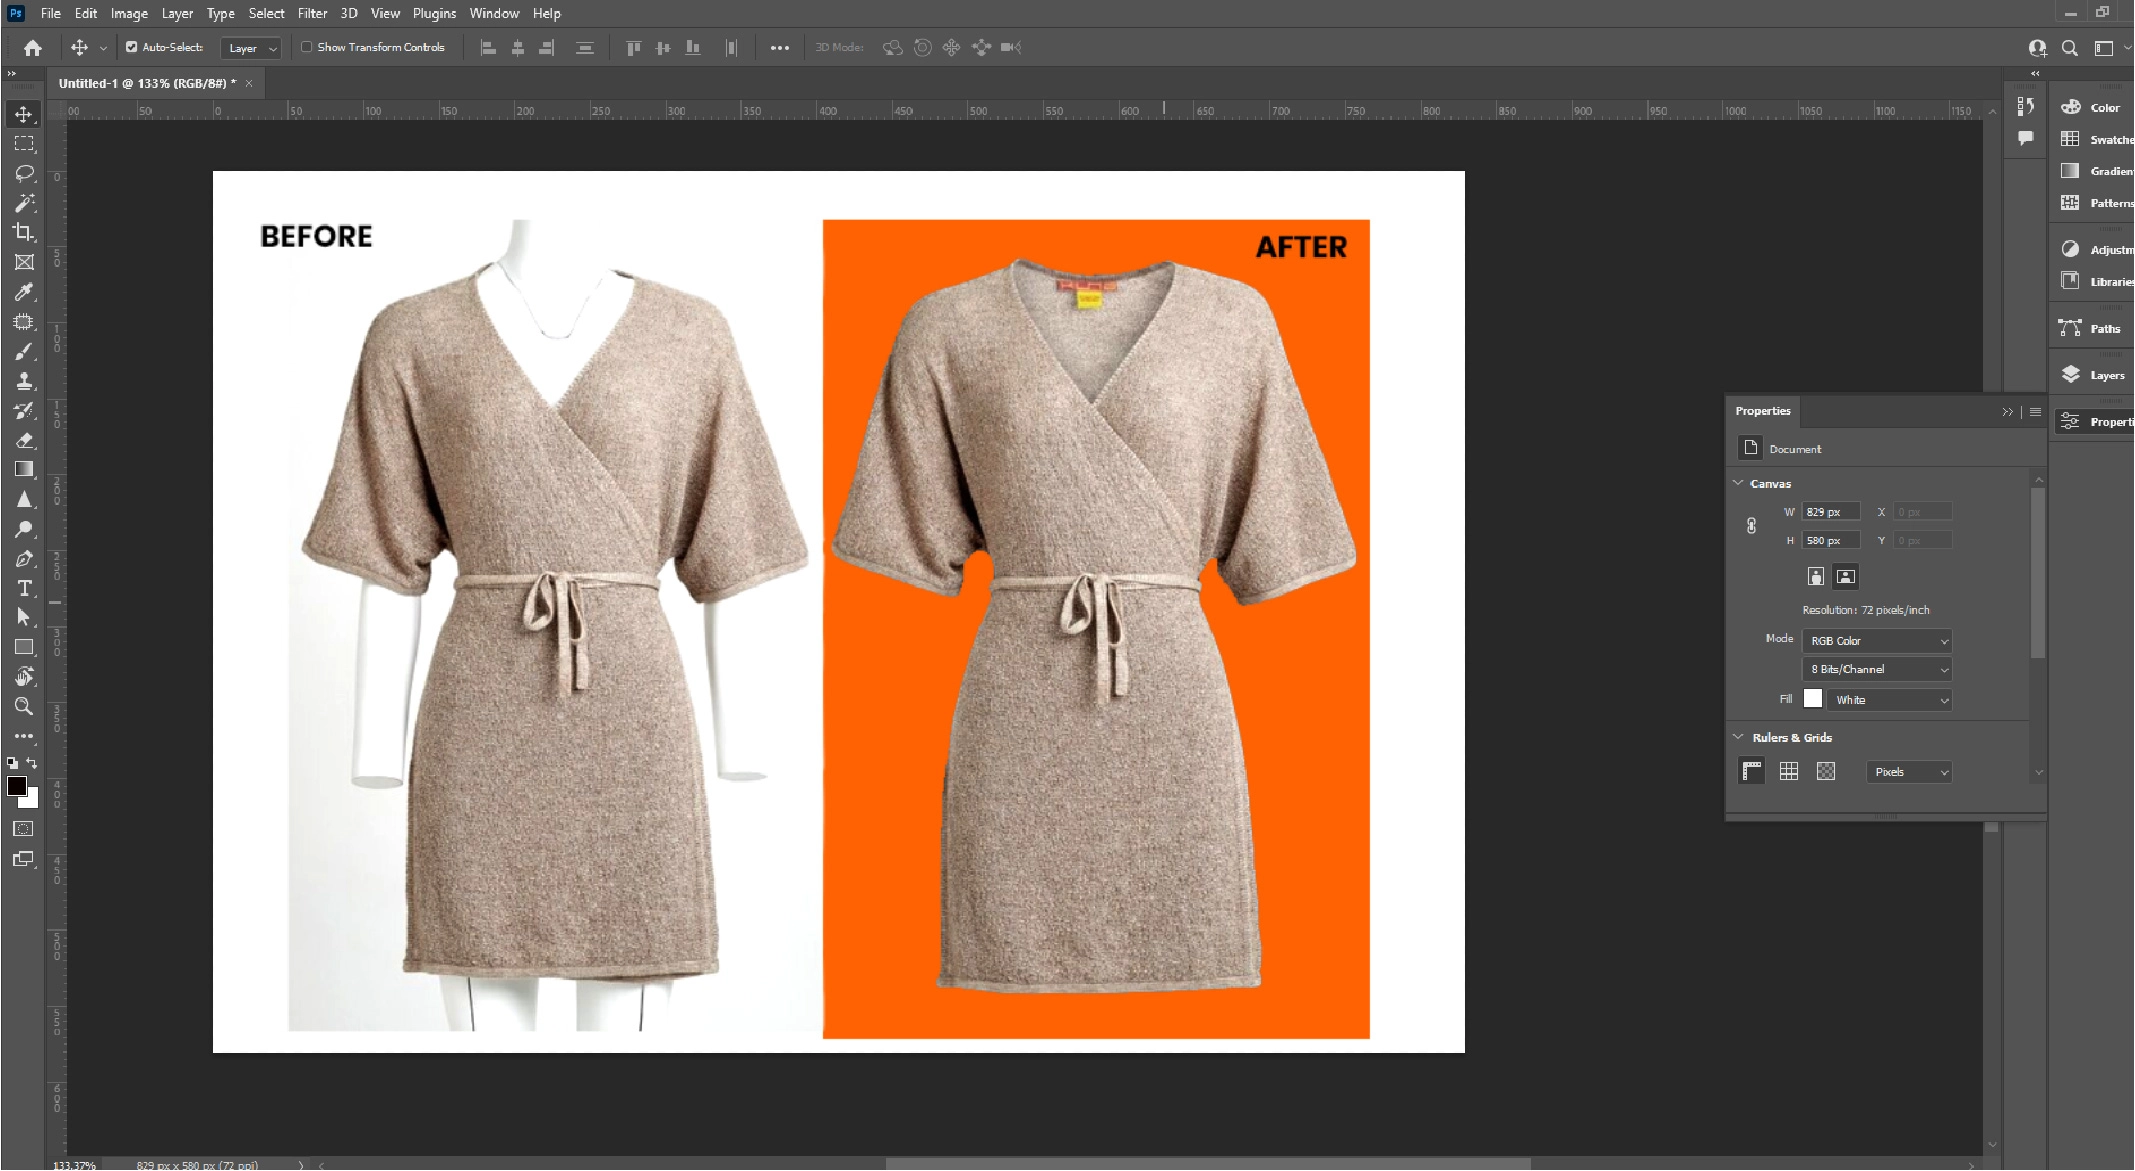
Advanced photo editing software such as Adobe Photoshop can remove the mannequin from the photo. Below are the essential activities in the post-processing:
Open the image: Import multiple photos of the exact clothing item. You will need pictures of the fashion item’s front, back, sides, and inner parts.
Remove the mannequin: Image editors use Photoshop tools such as Pen or Lasso to select the unwanted mannequin area. After careful selection, they will remove the mannequin from the main image.
Merge missing parts: After mannequin removal, the neck, bottom, and sleeve area may create missing hollow regions. Take inner areas from other images and merge seamlessly with the main image.
Refine edge: Use the refine edge tool to work with rough edges. It will smoothen the transition between the background and the product.
Final touch: Adjust the light, color, shadow, and other photo elements before exporting the photo. Crop or resize the image as per the requirements.
FAQ
Why removing a mannequin is essential in clothing photography?
Mannequins create distractions. A clothing photo without a model helps the customers focus entirely on the item. They can also understand the design and fit of the product. This kind of photography is essential in e-commerce for professional clothing presentations.
Should I use props for RMG photography?
Yes, pros help add context to a photo. They will make the RMG product more attractive by creating a meaningful photo composition. However, photographers should use them in a minimalistic way so that props do not become the primary attention of the photo.
Is it essential to edit the clothing photos before publishing?
Yes, editing is essential for any e-commerce product photo. Photographers can not always capture the best light, color, and appearance. Therefore, adjusting these photo elements is mandatory to ensure a perfect presentation.
What’s the best way for clothing photography without the mannequin?
Flat lay is the preferred way, but you may also consider other techniques such as stylish hanger for taking clothing photos without a mannequin.
Is a professional setup mandatory in RMG product photography?
A professional setup will help you take good-quality RMG photos, but it is not mandatory. But you need a good quality camera, proper lighting and photography sense for this job.
What type of lights can I use for RMG photography?
You can use both natural and artificial light. Whatever light source you are using, make sure an even illumination.
Conclusion
Utilize your creativity how to take pictures of clothes without mannequin. Whether it is flat lay, stylish hanger, or pinning photography, try to showcase the fit and design of the dress. Do not overcrowd the photo composition so the viewers can focus only on the product. Lastly, do not forget to post-process the photos to give them a polished finish.