What if t-shirt product photography is trickier than you imagine? It is not just about keeping a shirt on a hanger and taking shots. What you see is only the tip of the iceberg. You have to be creative enough to present t-shirts appealingly.
Remember, thousands of e-commerce businesses are your competitors. The more professionally you present your items, the more chances you have to beat them and grow your business. This article covers some pro-actionable ideas and tips on t-shirt photography.
Dozens of photography styles are available. However, most professional photographers use the following approaches in t-shirt photoshoots.
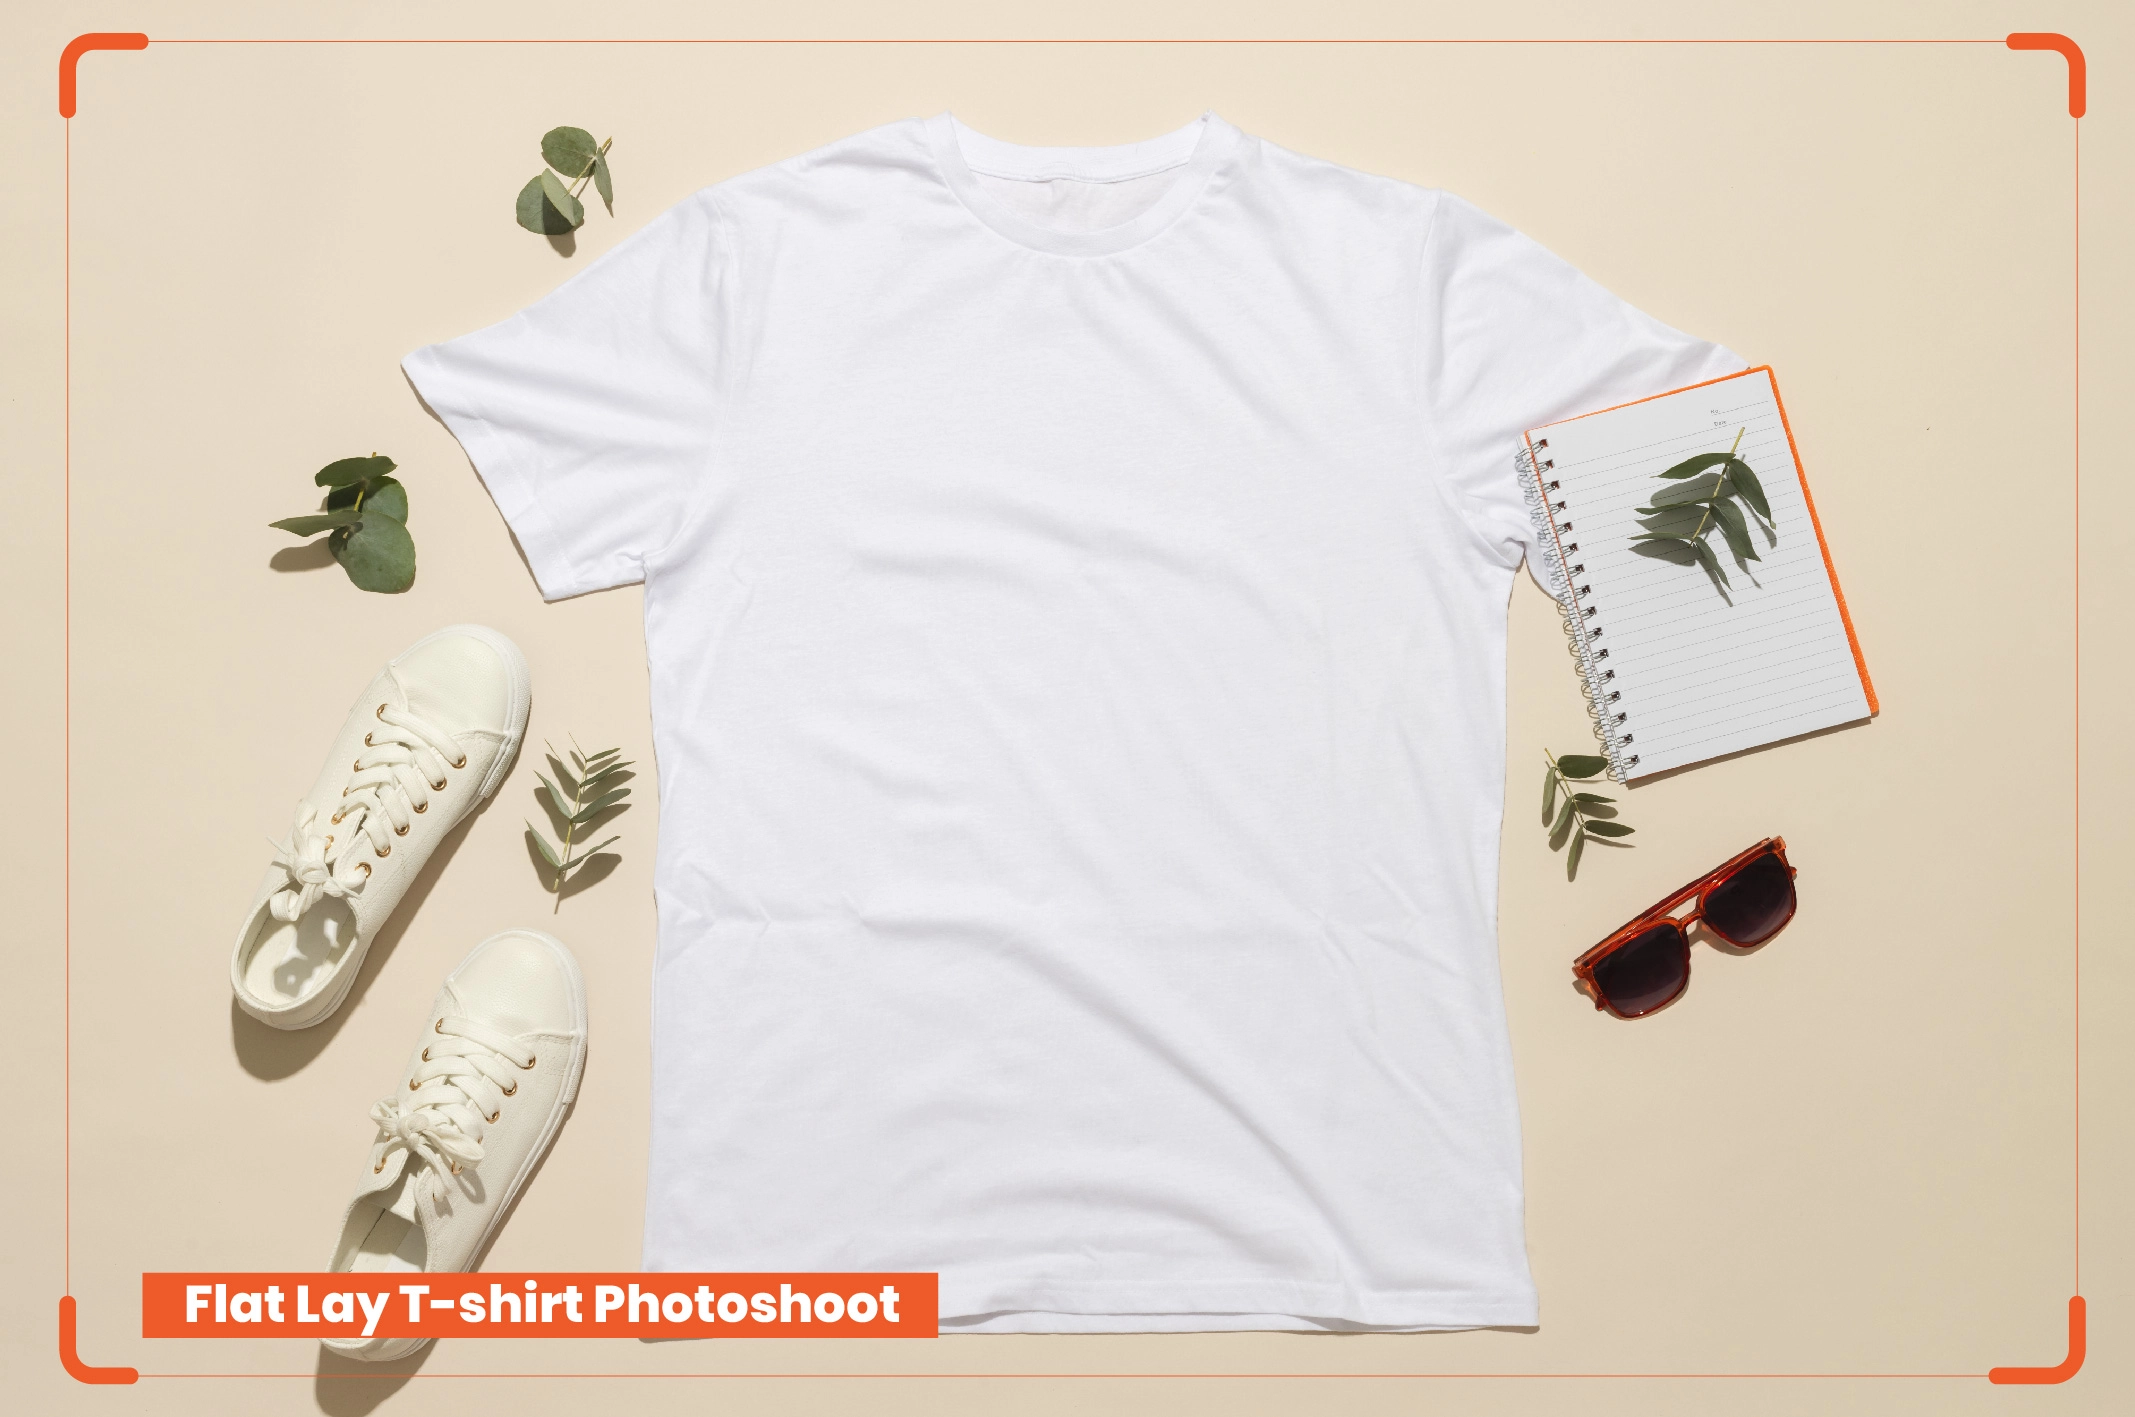
Do you want to convey creative visual stories on your t-shirts? Flat-lay photography is a perfect choice for this purpose. Set up a backlit table. The surface must be smooth and even. Capture shirts from a bird’s eye view. Making an appropriate arrangement is the key. Choose a plain, neutral background color. But a clean wooden surface is not bad, either. You can also choose a black backdrop to add a dramatic mood. Choosing the right props can elevate the main product’s visual. For example, you can add hats, bags, watches, sneakers, sunglasses, books, plants, etc. These elements complement the t-shirts based on their style.
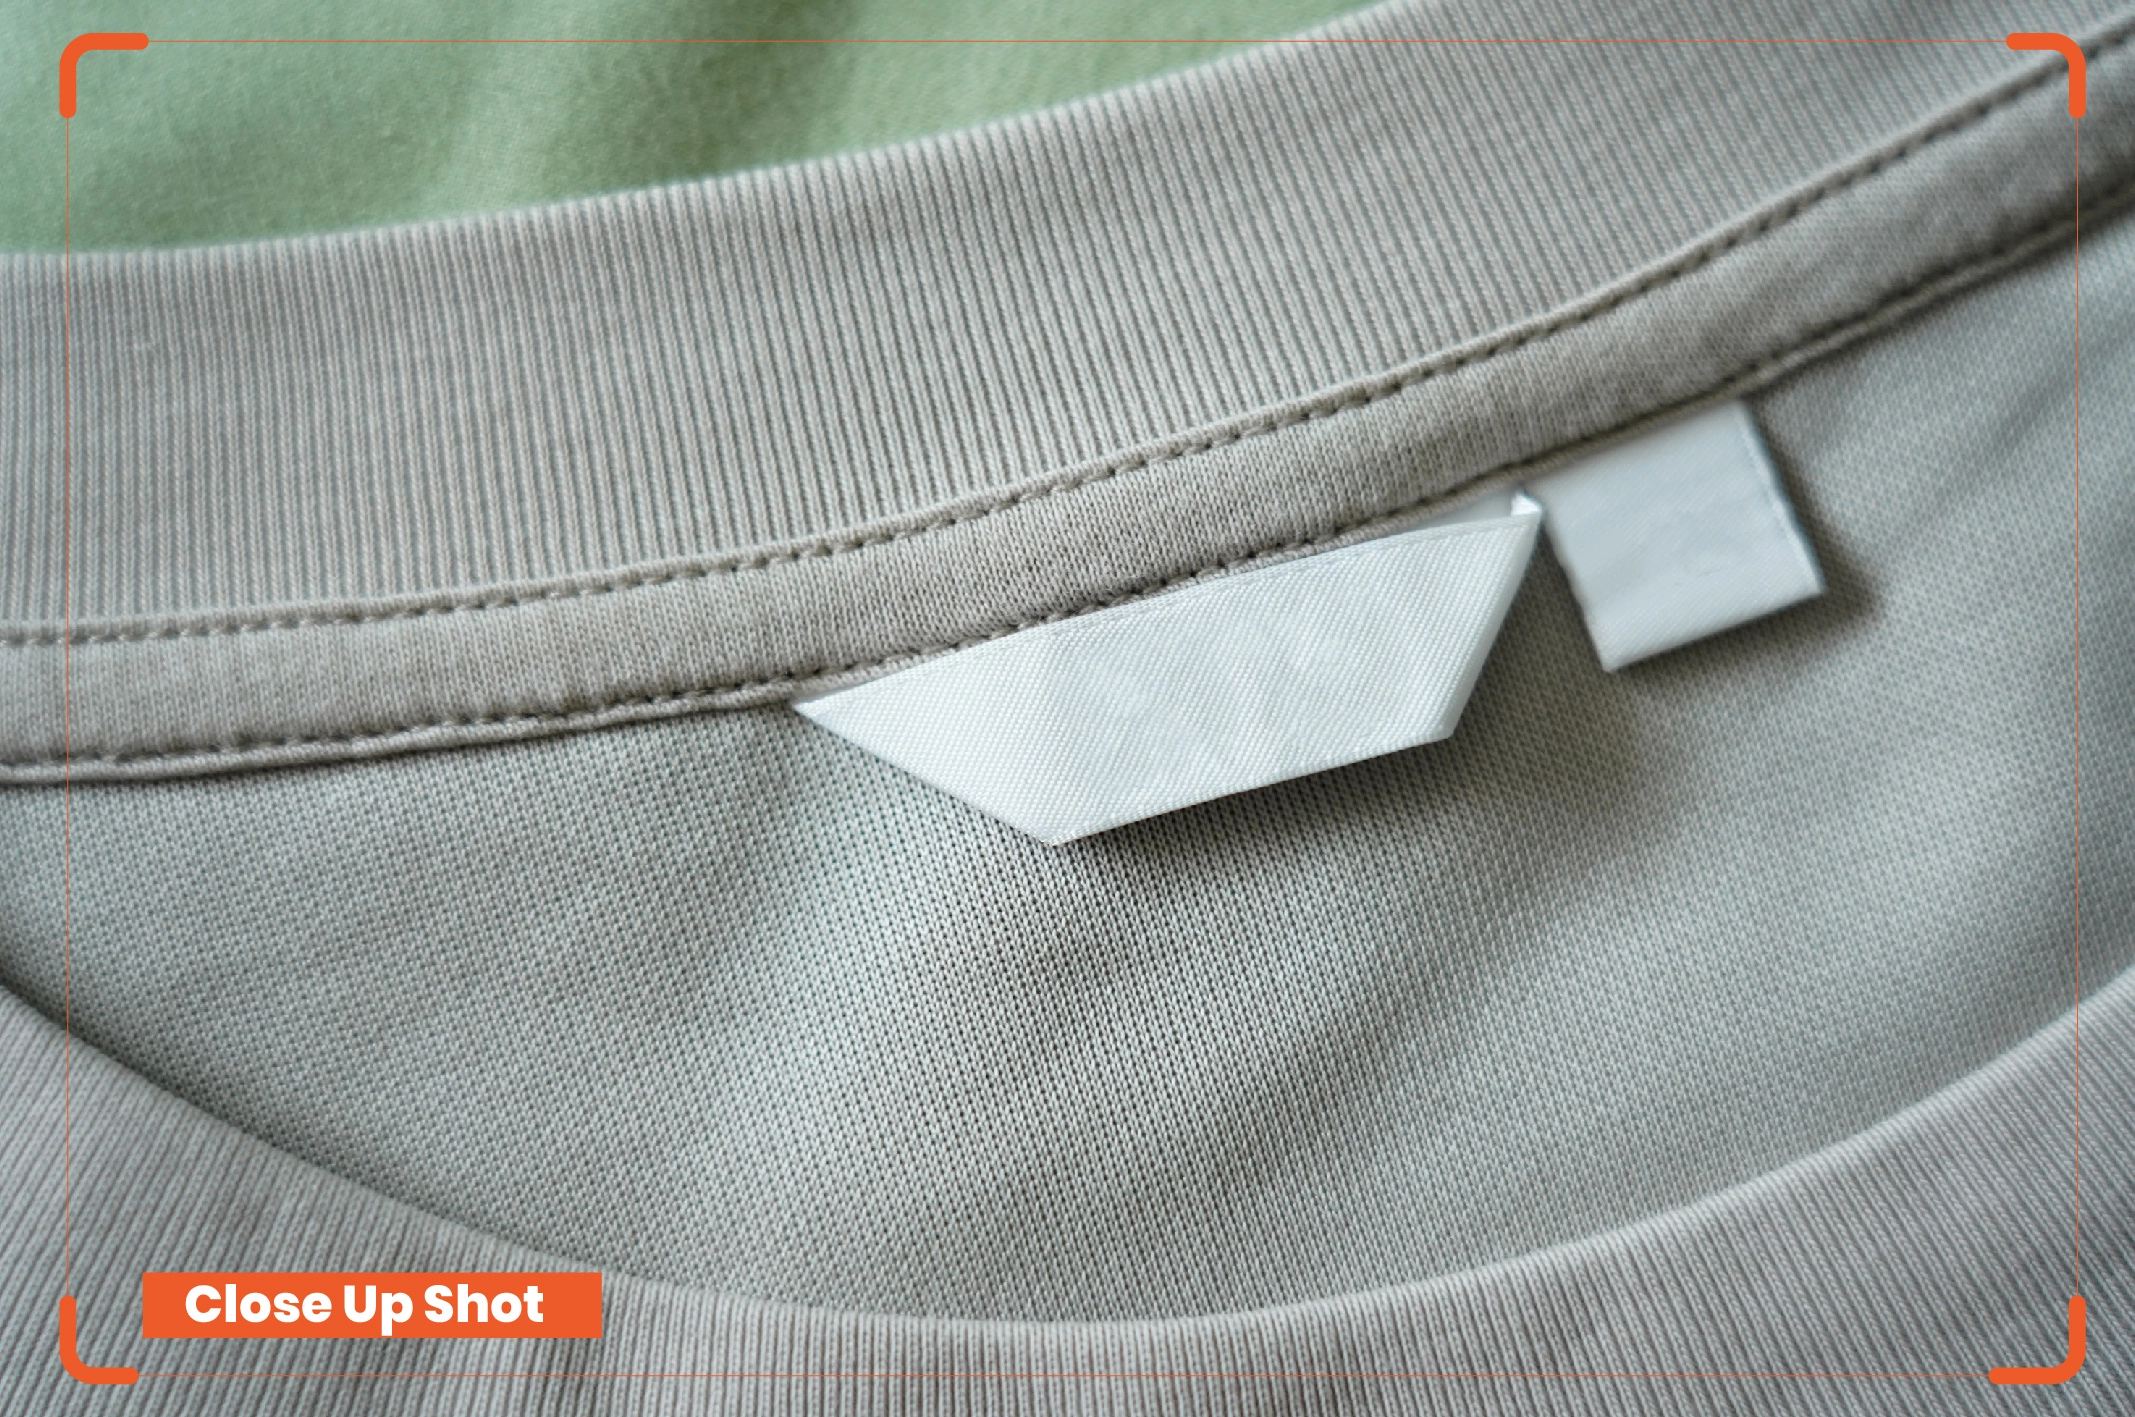
When it comes to highlighting the colors, textures, intricacy, design, and craftsmanship of shirts, close-up shots are a perfect choice. Customers can evaluate the product materials and build quality easily.
For example, macro-shots can highlight the print quality of printed t-shirts. It also enables customers to see the fabric, embroidery, stitching quality, or subtle accents at the seams. Use the wide angle (macro lenses) to capture the full design of the shirt. Decide on the main subject of the t-shirt. Maintain 1-2 feet distance from the clothing piece. Shoot from a shoulder-level distance to create a natural, relatable perspective.

How about giving your T-shirt a floating look? Hanging product photoshoots can provide a close, realistic 3D view. The way you suspend the shirt in mid-air creates a dynamic, weightless appearance. Hanging photoshoots can help you present the structure and shape of the t-shirt. Choose a stylish hanger to complement the theme. You can use wooden or velvet hangers for on-hanger shots, depending on the type of t-shirt. Its color should be matte black or white to keep the main product focused.
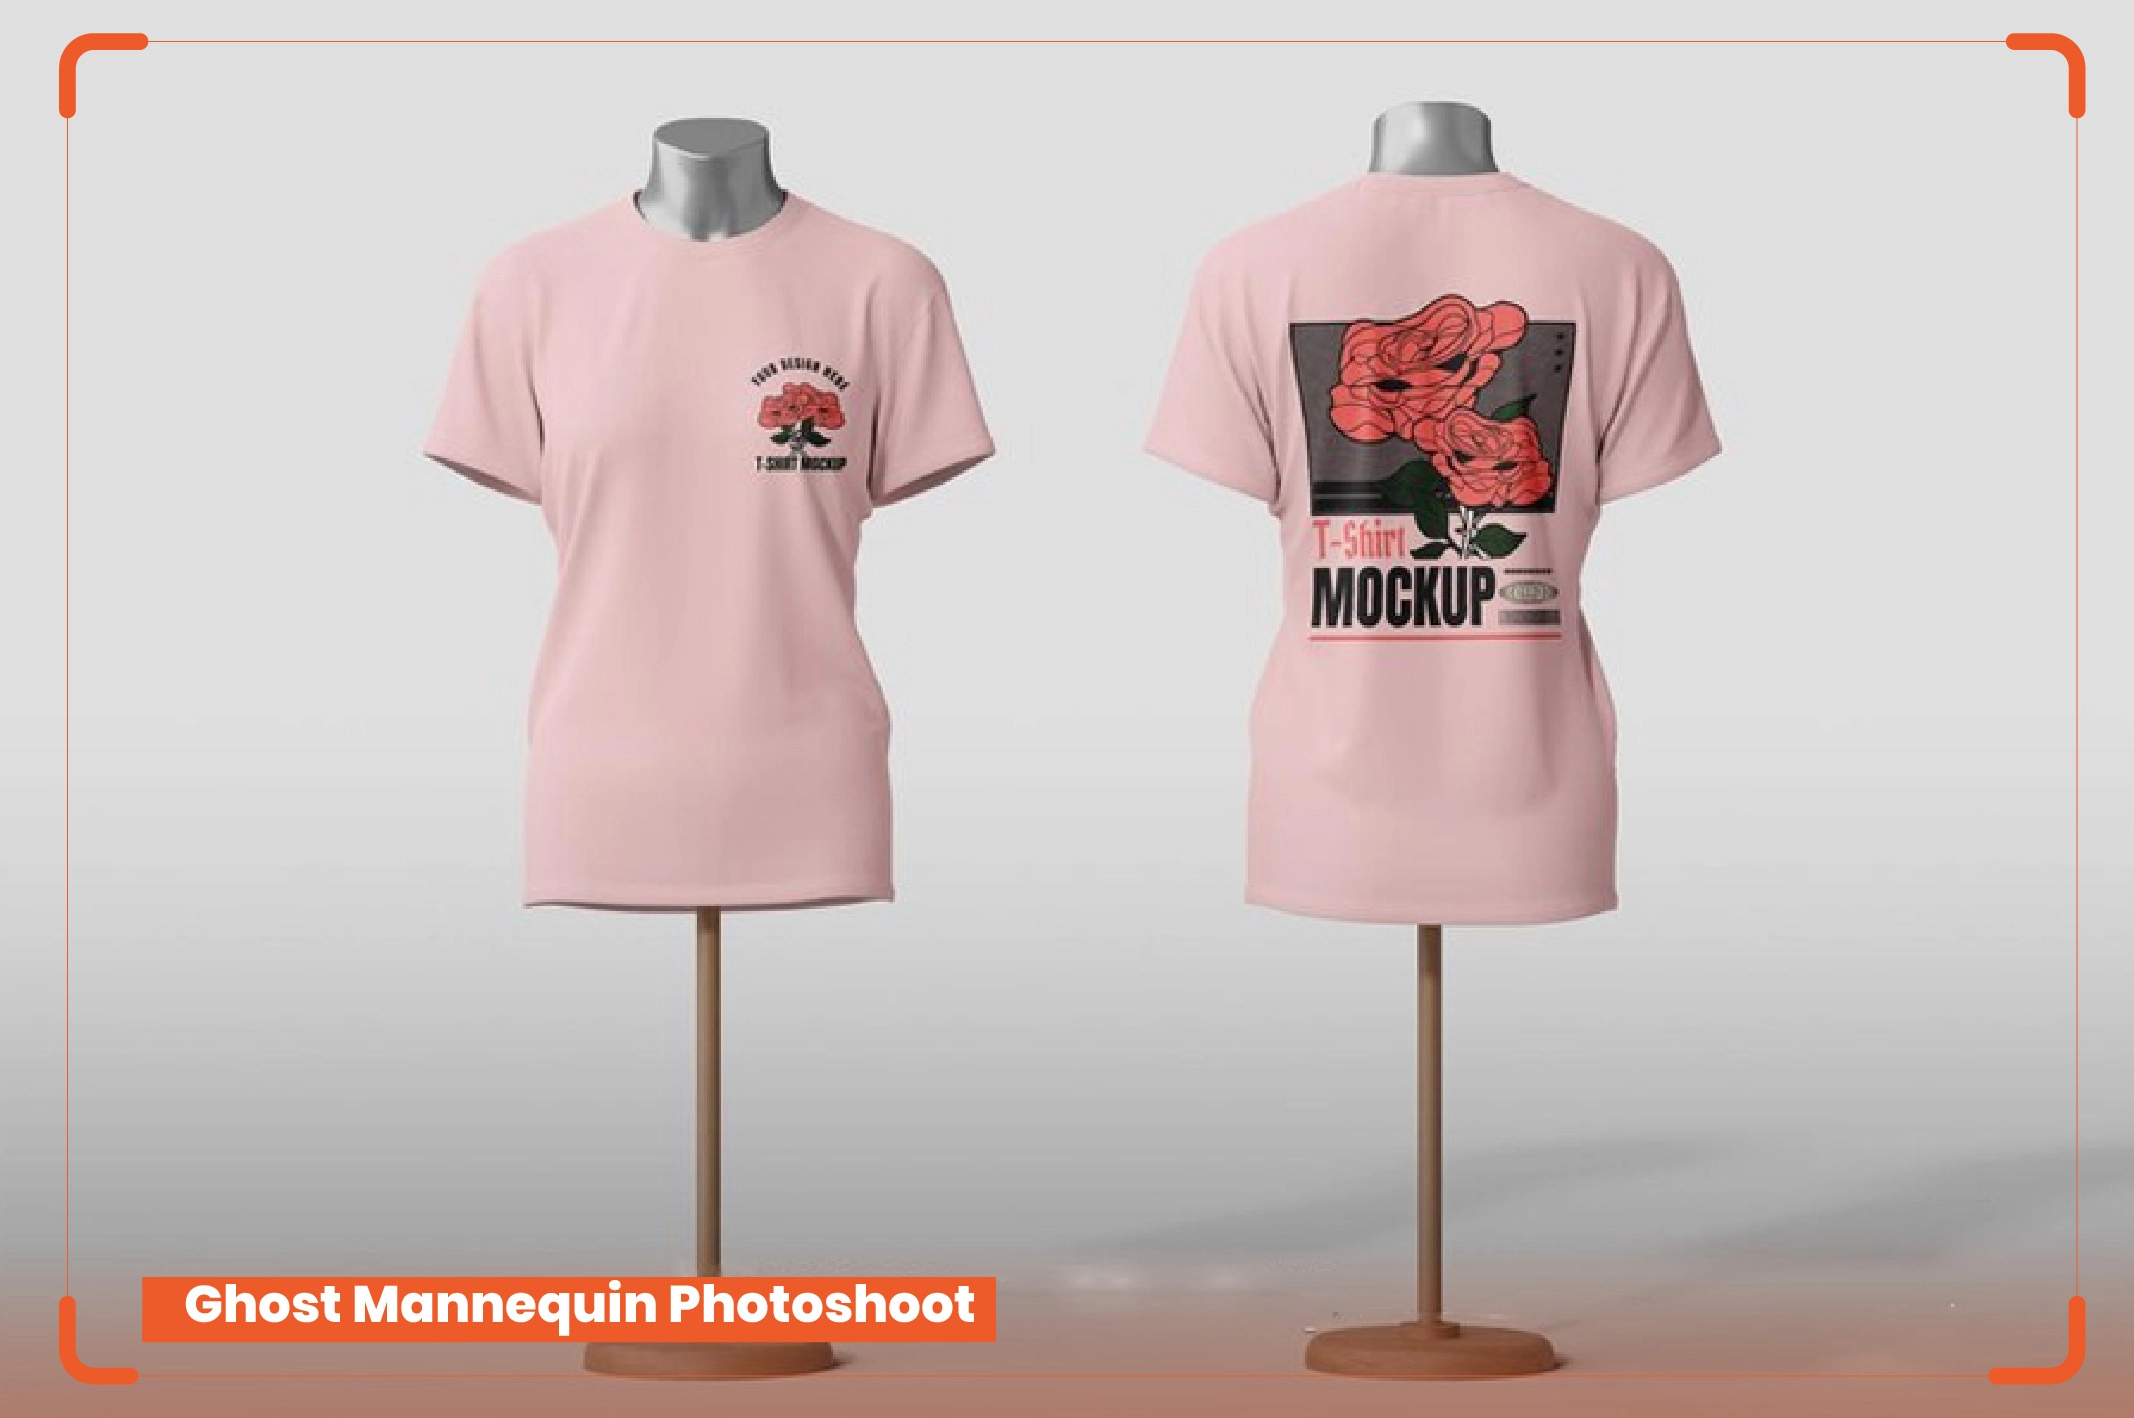
Don’t you have a budget to hire professional models? The best alternative solution is an invisible mannequin product photography shirt. It can help you showcase t-shirt fit, fabric, and details. The way it hovers, the clothing piece looks cool and realistic. Take pictures from the front, back, and sides to provide a complete view of the shirt. Use a premium ghost mannequin model with a matte white finish to minimize reflection and interference.
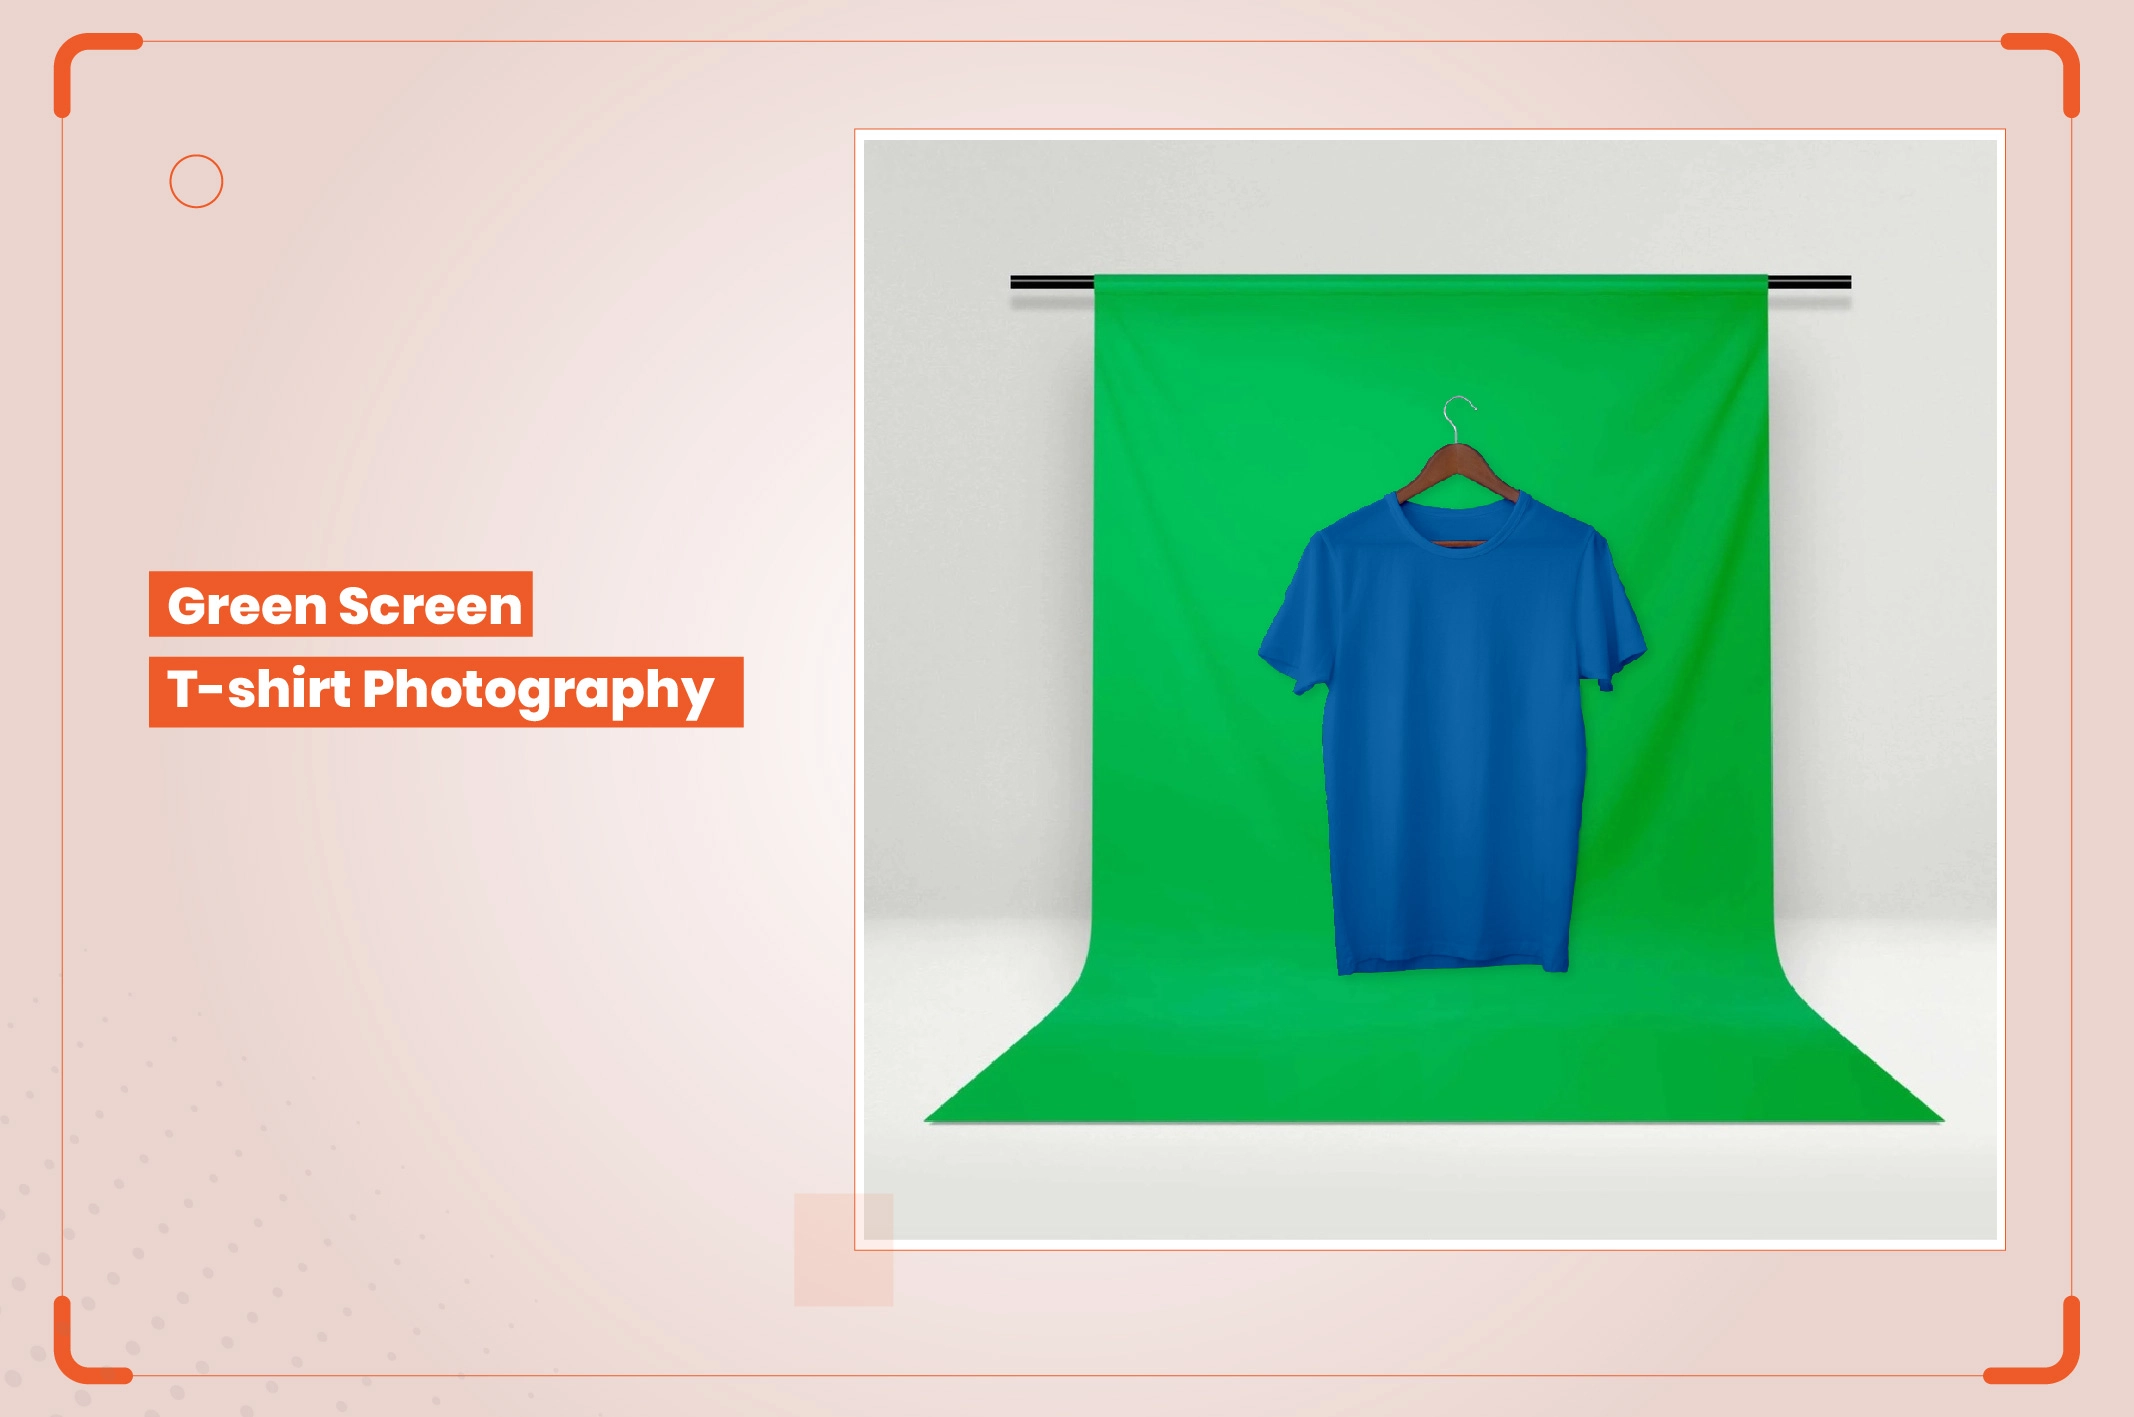
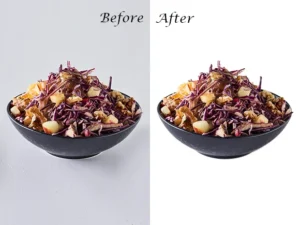
Do you want to use your t-shirt images on various e-commerce or social media platforms? They may need different backgrounds. Will you use a specific backdrop for each platform separately? This is a time-consuming and difficult task. So, what is the solution? You can use green screen t-shirt product photography techniques to replace the background.
However, photo editing plays a pivotal role in this purpose. If you are not an expert, hire a professional photo editing company to replace and add a new background to your shirt images.
Good preparation is a must for capturing high-quality t-shirt photos. The following are key elements to note down to make your fashion editorial photography successful.

A powerful mirrorless or DSLR camera can take your t-shirt photo-shooting skills to a new level. Get a professional model from Canon, Sony, Fujifilm, or Nikon. They can capture high-quality visuals with more details. However, what about the lenses? They are as important as cameras. Photographers can use a wide range of prime lenses to create uniform perspectives in visuals.
Moreover, 35 mm, 50 mm, and 85 mm are the best choices. Apart from prime lenses, wide-angle lenses are also great for creating a sense of depth and space in photos.
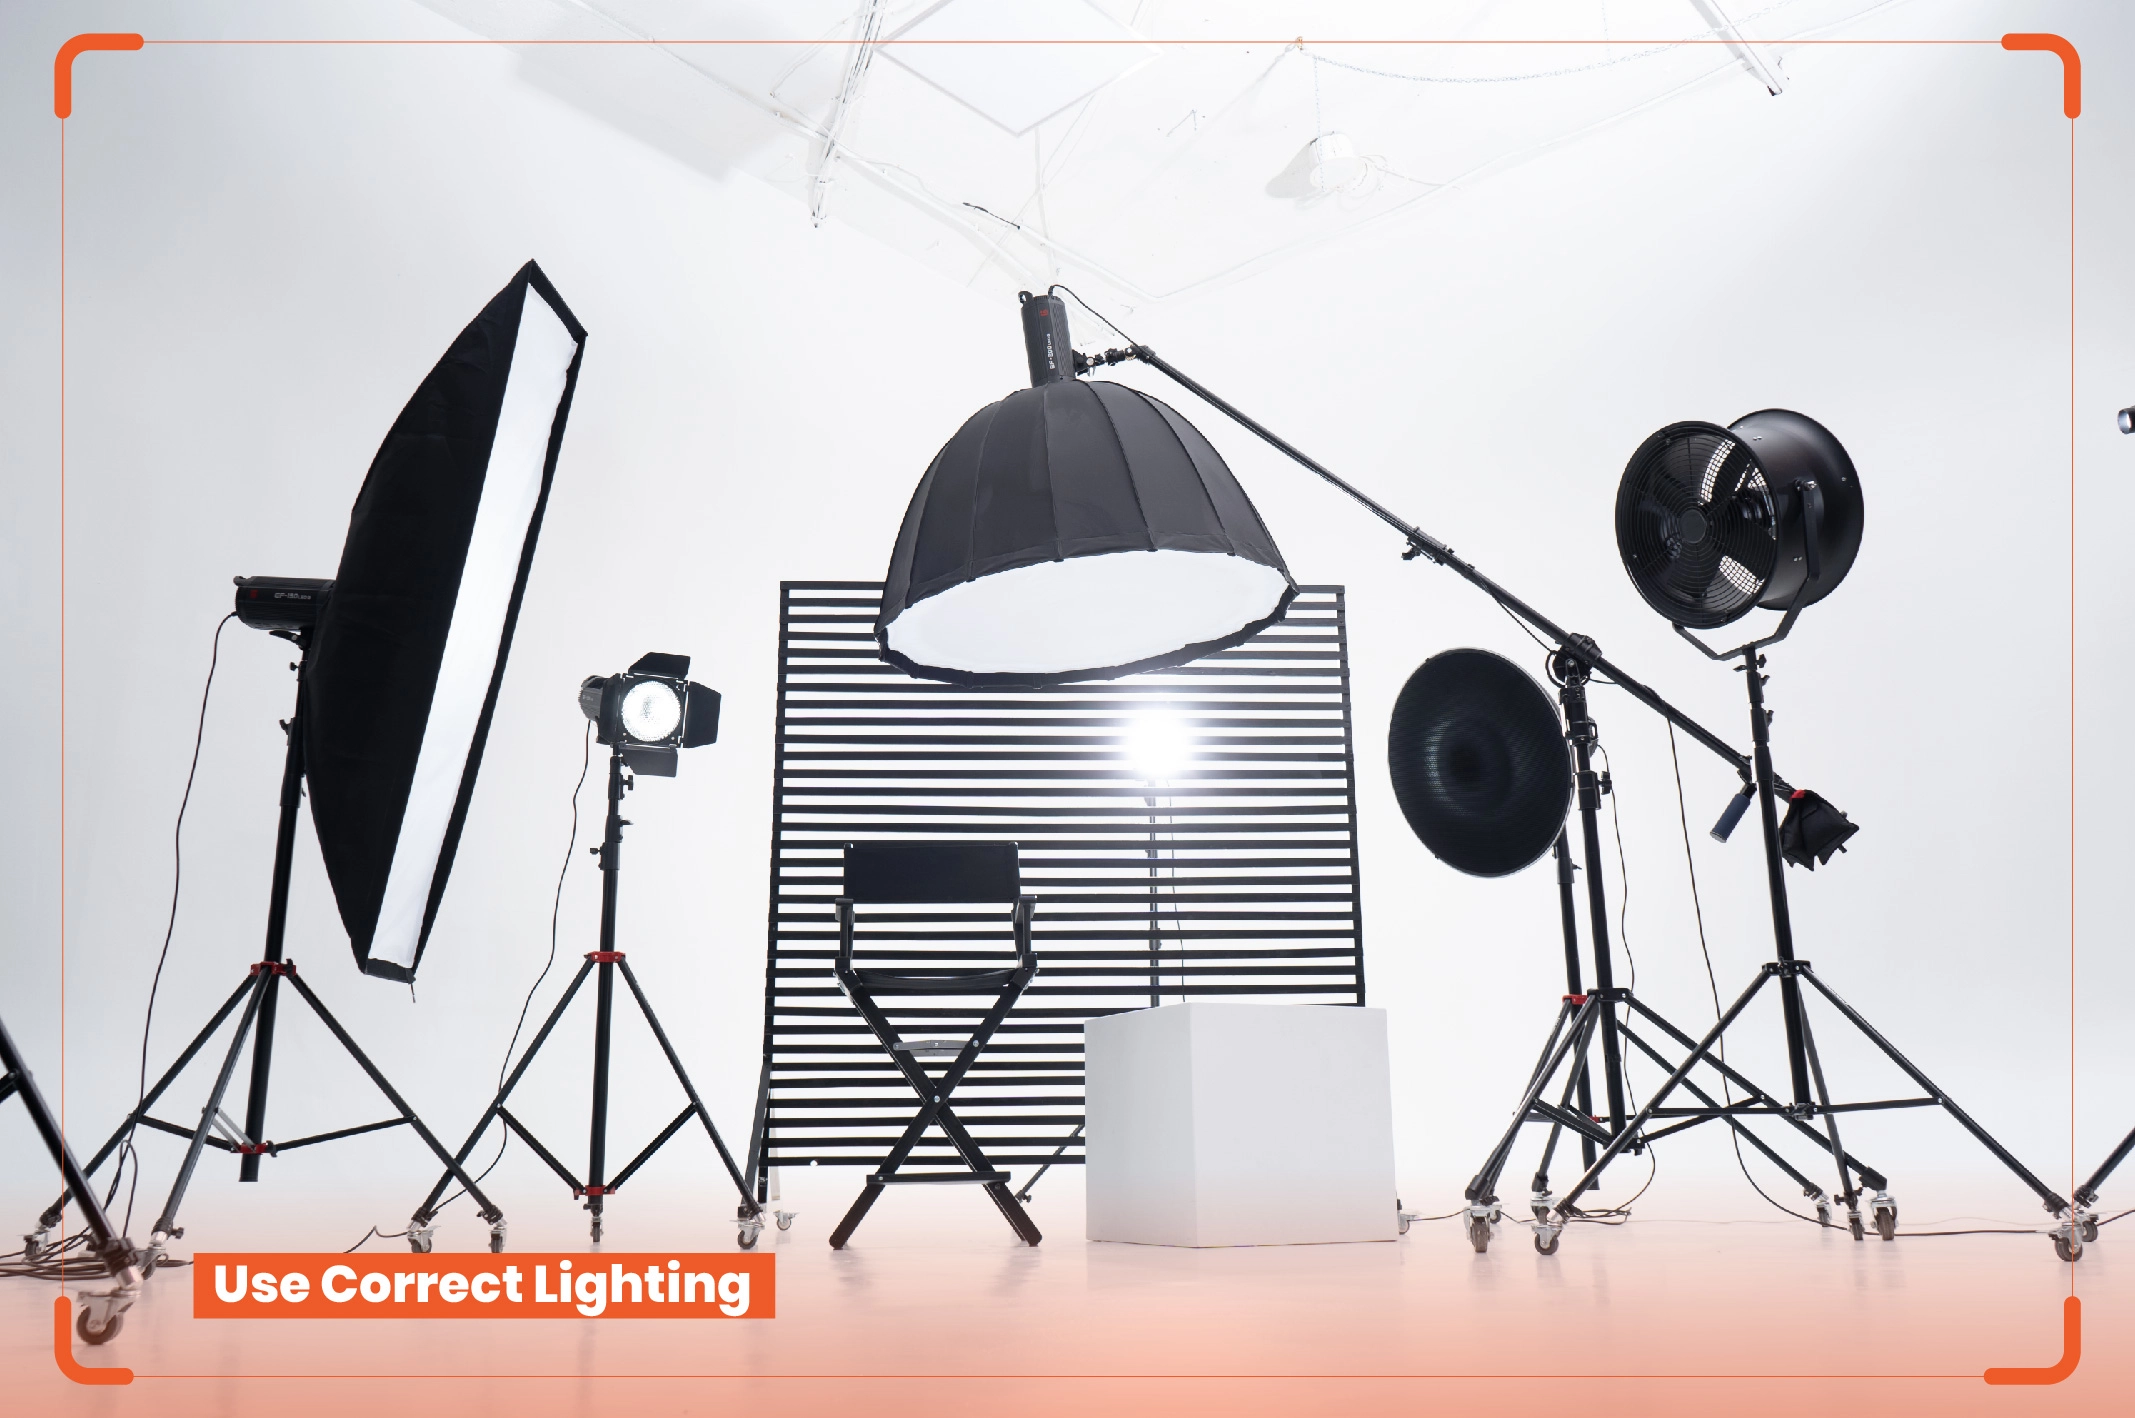
Lighting can determine how viewers perceive the textures, patterns, and details of your t-shirts. But what type of lights do you use for T-shirt photography? It depends on your photoshoot style and what you want to highlight. Choosing the right lighting and placing it in the correct location is the key. For instance, overhead lighting is good for flat-lay photography t-shirts to ensure even light distribution.
In contrast, direct front lights are necessary for ghost mannequin t-shirt photoshoots to illuminate the shirt clearly and evenly. You may need to use a key light and a fill light to make the images more balanced and professional. A reflector also comes in handy to reduce harsh contrasts and soften shadows.
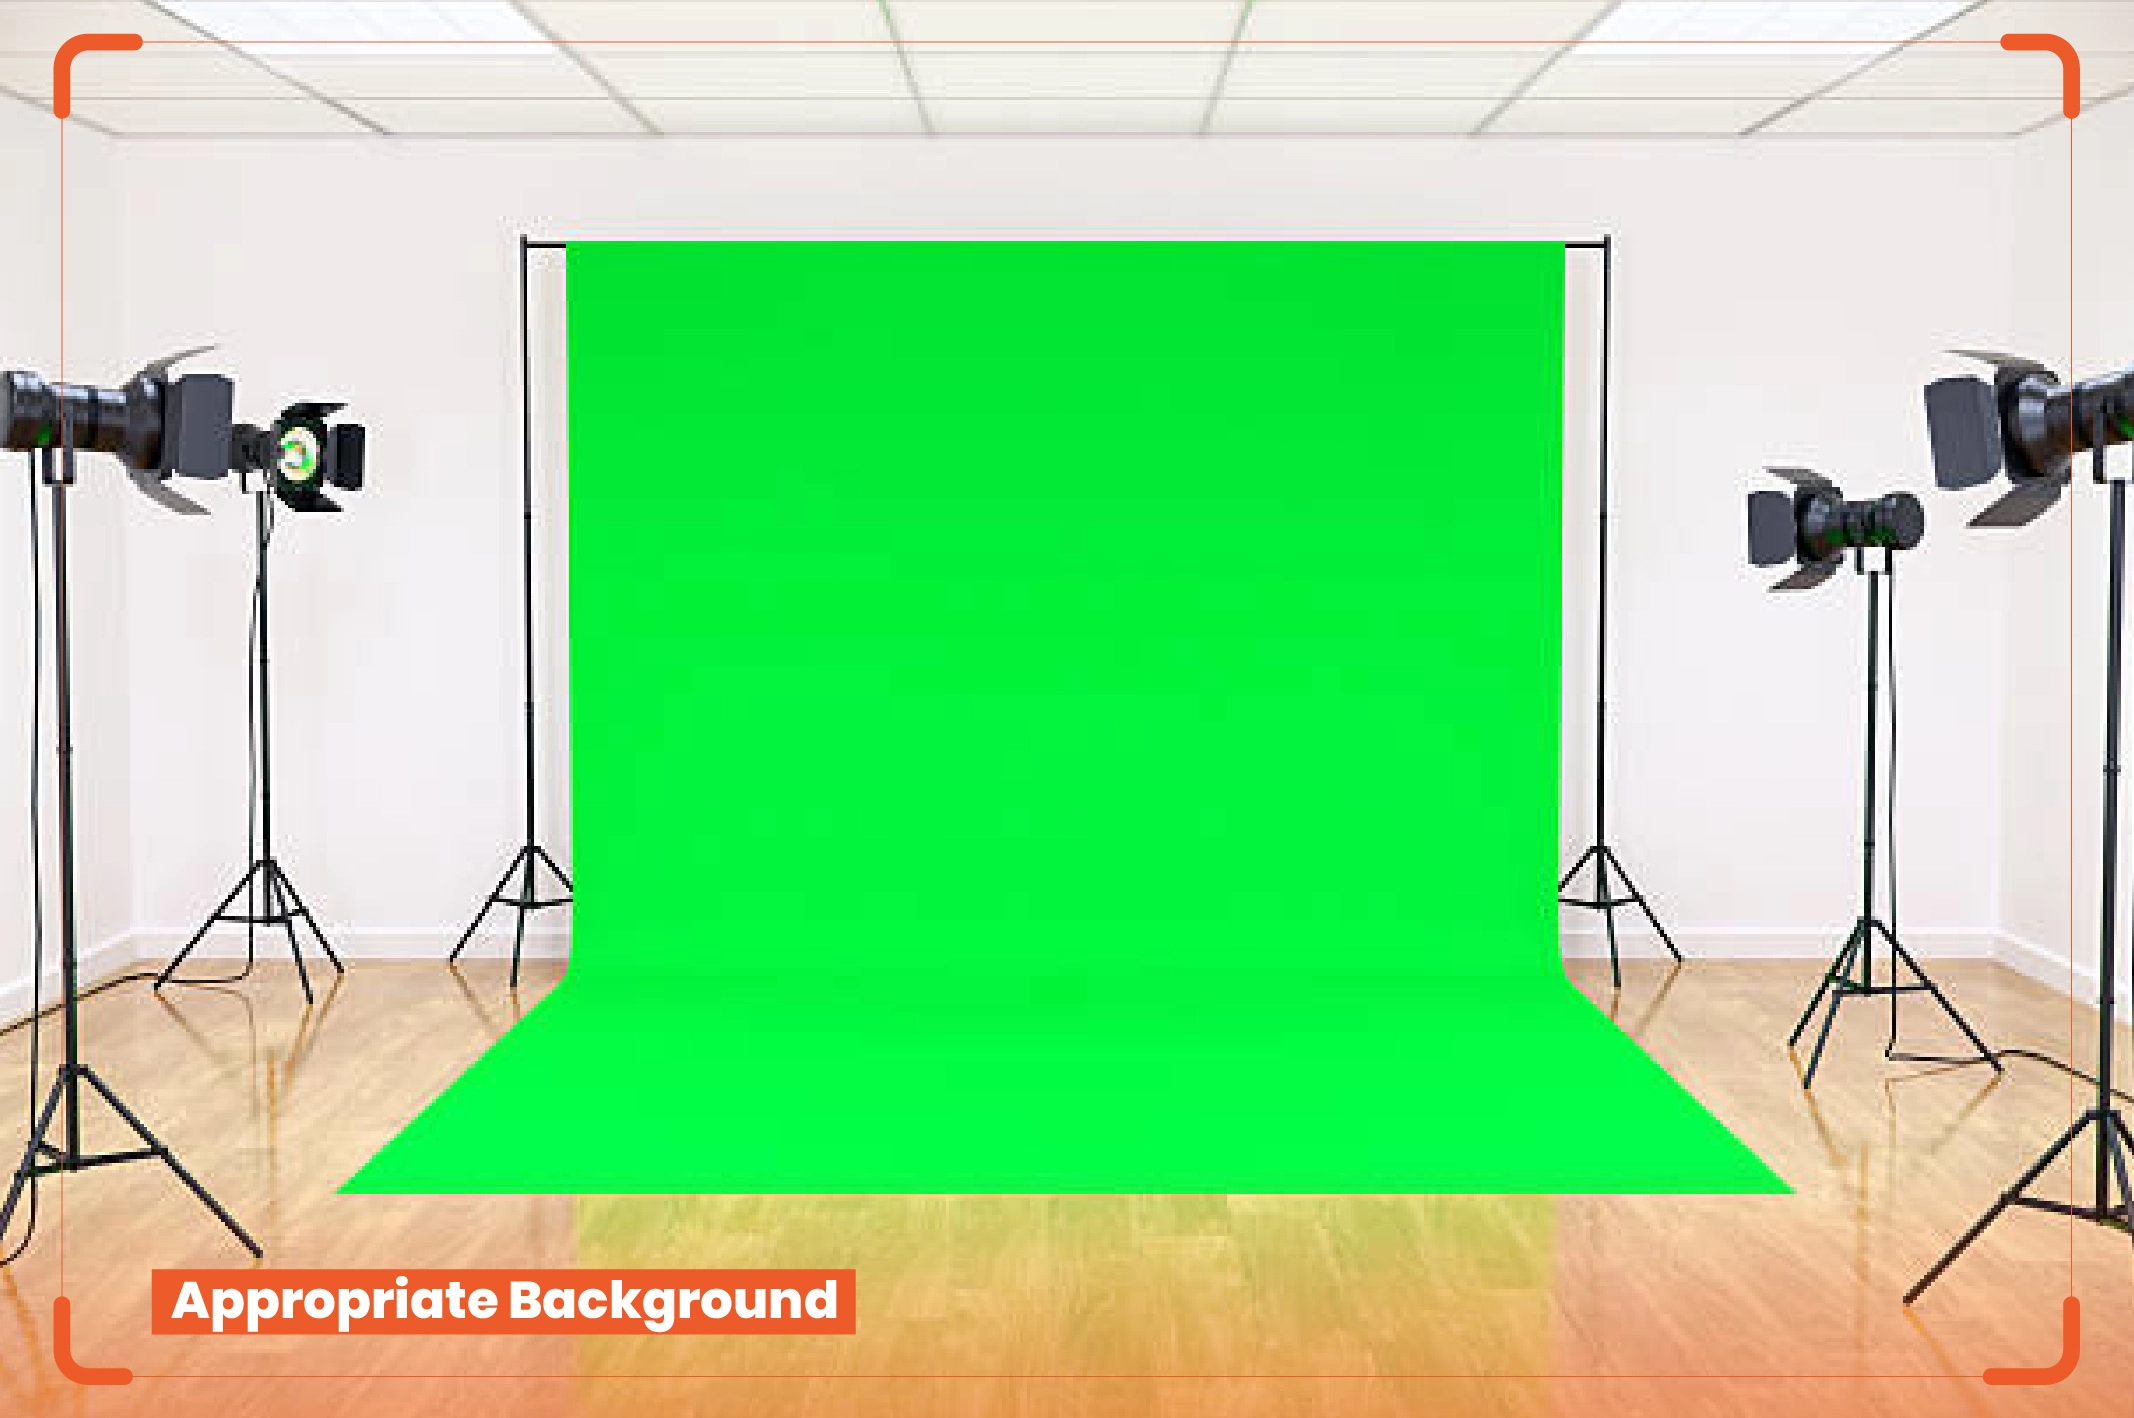
The first rule is to say goodbye to cluttered or jam-packed backdrops. They can take away the focus. So, what type of background is the best choice for t-shirt product photography? Most professionals prefer a pure white or neutral, plain background. You can use slightly off-white, light gray, beige, etc. Solid colors, like red, green, blue, etc., are also good for making the clothing item stand out. They can contrast or complement the shirt’s main subject.
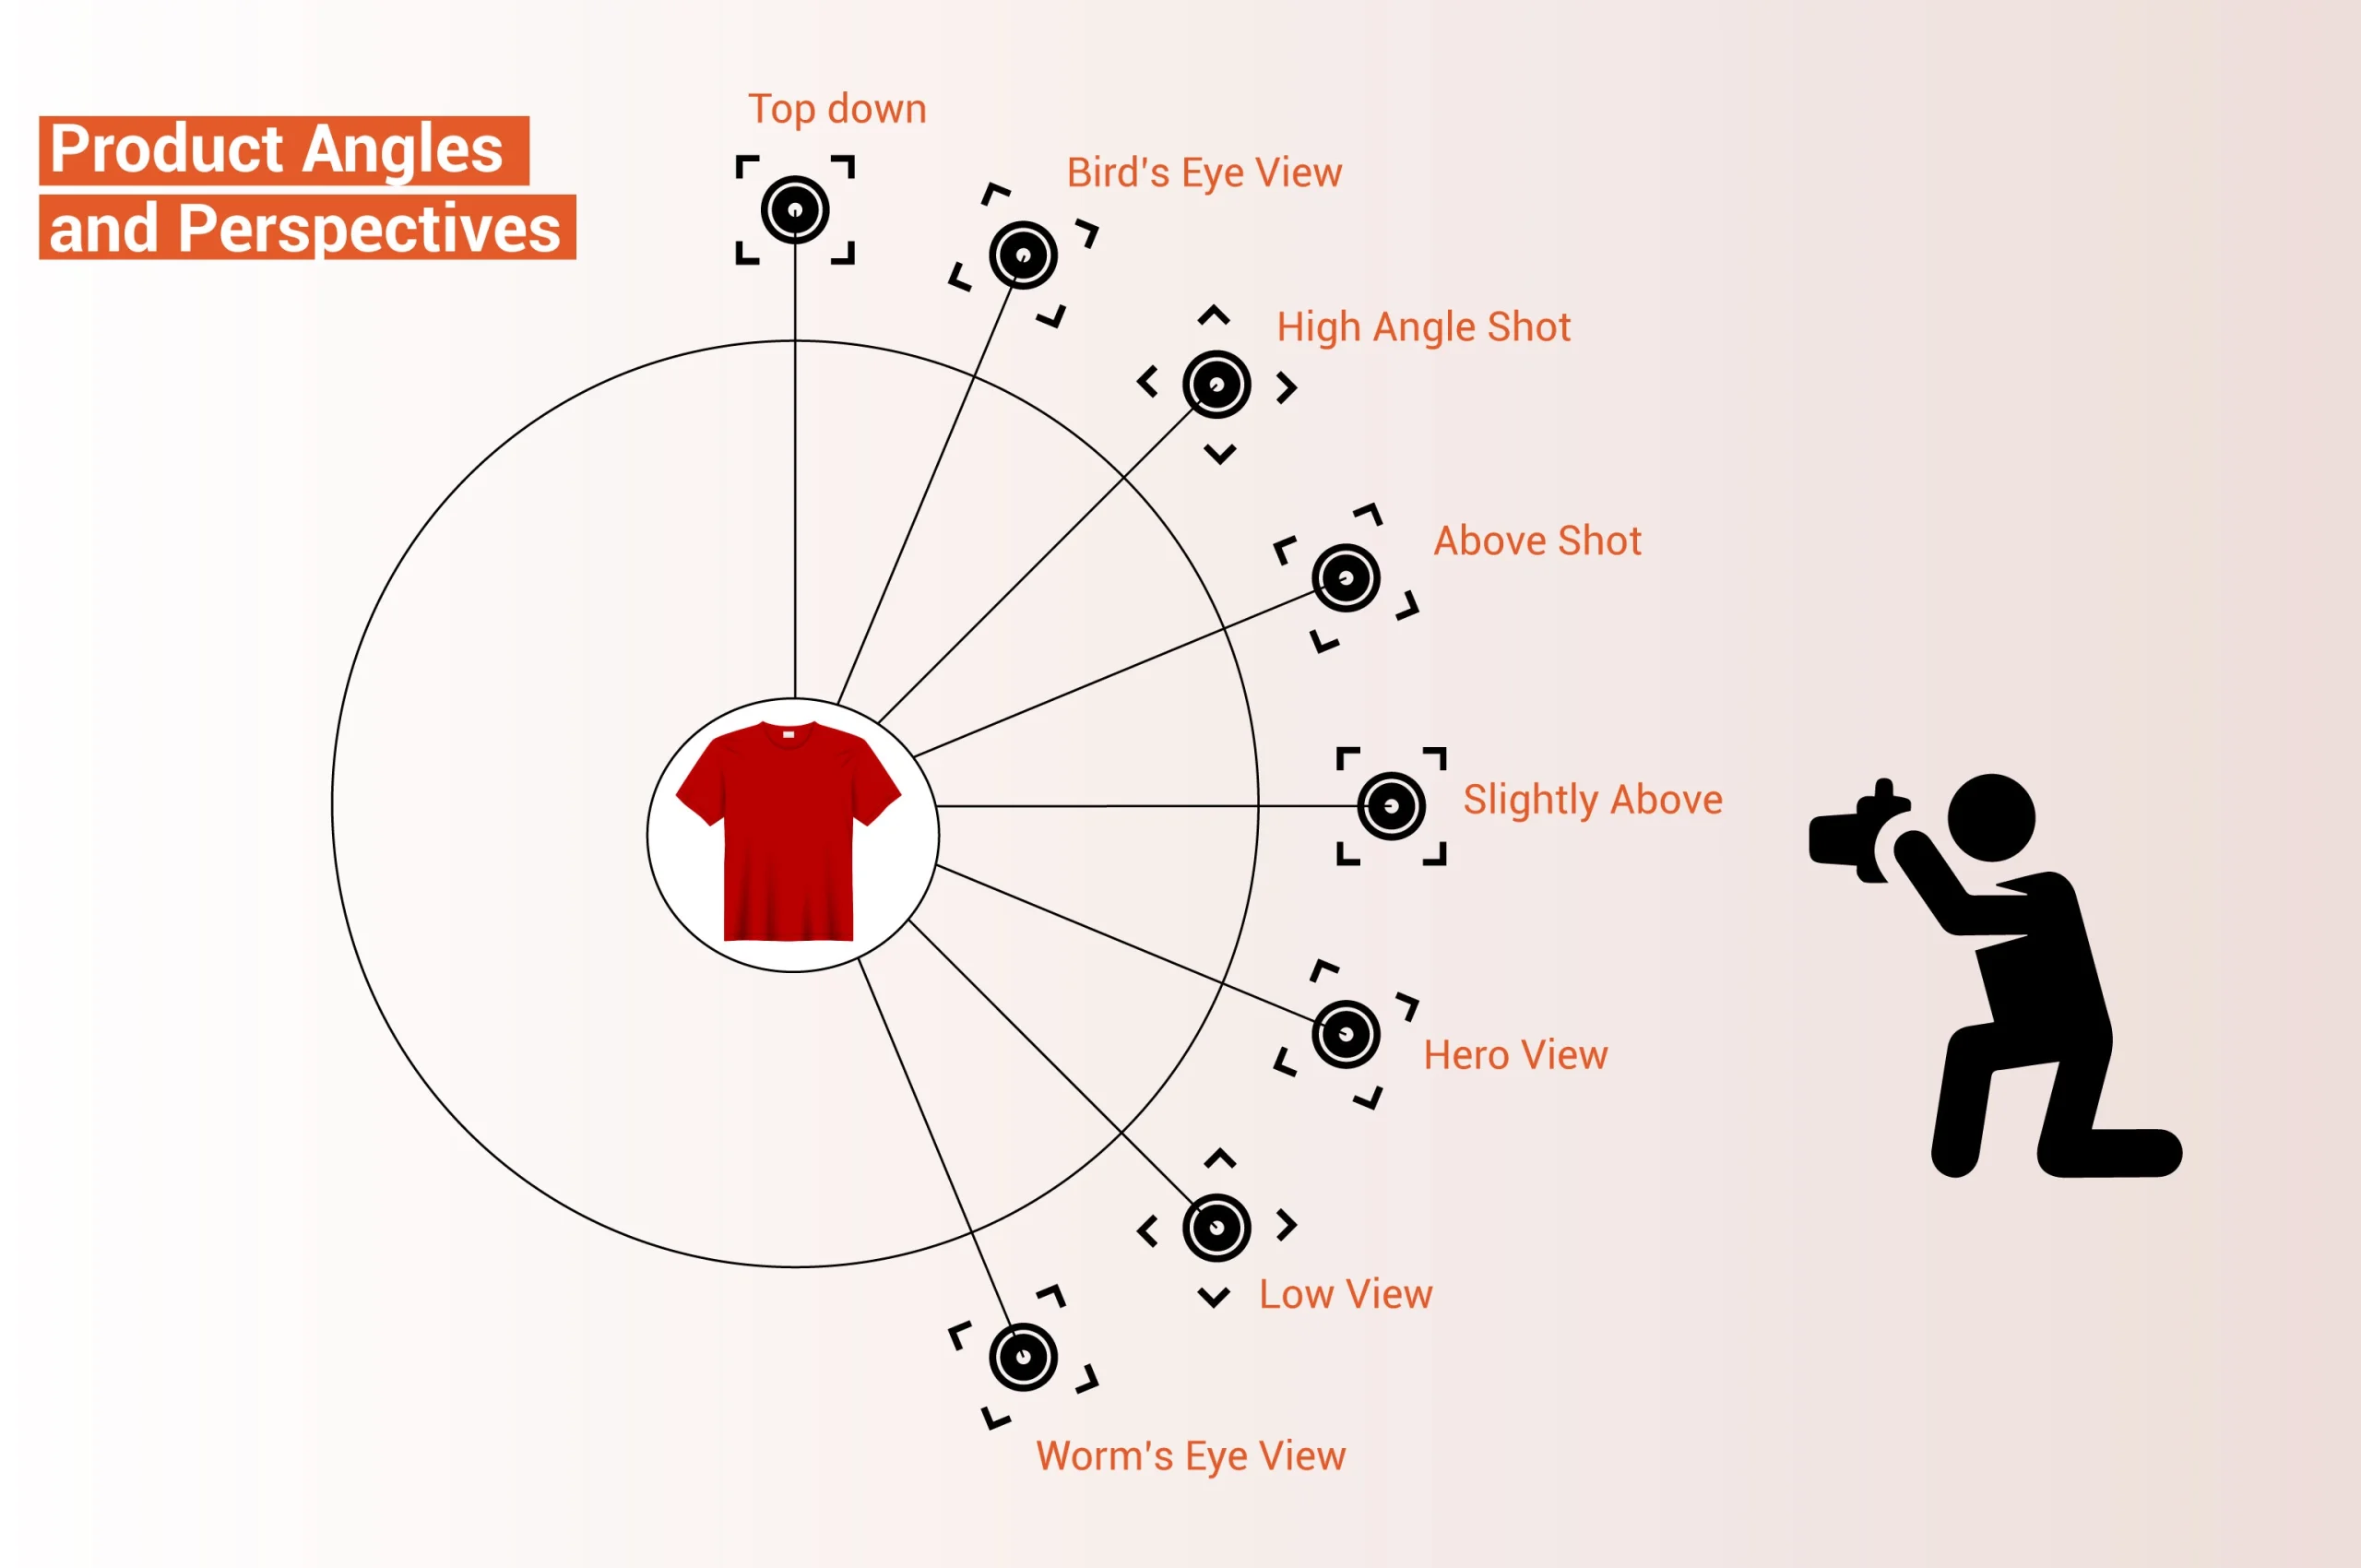
Regardless of the photography t-shirt style you use, shooting angles plays a key role in t-shirt photoshoots. It conveys specific perspectives in visuals. Plus, shooting angles affect how the main product will interact with the background and other physical elements. A creative photographer knows powerful techniques to present the product in the best possible way. For instance, you can use low-angle shots to add empowering, strong, and confident perspectives in clothing visuals.
Pro Tips for Best T-Shirt Product Photography
T-shirt product photography may look like capturing some typical photographs. However, pro photographers know how to highlight key areas of clothing as selling points. The following are some powerful T-shirt photography ideas to showcase T-shirt images creatively and attract prospective customers to purchase the items.

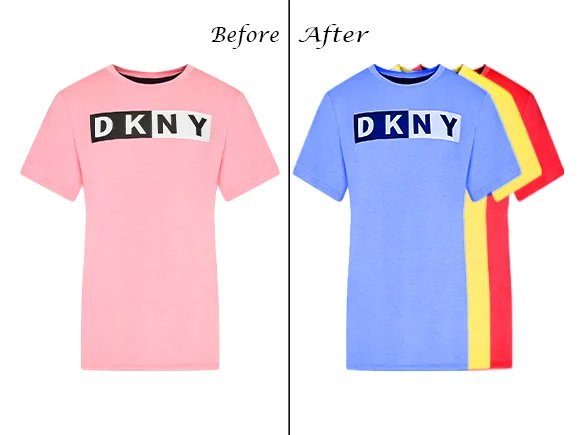
Are you selling different colors, styles, or sizes of the same shirt? If so, showing variations is important to help customers compare the products. This streamlines product selection. Shoppers can make informed and clear purchasing decisions. You can use the same angle, pose, close-up, or full-frame shot for all variants to ensure uniformity for comparison. Add multiple images for each variant. Customers will feel more confident to buy the product.
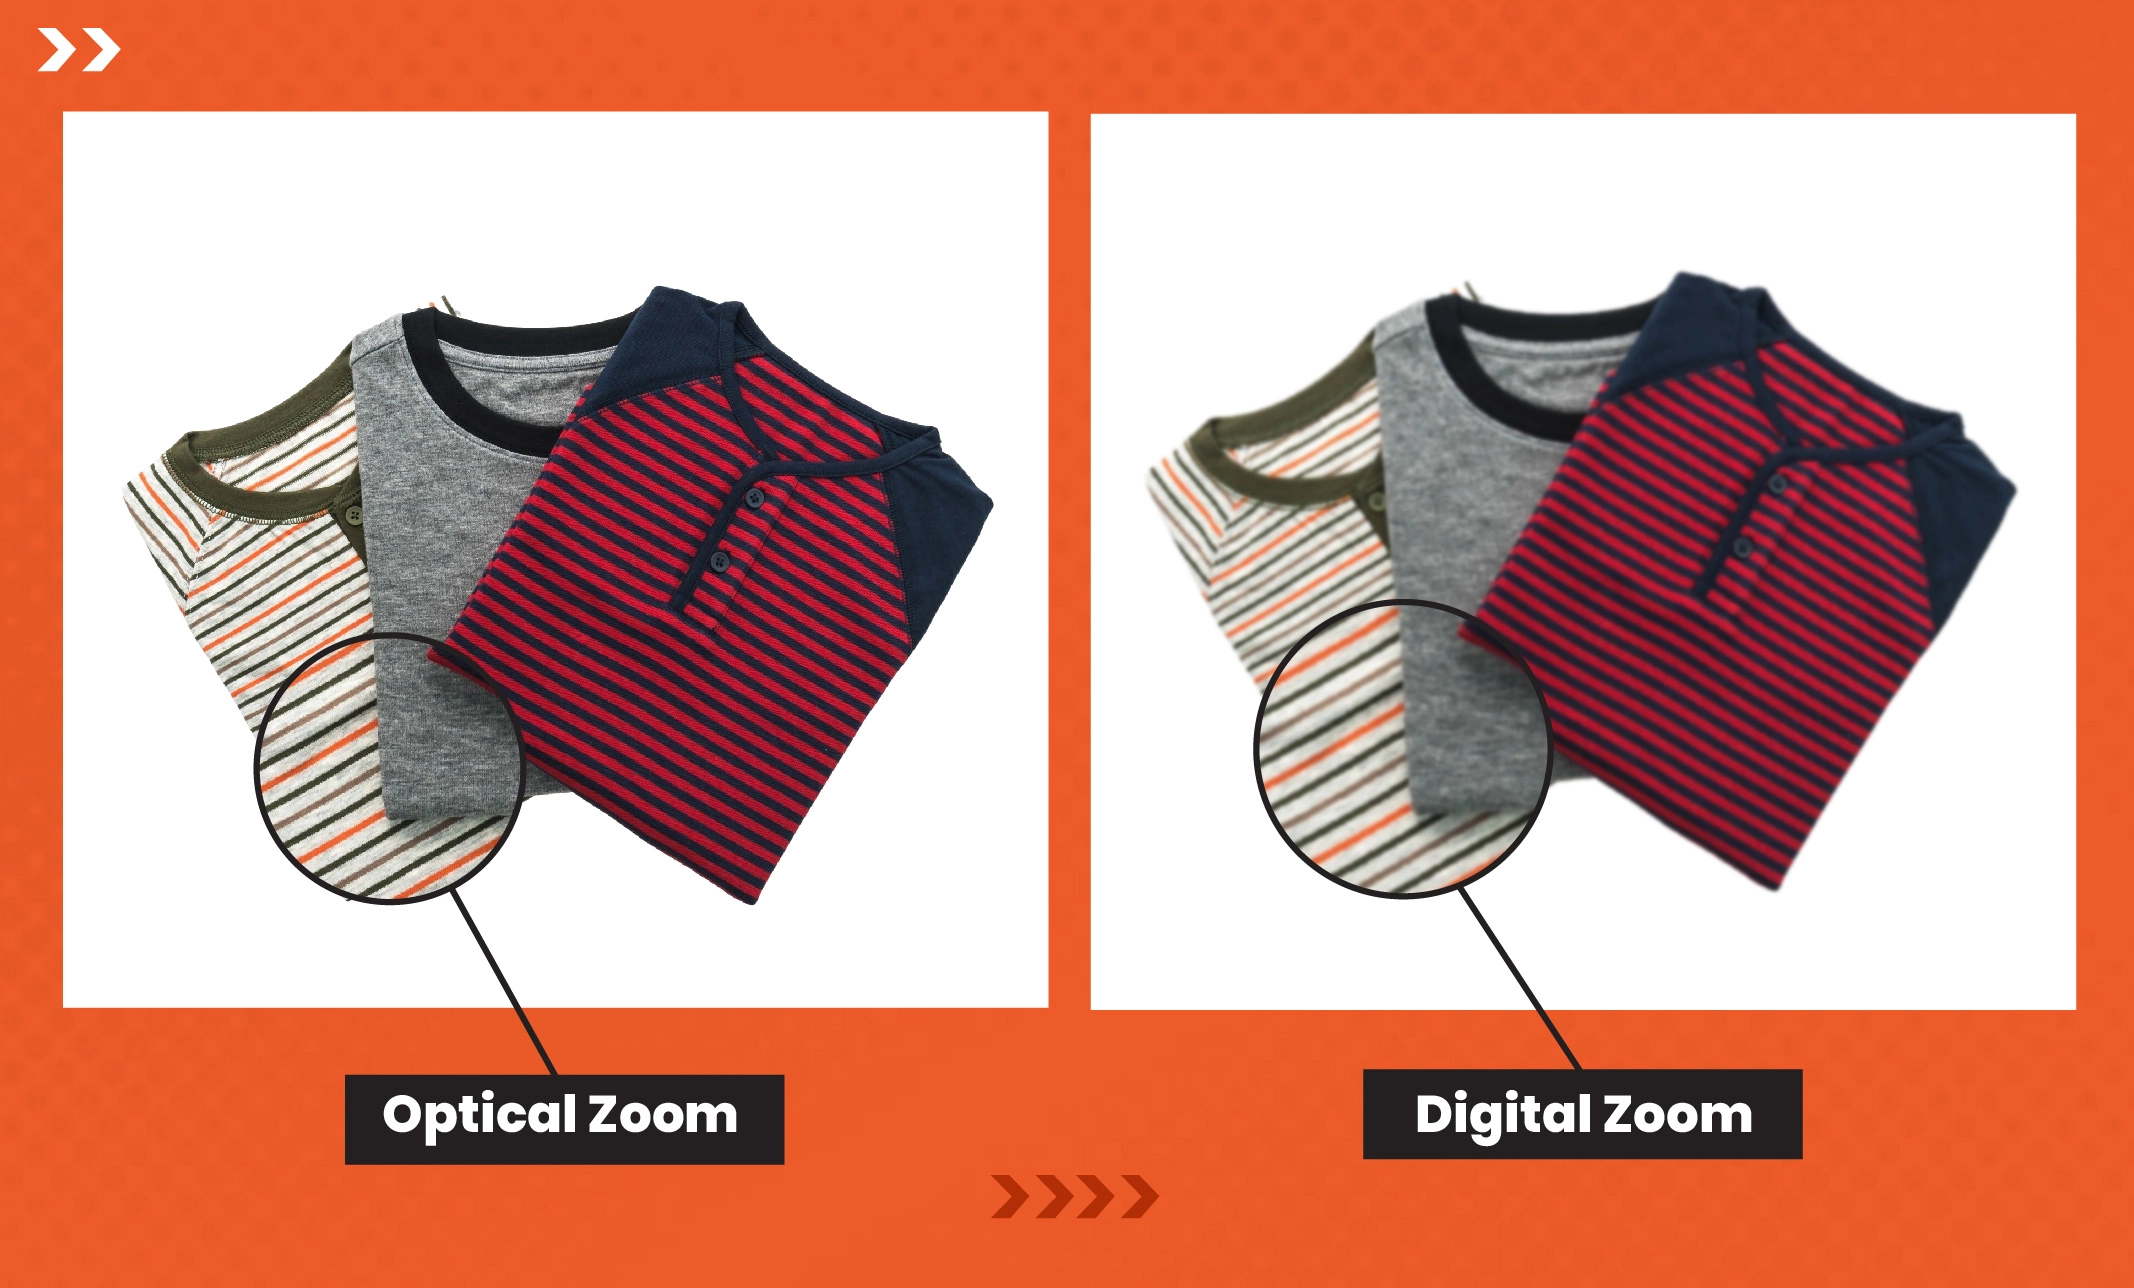
Should you use digital zoom or optical zoom for t-shirt product photoshoots? Digital zoom negatively affects the photo quality and exponentially worsens it. This causes lower resolution and fuzziness. In contrast, optimal zoom provides full image resolution and high-quality visuals with true magnification. It retains the maximum image quality. You won’t have to worry about pixelation. Each picture is clear and concise, even if you capture distant subjects.

Why do you take the hassle of post-production when a few minutes of preparation can save you a lot? Clean the t-shirt appropriately to remove stains or marks. It should look fresh. Should you photograph your shirt with wrinkles? NO! It looks messy and unprofessional. Steam or iron the clothing piece to smooth out wrinkles. It also freshens the fabrics by removing odors.
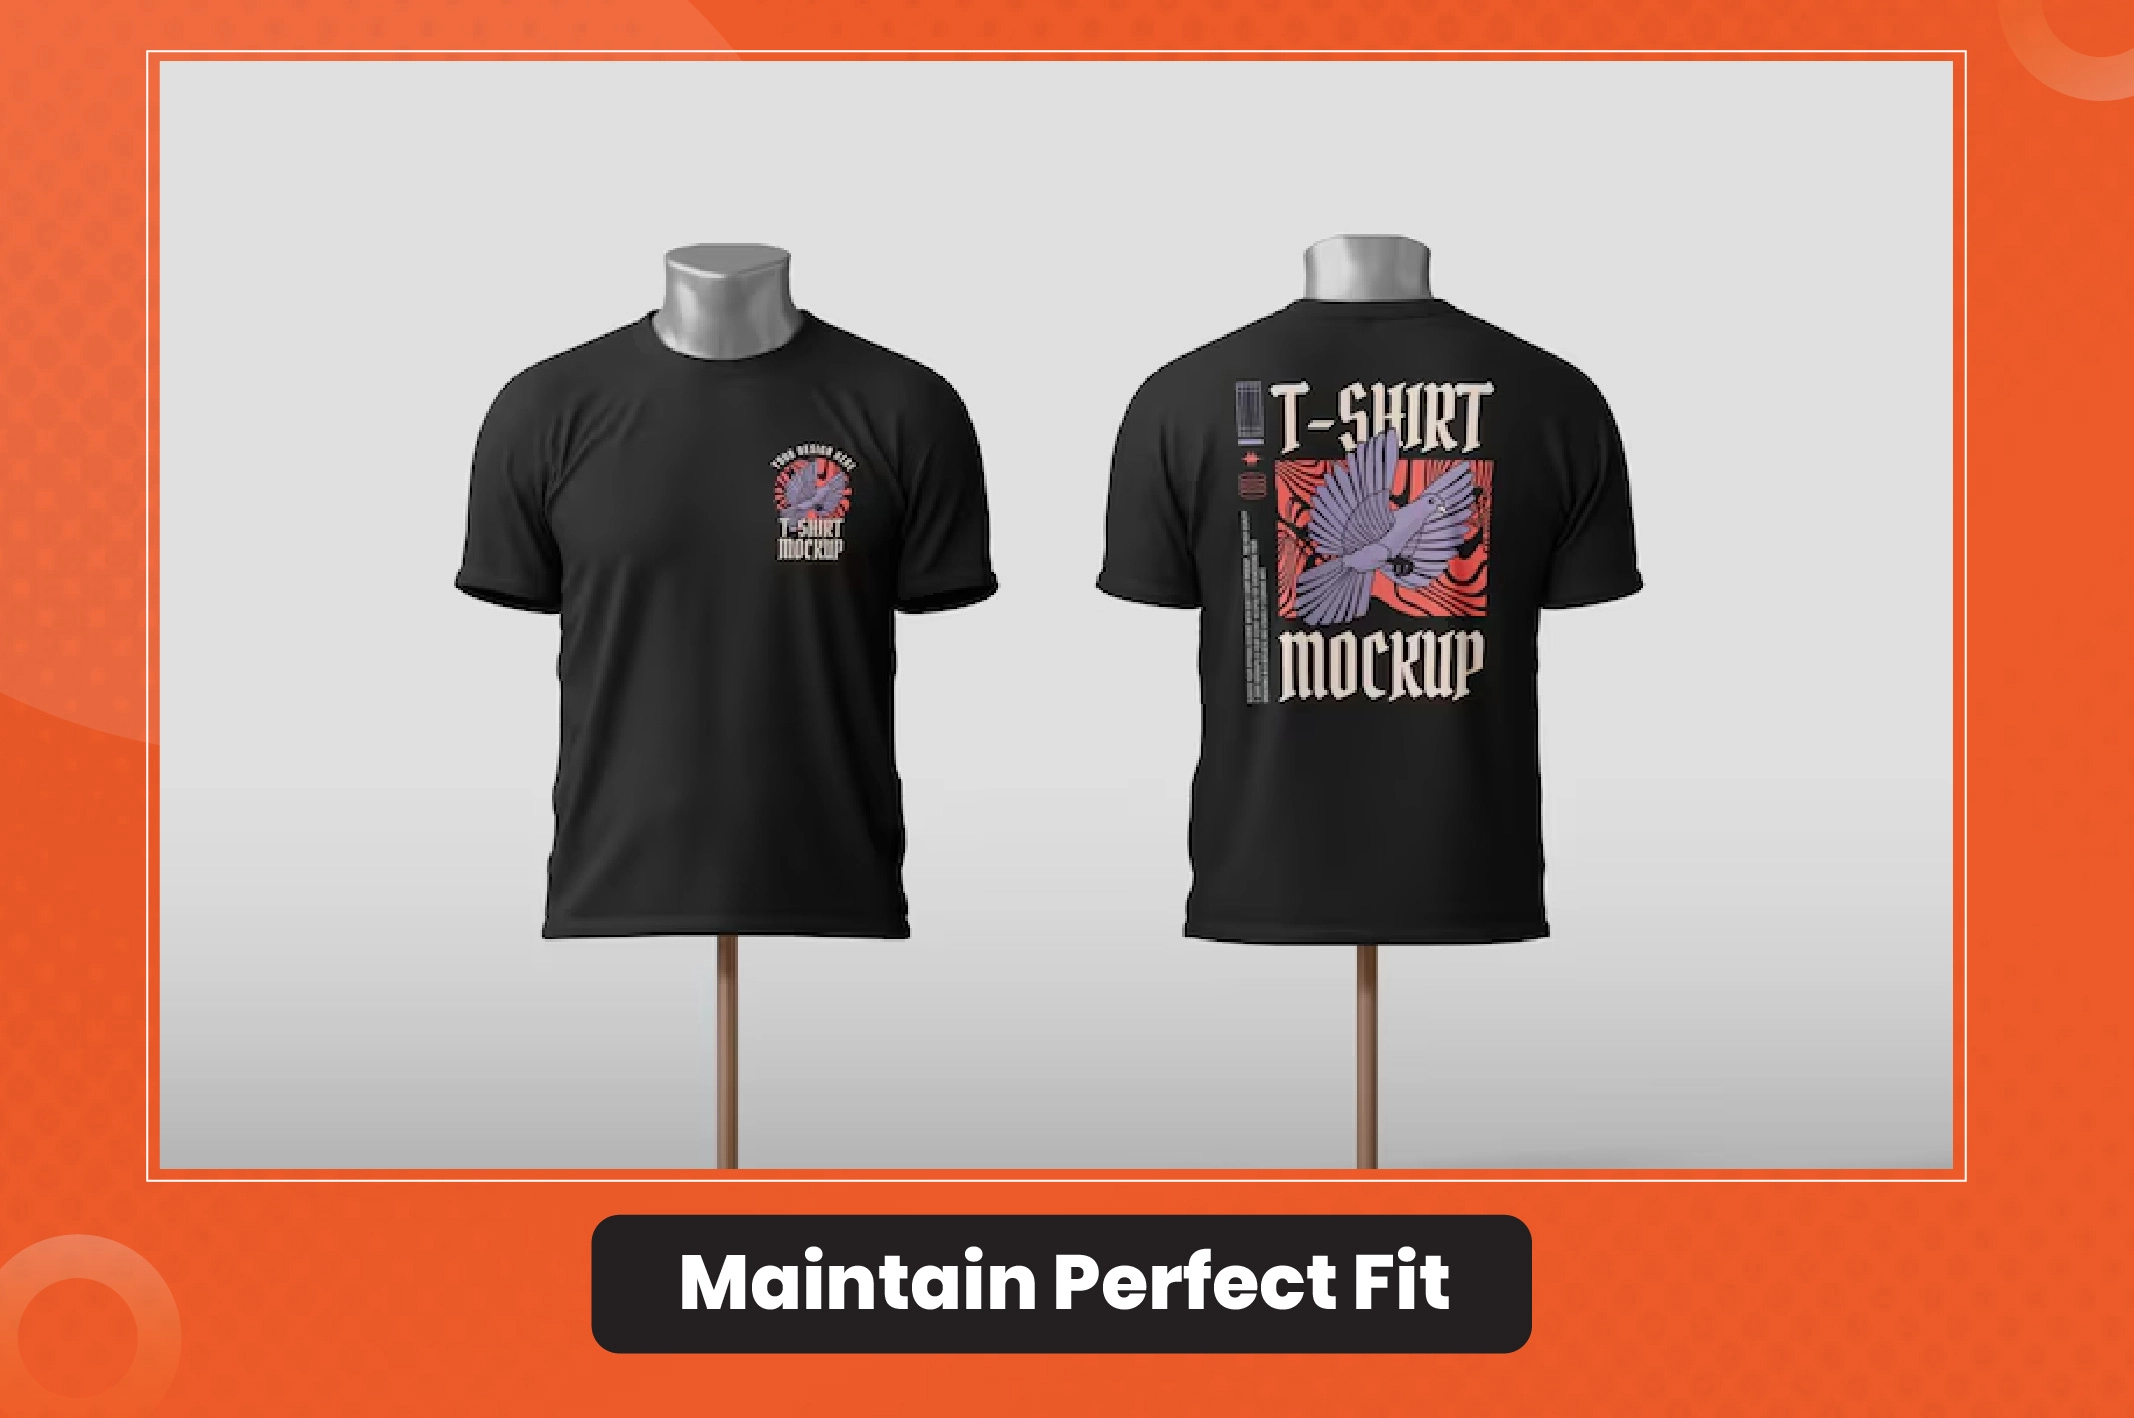
Are you using a mannequin or a real model for t-shirt product photography? If so, it must fit appropriately and have a decent style to grab attention. You can use different styling tools and accessories to create a sleek, form-fitting appearance. Various types of pins, clips, masking tape, fashion tape, or even tissue paper are needed to shape the fabric and create smooth lines.
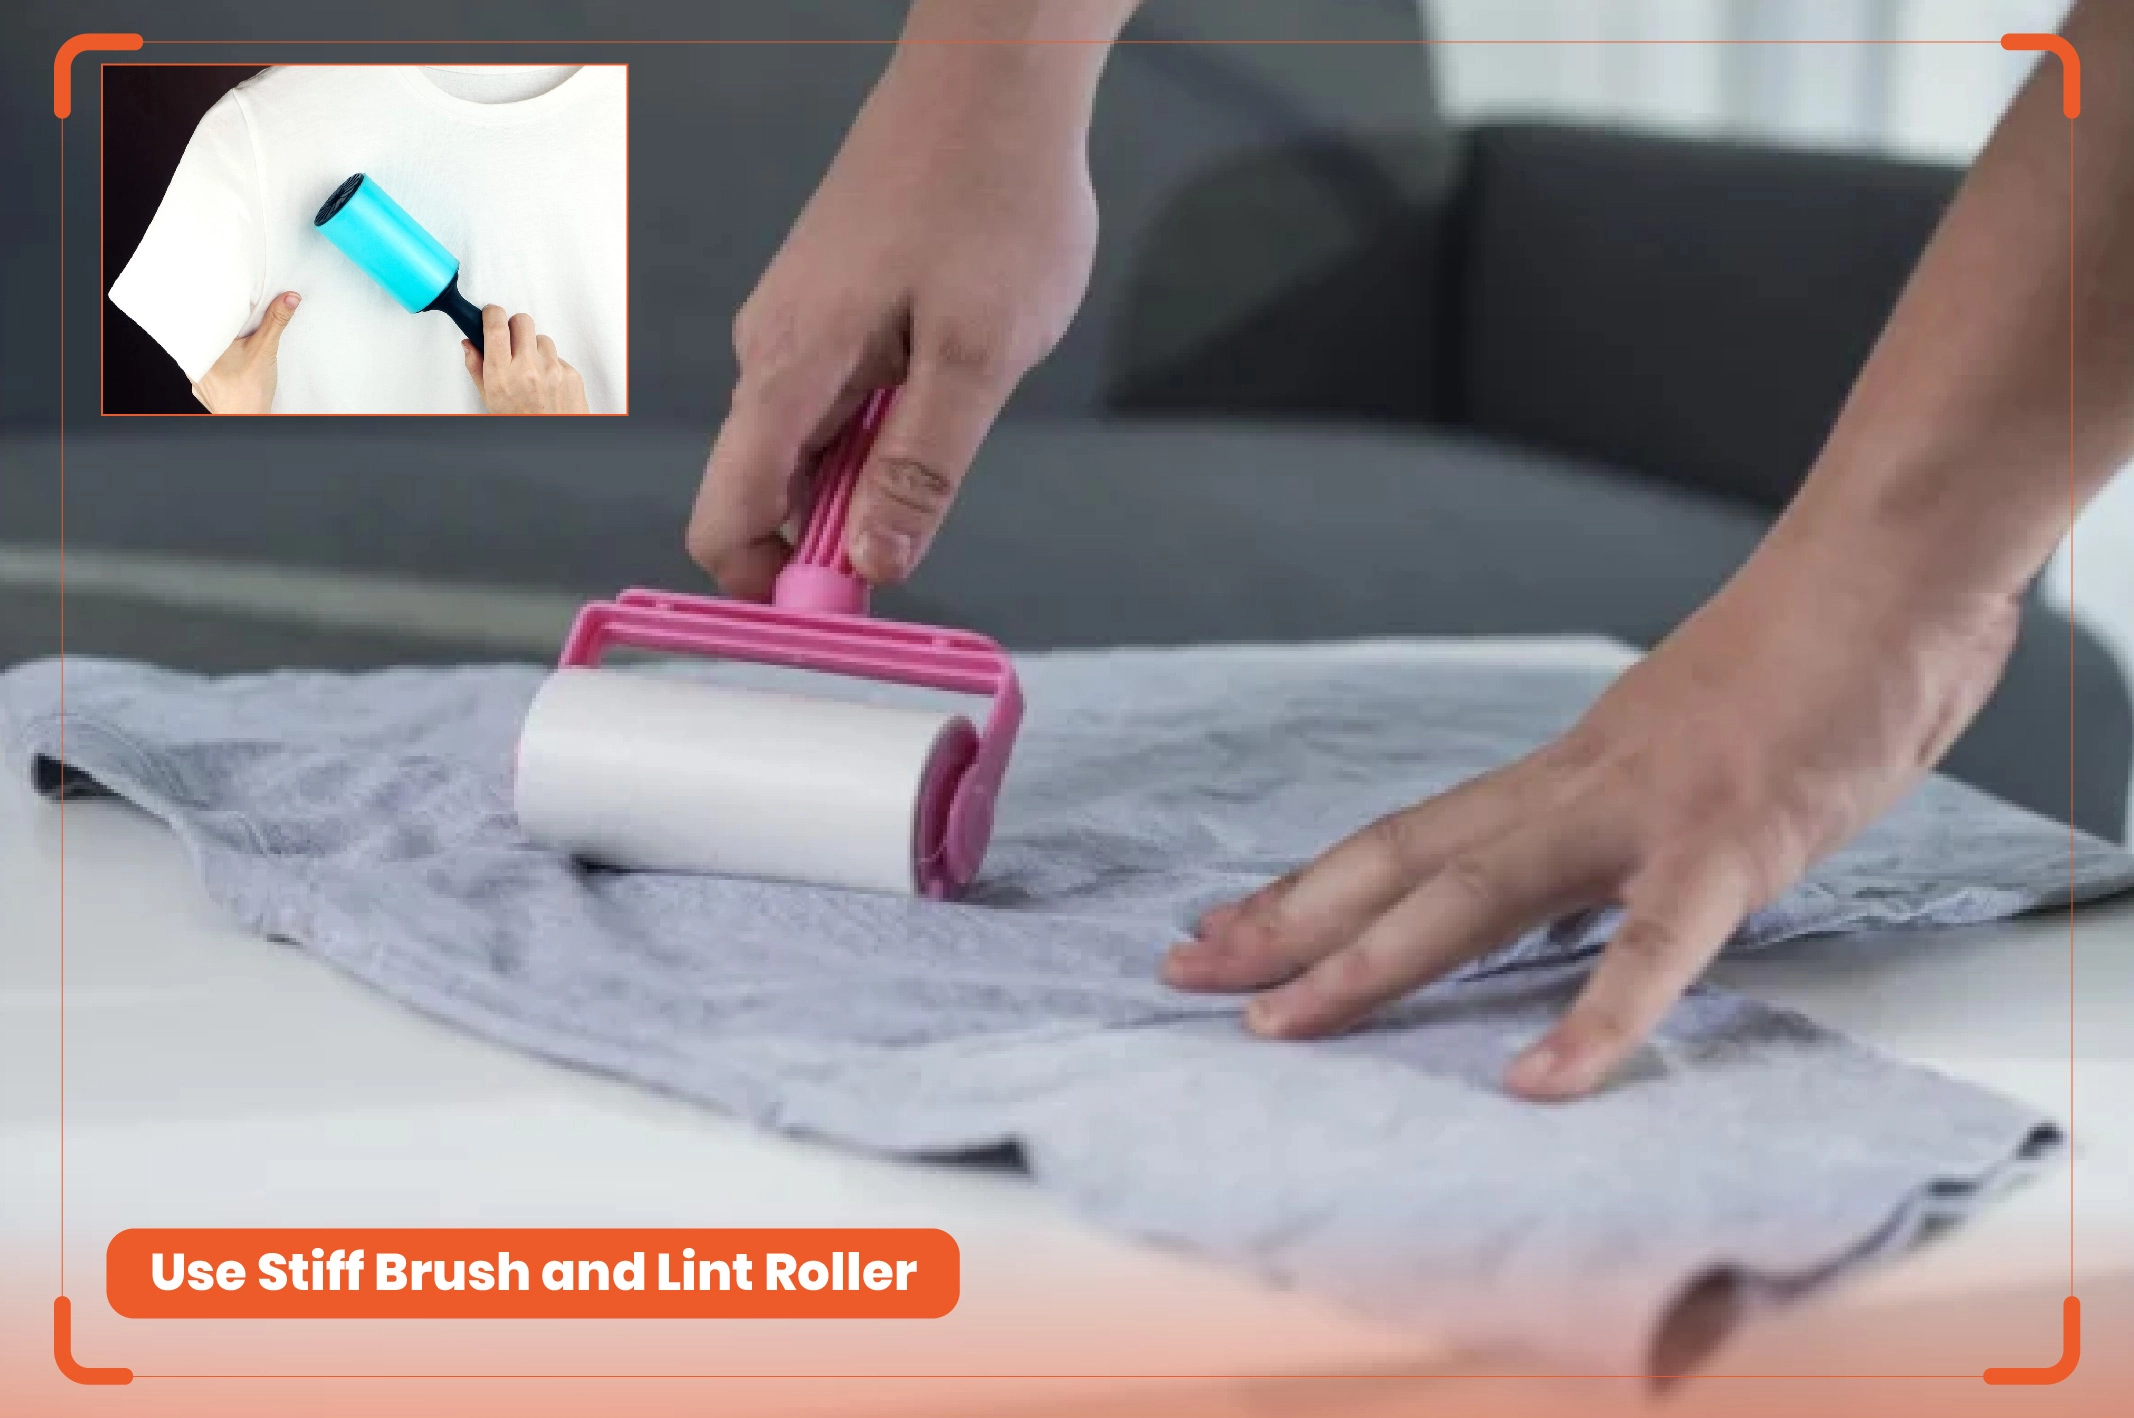
Blemishes are common for fabrics like linen, cotton, or light-colored materials. A stiff brush can remove fluff, hair, dirt, grease, and other clinging particles on t-shirt surfaces. The key is keeping your clothing as neat as possible. Another handy accessory is a lint roller. It is effective in gently removing lint, dust, fur, and hair. Professionals mainly use it for darker clothing to give the exposure a boost and showcase the details.
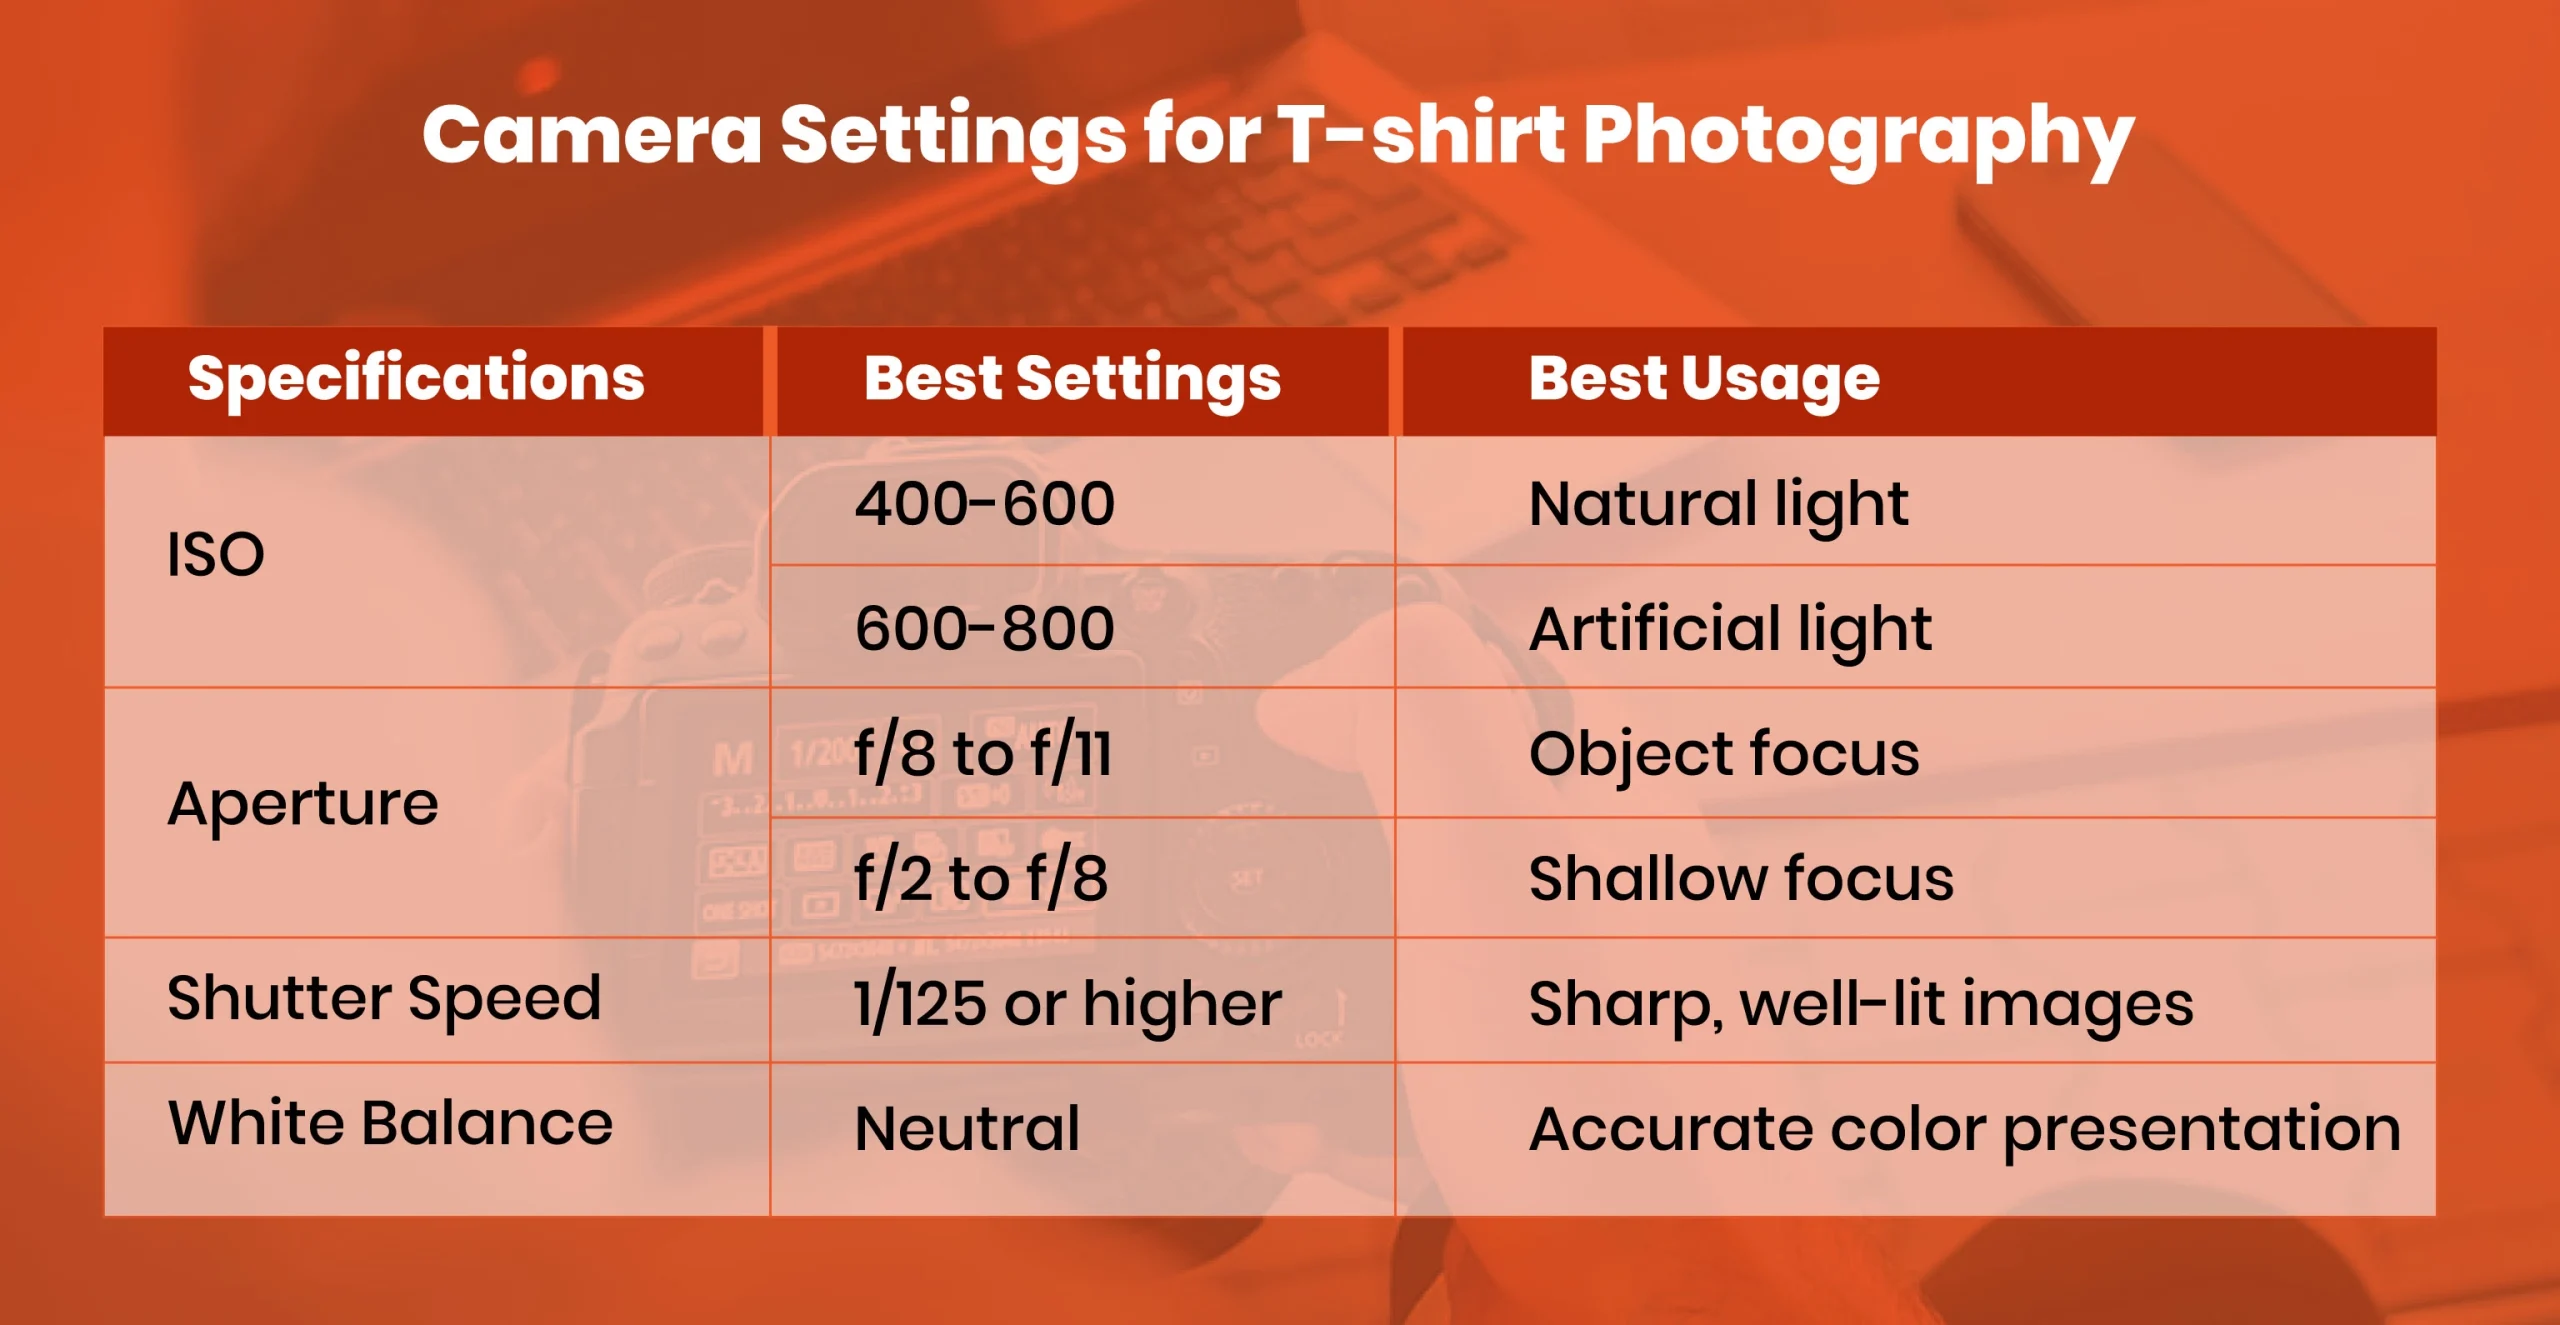
Appropriate camera settings determine how good your image quality will be. Make sure to choose the right option for different camera settings. The following are the best practices for photographing t-shirts.
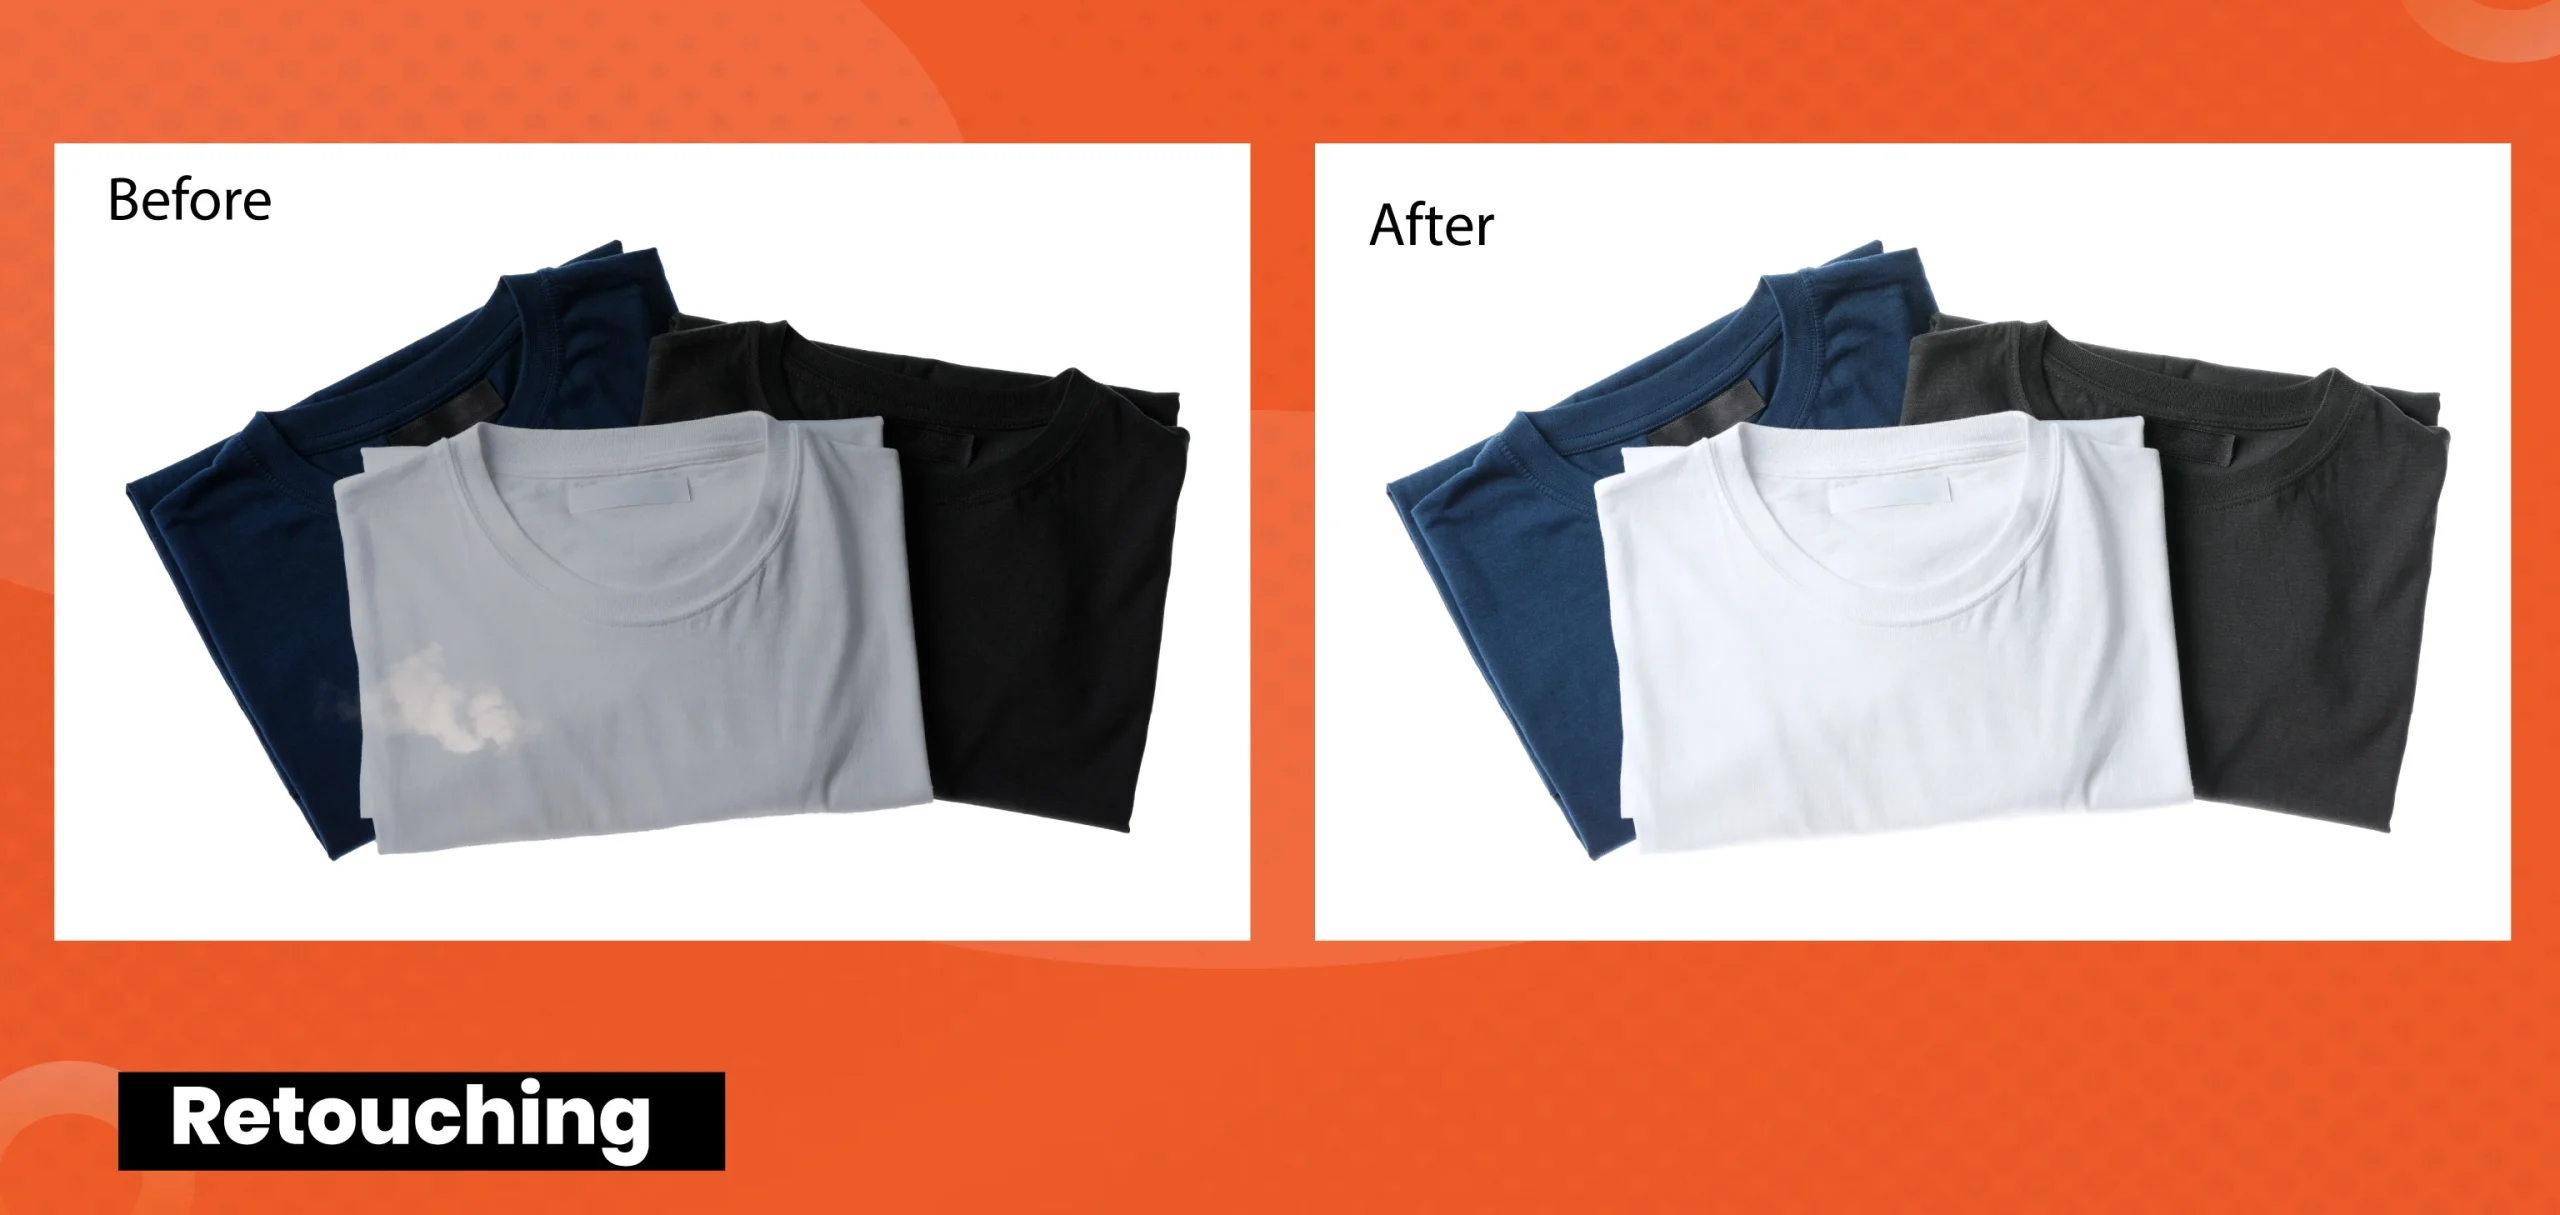
Do your t-shirt images have any dirt, wrinkles, or any other blemishes? It will create an unprofessional look and give potential buyers a negative impression. Evaluate each element of your shirt pictures and retouch them to make them as perfect as possible. You can use various tools for retouching.
| Tool Name | Using Purpose |
| Spot Healing Brush | Automatic blemish and imperfection removal |
| Clone Stamp Tool | Replacement of unwanted areas |
| Healing Brush | Imperfection correction |
| Content-Aware Fill | Dirt and wrinkle removal |
| Frequency Separation | Wrinkles smoothing |

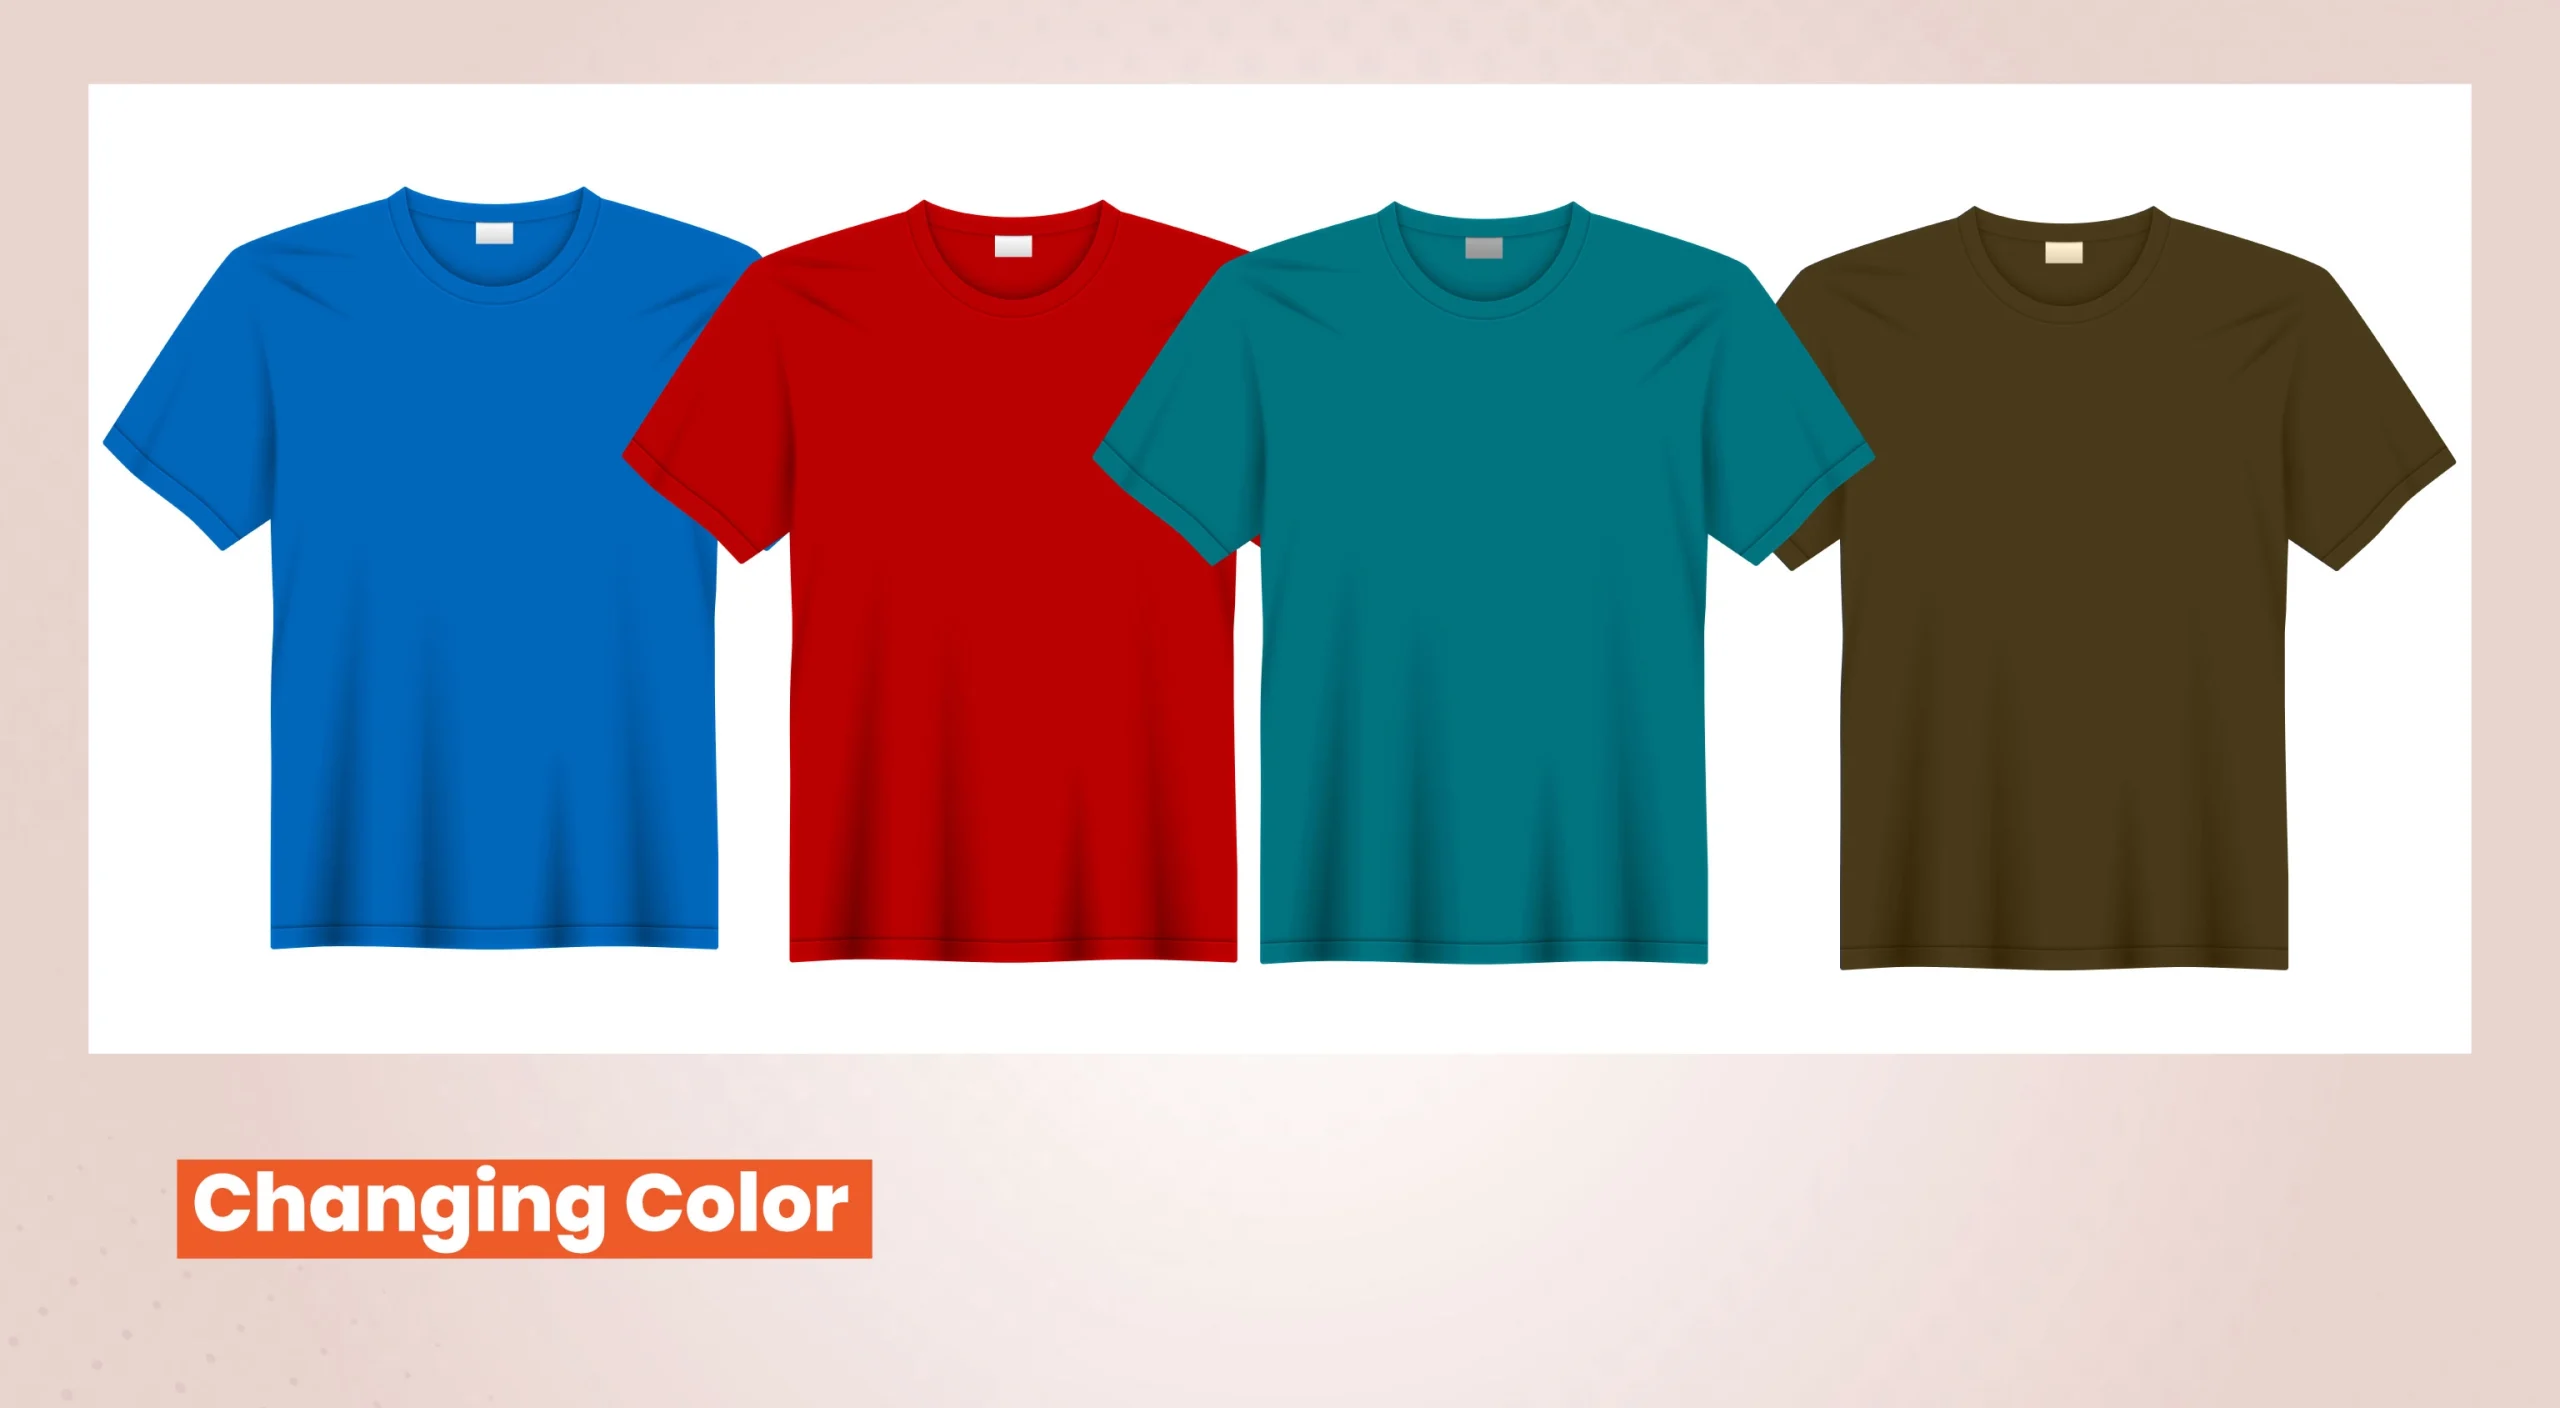
How will you react if you see a huge mismatch between the delivered product and the online image? The same goes for customers. The key is showcasing the true color of the shirt. It builds trust and reduces returns. Different editing tools are available to edit and adjust the t-shirt image color.
| Tool Name | Using Purpose |
| Hue/Saturation | Adjustment of color balance and saturation |
| Color Balance Tool | Adjustment of shadows, mid-tones, and highlights |
| Levels or Curves | Adjustment of color channels and brightness |
| White Balance Tool | Removal of color temperature issues |
| Selective Color Adjustment | Fine-tunes specific colors |
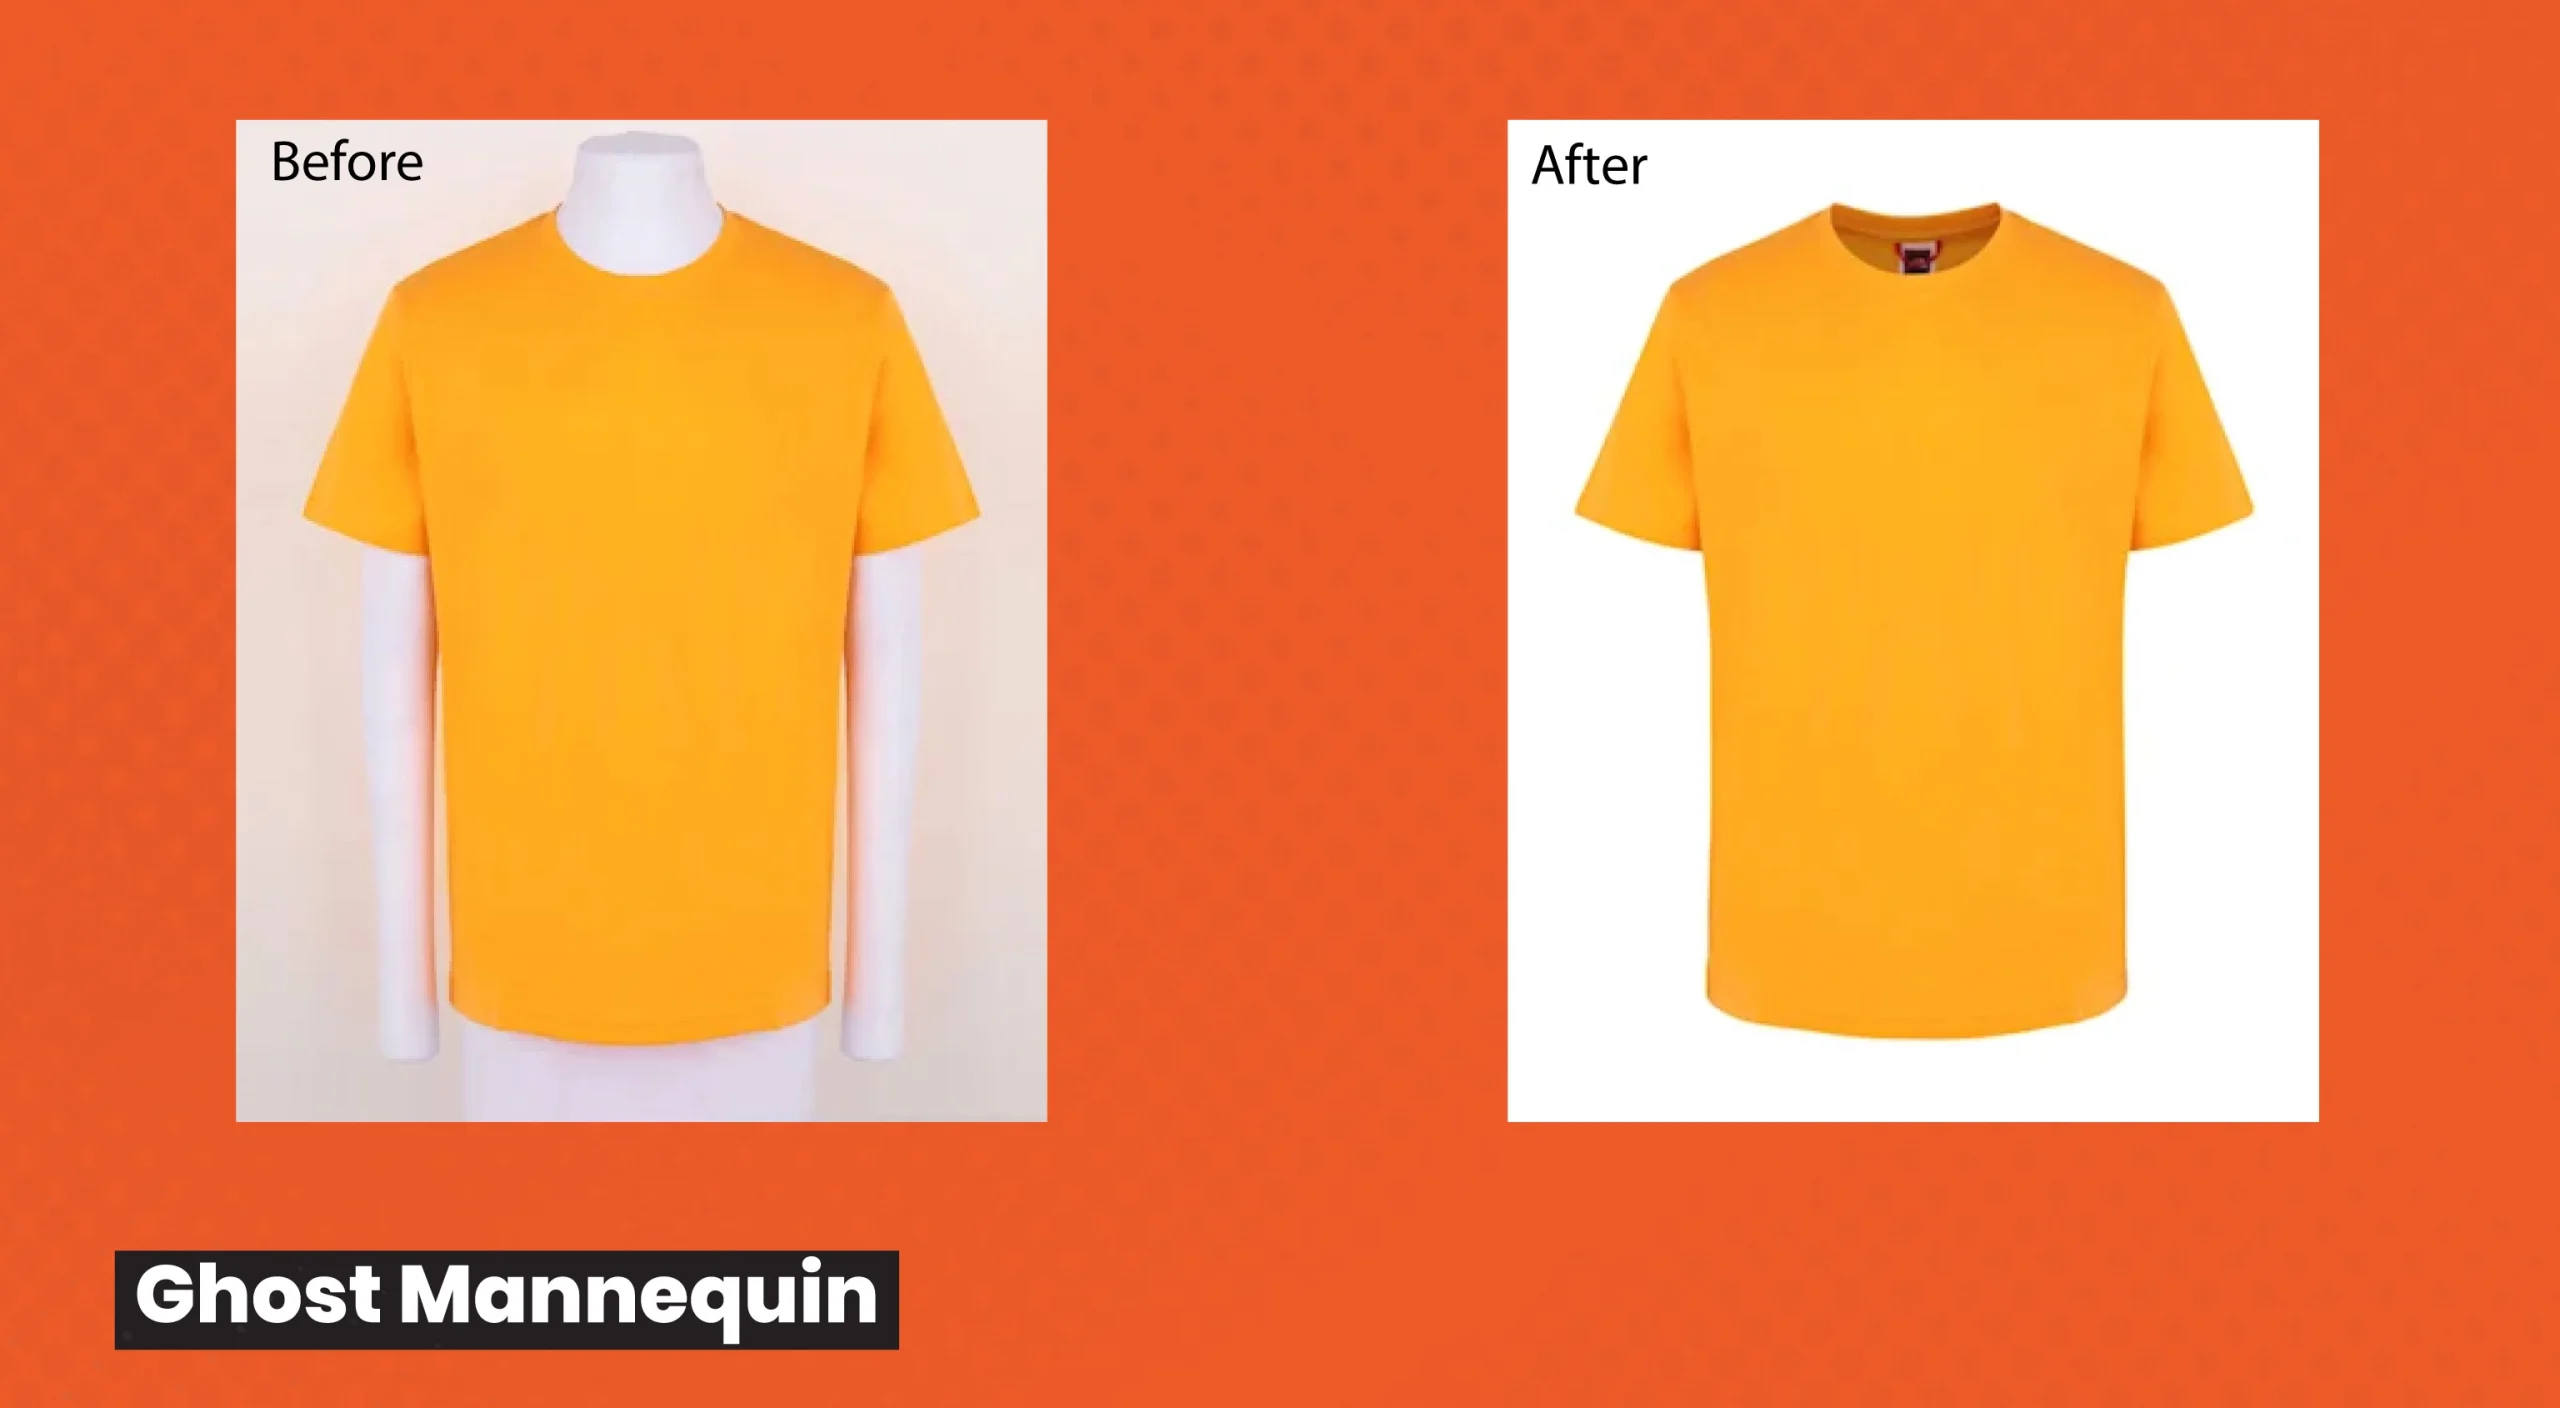
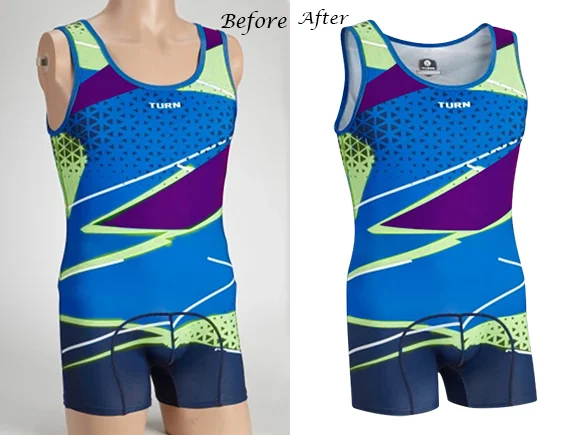
Have you already taken t-shirt images after putting it on the mannequin? If so, you have to digitally remove the visible areas of this dummy and give it an invisible appearance. But why do you need to take out the mannequin? Well, it gives customers an exact visual of the structure and fitting of shirts. Prospective buyers can imagine how the fabric will flow and fit naturally. The final image looks like an invisible man wearing a t-shirt.
Since it is an advanced level of photo editing, a highly professional person is a must to get the best result. If you are not expert enough, hire a professional photo editor.
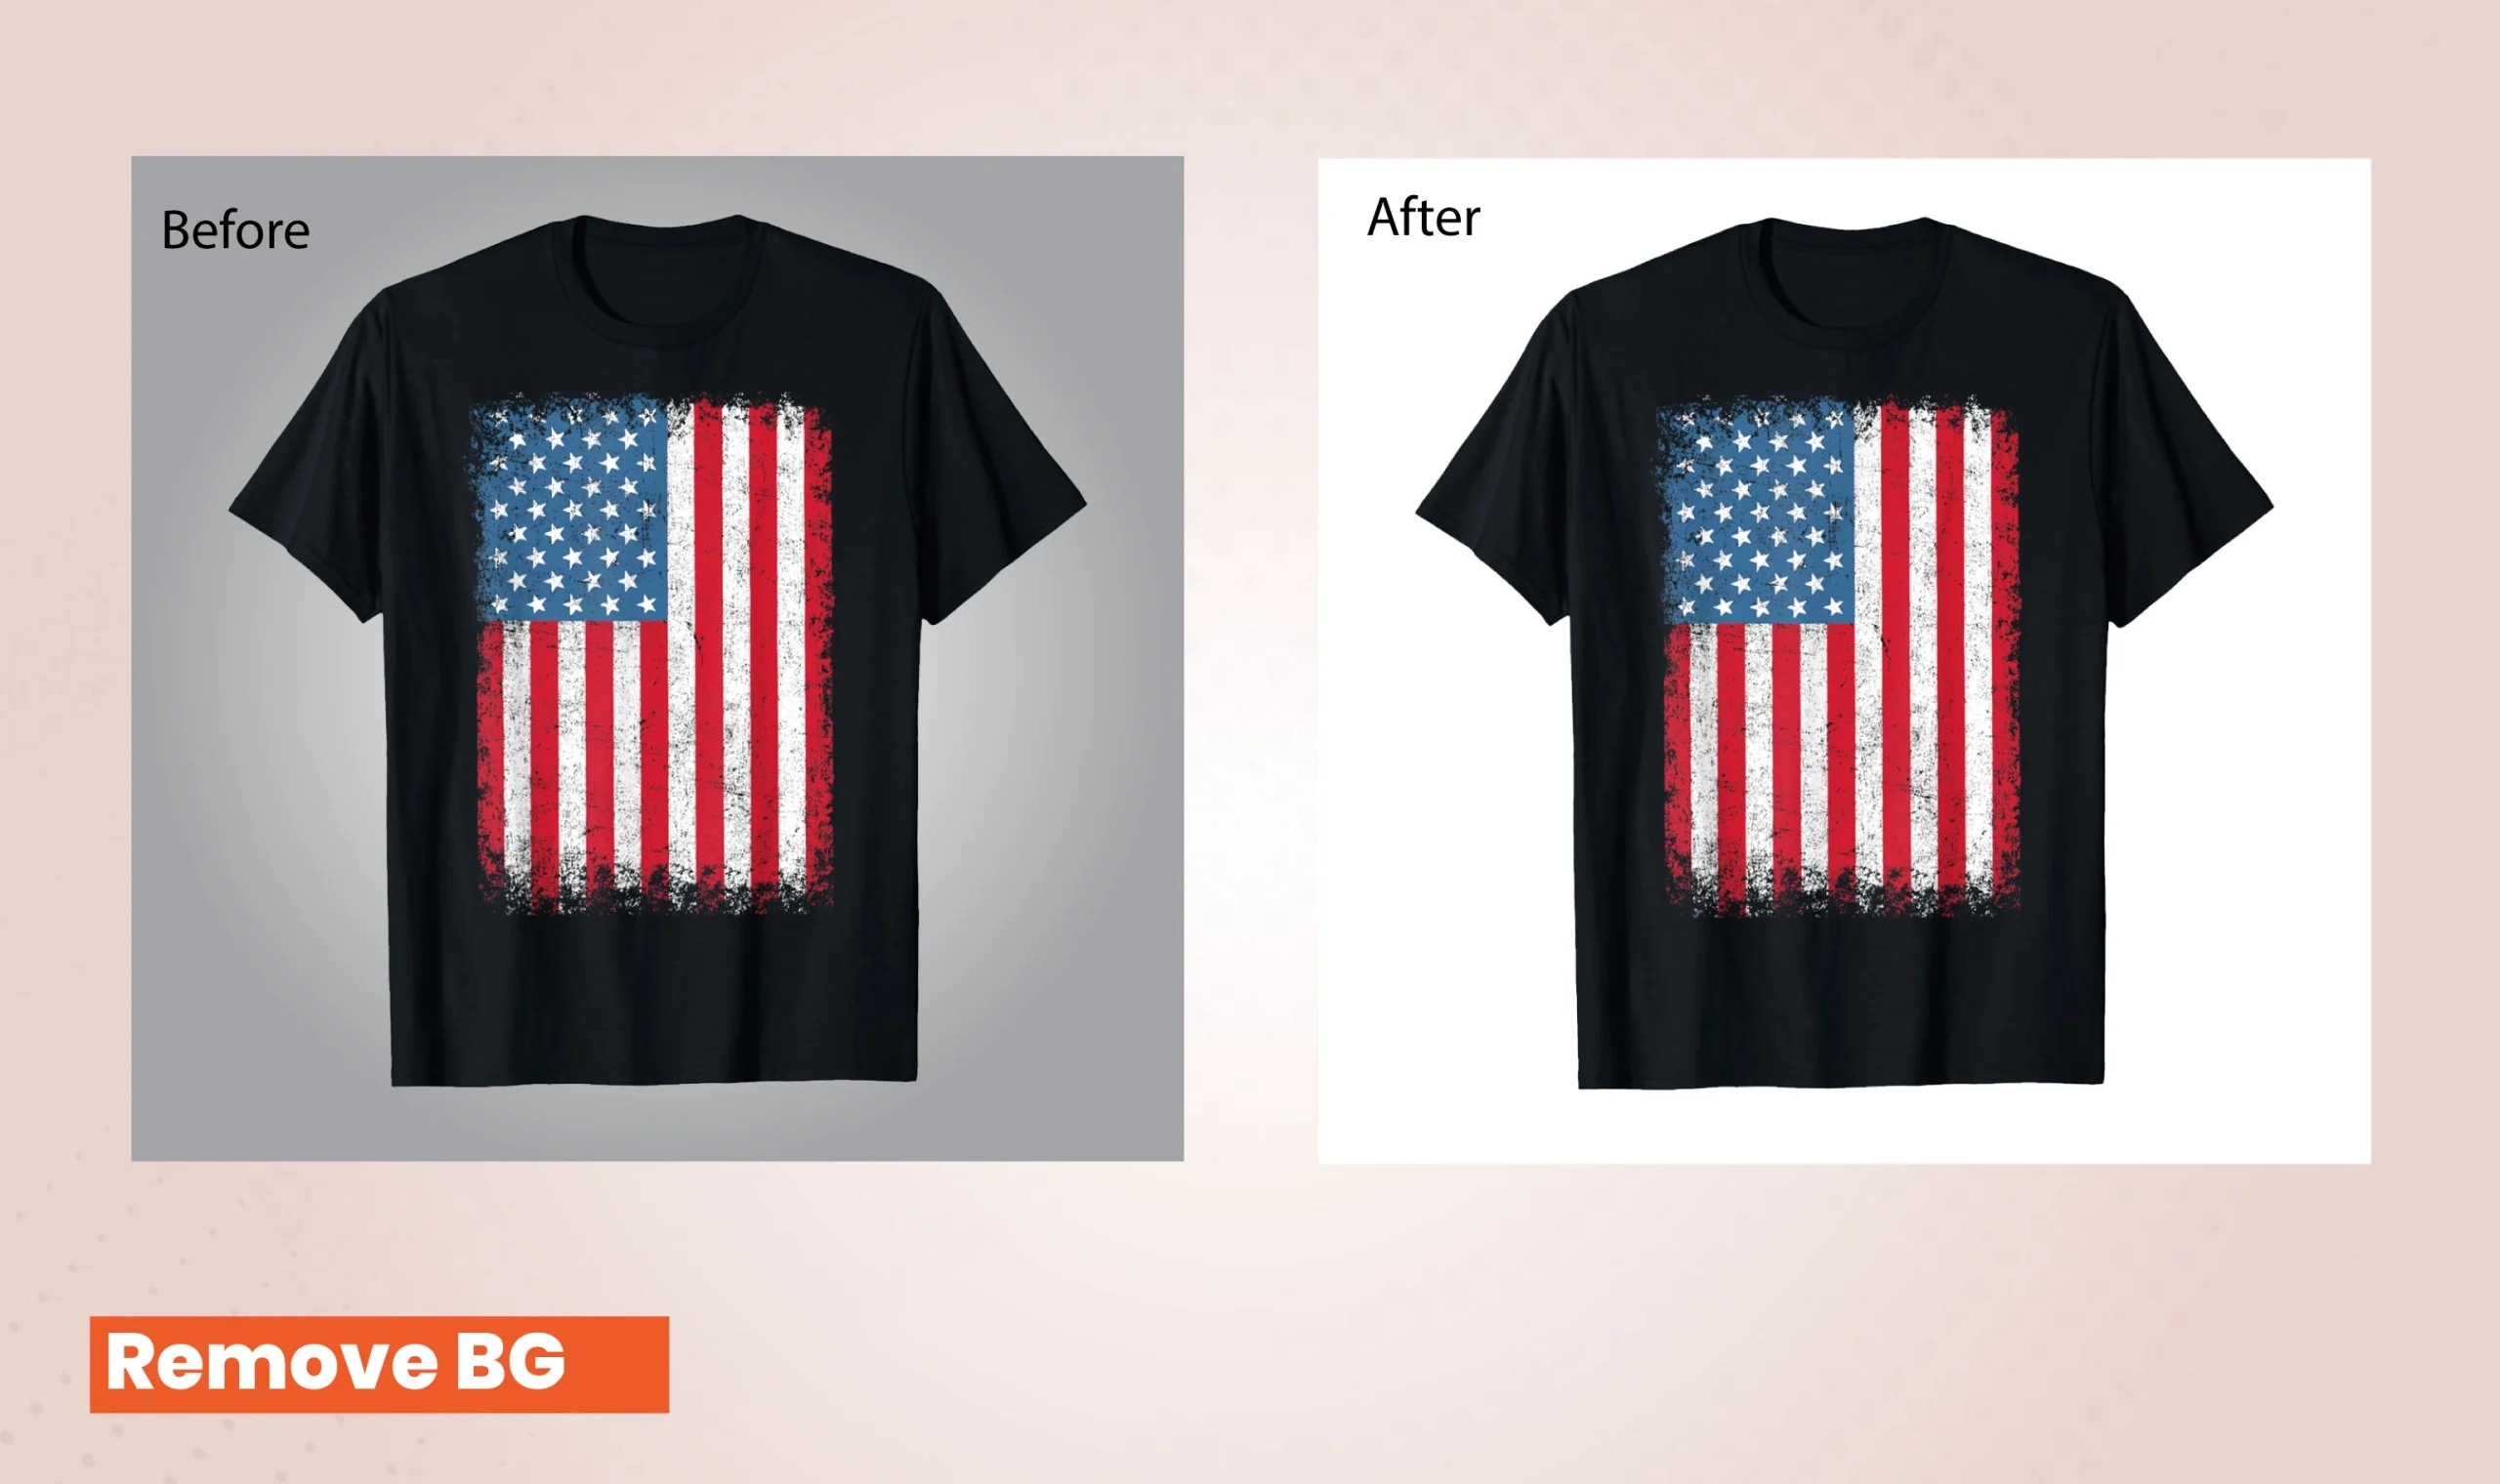
Do you want to add a creative or special background to your shirt images? It can evoke different emotions and present products in unique ways. Or you may want to remove the entire background and show only the product. It creates a clean and professional appearance. They are perfect for various e-commerce platforms like Amazon and eBay.