
Photographers shoot their photos in different locations and different places. But this is not perfect all the time. So, you need to remove background in Photoshop by applying many tools and techniques. Let’s see how to create a transparent background in Photoshop.
Photoshop is fun when you are familiar with its tools and their uses. Is it hard to create a transparent background? Not really, because Adobe Photoshop software makes your way easy; they feature an easy background removal process with a few simple clicks—the best way to remove photo background by any background removal service from Professionals.
Remove Background in Photoshop by Taking Few Steps
There are several effective ways to create a transparent background in Photoshop. Let’s check a few.
Magic Wand Tool- Transparent Background Creator
A magic wand is an excellent tool for beginners. It works with simple principles and saves you time editing. Let’s see how this tool works.
Step_1: First things first: open the file
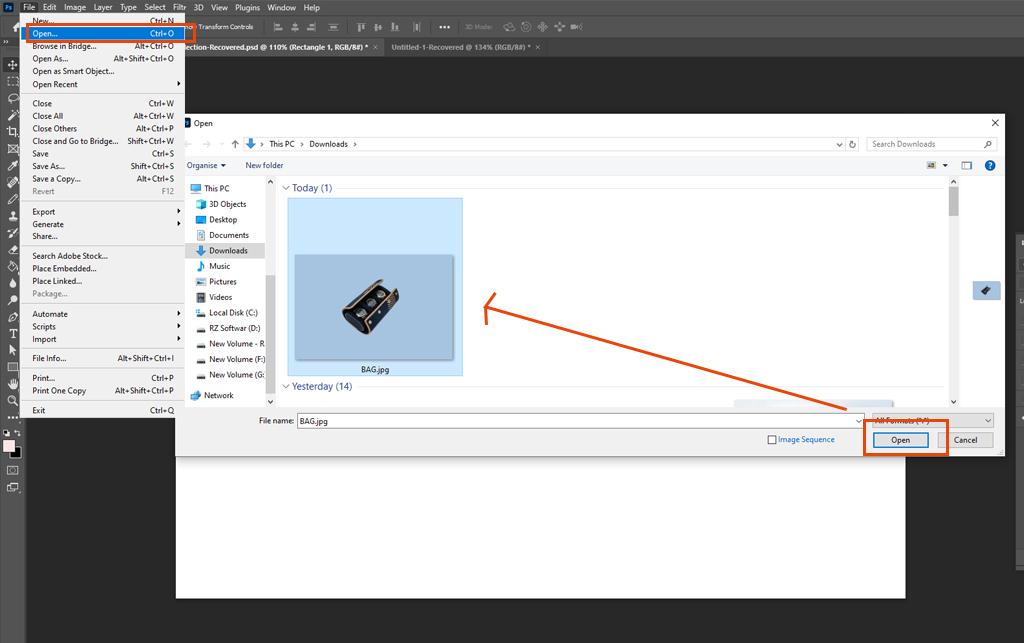
Open the logo file. You want to remove the background color and make it transparent. You can find the file in the “My Computer” segment. It’s more convenient to find the file by searching its name.
Step_2: Attach a transparent layer
- You need to know how to create a transparent background layer in Photoshop. After opening Adobe Photoshop, you’ll see a menu bar on the front page. Tap on that option to find the “layers” option. Now, select “new layer” from the sub-menu segment.
- Alternatively, you can tap on the square icon on the layer window. Then, the new layer will be transparent automatically- the beauty of Adobe is here. You must drag this new layer below your image’s layer this time. Finally, you can select your content layer.
You may also like to read… How to Use Affinity Photo to Remove Background Easily
Step_3: Use a tool to make the background disappear.
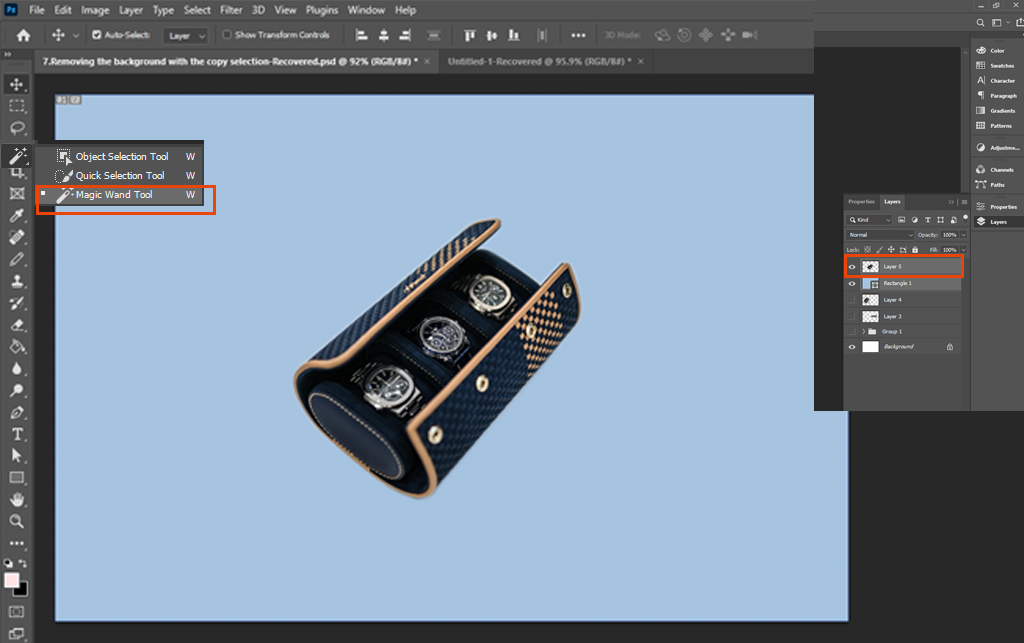
- It’s time to disappear from the background using the magic wand tool permanently. With these tools, you’ll know how to make part of an image transparent in Photoshop 2020.
- These tools are invaluable when you want to remove the selected area of a photo. The tolerance settings should be 32 here for the best result.
- Using different settings is encouraged if you’re dealing with a photo with high contrast. The last thing at this step is to hit the delete button. Your image’s new background will be a gray and white checkered background.
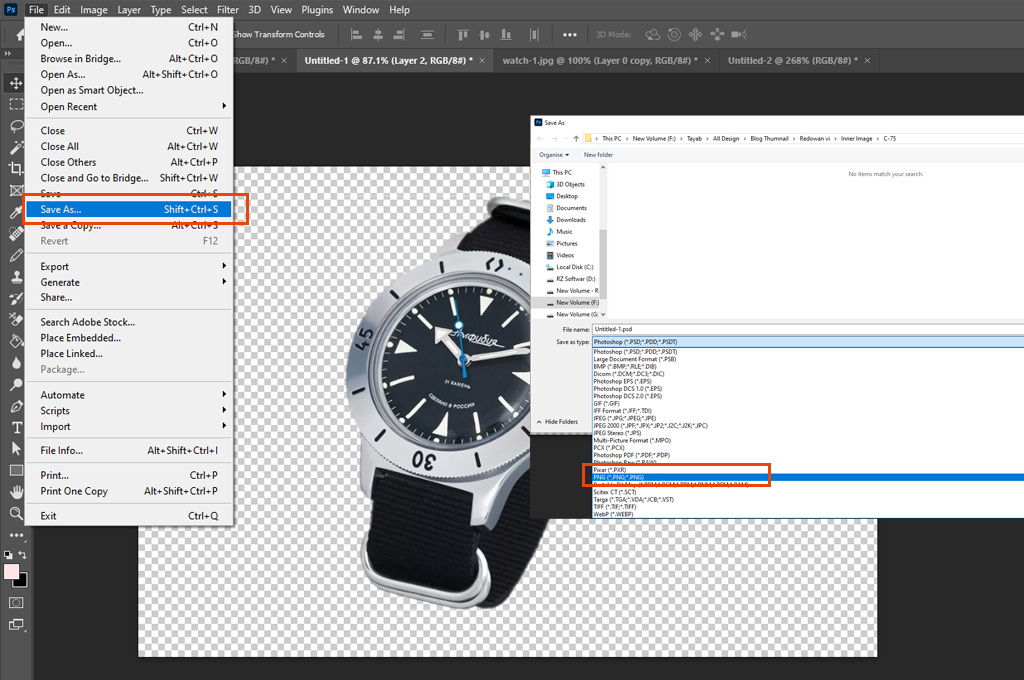
Step_4: Final work: saving the image

- The final work is to learn how to save transparent backgrounds in Photoshop. This process is just like the saving process of other files: select files and hit the “save as” button.
- The final fine, after being saved, will look genuinely transparent. If you want to convert your image color into RGB, select “Mode” and “RGB Color.” This is how you get a transparent background in Photoshop 2021 and CC 2020.
Magic Tool- Manually Create Transparent Background in Photoshop
Using a magic tool, you can easily remove the background. This tool is available in Photoshop 2021, photoshop cc 2020, and many more versions. But some situations may lead you to use a manual background-removing tool. The background eraser tool is here to deliver you a transparent background.
You may also like to read… Importance of E-commerce Product Background Removal
Step_1: Add a layer
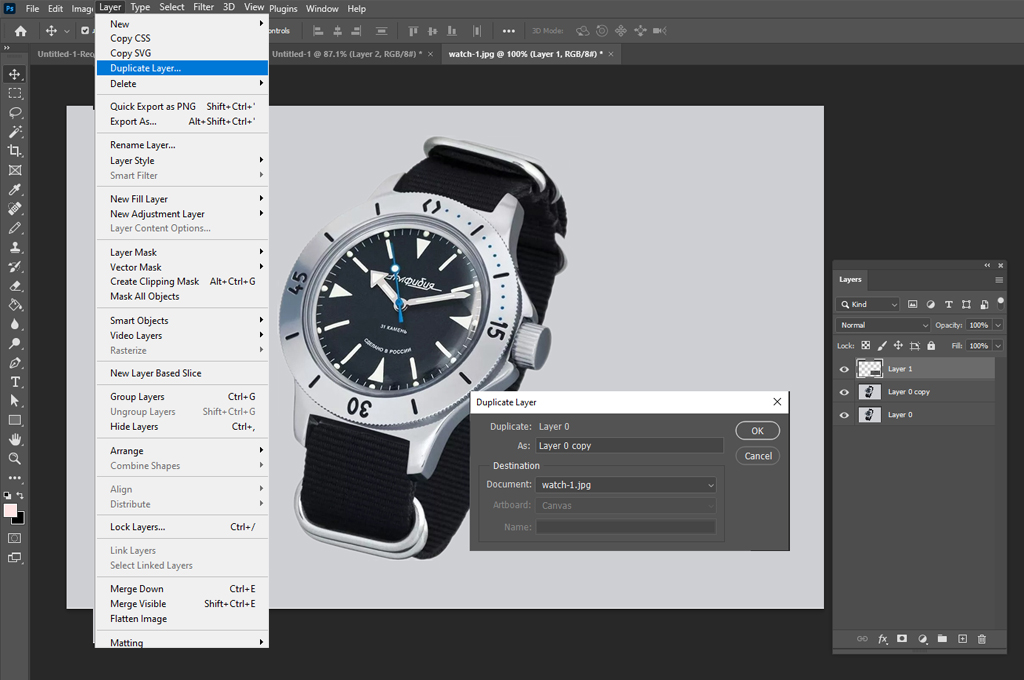
Open your target image in Photoshop and select the background layer option. You can choose the Duplicate layer option to add a new layer. A dialogue box will appear; you need to rename it. Tap on “ok” and click the eye button to turn the original layer off.
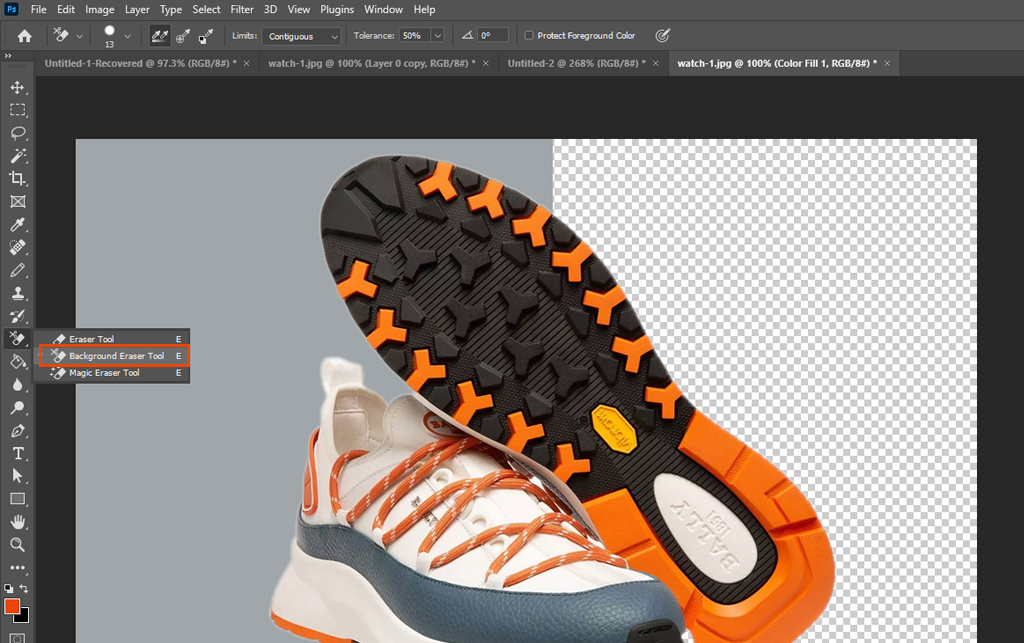
Step_2: Find the background eraser tool
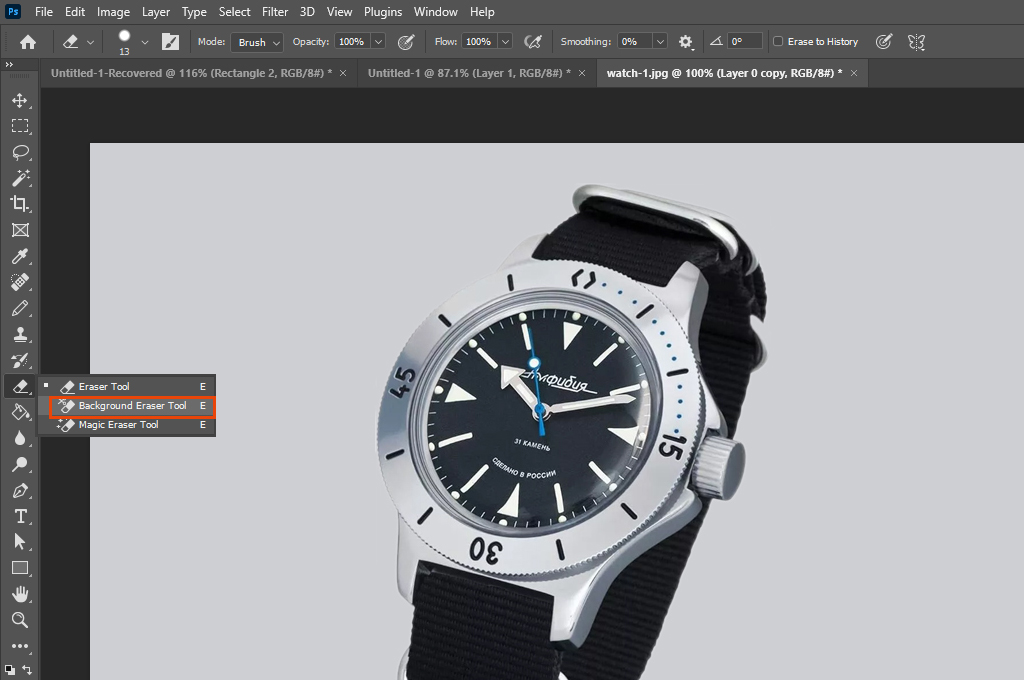
There is a toolbox on the left-hand side. Select the Background Eraser tool from there. It might be hidden below the Eraser tool. This time, you need to click and hold the Eraser tool. This way, more options will be revealed, and you can finally select the tool.
Step_3: Make some changes
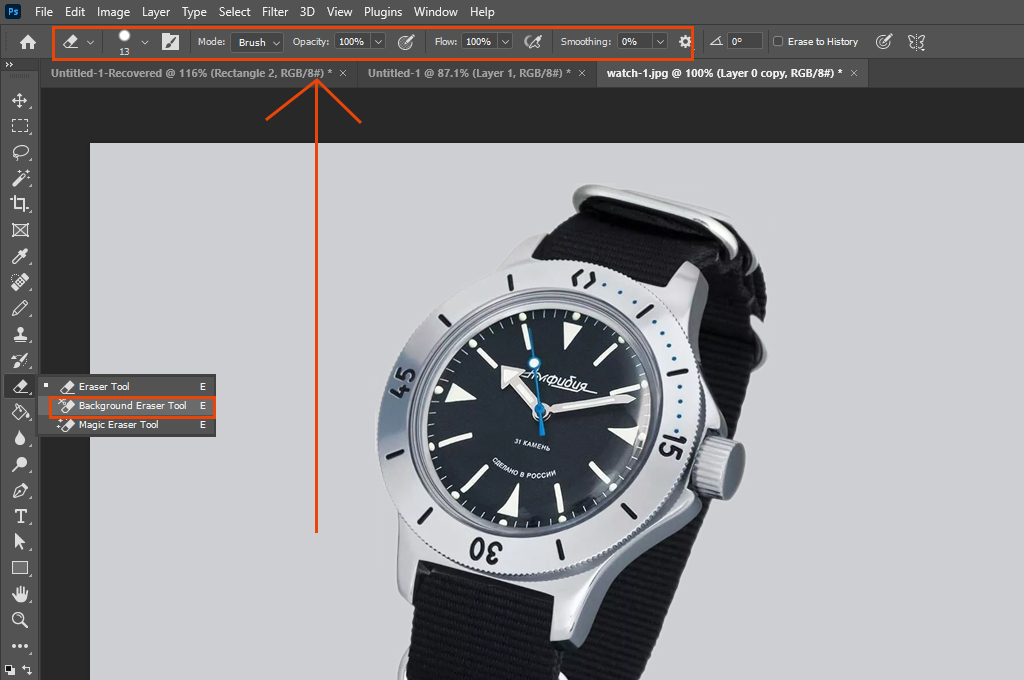
You must see the brush icon on the top of the screen at this stage. Tap on the icon to change the hardness of the image. Try to keep it close to 100% as much as possible. The size is a personal preference. You should increase and decrease it according to your demand. Also, you have the power to change the spacing and angle.
Step_4: The most crucial stage: removal of background
- So, how do I make a white background transparent in Photoshop? Well, start erasing the background from the edges of your subject.
- Here, you need to know how to use the Background Eraser tool to remove background in Photoshop. It works by clicking and holding while moving the brush. Your target is to keep the crosshairs inside the whole time.
- There is a zoom-in facility to see more close details. That means you’ll get more ease of use while editing. Short strokes with the brush are recommended so that you can always undo previous mistakes. If the brush goes too far, that’ll be hard to correct.
- When dealing with problematic areas, you may be required to adjust your brush size. It’s easy to do- revisit the tools option bar. Alternatively, you can use [ and ] to adjust your brush size as you wish. Resizing the brush could cause a problem as it may not erase your subject. The solution is to undo the last action first. Now, visit the tool options bar to adjust the Sampling to Once (the middle icon in the set of three).
- Fix the Discontinuous limits and fix the tolerance to 10% or a few more. The outcome of this setting is mind-blowing. Hence, you can create a transparent PNG in Photoshop by following this method.
You may also like to read…Remove Background from Image on iPhone: Quick Guide
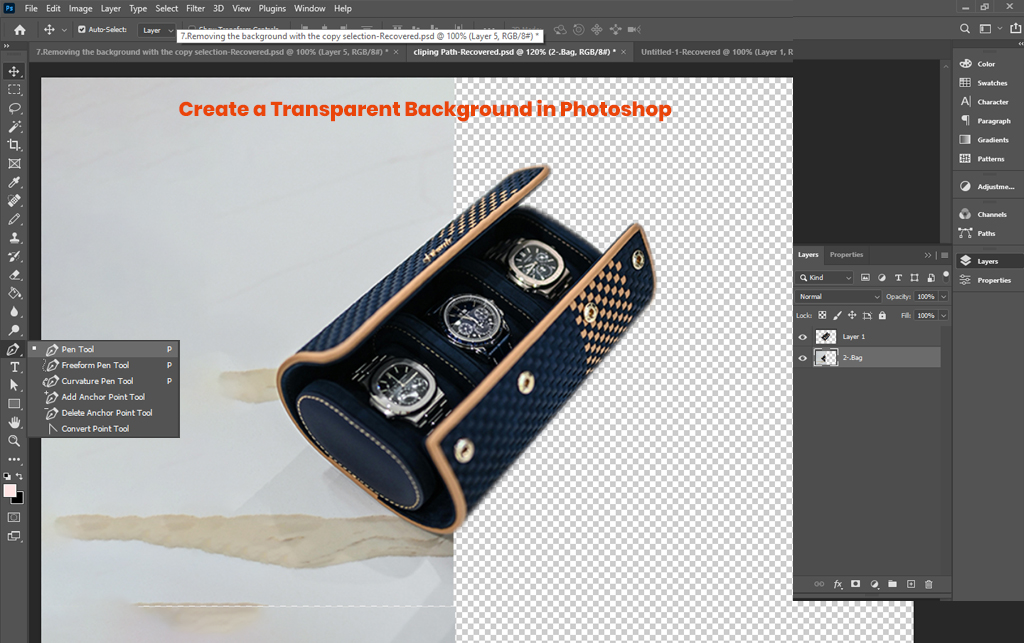
Photoshop Pen Tool- Make the Background Transparent
This tool is highly recommended for pro editors. If you’re a newbie, a little practice with consistency will bring an excellent result. Here you know the details about its use.
Step_1: Select an area
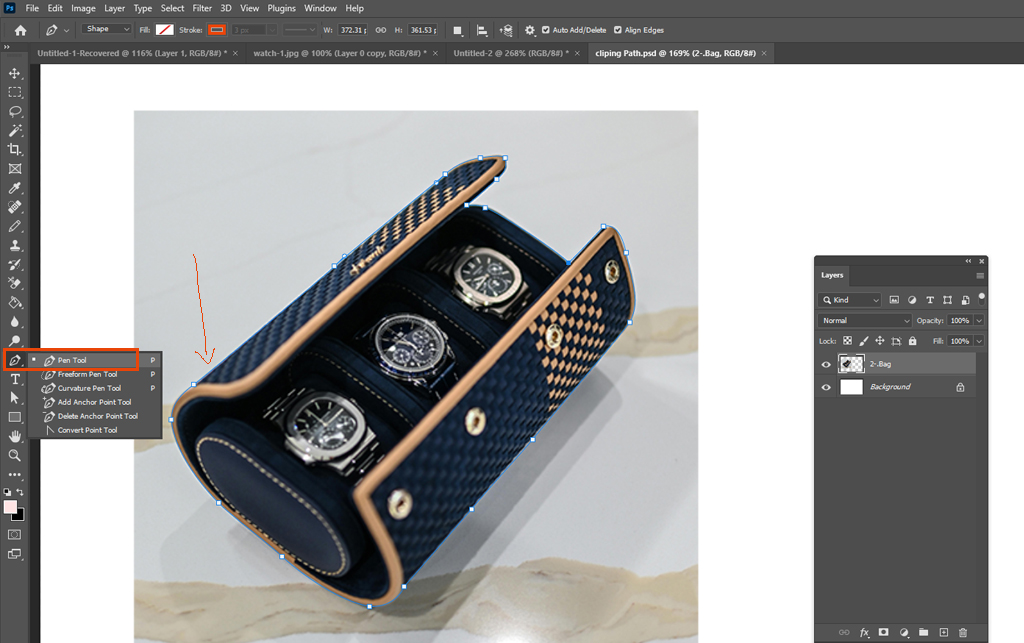
- After opening Photoshop, you’ll find many options on the software’s left portion. From there, select the pen tool. It’ll be at the top, inside the pen symbol.
- Now, start selecting an area by using a cursor. Trace the path slowly and cover the detailed area. To do this, it’s mandatory to zoom in on the photo as much as possible.
Step_2: Dealing with the clipping path
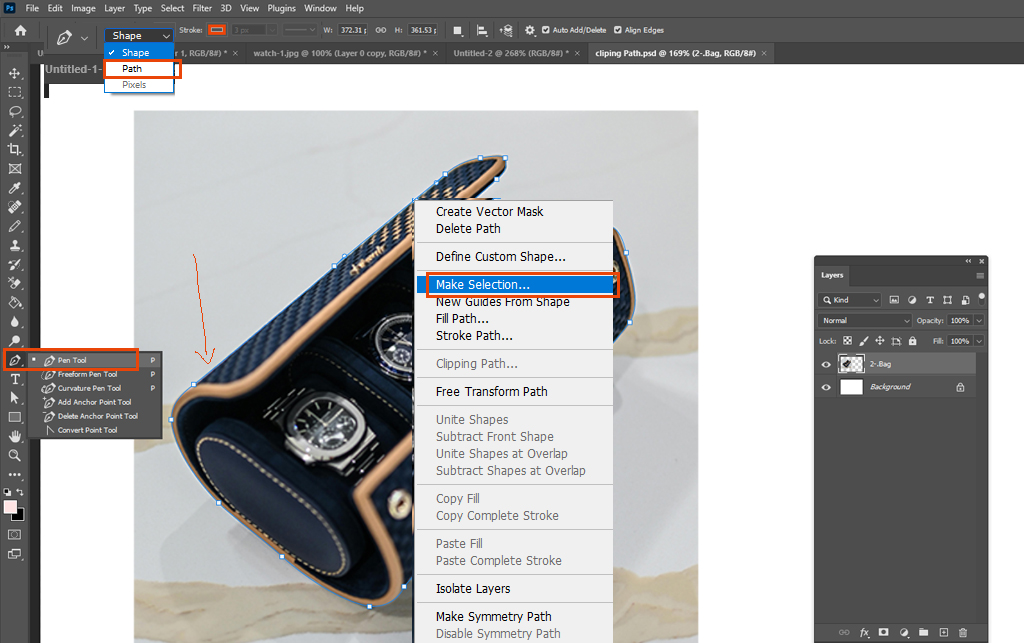
- Find the window option from the top part of Photoshop. Now, select it and click on “paths” from many options. Renaming the path is convenient for your work.
- You need to rename the path when a patch panel pops up next to the layer panel. Click on it and rename it whatever you want.
- After renaming, it’s time to convert the clipping path into a selection. Open the path panel and right-click on the panel—the best professional Photoshop handmade clipping path service for outsourcing.
- You can see the option “make a selection.” This option involves choosing the appropriate value of the feather. Tap on “OK” after selecting your desired value.
Step_3: Background removal stage

- The most crucial stage is in front of you now. Visit the layers panel to select “Duplicate Layer.” There are many options on the right side of the screen, but you may have trouble finding them.
- Go to Select and then Inverse. After that, you need to hit the delete button. The magical moment is here- the background will be removed. You’ll get a transparent background on your desired photo. Only the selected area will be changed in this way. The success of this tool depends on your skill with Photoshop.
Lasso Tool- Remove Background in Photoshop
The Lasso tool’s working function is similar to the Magic wand’s. Though it’s easy to use, you must first know its pros and cons. Here is a detailed overview of how to make a transparent background using the Lasso tool.
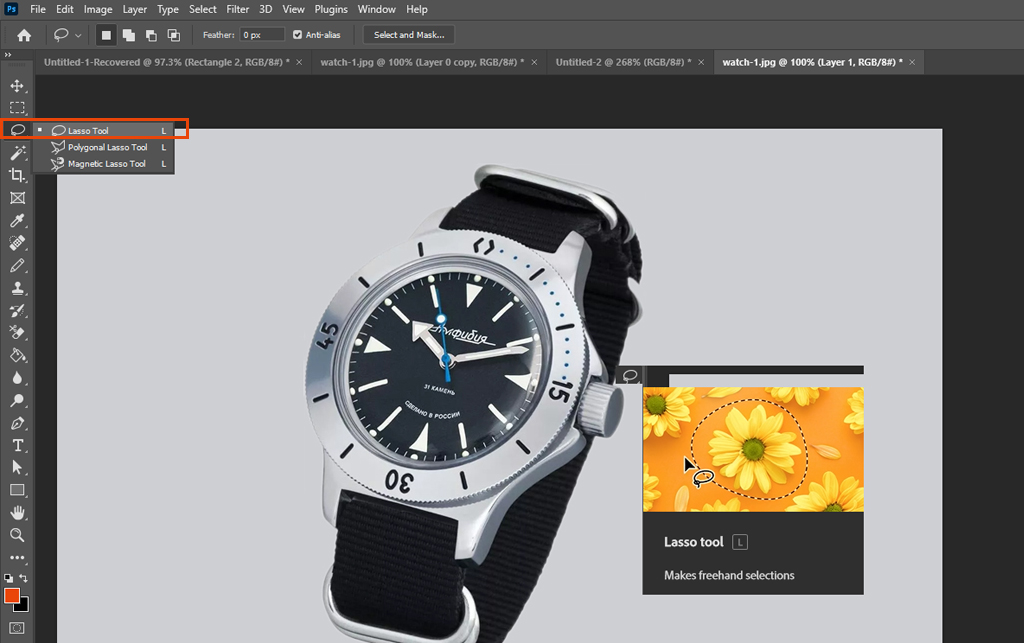
Step_1: First things first: trace the image
- Find the Lasso tool from the Photoshop toolbar. There, you can see three Lasso tools: the everyday Lasso tool, the polygonal Lasso tool, and the magnetic Lasso tool.
- You should select the last one. Now, start tracing the image with the help of a mouse. Be careful while choosing the area, as it can be damaged due to lack of concentration.
Step_2: Selected region separation
- After tracing the photo, it’s time to separate the selected region. Perform a right-click to get access to the chosen segment. Once you’re in, click on “layer via copy.” It’s also accepted if you move with select and inverse.
- This action makes the selected region separate. By pressing the delete button, you can easily remove the background.
Step_3: Perform necessary cropping
Use the zoom-in feature to get a close view of the image. It helps to crop the final image more efficiently.
You may also like to read… 4 Best Photo Background Removal Apps for Mac for Beginners
Background Eraser Tool to Get Transparent Background
The background eraser is one of the easiest and fastest tools for transparent backgrounds. Let’s check out how this tool can make your life easy.
Step 1: Change settings
Look at the eraser menu under the toolbar. There is an option called the background eraser tool. Tap on it and select the background layer. Now, your responsibility is to change the size and hardness of the menu.
Step 2: Start remove background in Photoshop
Drag the mouse to remove the background slowly. For faster performance, zoom in on the photo. Move the eraser slowly and make the background transparent. The software will manually erase pixels on a layer to remove the background. It has a reasonable control you would never get with the Magic eraser tool.
How to Make the Background Transparent in Photoshop iPad
Have you ever thought of doing some groundbreaking editing using your iPad? If you’re an iPad user, you have a straightforward method to get a transparent background. Check this out to make a background transparent in Photoshop iPad.
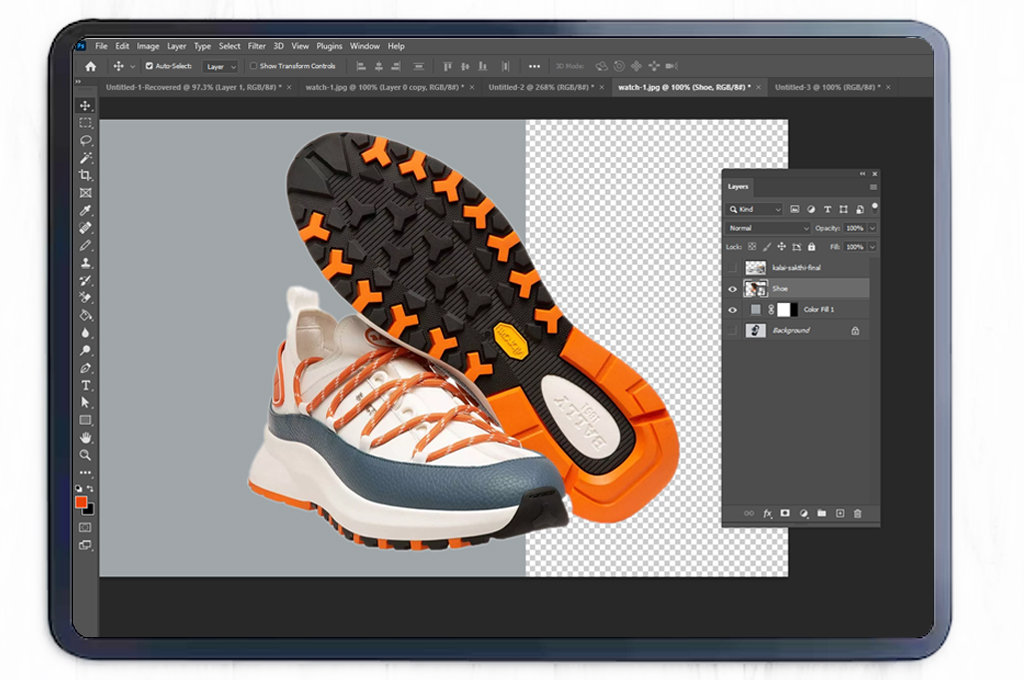
- First, introduce the Instant Alpha tool to get your desired transparent image.
- Open the image and tap on it to start editing
- Select “instant alpha” at this stage
- Now, drag a finger over the color, and the color will disappear
- For removing multiple colors, tap and drag various times
- If any change is required, tap reset to get the image’s previous state
- When you’re done, tap on Done and enjoy
How to Create a Transparent Background for a Logo in Photoshop
A logo is stubborn to edit, let alone remove the background. The task is more difficult if there is a strict background. This time, you’ll know briefly how to create a transparent background for a logo in Photoshop.
![]()
- First things first: Make your image into a layered file
- Leave the image with the default layer settings “layer 0.”
- Click on the subject to remove the stubborn background color
- Select areas using the tool like a magic wand
- Subtract the background from the selection
- To do this, enter SHIFT+CTRL+I from the keyboard
- For Mac users, the command prompt is “SHIFT+ COMMAND+I”
- If you want to make any changes, enter CTRL+D
- For Mac users, it’s COMMAND+D
- The last step is exporting the image in PNG format
- Check if it’s finally saved with the “.png” extension
Takeaway
Getting a photo with a transparent background is all about performing some easy steps. Now that you know how to create a transparent background in Photoshop, you can handle it on any device. Some versions of Photoshop are preferred for the latest features.
Sometimes, you may need to remove background in Photoshop to change the color from a selected area’s background. Well, you also have gone through it. After uploading the photo, add a preferred layer. Then, select the object and apply the background eraser tool. This is how to make a transparent background in Photoshop. iPad users can also try this thing quickly by using the Alpha tool. If saving time is your utmost priority, go for Snappa. For a quality image with better resolution, try Canva or Adobe Photoshop. Whatever you use, you need to learn the proper use of the eraser tool for the best output. If you have any confusion, view our video tutorial below.