InDesign first came out in the market in 1999. This professional software is popular among professionals who design and create print and digital materials. A clipping path is a key tool of this industry-standard page layout program. This special tool of this publishing software application is used for photo manipulation and composition. Let’s learn what a photo clipping mask in InDesign is and how to use it?
Photo Clipping Mask in InDesign
A clipping mask in InDesign is a vector shape, line, or series of lines to isolate an object from an image. It creates complex, highly attractive layouts and seamlessly integrates into multiple layouts. Creating deep-etching thoroughly in InDesign allows you to achieve images with sharp edges and fine details.
Common Uses of Clipping Paths in InDesign
Product Catalogs: You can create various product catalogs using deep etching in InDesign, such as
- Fashion Lookbooks
- Electronics
- Jewelry
- Furniture Catalogs
You may also like to read… What is Image Clipping and Why Do We Need It?
Brochures: This powerful tool enables you to make:
- Real Estate Listings
- Restaurant Menus
- Travel Guides
- Wedding Brochures
Flyers: Users can create various printed or digital promotional materials, such as
- Gym Advertisements
- Event Invites
- Travel Promotions
- Fitness Programs
How to Create a Clipping Path in InDesign?
Drawing a deep etching in InDesign is slightly different than using Adobe Photoshop. The following are the steps to create an image isolation area in InDesign.
Step_01: Import the Image
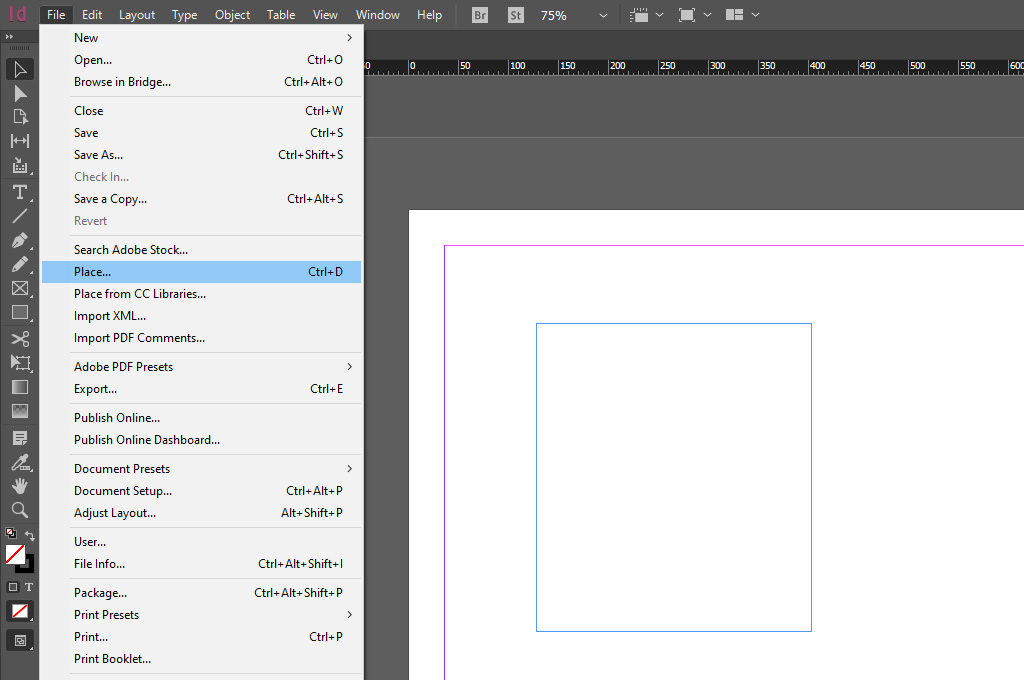
- Launch the InDesign software on your computer or laptop. Select File > Place. Pick the image you want to edit.
- Right-click on the photo and choose the “Open” option from the drop-down list.
Step_02: Turn the Photo into a Graphic
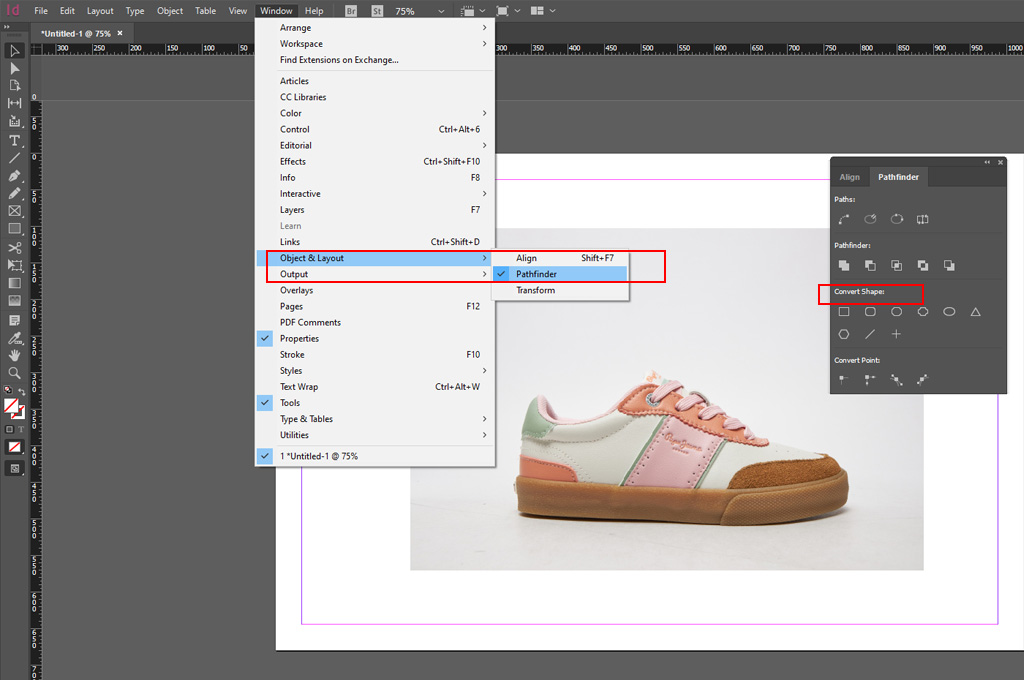
- Once the image is opened into the professional desktop publishing software, choose Window > Object & Layout > Pathfinder.
- Next, tap on the “Convert Shape” option from the drop-down lists. It will help you fit the picture into a pre-defined shape. The image will have a graphic-like look.
Step_03: Create A Clipping Mask
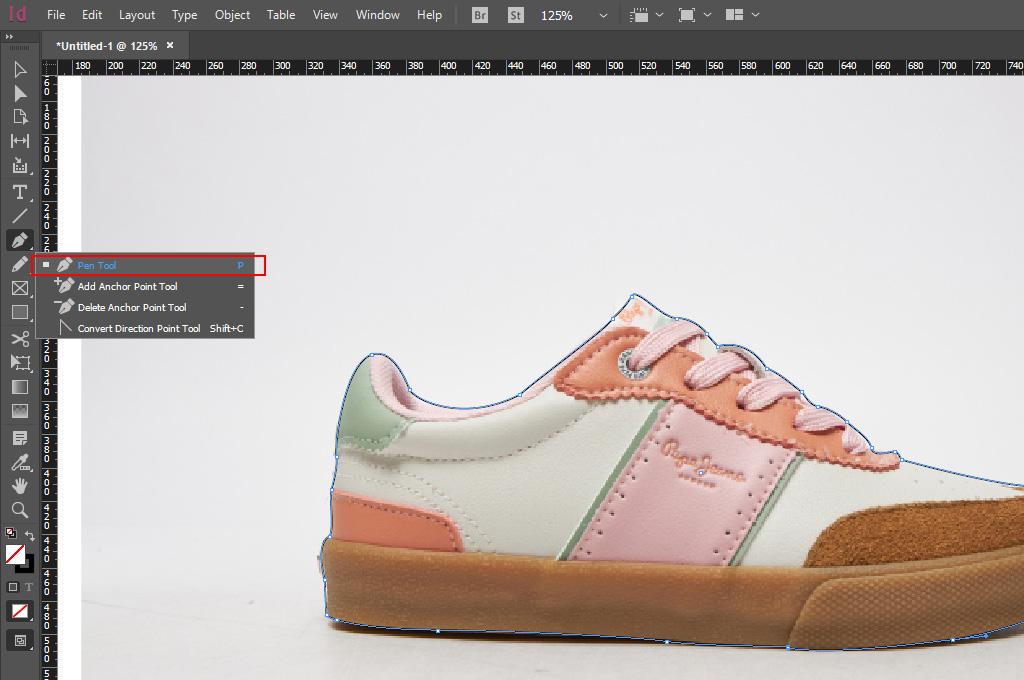
- Navigate to the toolbar section on the left side of the screen and tap on the Pen Tool. The shortcut key is ‘P.’ Use the Pen Tool to create a hand-drawn deep etching.
- Be cautious about the anchor points. It determines how good your drawn image isolation sections will be.
- Add “anchor points” along the subject’s edges and carefully adjust the curve lines. If you accidentally make any mistake, undo it immediately.
Step_04: Apply the Clipping Mask

- Once you create a perfect deep-etching, select the area. Head to the menu bar section and choose Object > Clipping Path.
- A dialog box will pop up. Hover over to the “Type” menu section and select the Detect Edges option.
- Once you have determined the options, tap on the “OK” option.
- Now, the screen will show the hand-drawn, deep-etching while concealing the outside portion.
How to Adjust a Clipping Path in InDesign?
Your handmade image extraction section may need a slight adjustment for a clean and accurate cut-out.
Tips_01: Use the Direct Selection Tool
- Navigate to the toolbar section and select the Direct Selection tool.
- Tap on the individual anchor point and modify or remove the point based on your requirements.
Tips_02: Adjust the Clip Options
- Again, go to the Clipping Path dialog box and choose the “Inset Frame” option. It lets you set a slight margin or border within the frame’s edge.
- Choose the “Threshold” settings from the same dialog box. It can identify and outline the distinct boundaries between different objects, colors, or contrast areas.
Tips_03: Use the Detect Edges Option
- If you want to conceal the darkest or lightest section of your image, use the Detect Edges option.
- But this function goes well with a subject with a solid white or black background. Choose Object > Clipping Path > Detect Edges to use this function.
- Once you have made an accurate deep etching, save the graphic.
Similar Reads for You
-
What is Masking in Photoshop, Guide for Beginner
-
How to Make a Clipping Path in Illustrator in 3 Steps?
-
How to Choose the Best Clipping Path Company
Conclusion
When it comes to creativity and preciseness, deep-etching plays a vital role in seamlessly integrating images into layouts. We have already outlined what is photo clipping mask in InDesign and how to use this software to make hand-drawn image isolation paths.