Customers can’t touch products online like in-store. They have to rely on visuals, right? But how about making them feel like they are touching the item virtually? Guess what? 360 product photography can provide prospective buyers with captivating, lifelike visuals that mimic physical store experiences. So, what do you need for professional 360° photos? A well-functional turntable is necessary to capture e-commerce images consistently from all angles. But how do you use turntables for 360 product photography? This article gives you a complete step-by-step idea about this topic. Let’s dive in!
A product turntable is a rotary device where items are placed on a flat surface. The surface is mainly a plate. Photographers take e-commerce images and videos from different angles while the platter spins slowly and smoothly.
Customers can get a comprehensive view of the merchandise from all angles. This improves their overall shopping experience and helps them to make informed purchasing decisions.
Are you curious about the cause to invest in a product turntable? Why is it not enough to take shots in the typical way? It must give you some value for your investment, right? Let’s figure it out!

Turntables allow customers to see items from all angles. It provides a more interactive shopping experience. Customers feel more confident to purchase the merchandise.
This rotating device spins automatically to capture item images. You don’t have to move the goods to different angles manually. This reduces manual efforts and saves time.
Turntables allow photographers to maintain the exact same angles for all e-commerce photos. This ensures consistent, uniform rotation. You won’t have to worry about irregularities between shots.
Not all photographers need the same turntables. Their photography requirements, preferences, and budgets vary. Let’s learn about various turntable options.

A manual turntable is an inexpensive option. You have to use your hands to spin the surface manually after keeping the item on the plate. Taking photos on this rotary device is time-consuming, as you have to adjust its position for each angle. You can make DIY turntables using a lazy susan bearing. This rotary bearing provides smooth, stable rotation with minimal friction.
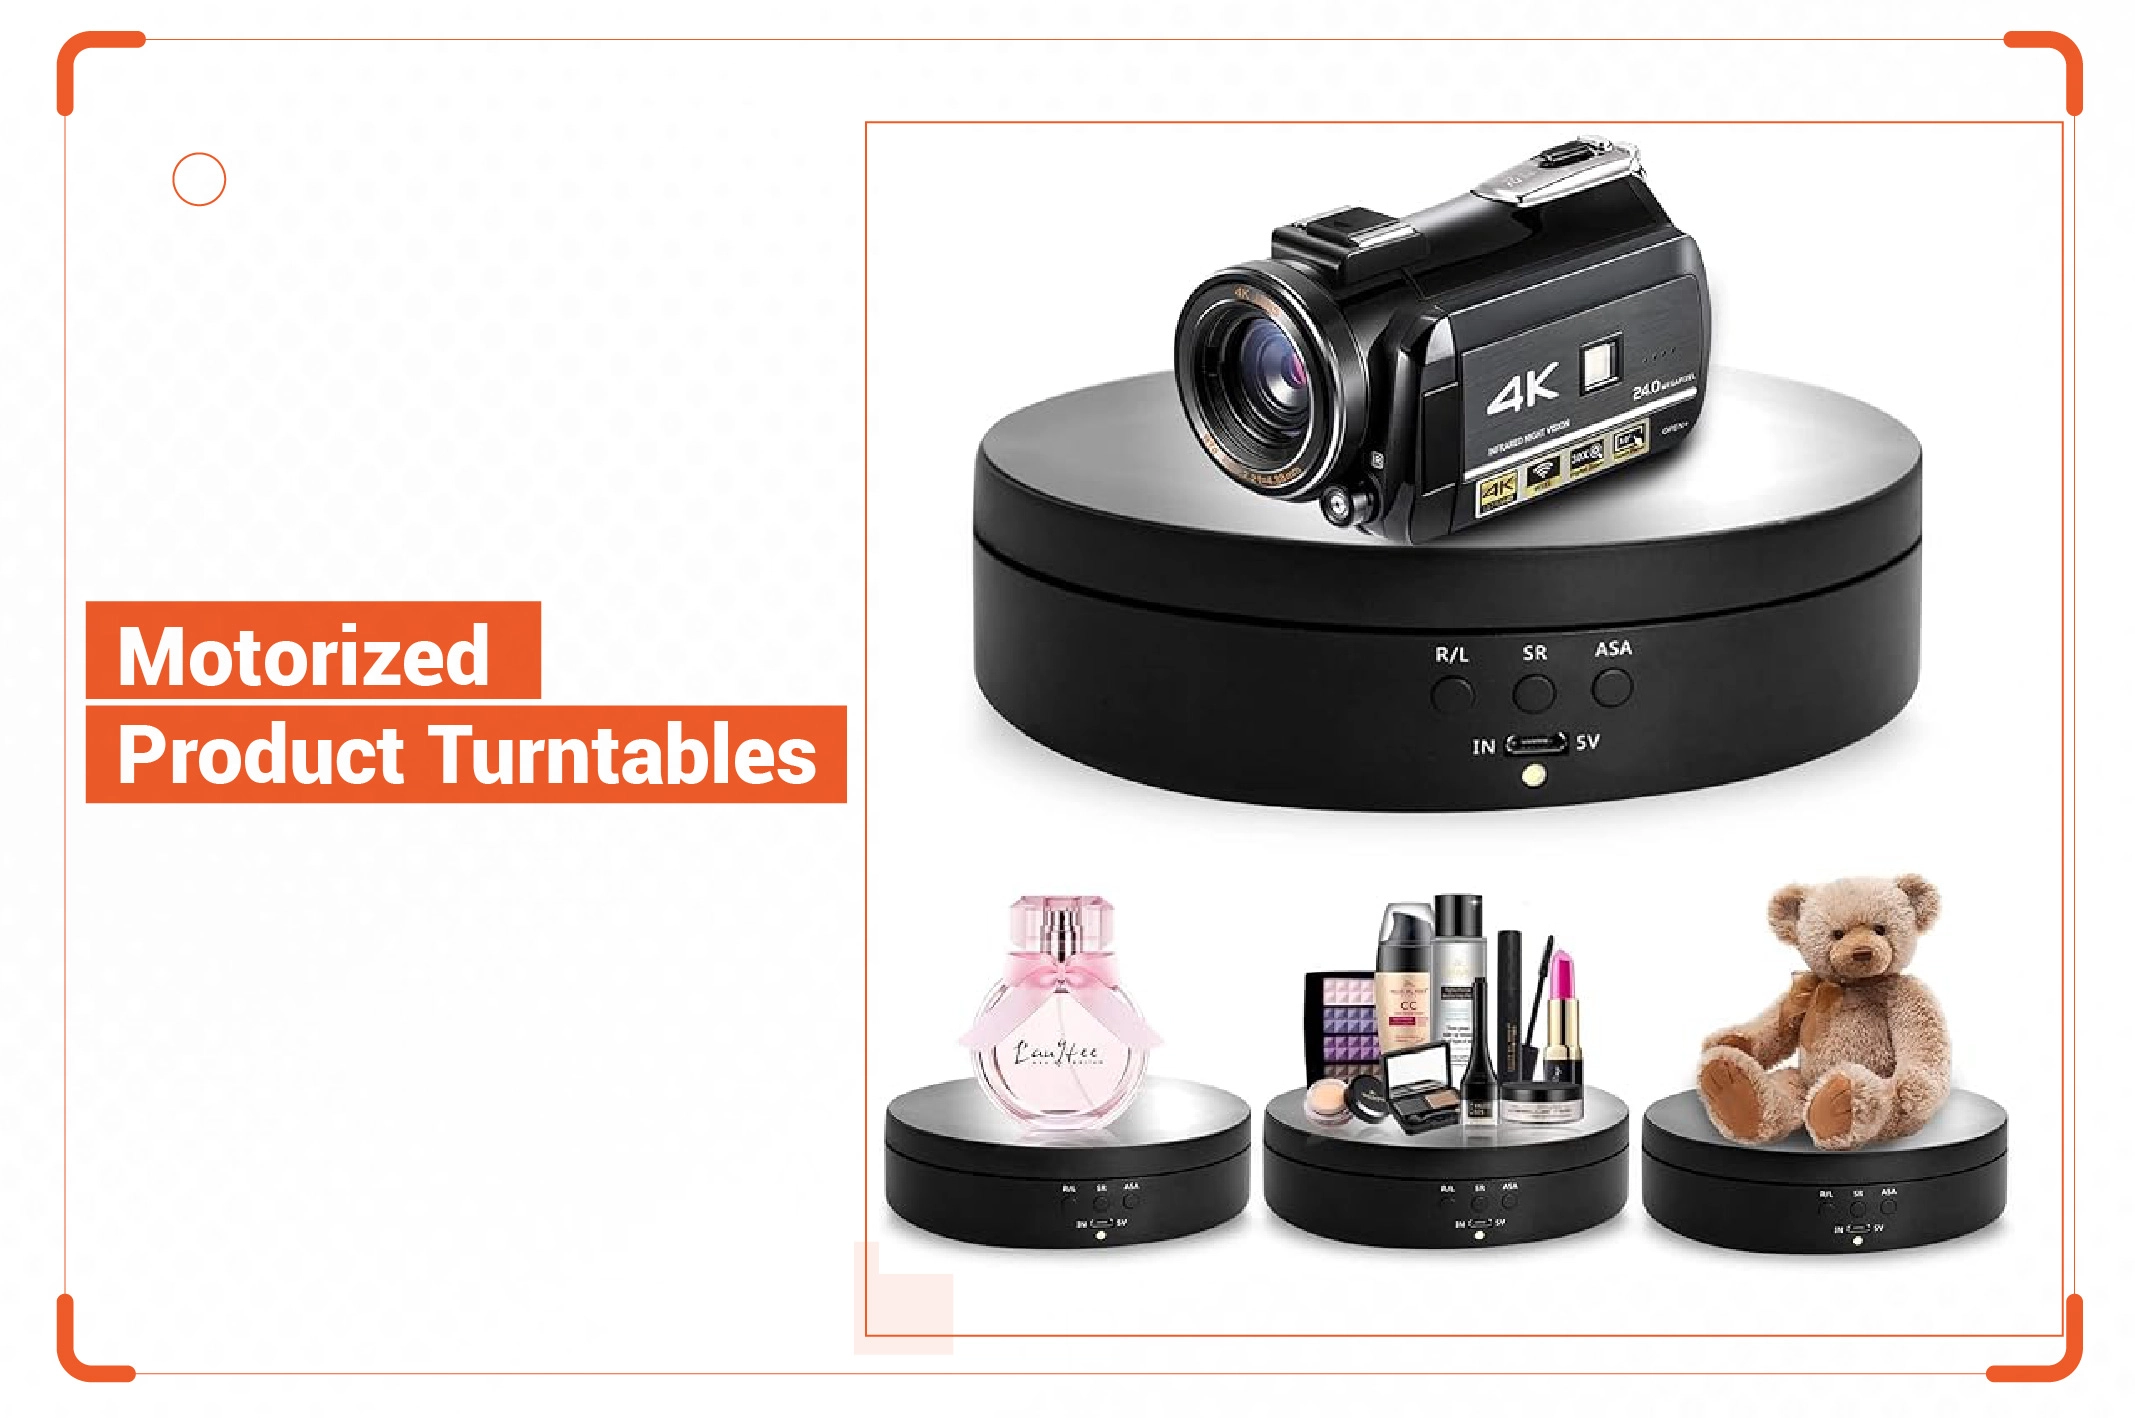
Here comes another affordable turntable. This automatic rotary device is equipped with a motor and an on/off switch. Once you turn on the switch, it rotates continuously. They usually have one consistent speed. You can’t pause it at a particular angle. Choose a turntable with a <0.75 RPM rotating speed. Its slower speed will prevent blurring or distortion effects. You can capture clear, high-quality shots.
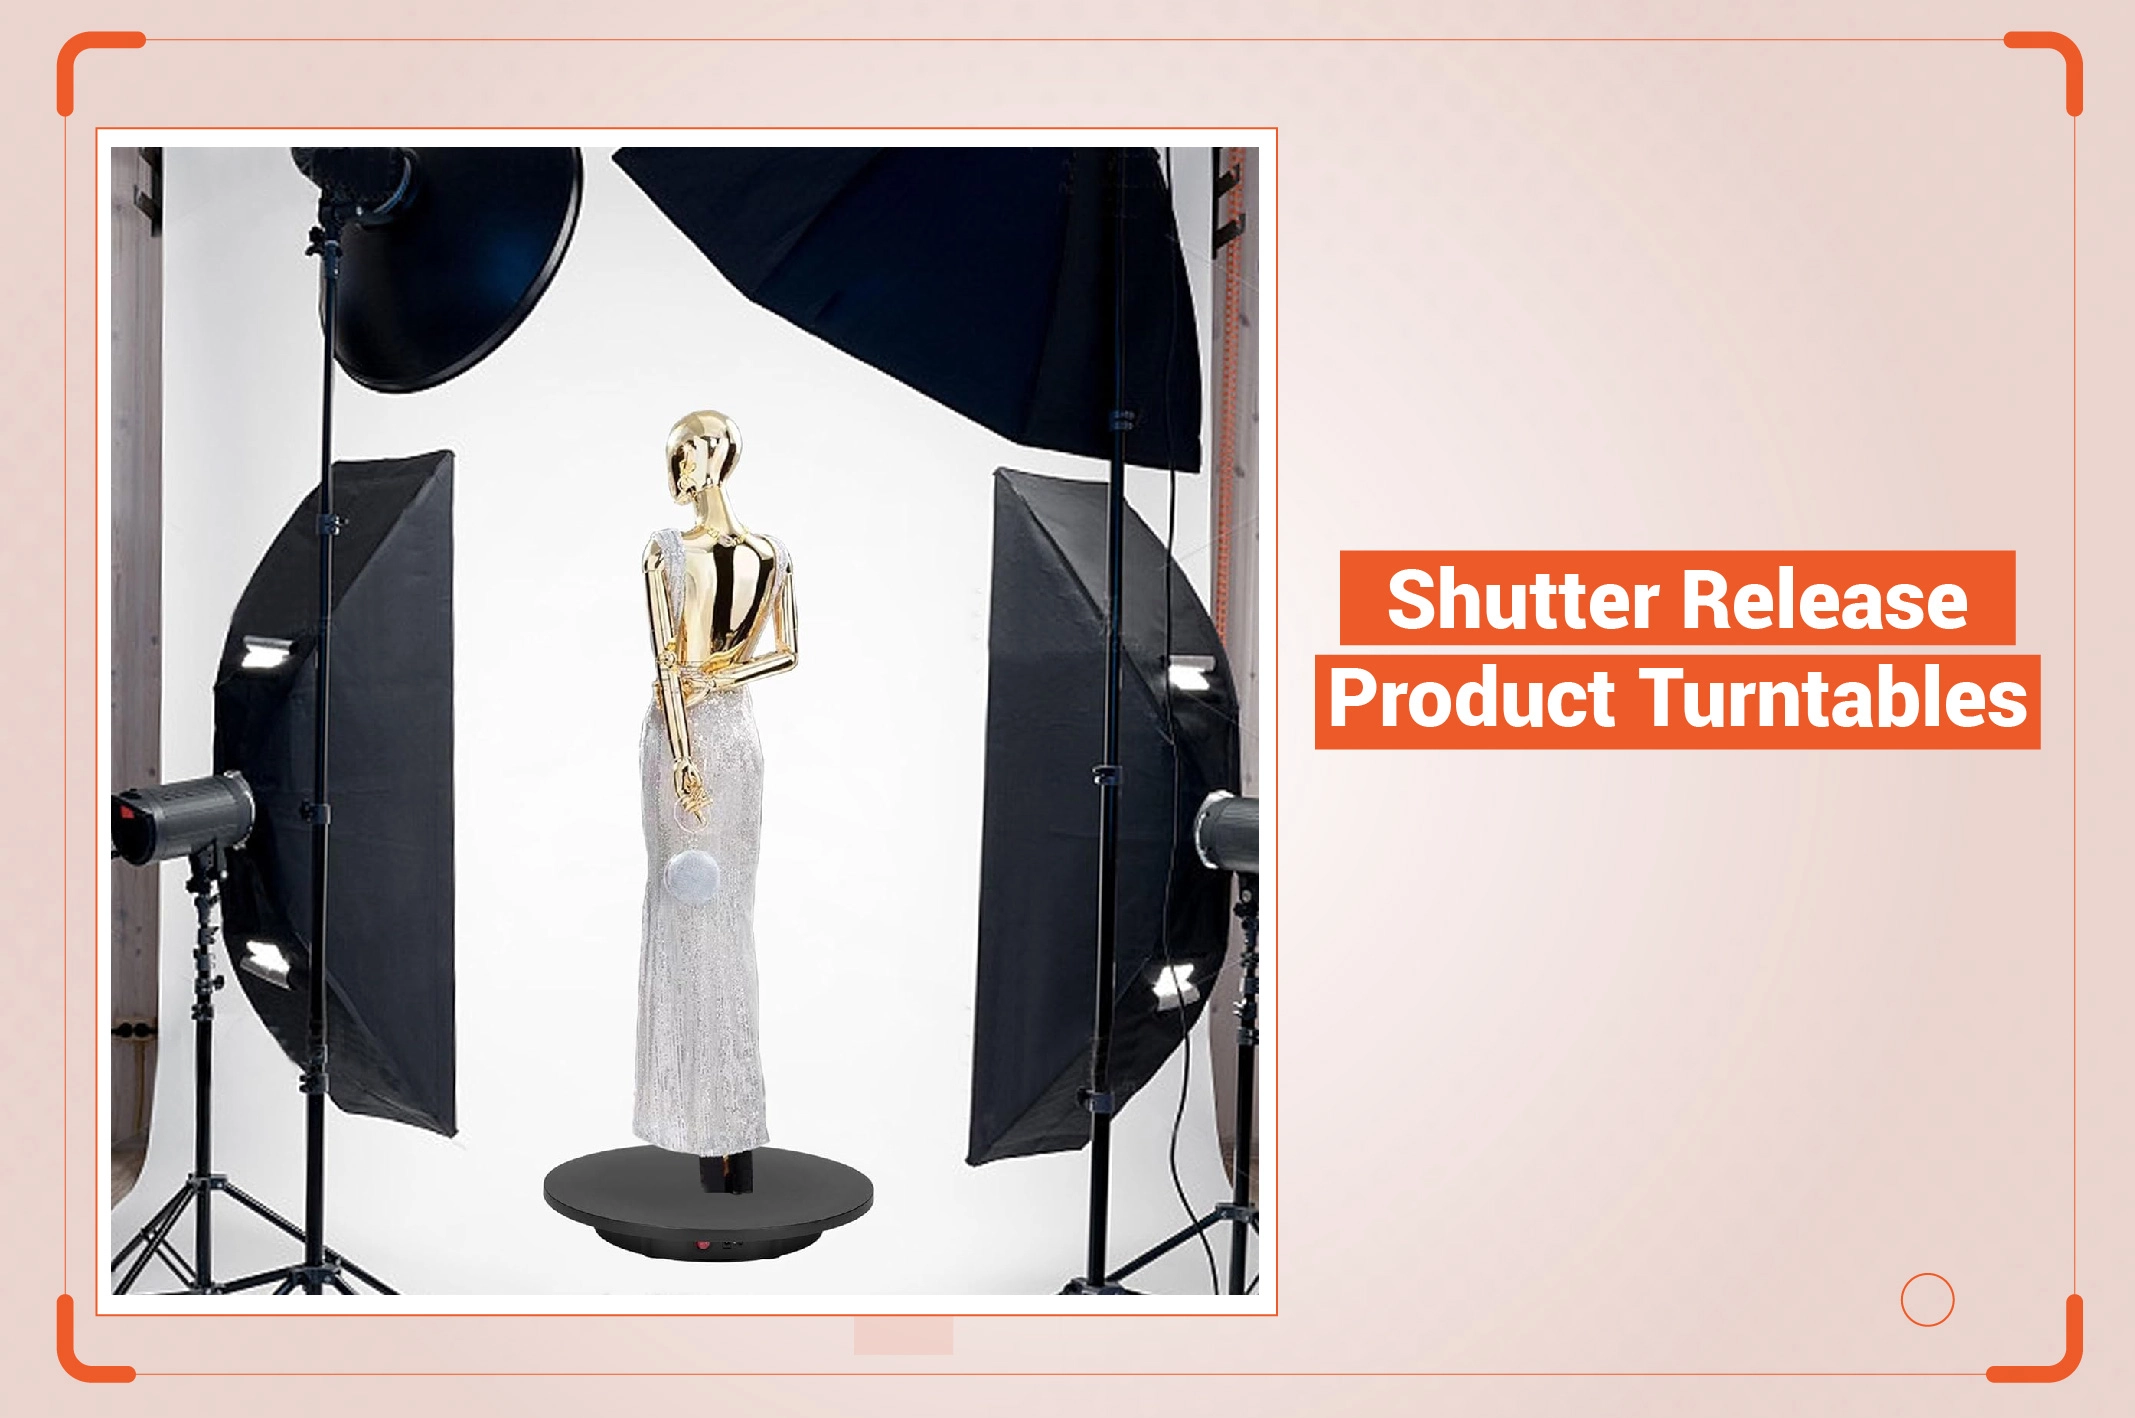
This type of turntable allows you to capture e-commerce images in stop motions. It is connected to a camera through a shutter release cable. Before you press the camera button, the device will automatically stop at the predetermined time.
You can set up how many times it will pause during rotation. For example, a rotary device spins at 360 degrees and stops at each 7.5-degree mark. Hence, it will stop 48 times to complete the entire circle.
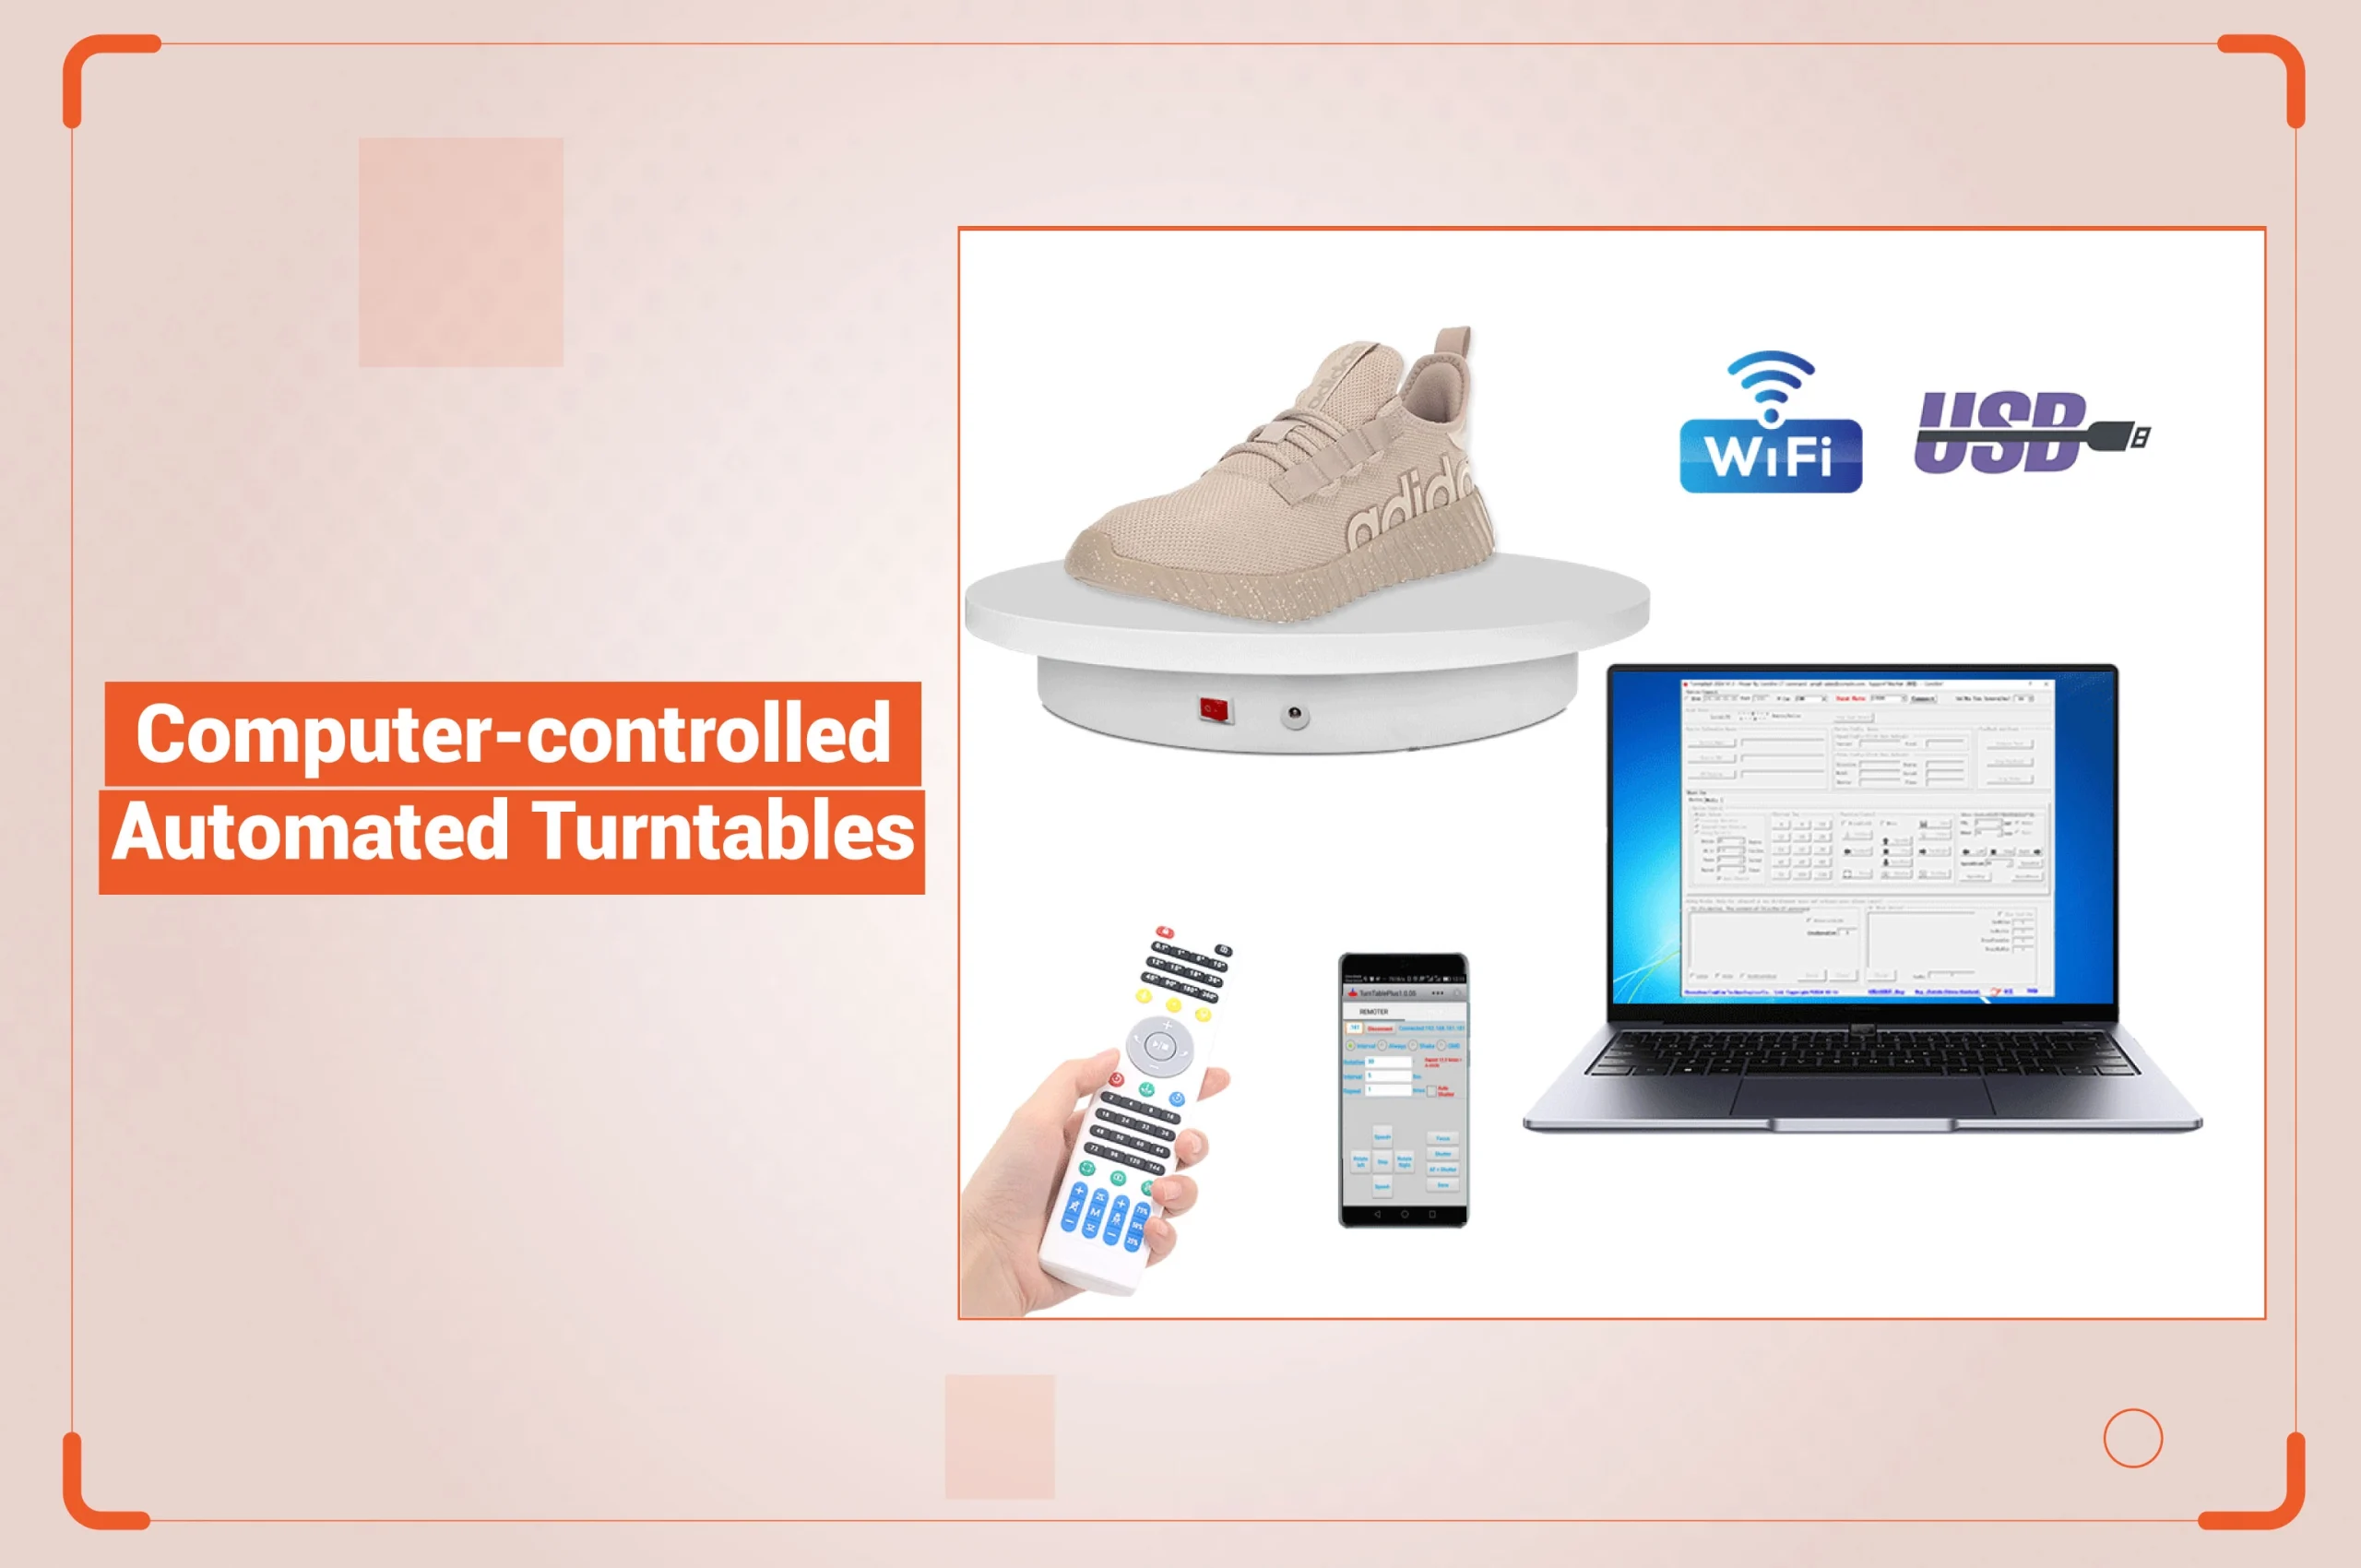
It is the most powerful and expensive turntable. You can control this rotary device using software through USB or wireless control. If you prefer top-quality images with better accuracy, computer-controlled automated turntables are the best choice.
Turntables come in various price tags. Their cost varies based on size, weight capacity, and automation level. But how should you select an appropriate turntable depending on your specific photography requirements? Let’s figure out how to choose the best turntable for product photography!
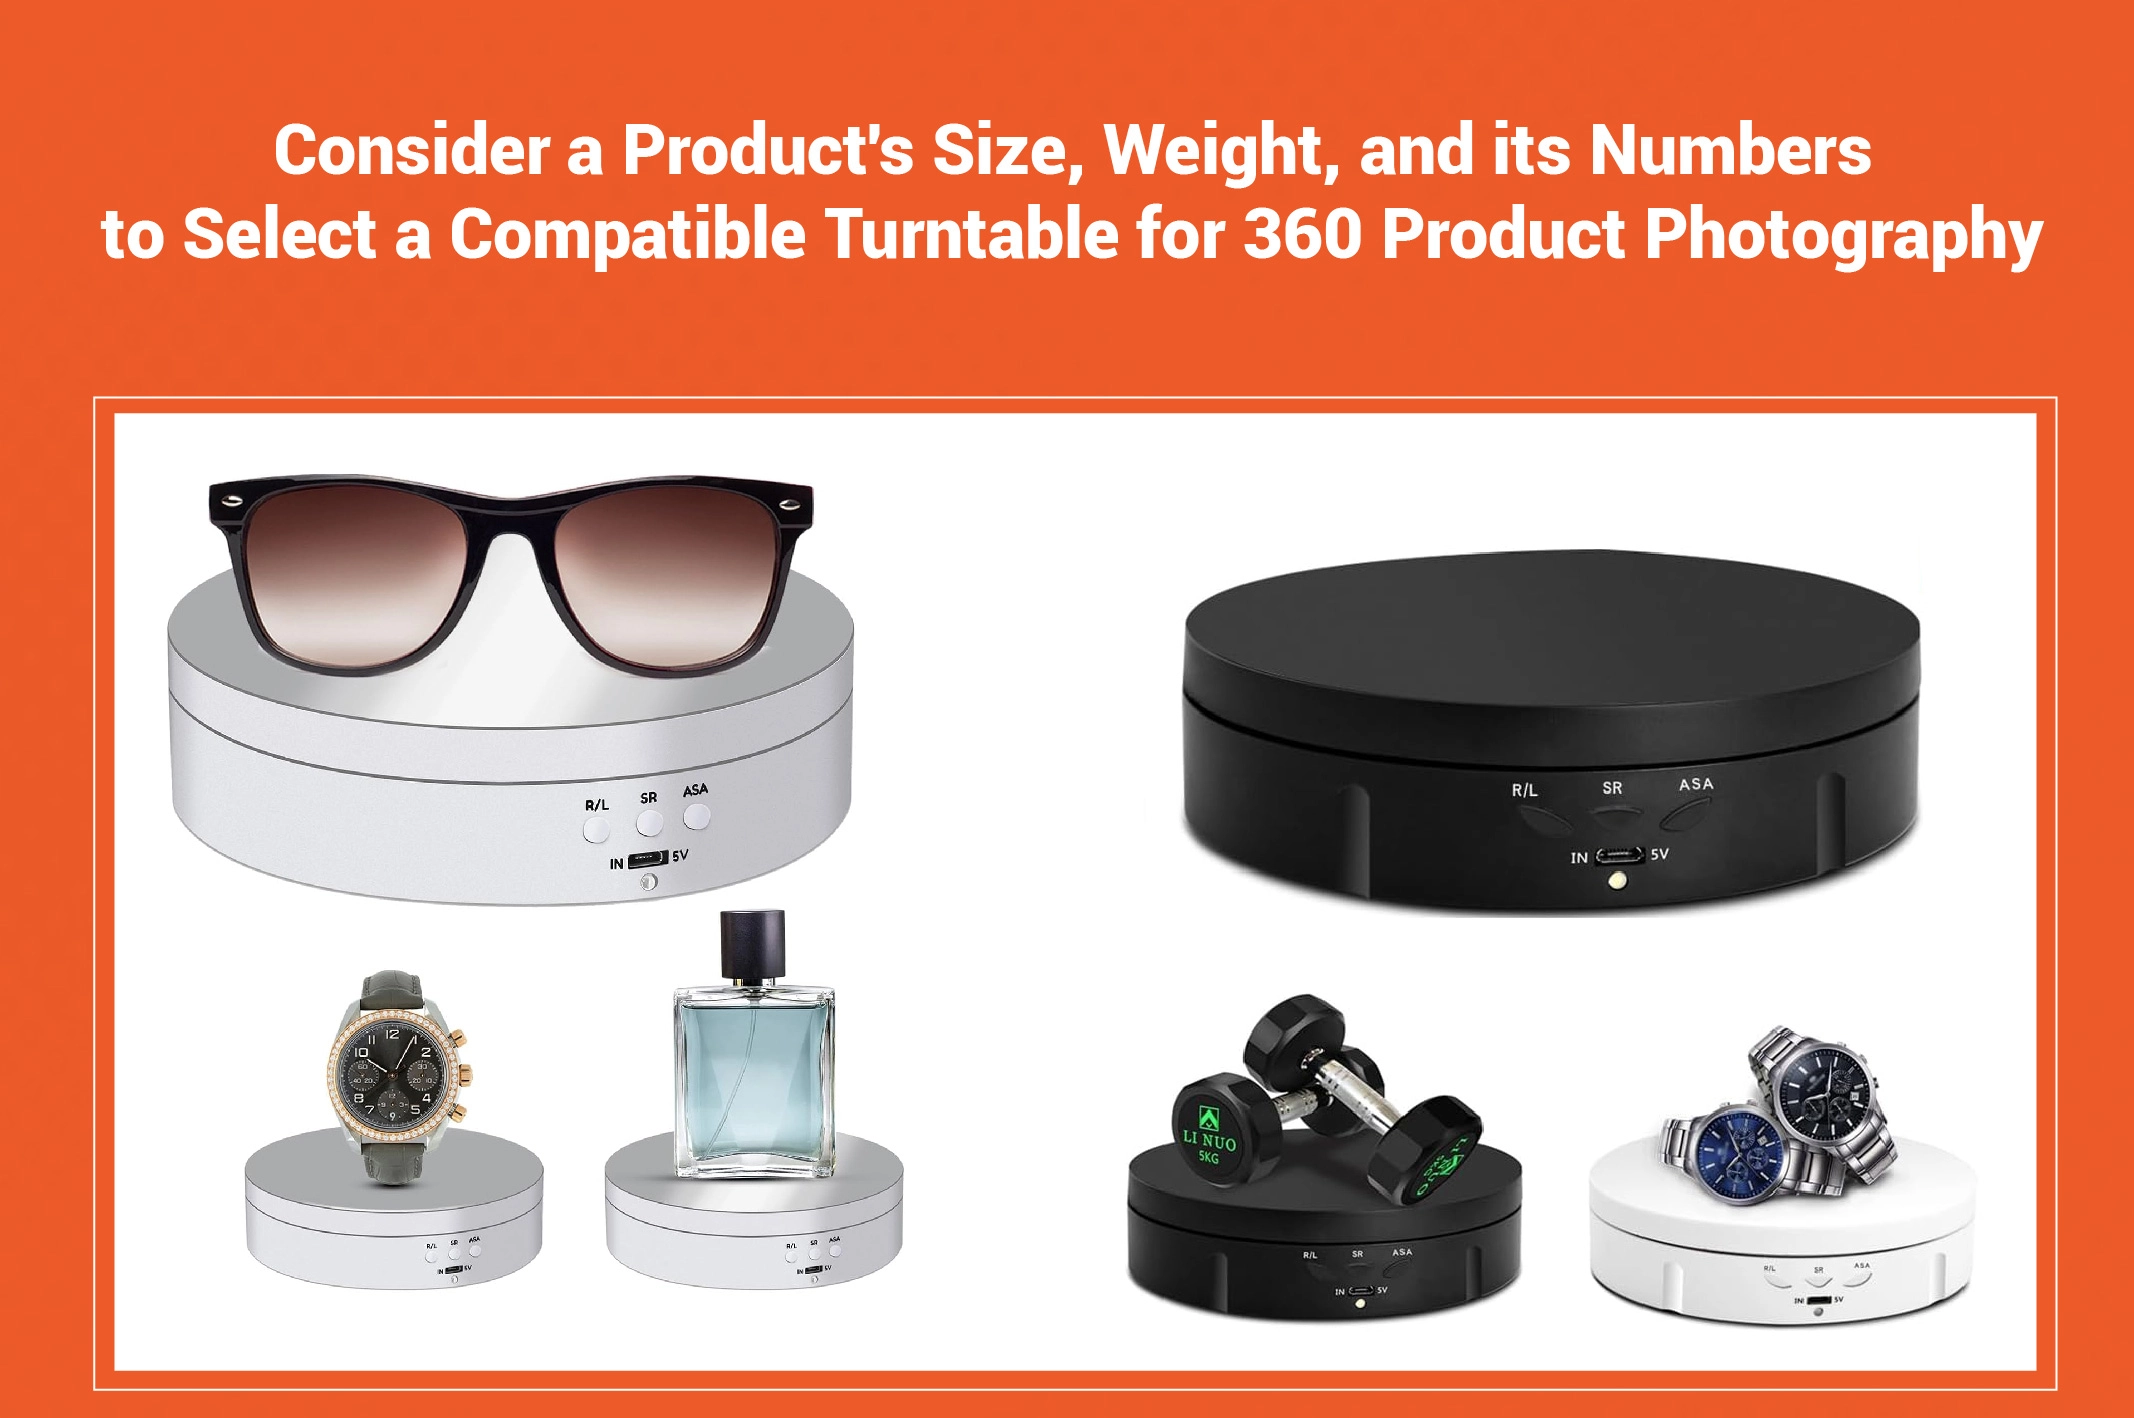
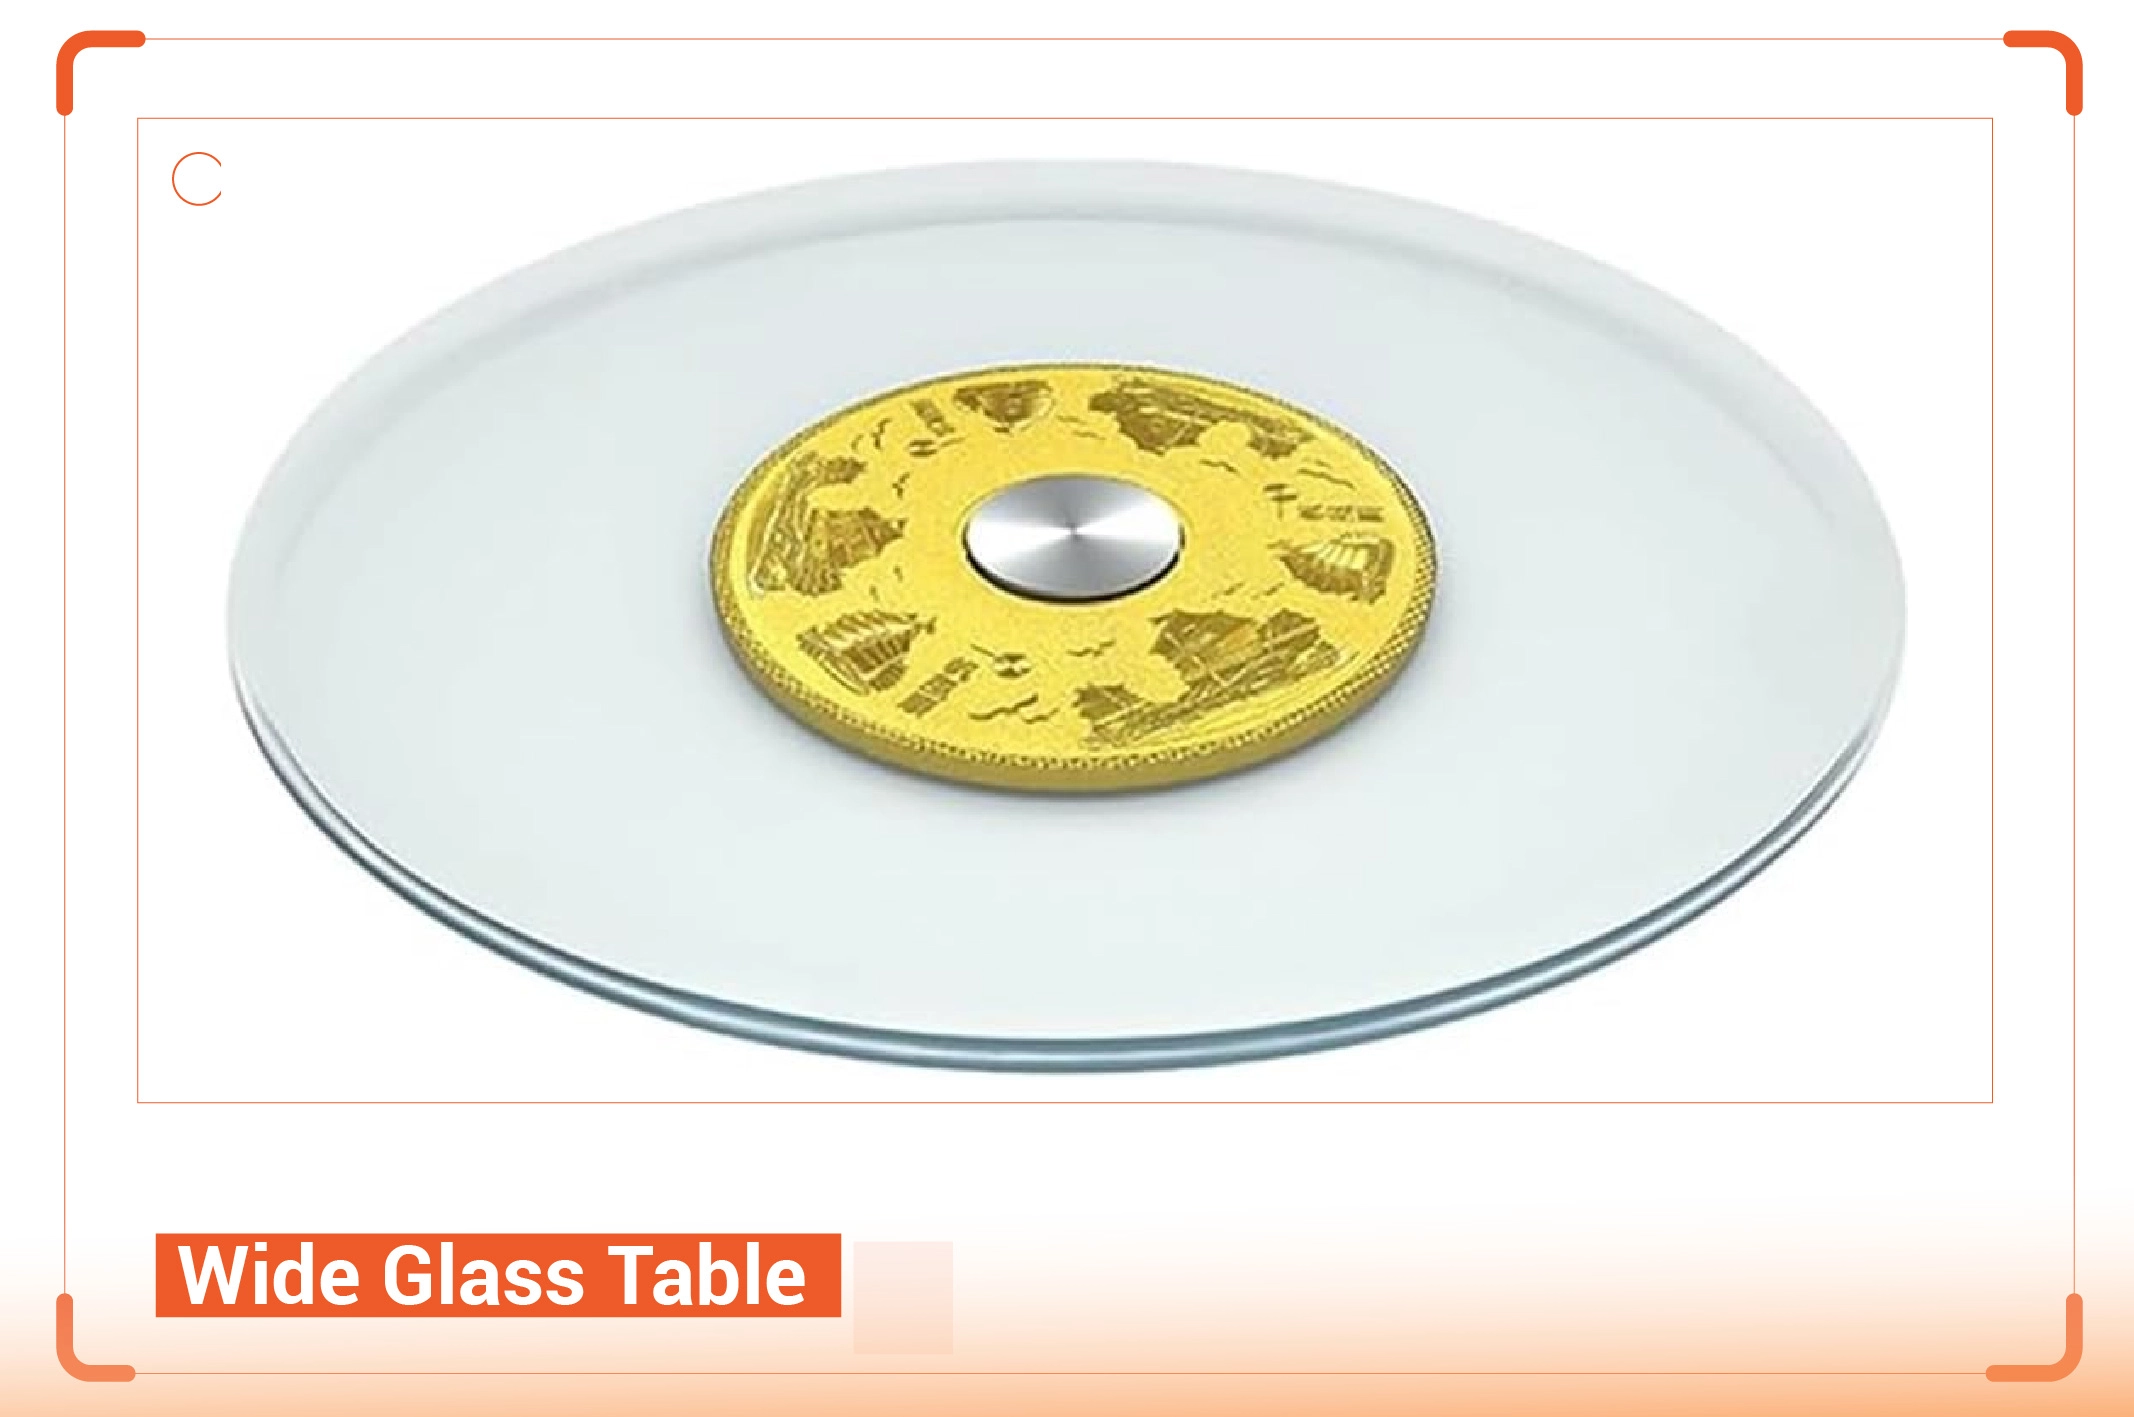
What size of your item do you want to photograph on the turntable platter? For different sizes, consider the largest option. Your turntable must be large enough to accommodate the entire item. Plus, the e-commerce goods must not fill up the entire platter space. Keep at least 2 inches of space at the edges. It ensures better stability and keeps the item centered. Otherwise, the merchandise may fall off during rotation.
How heavy are your items? Can your specific turntable handle its weight? For different weight options, consider the heaviest one. Plus, the motor must be powerful enough to ensure smooth rotation while the item is on the platter. A low torque motor can’t handle heavy weight.
How many items do you want to place on the turntable platter at a time? More items will require additional space and weight. Another important thing needed is a smooth and controlled automated rotation speed. It enables you to place items sequentially when the turntable automatically starts/stops. This reduces the hassles of manually starting/stopping the device. It saves valuable time and effort.
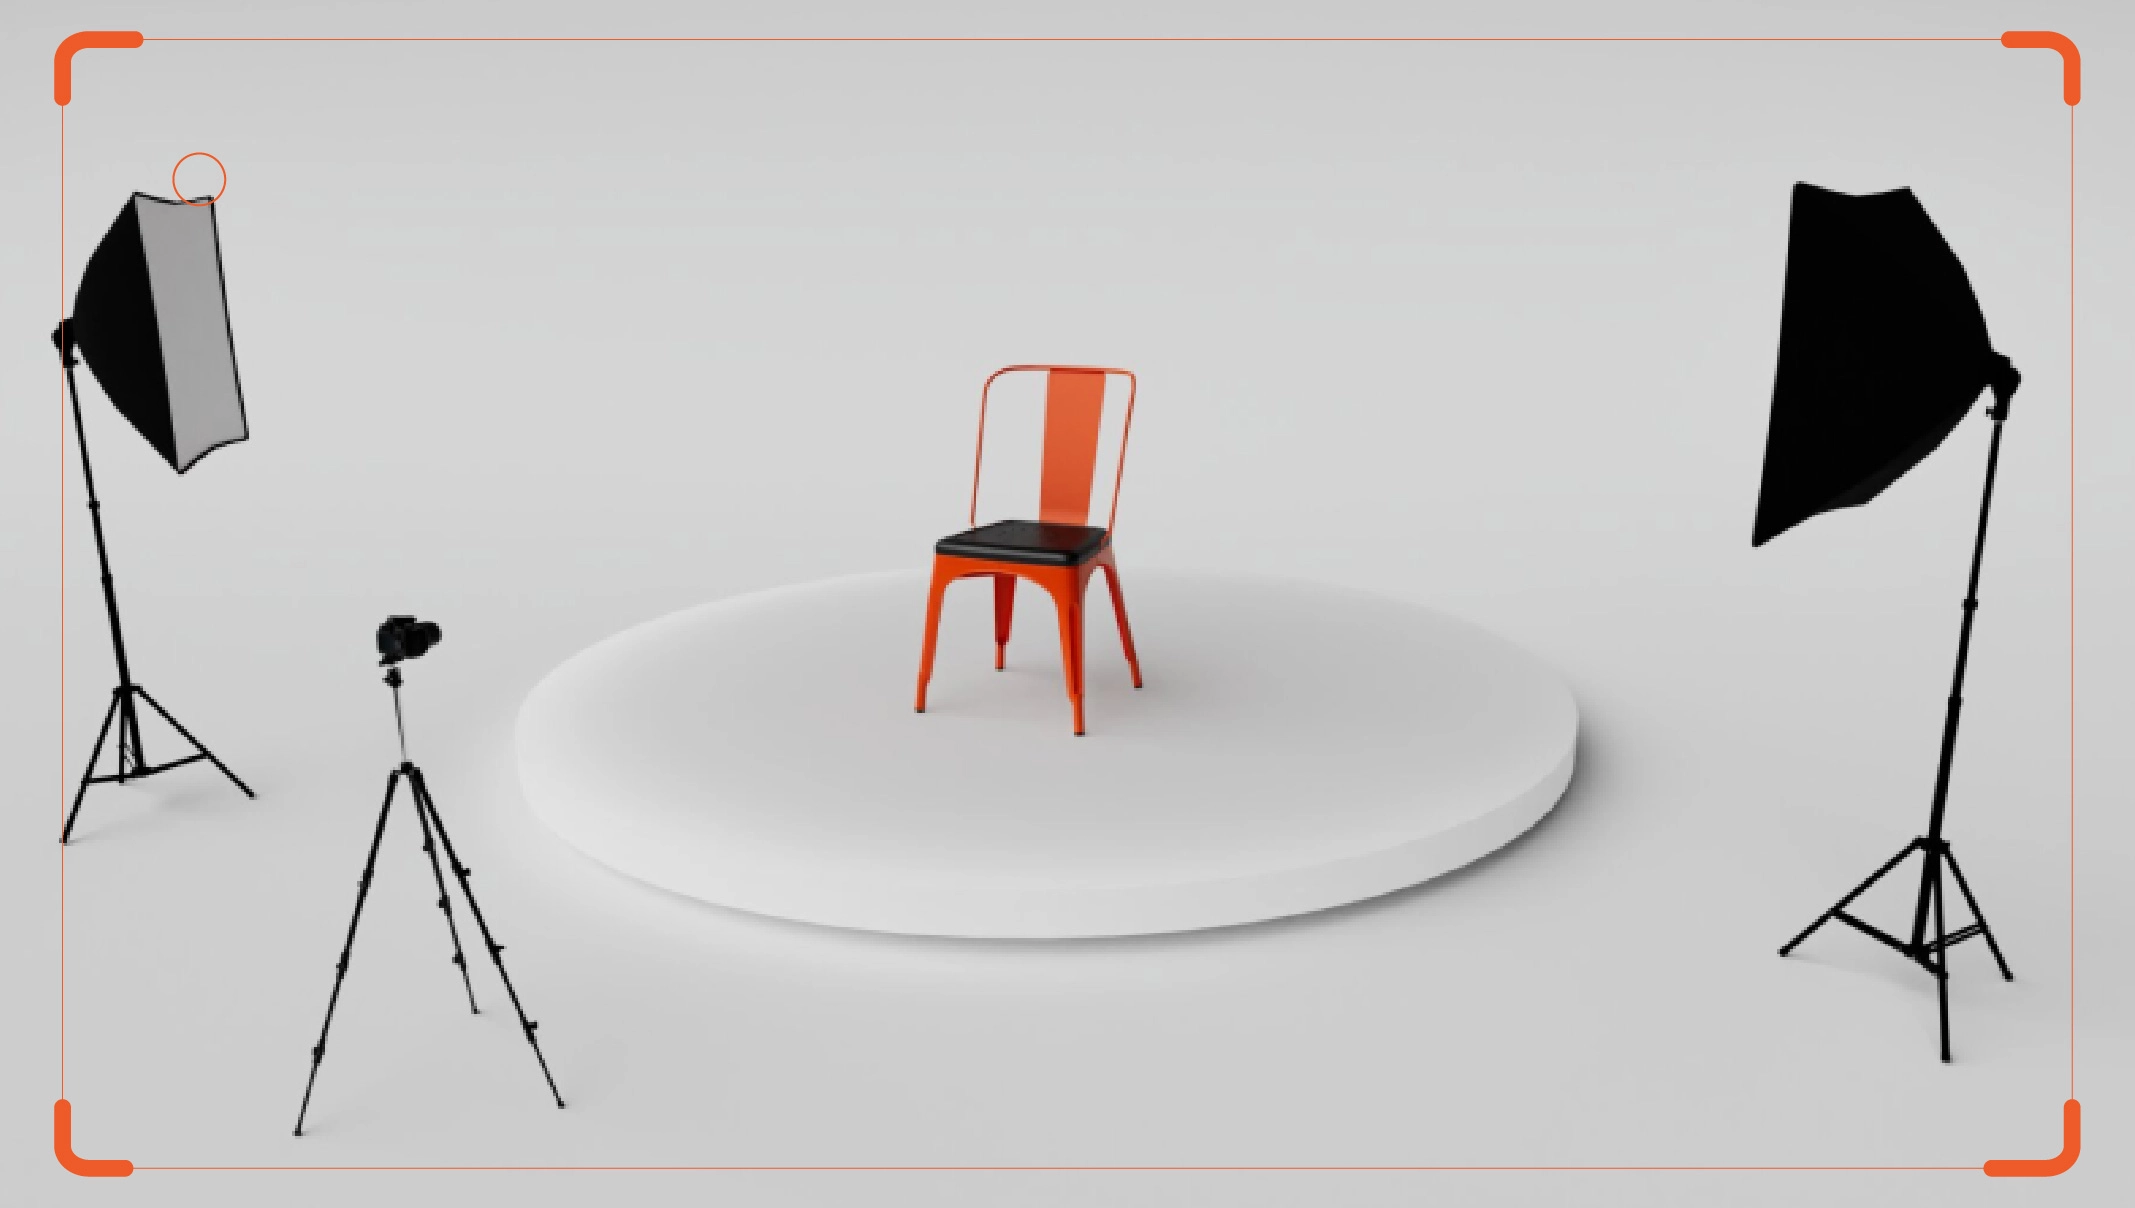
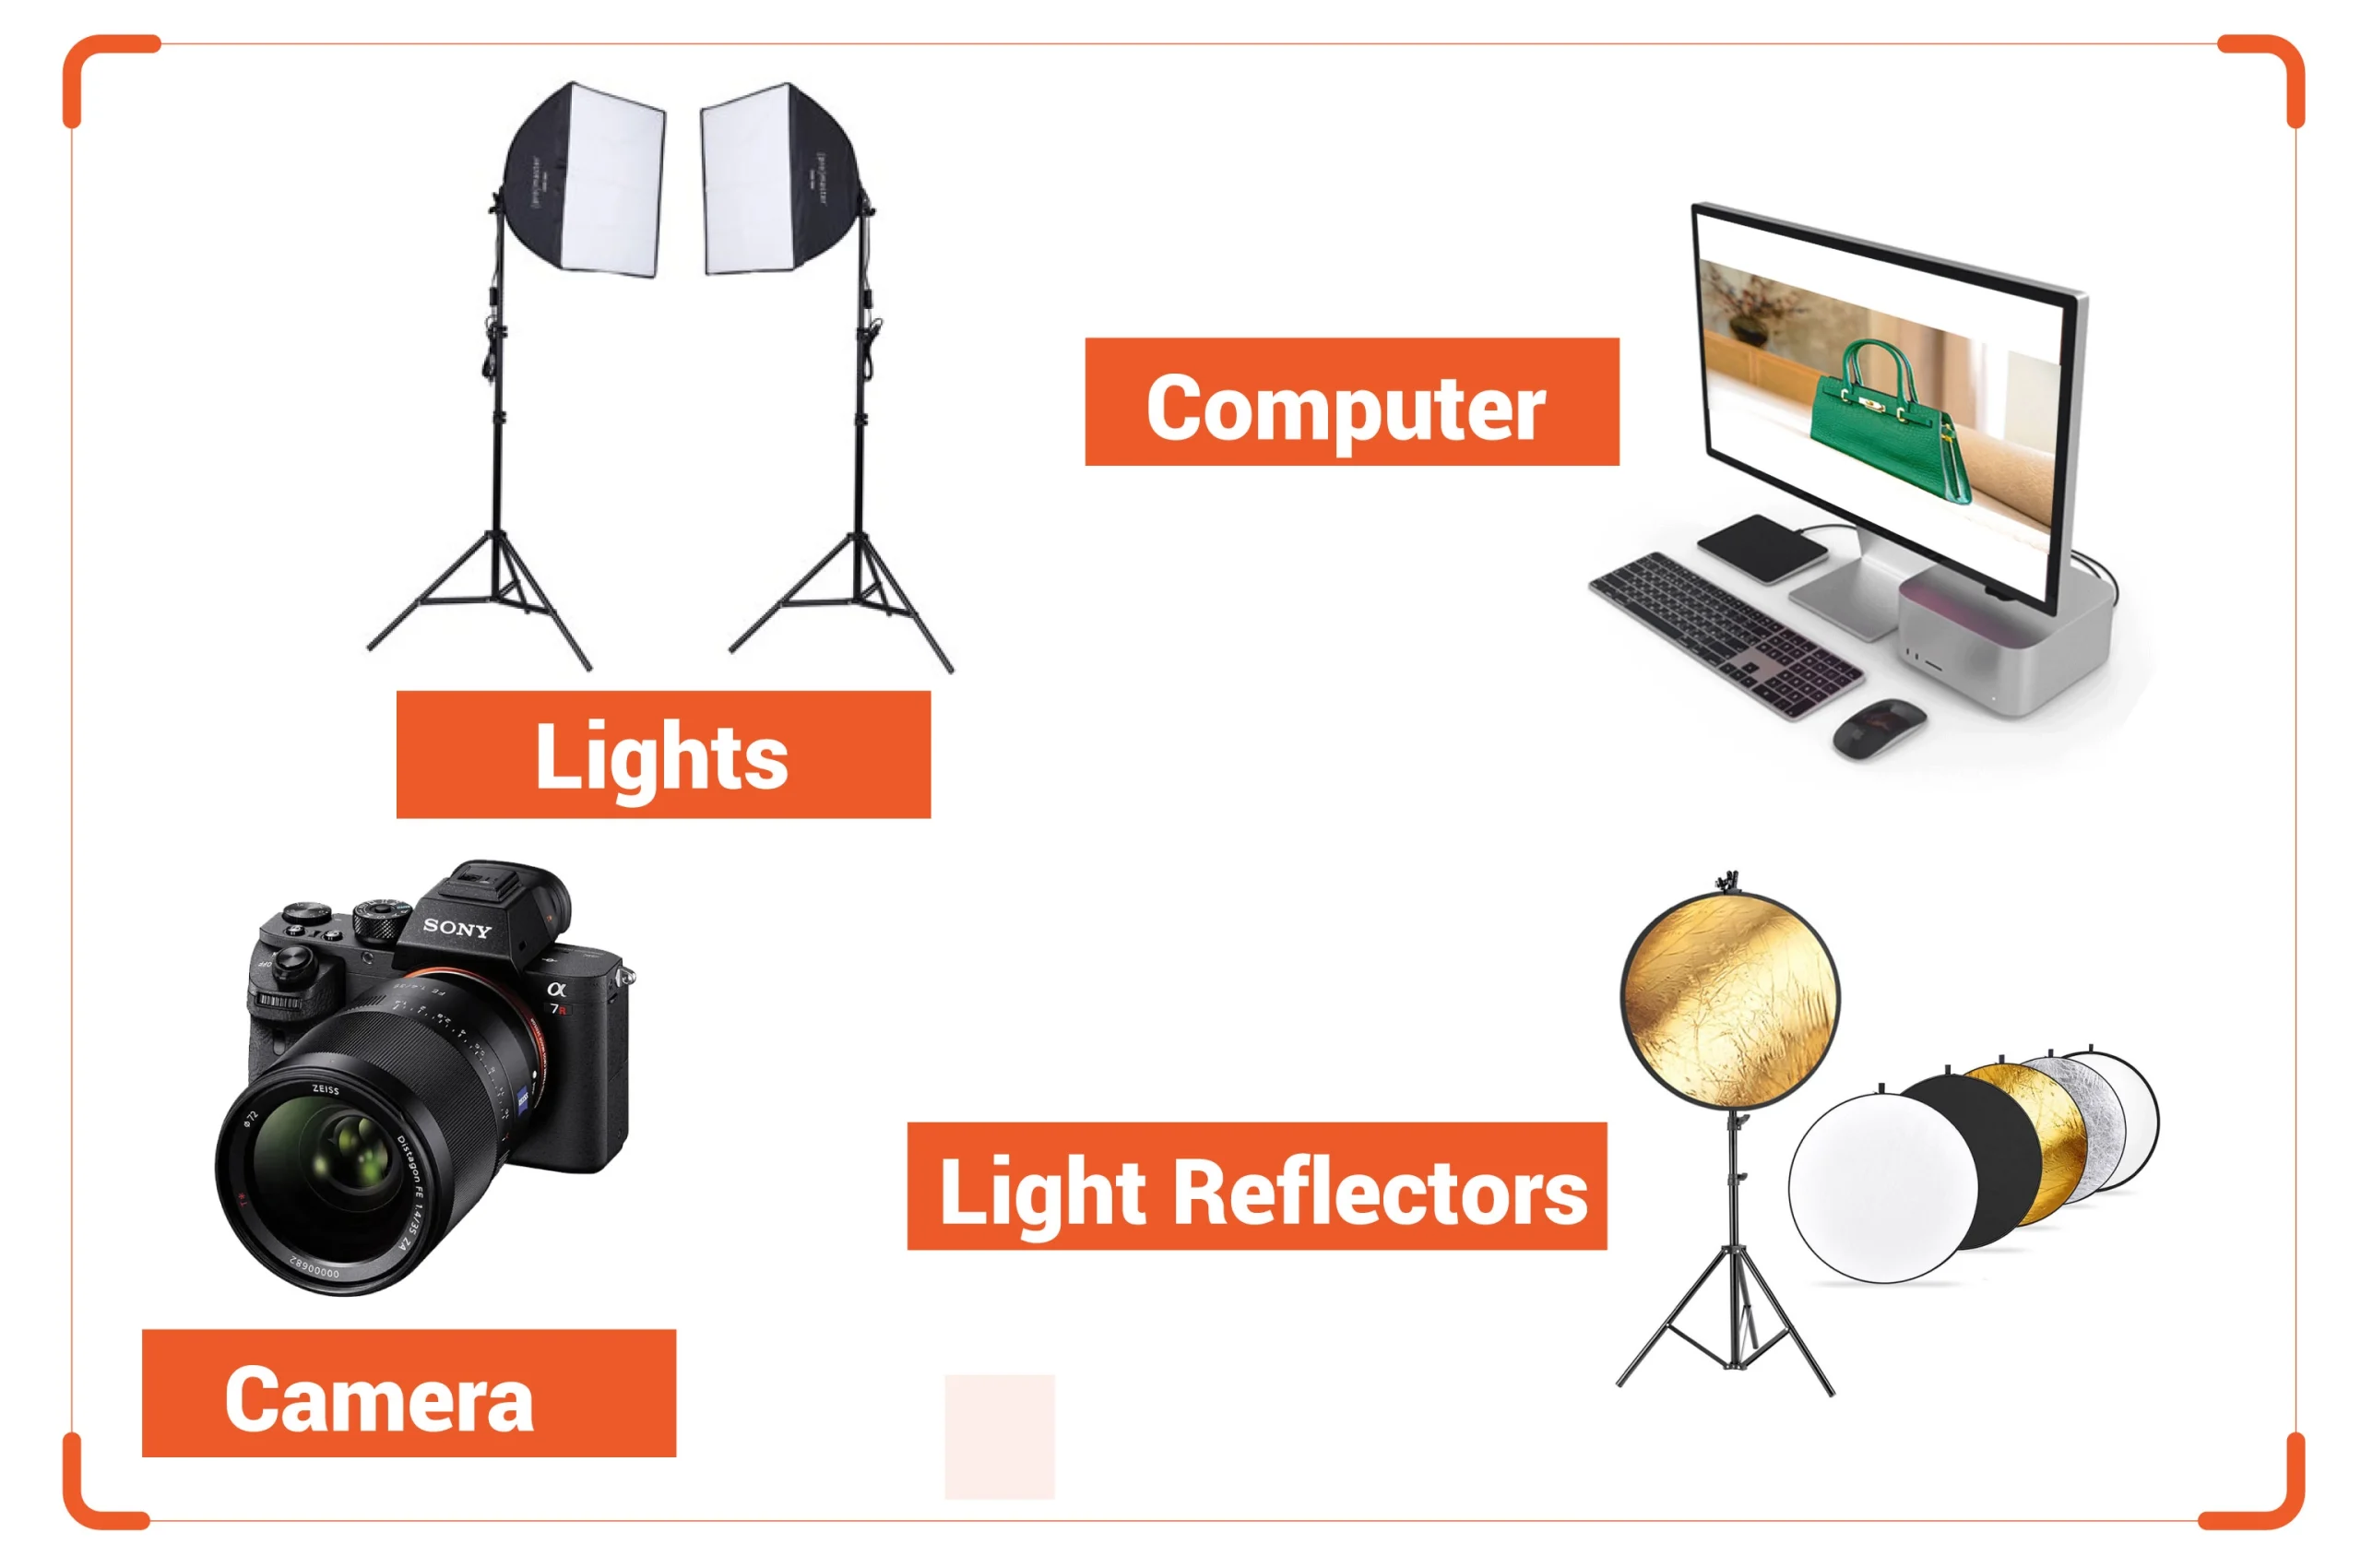
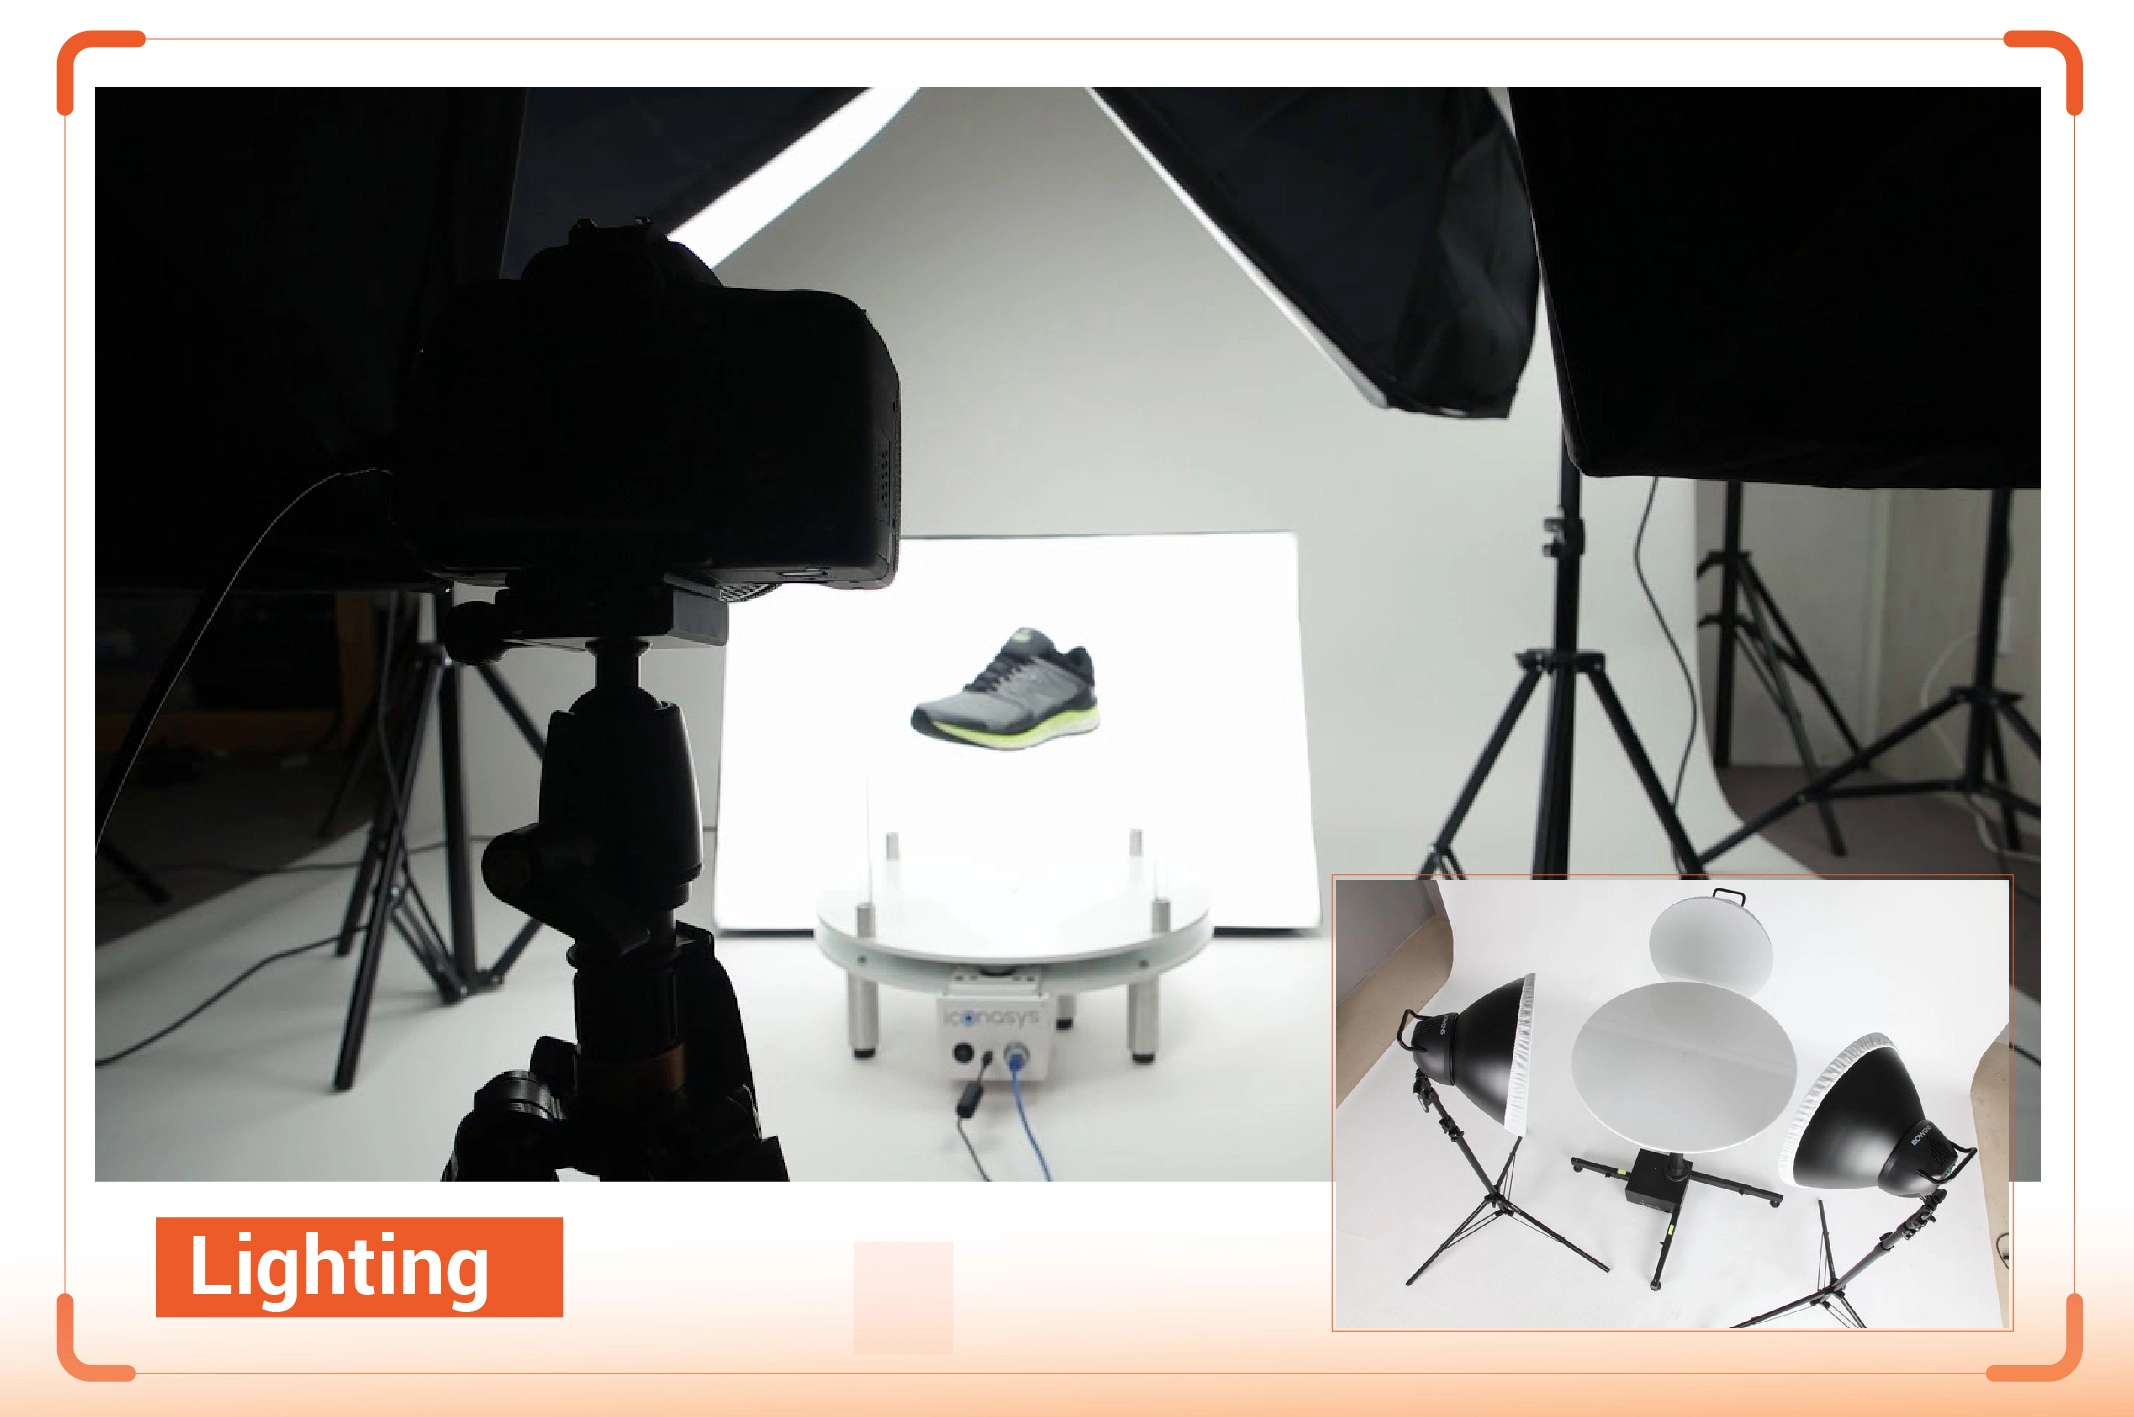
Before using the product photography turntable, you must prepare the studio perfectly. Here is how you should prepare it.

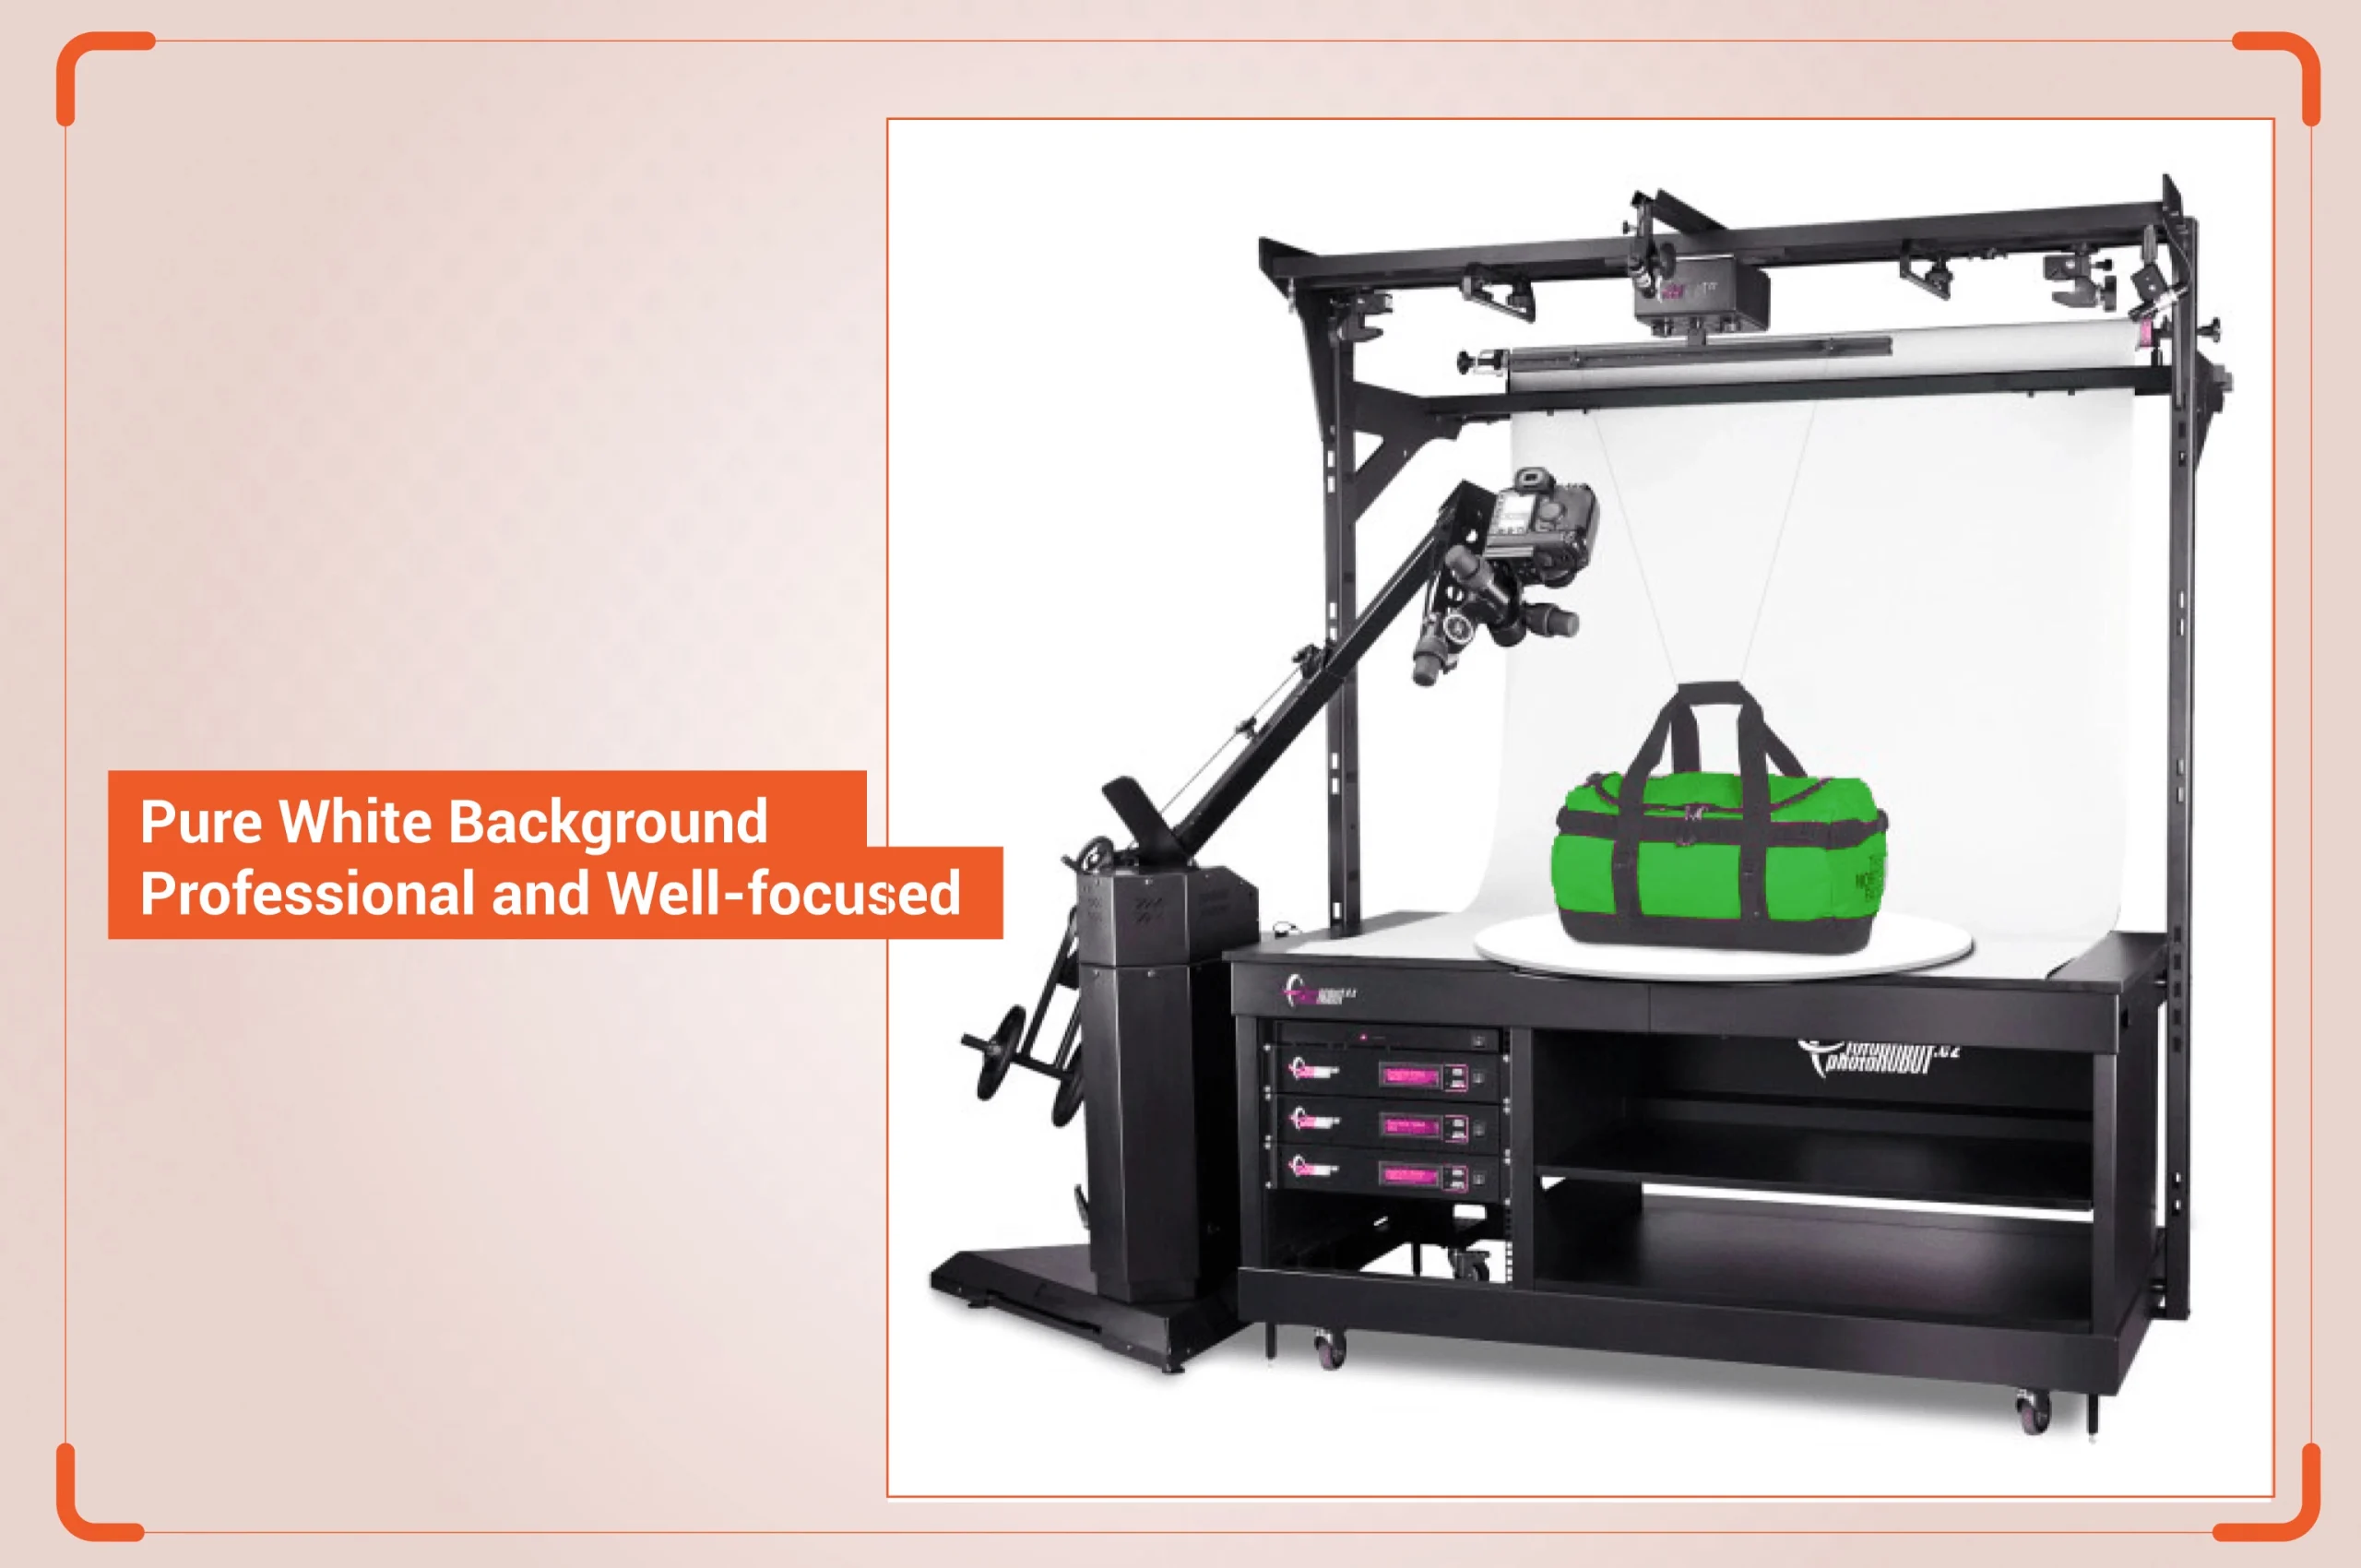
So, you have already learned how to select the right turntable for product photography and prepare a photography studio. The following are the steps to use a turntable to capture 360-degree product photos.
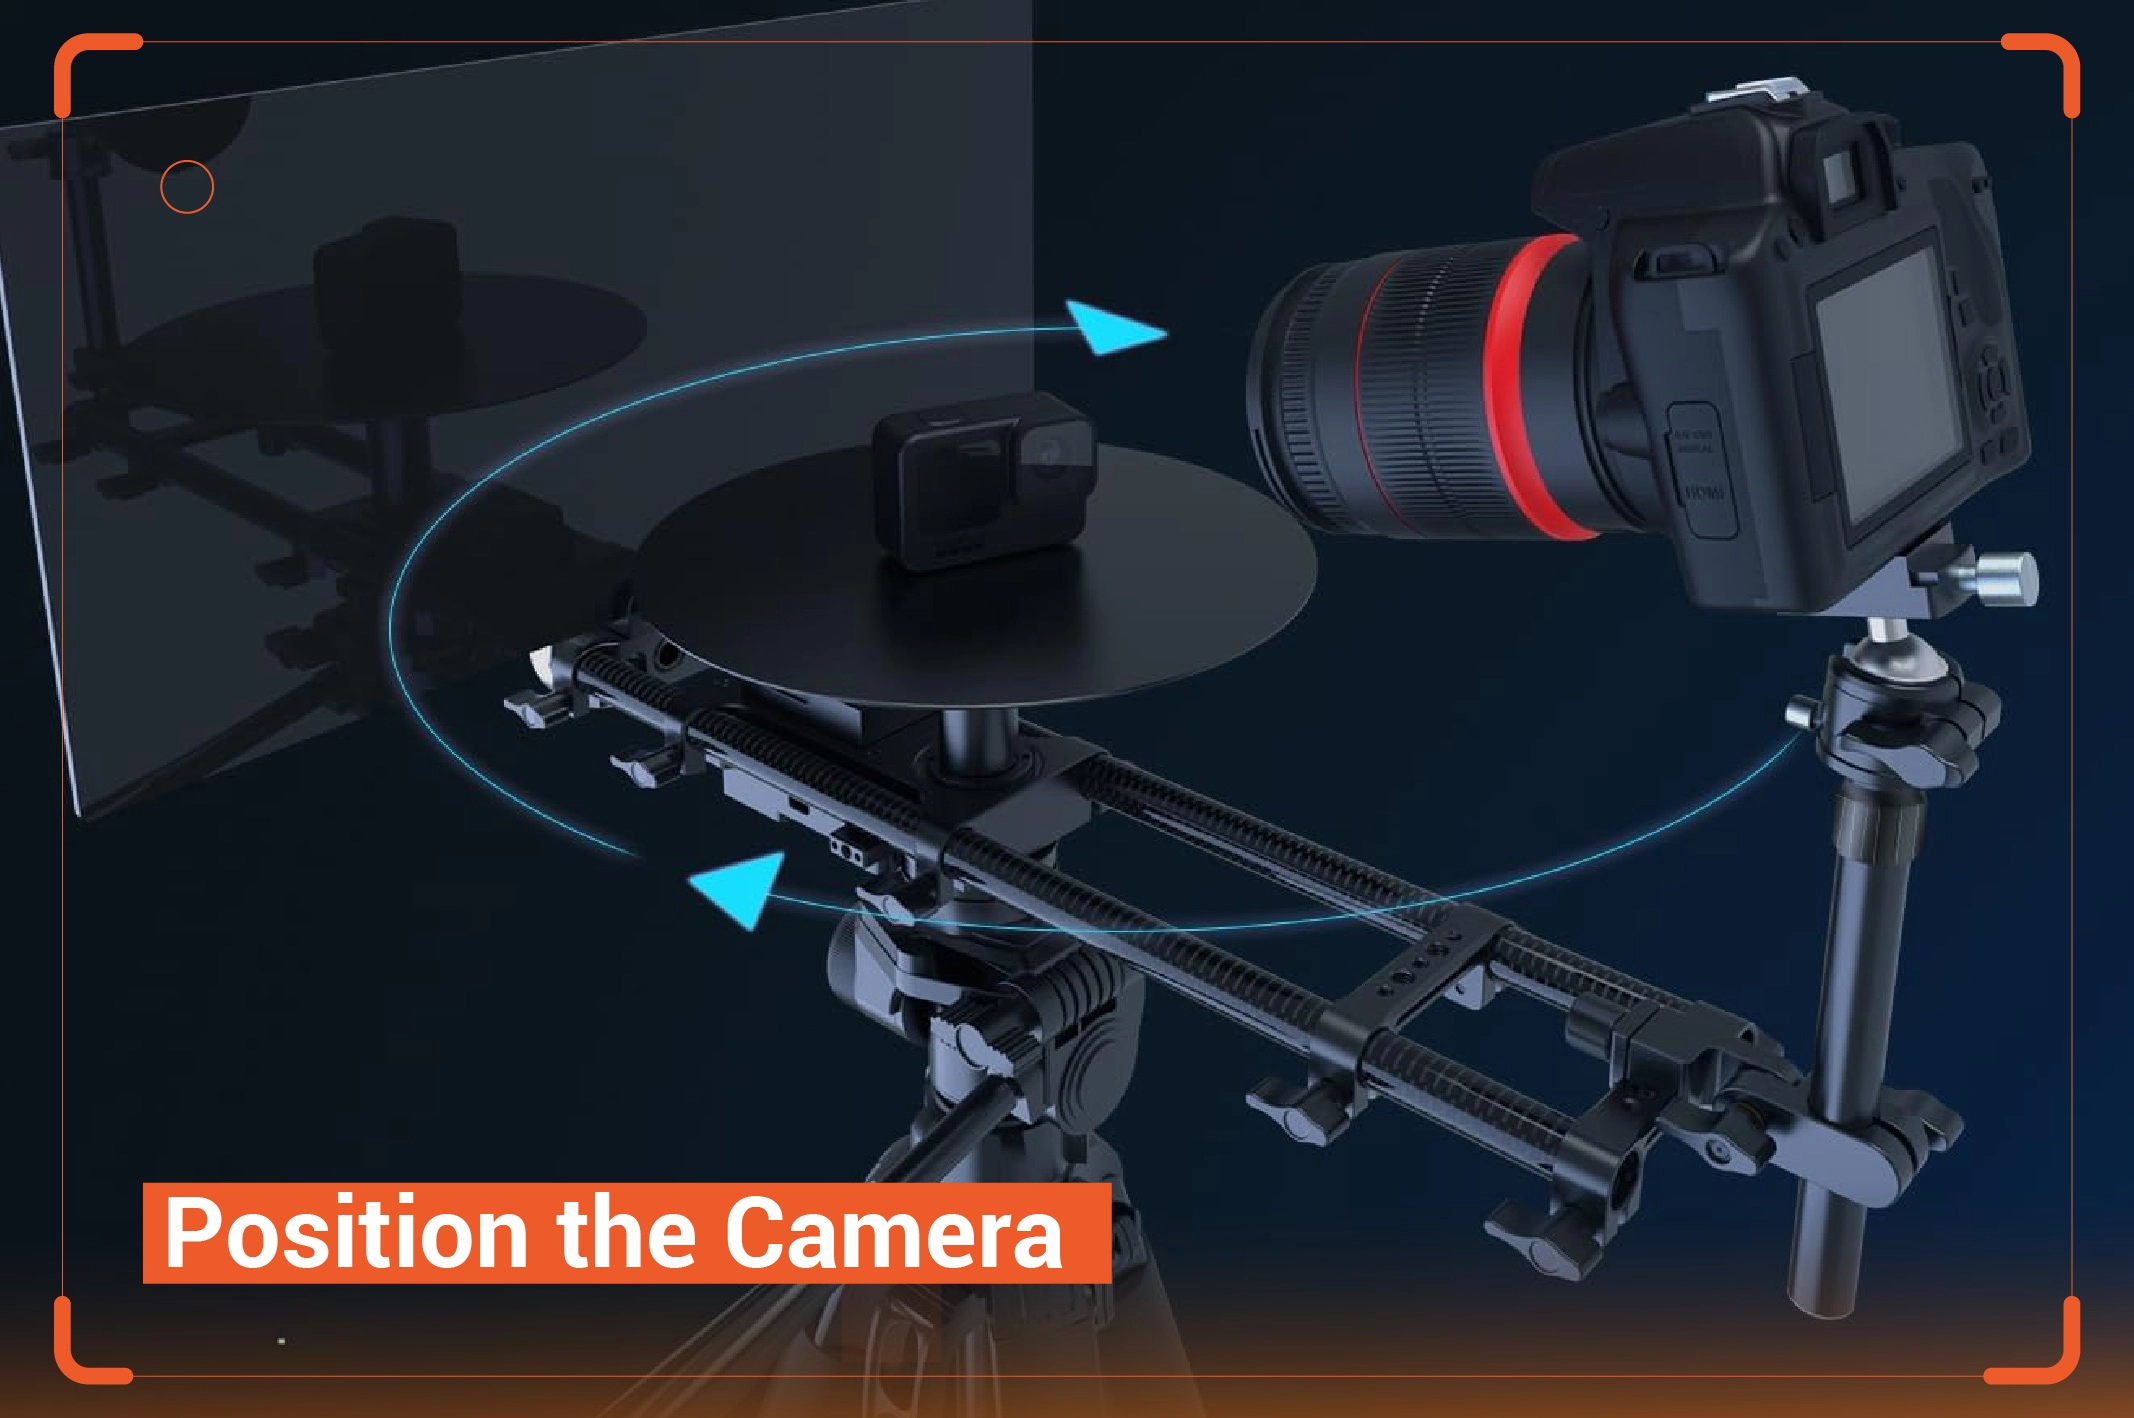
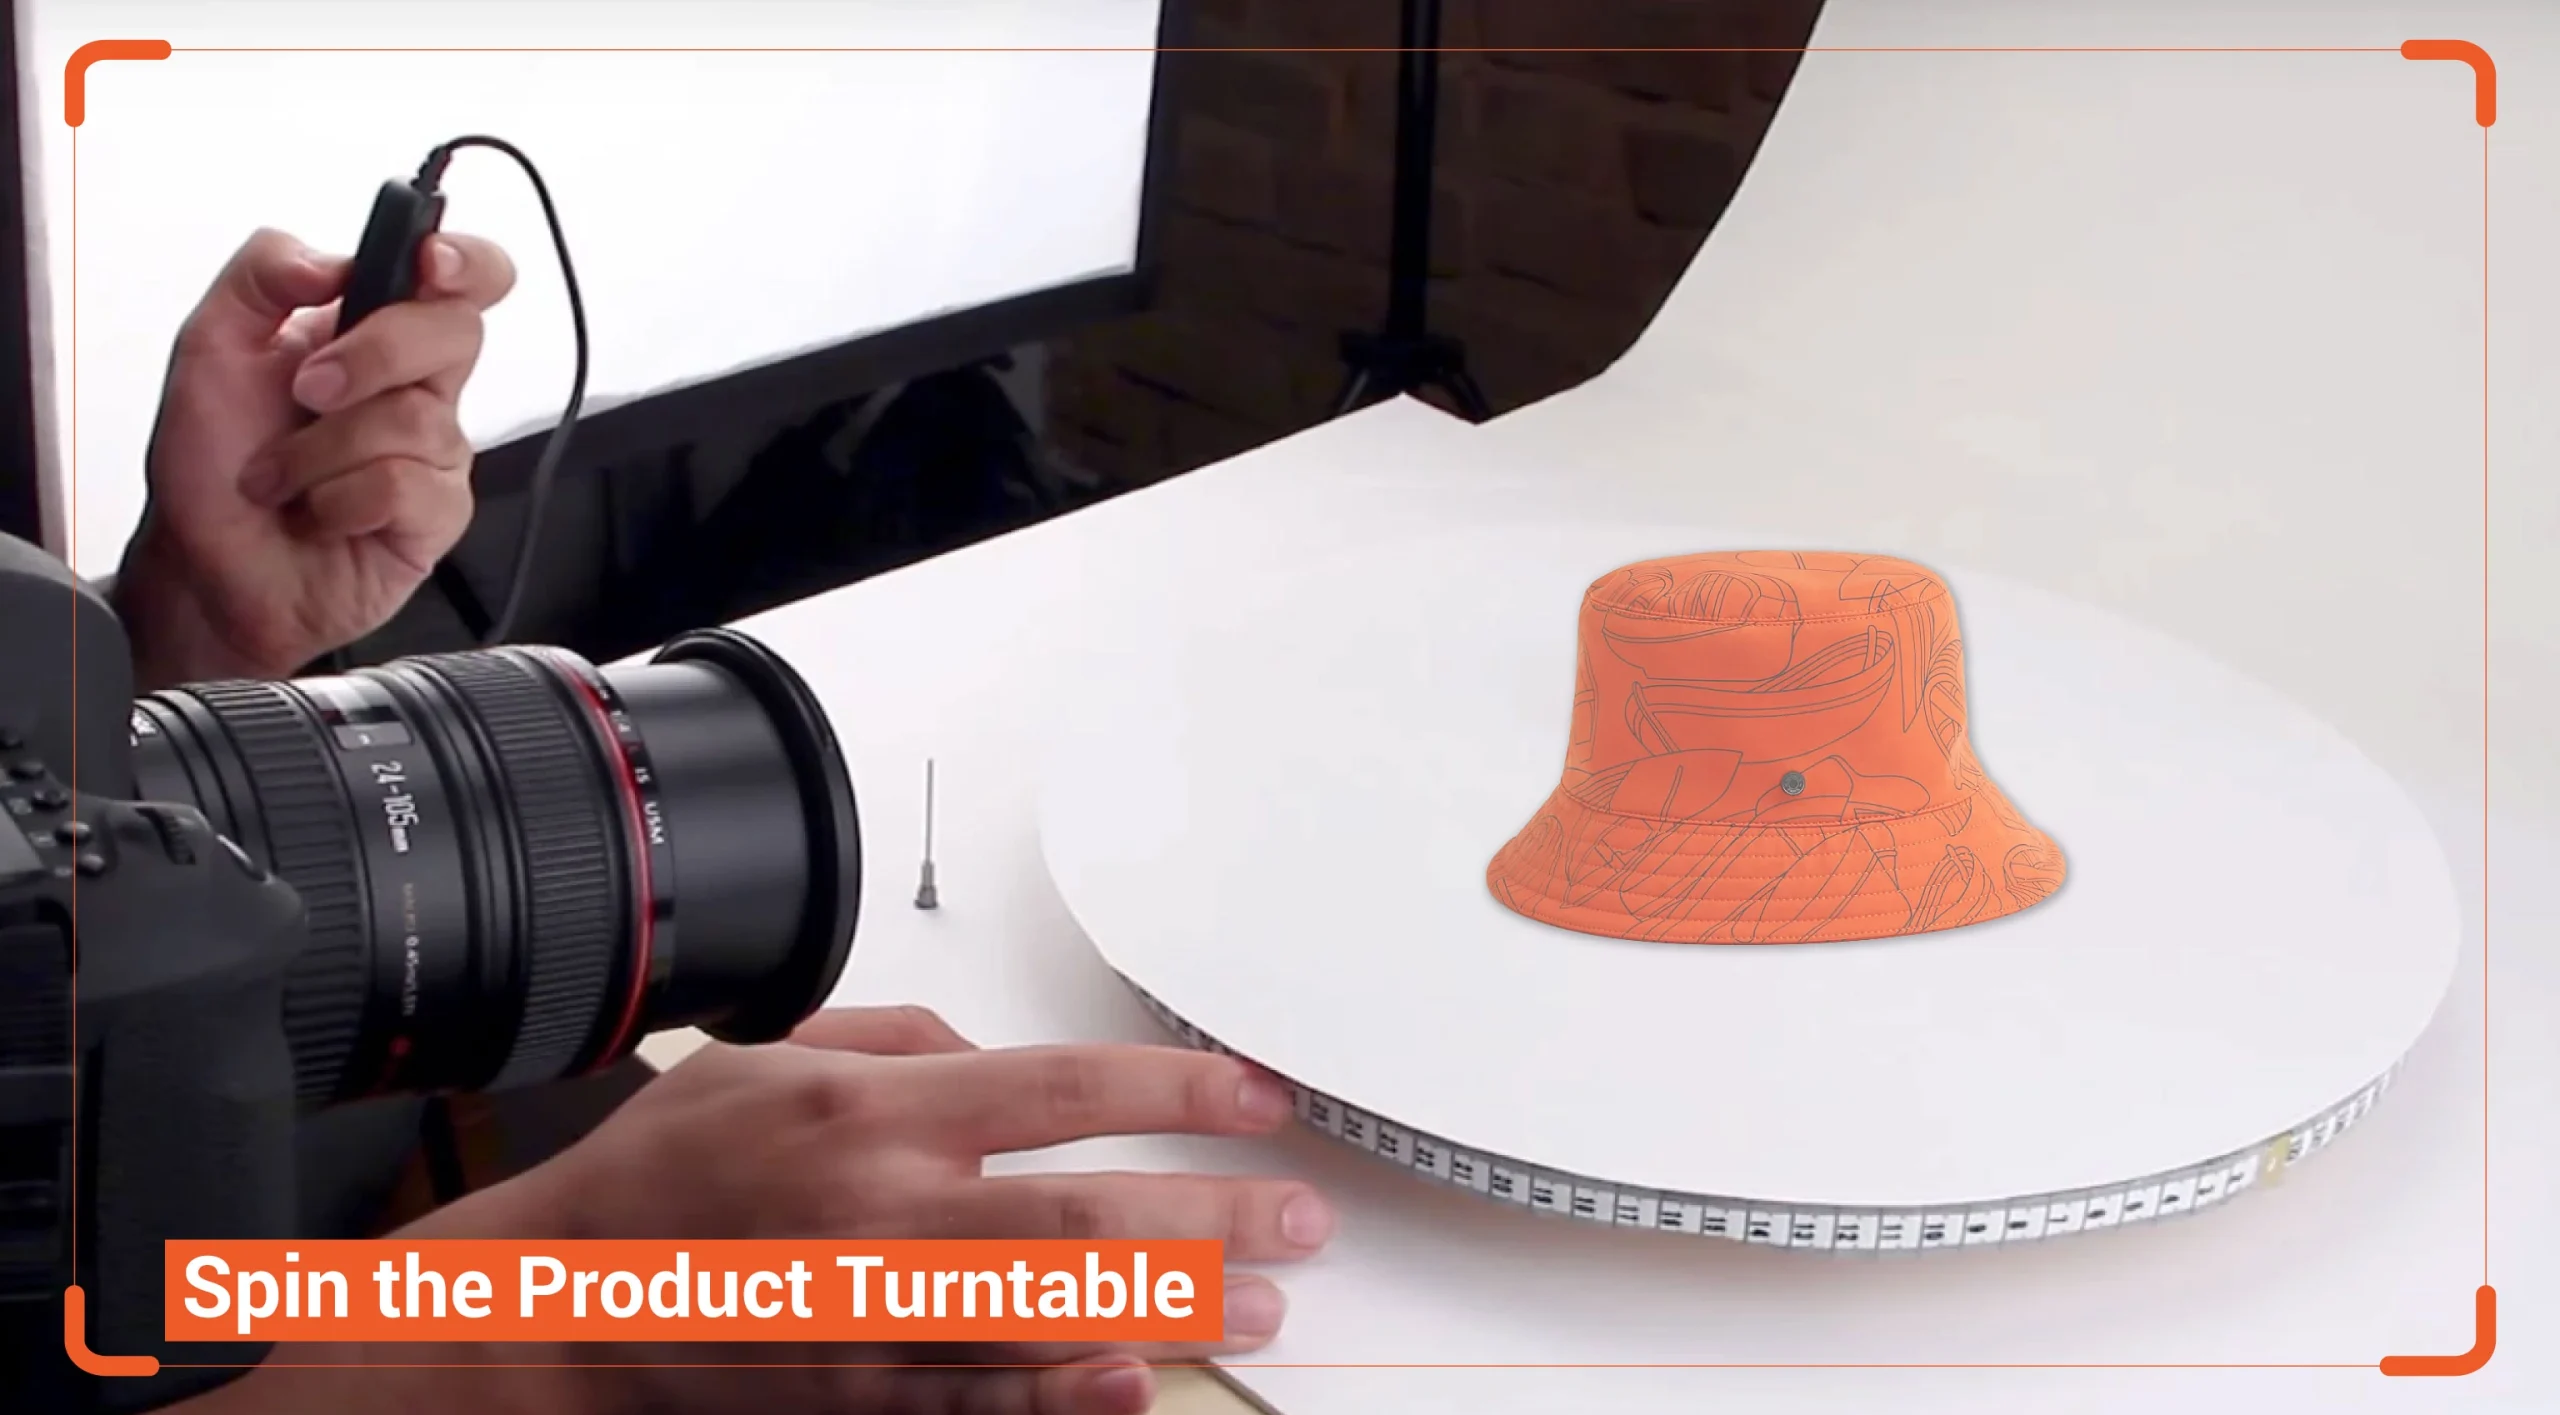
Different camera positions can affect the viewers’ perspectives. Experts recommend placing the camera straight from the middle point of the turntable. If you are confused about the center point of the turntable, use a measuring tape to find the sweet spot. Use a pencil to mark the point. Navigate to the “Grid Display” setting on your DSLR camera and activate the grid lines. Choose 4×4 or 6×6 grids, enabling you to place the item more effortlessly. Now, use the viewing finder option to line up the middle point of the viewfinder with the middle point of your turntable.
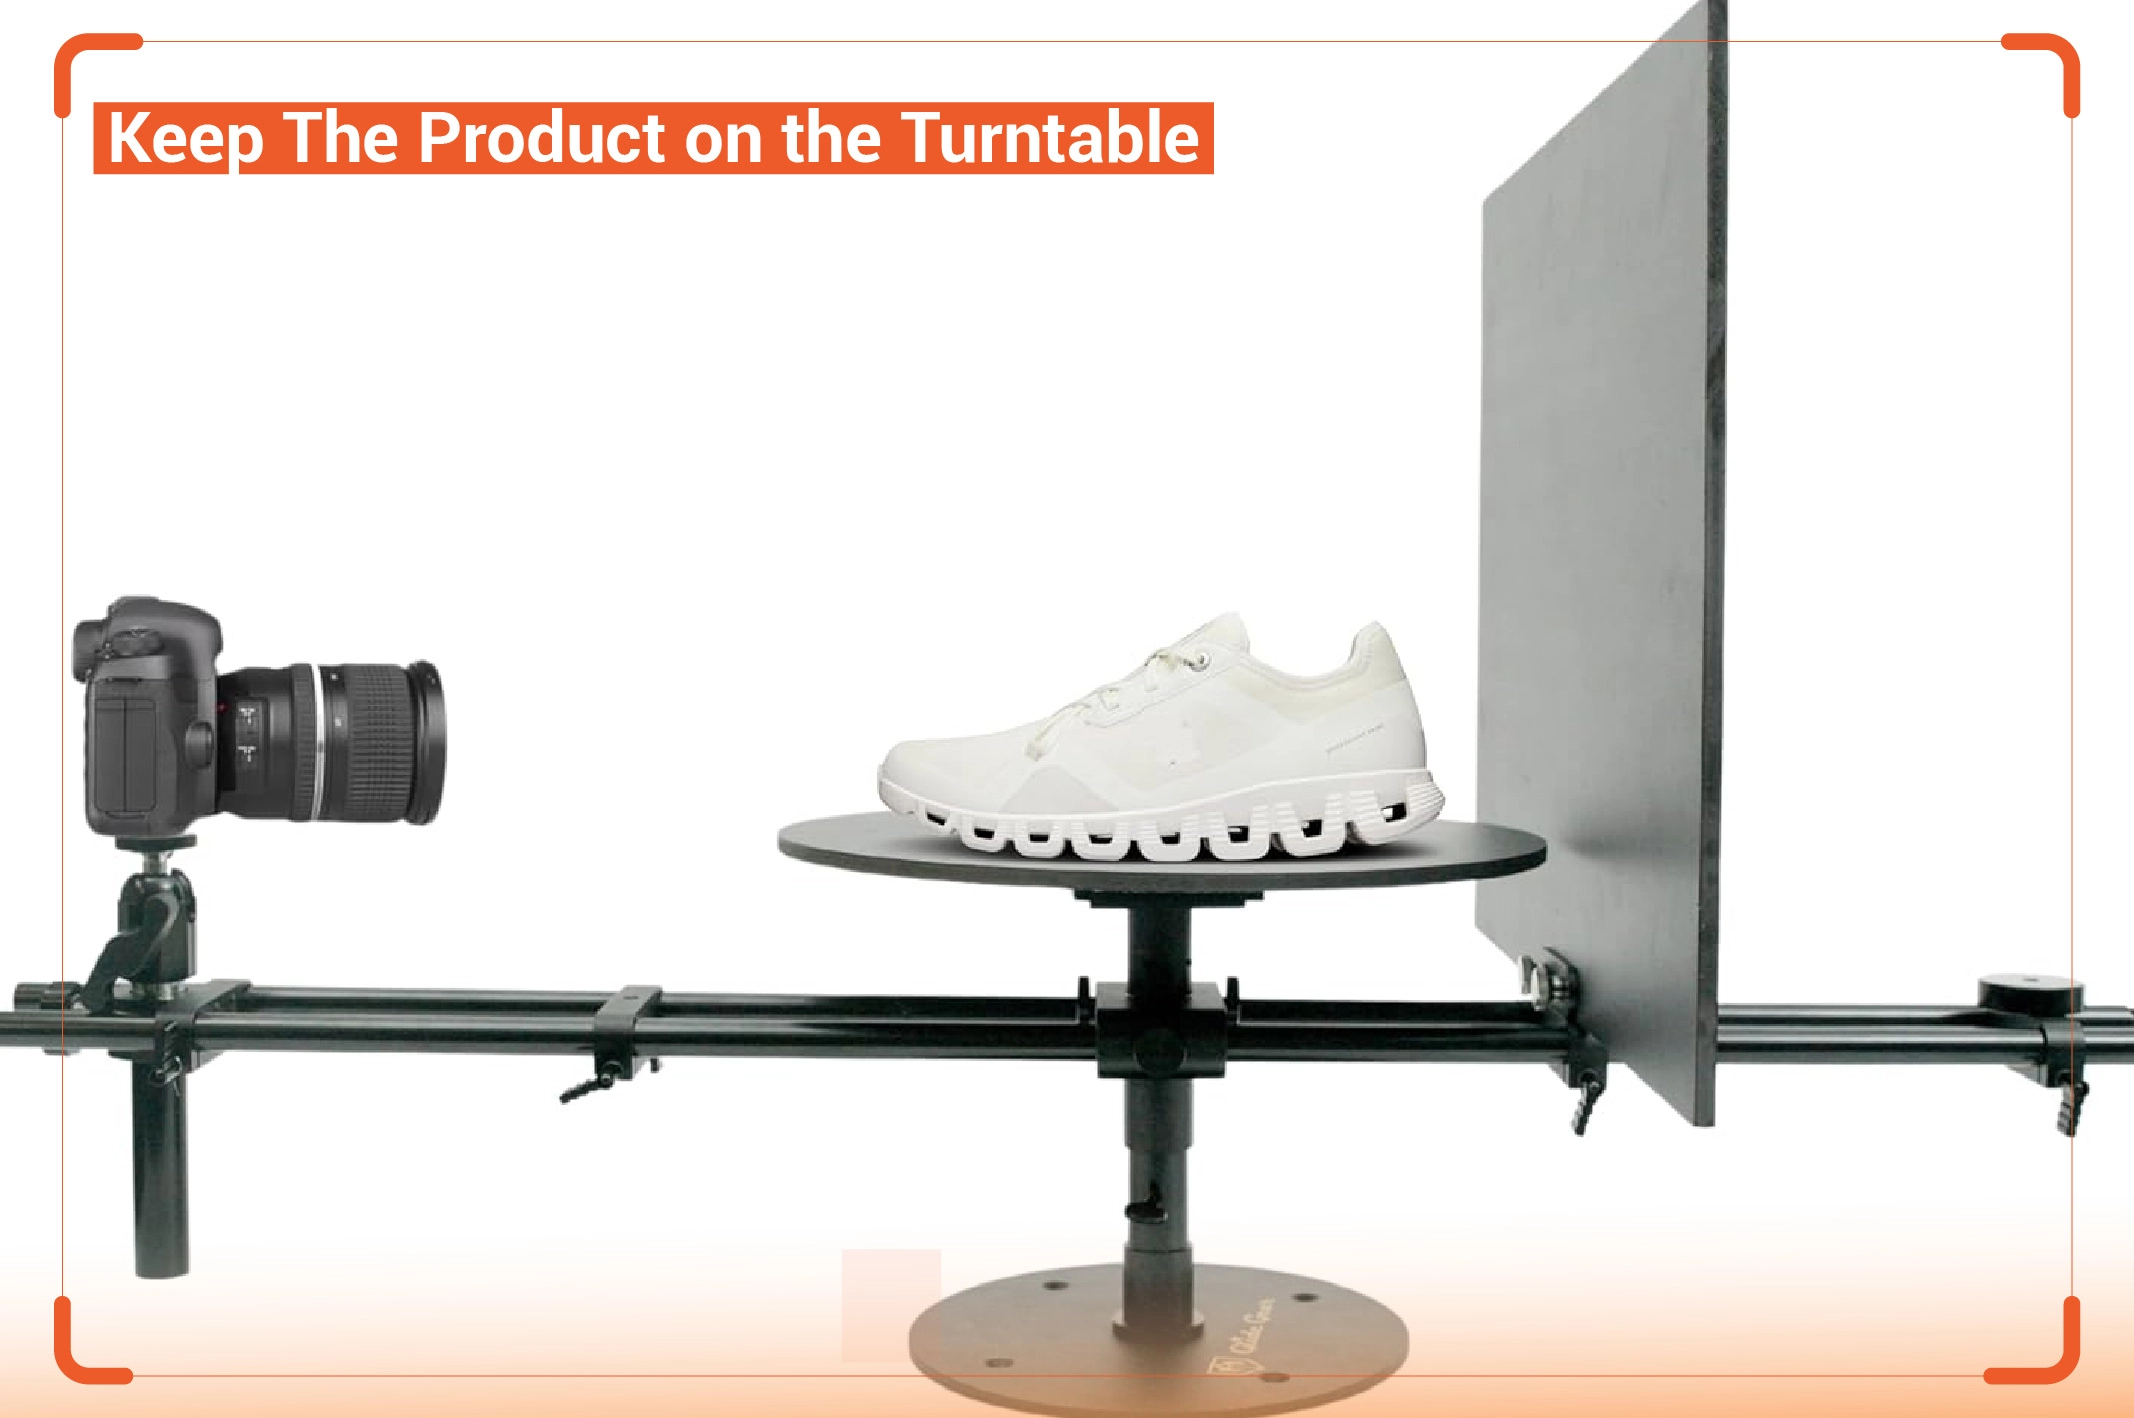
Place your e-commerce item on the marked area of the turntable. View the item from the camera grid lines. Adjust its position to keep it aligned at the middle point. Consider how much space is filled and empty on the left and right sides, as well as the upper and lower areas. Its position should be well-balanced. This helps the item spin smoothly without falling off during rotation.
For a manual turntable, use your hands to rotate the table in small increments. Spin the turntable carefully. Be careful not to overdo it. The item will move from left to right. For an automatic turntable, press the switch or use the remote control to turn it on. A few might be controlled using an app. Some may have speed control settings. Select a moderate speed for smooth, steady rotation.
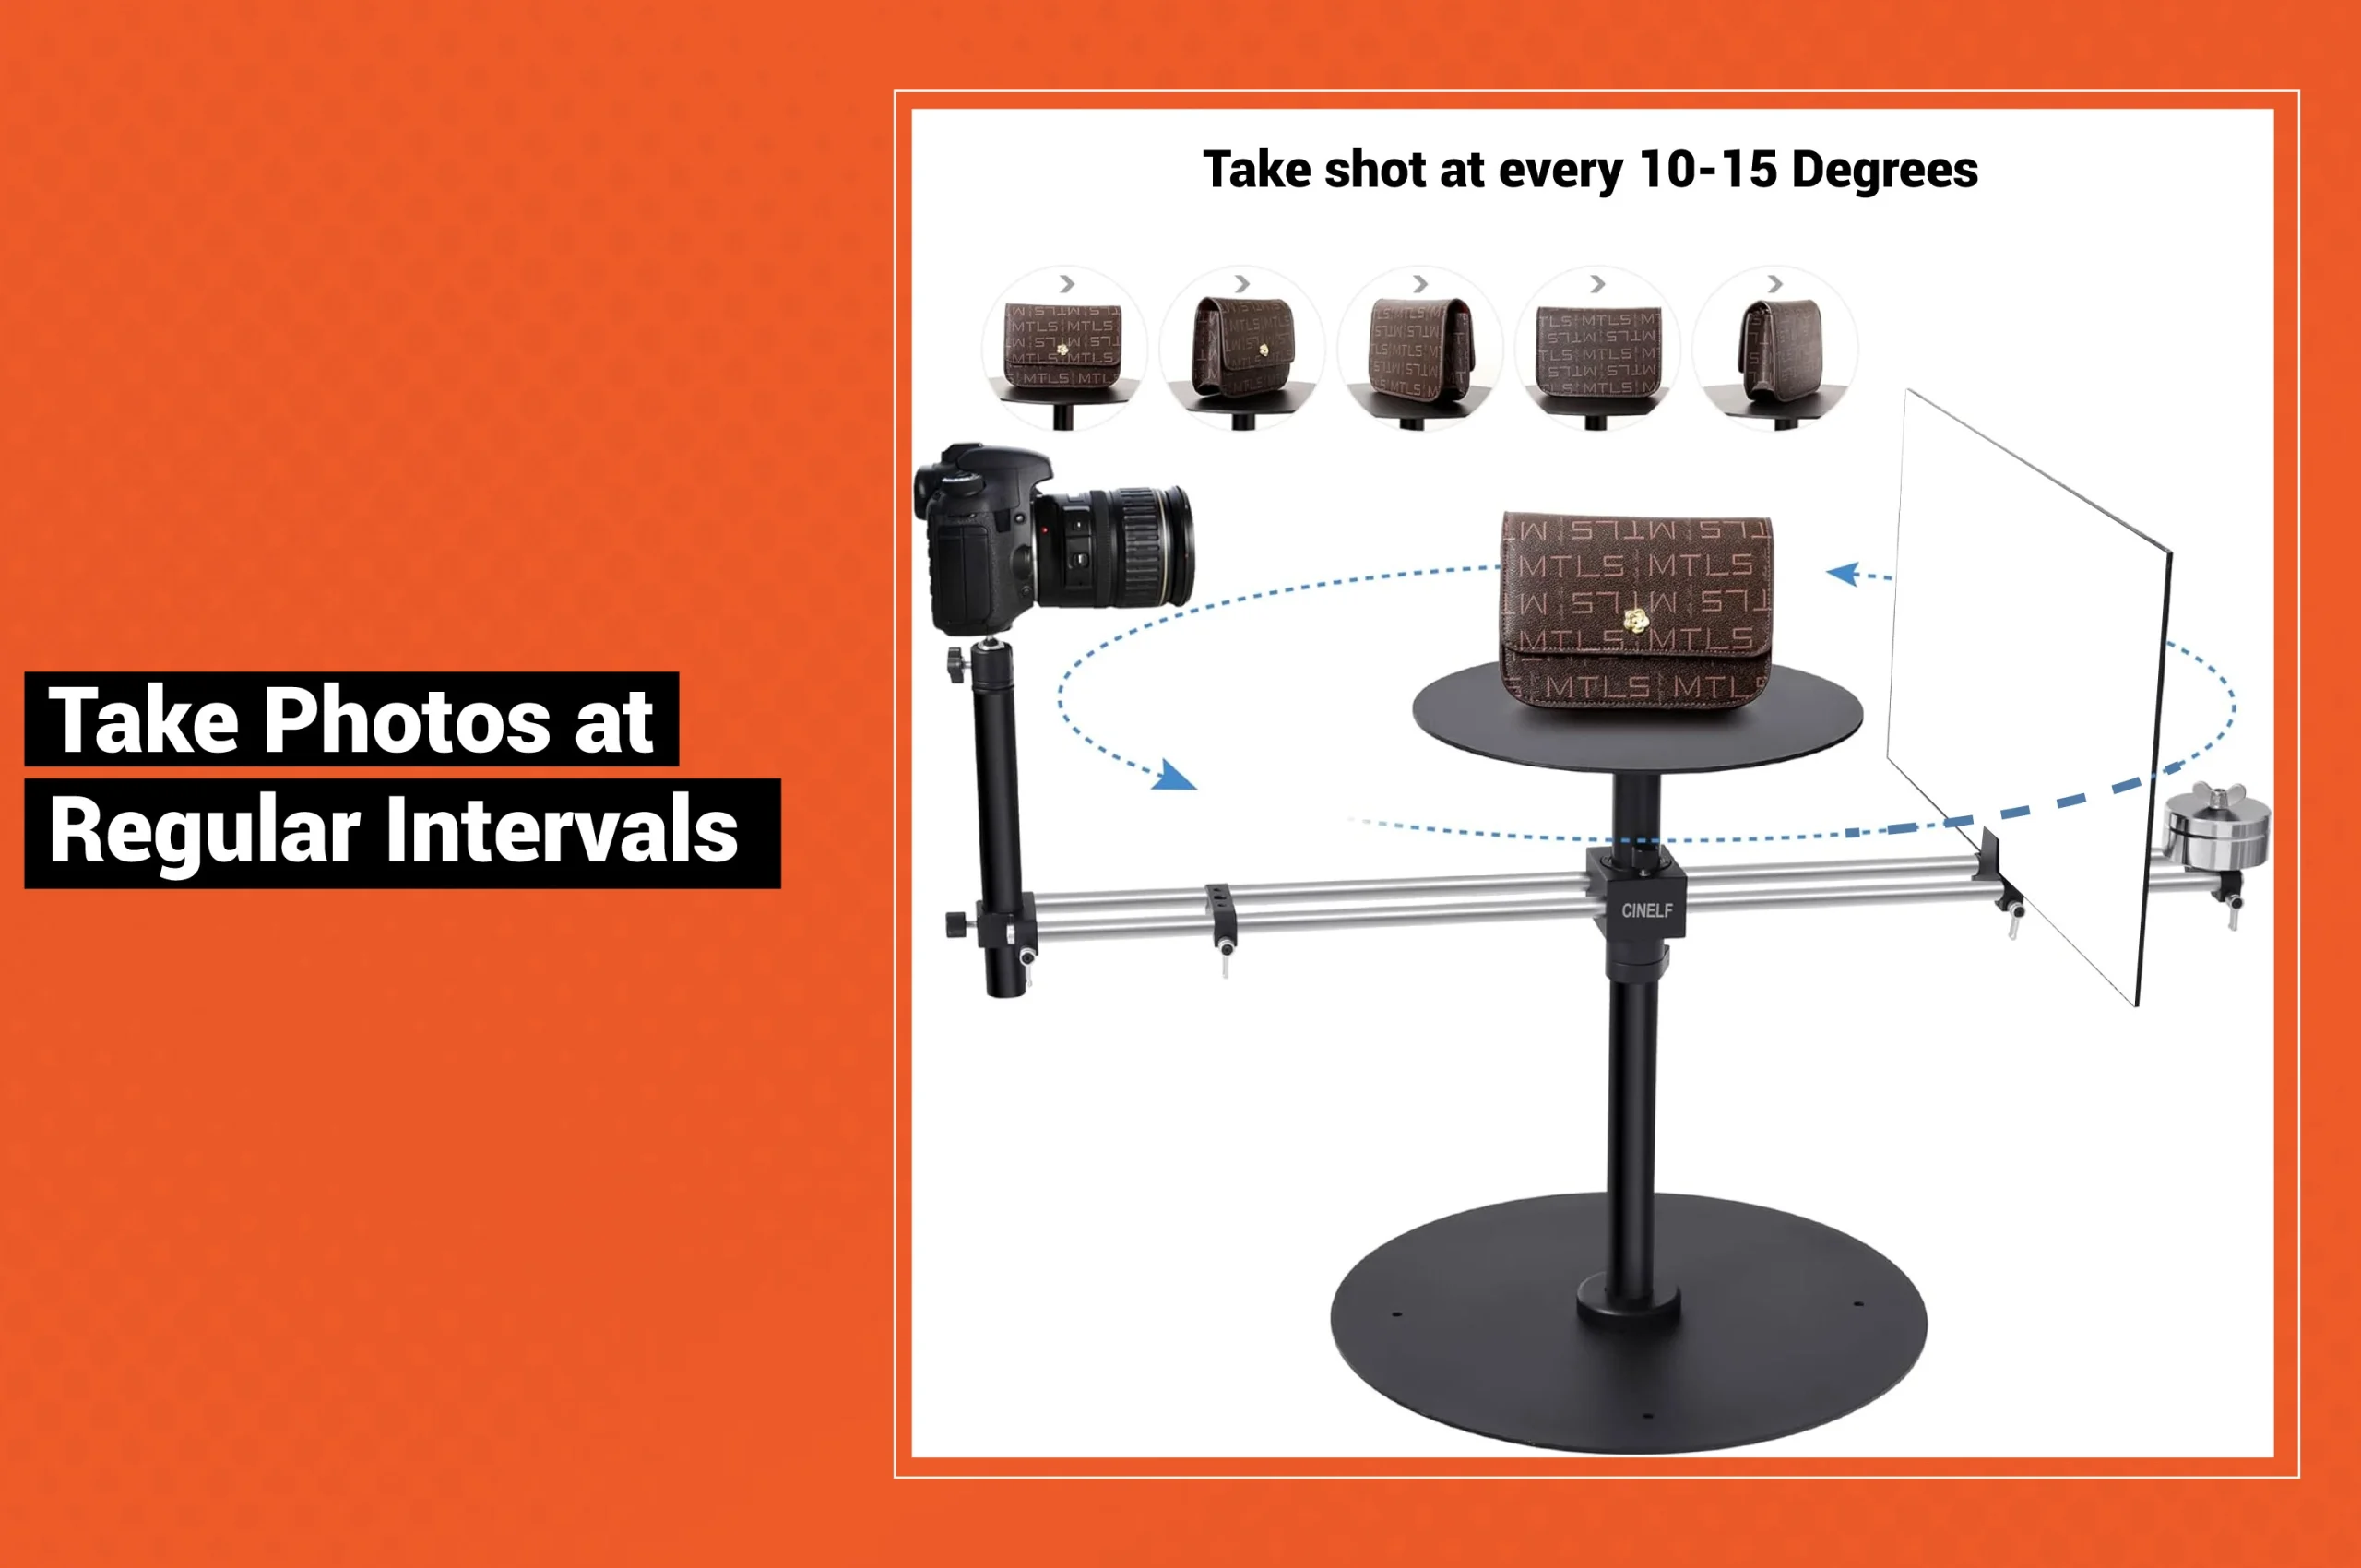
As the turntable rotates, take photos at each key angle. But how many shots did you take? It depends on how detailed you want the 360 views. Generally, experts recommend taking images for every 10–15 degrees. Make sure the item doesn’t move from the central point of the turntable.
Otherwise, it will create inconsistent focus and an uneven 360-degree view. Don’t forget to keep the camera well-focused during the whole rotation. Review the captured images to ensure consistency. The item must look centered on images with even lighting. If they are not up to the mark, adjust and take more shots.
Do you think your job is done after taking product shots from different angles sequentially? NO! The main task still has yet to be done, right? You have to make 360-degree images. Let’s learn how to do it!
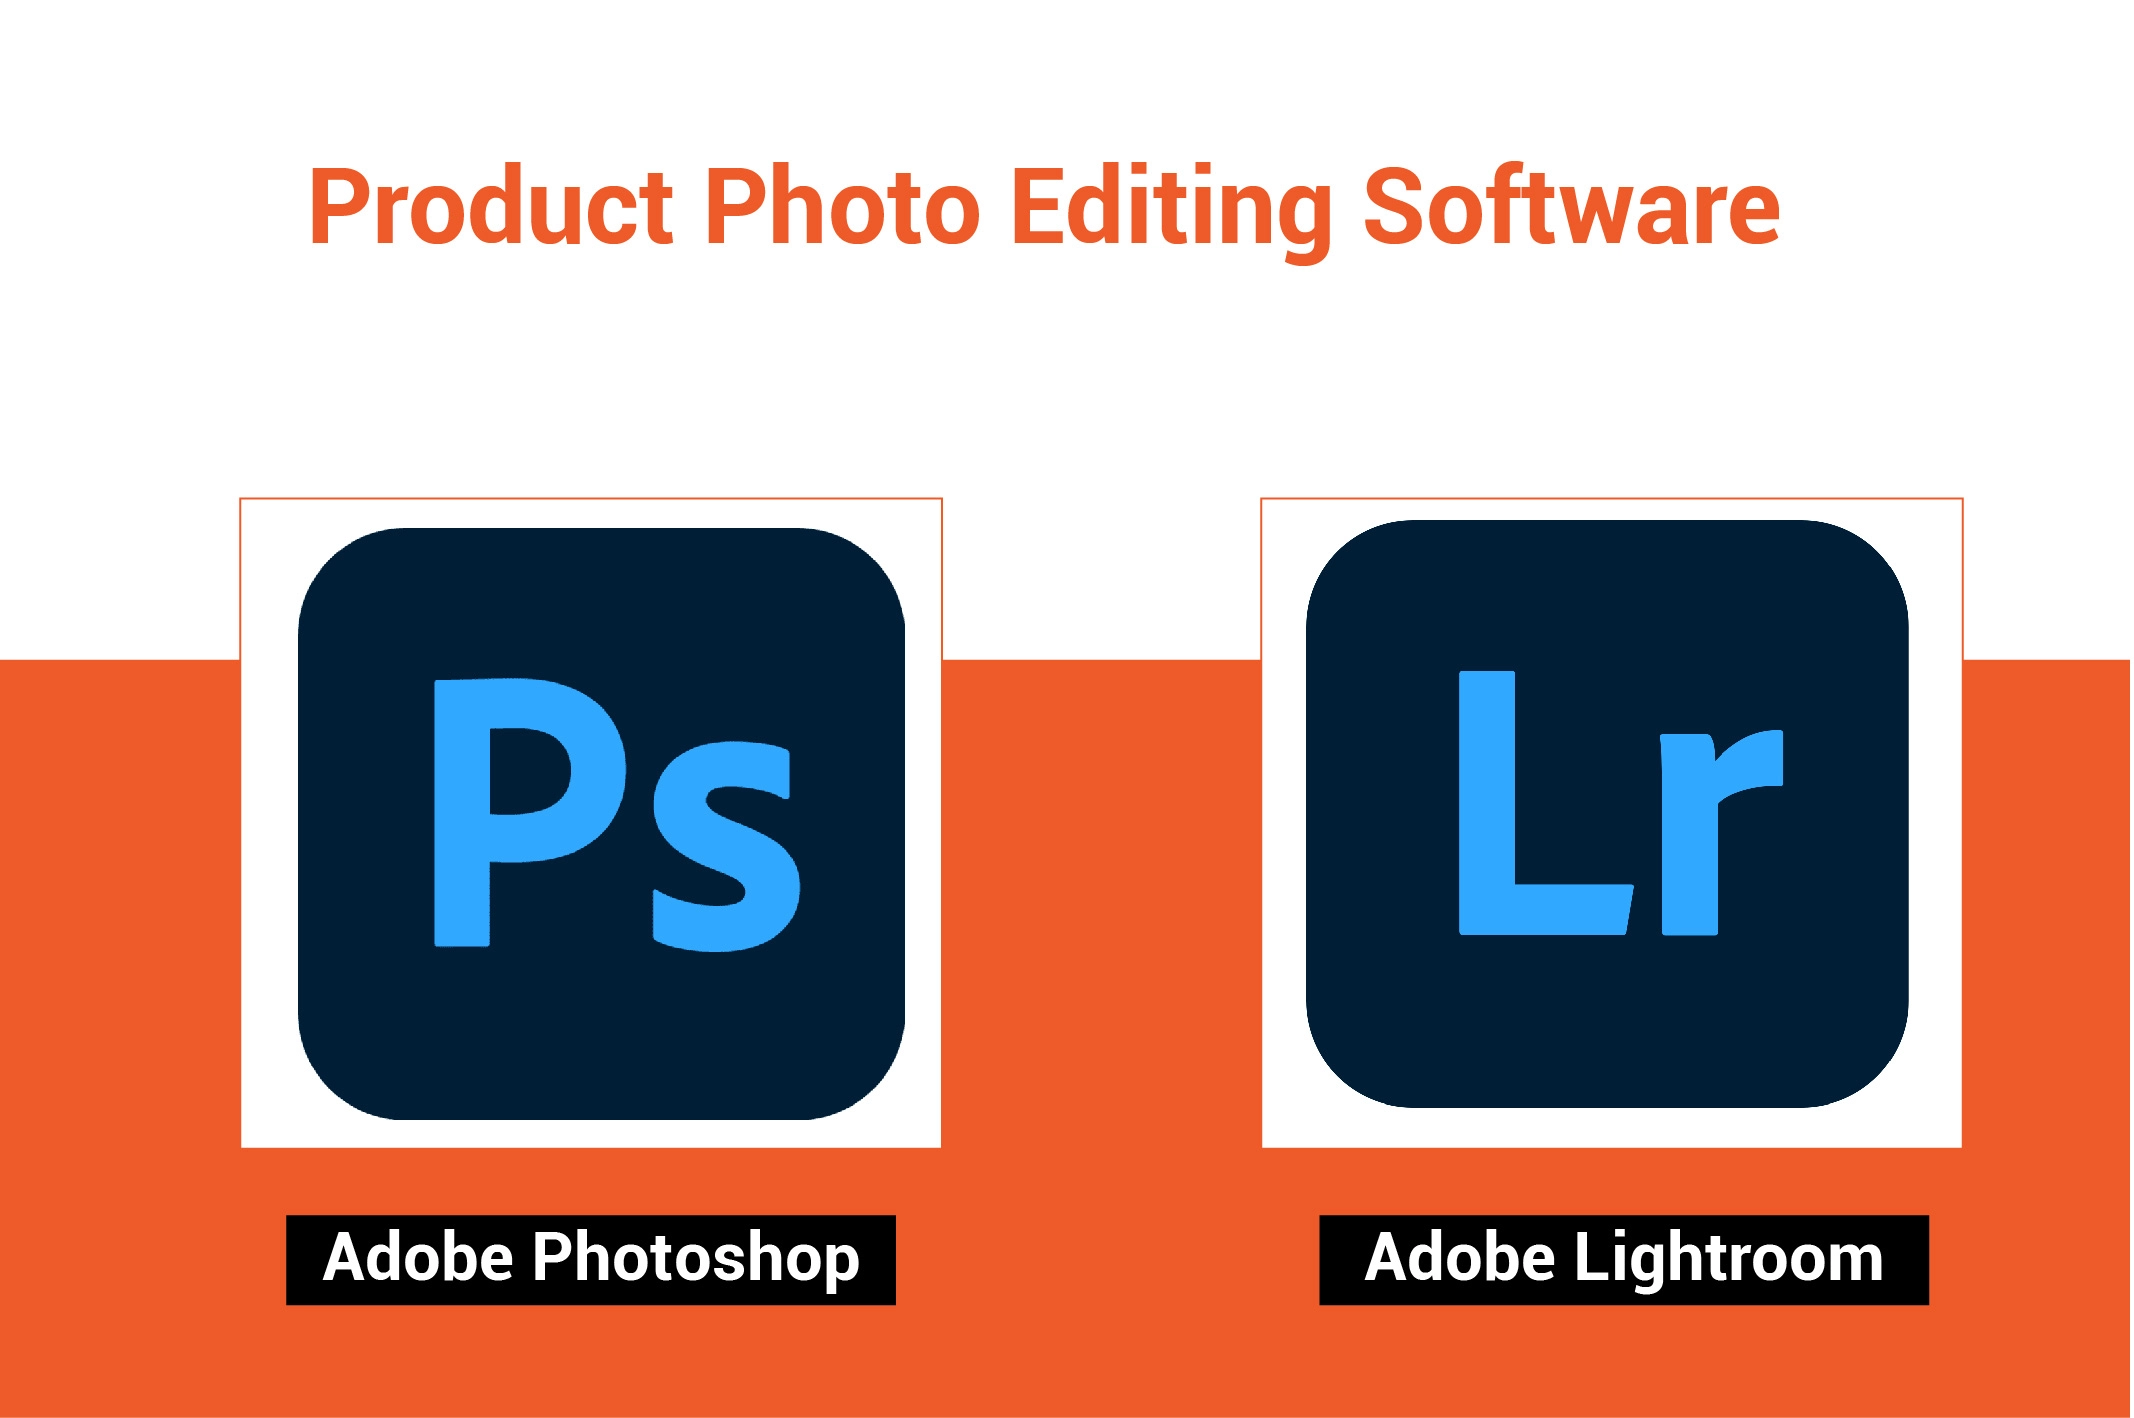
Once you take perfect shots, upload them onto your computer. So, what software should you use to edit e-commerce images? Adobe Photoshop and Lightroom are the top two leading industry-standard photo editing software.
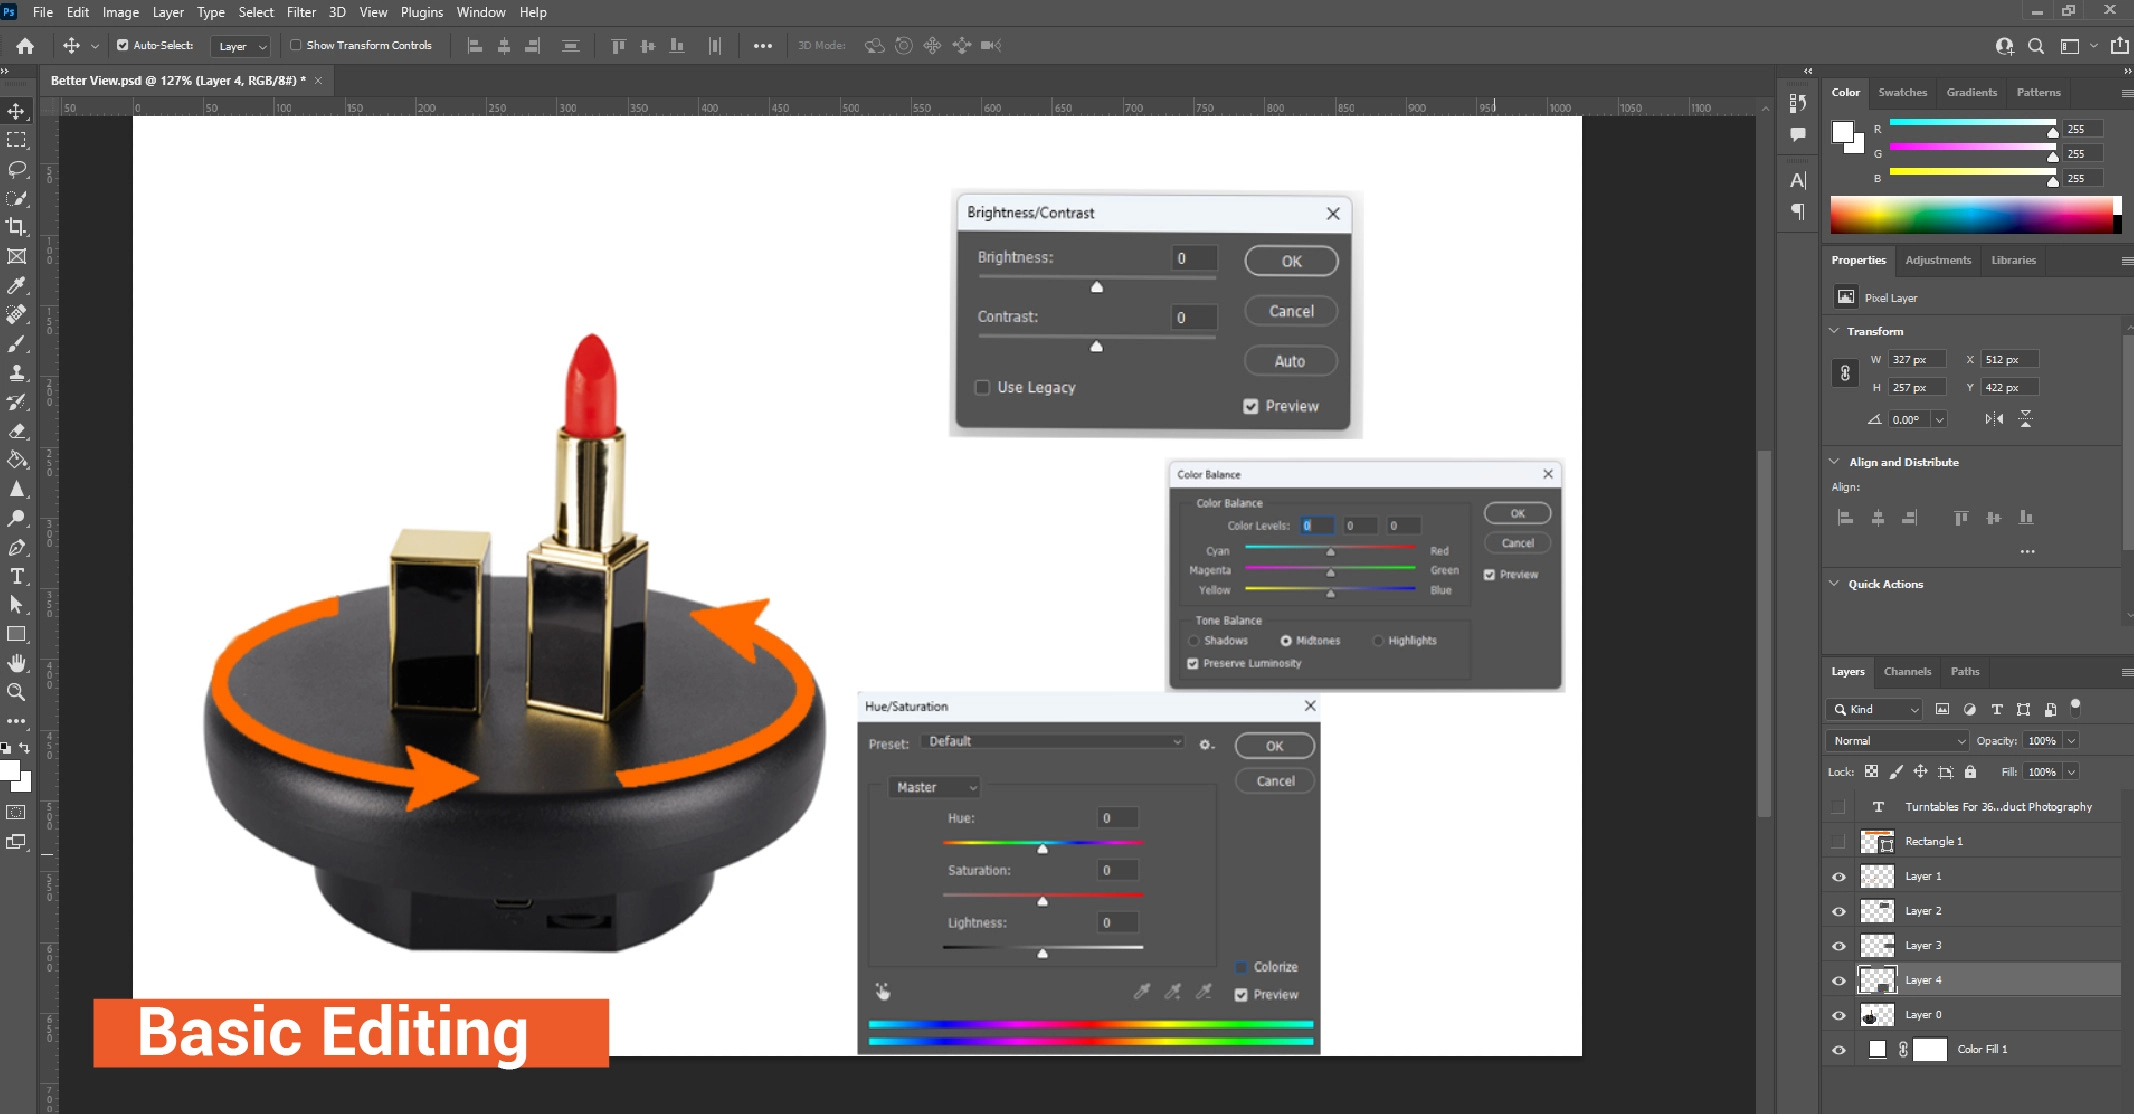
Your e-commerce shots may require basic adjustments like cropping, color correction, white balance, shadow adjustments, etc. You can use Adobe Photoshop to edit each one individually. Alternatively, use Adobe Lightroom to apply similar edits to multiple images simultaneously.
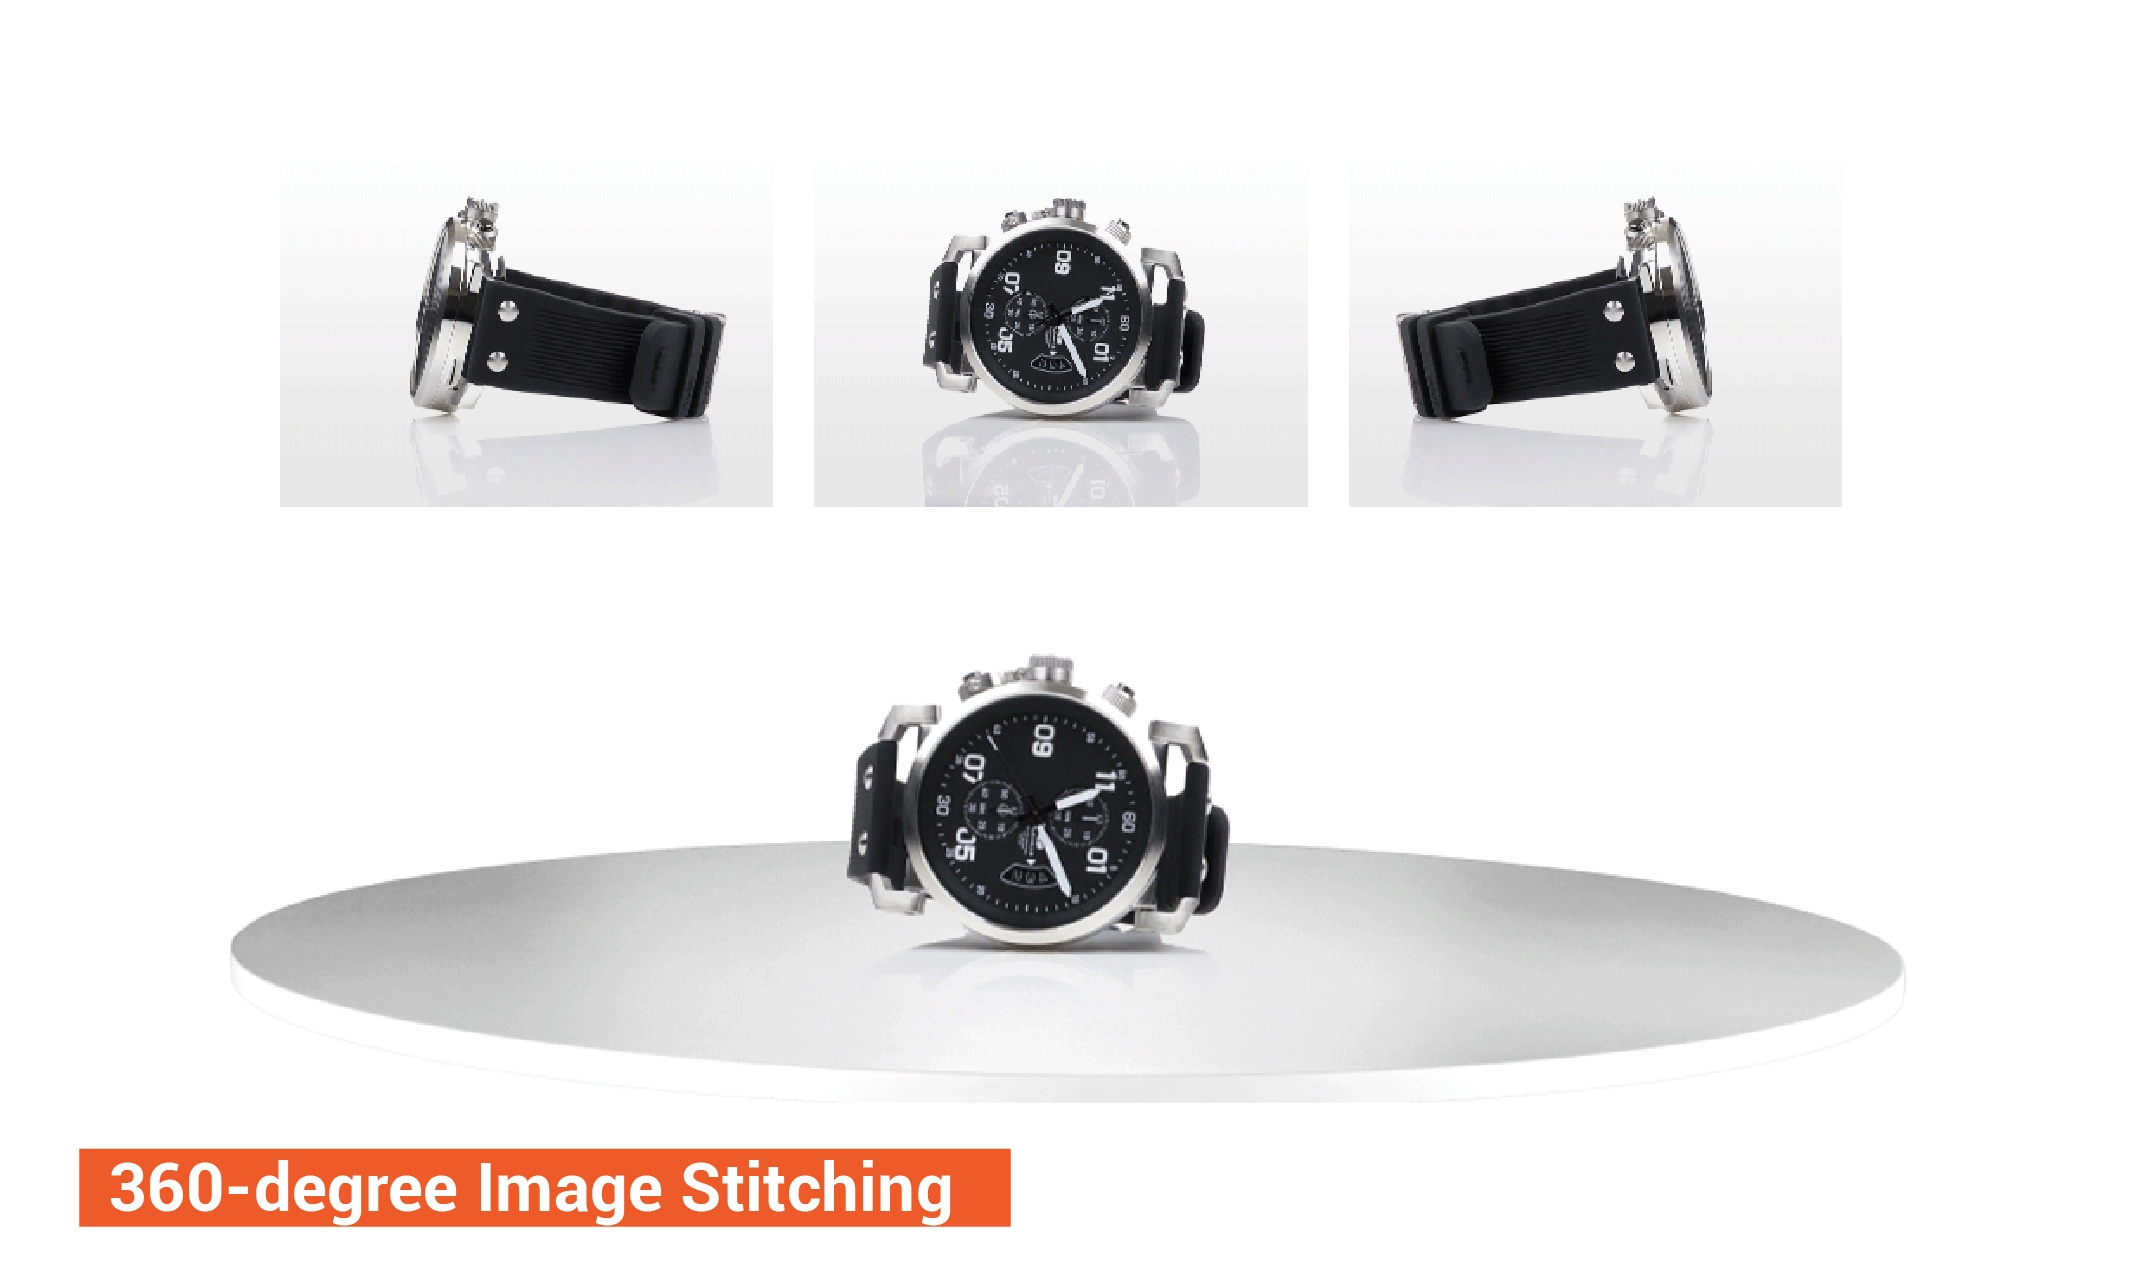
Once all item photos are perfectly edited, merge them together to create a 360-degree photo. The final output should look like an interactive spinning visual. But what software should you use to make 360 photos from multiple images? You can use PhotoRobot or Iconasys to stitch several images and create a perfect 360-degree image.