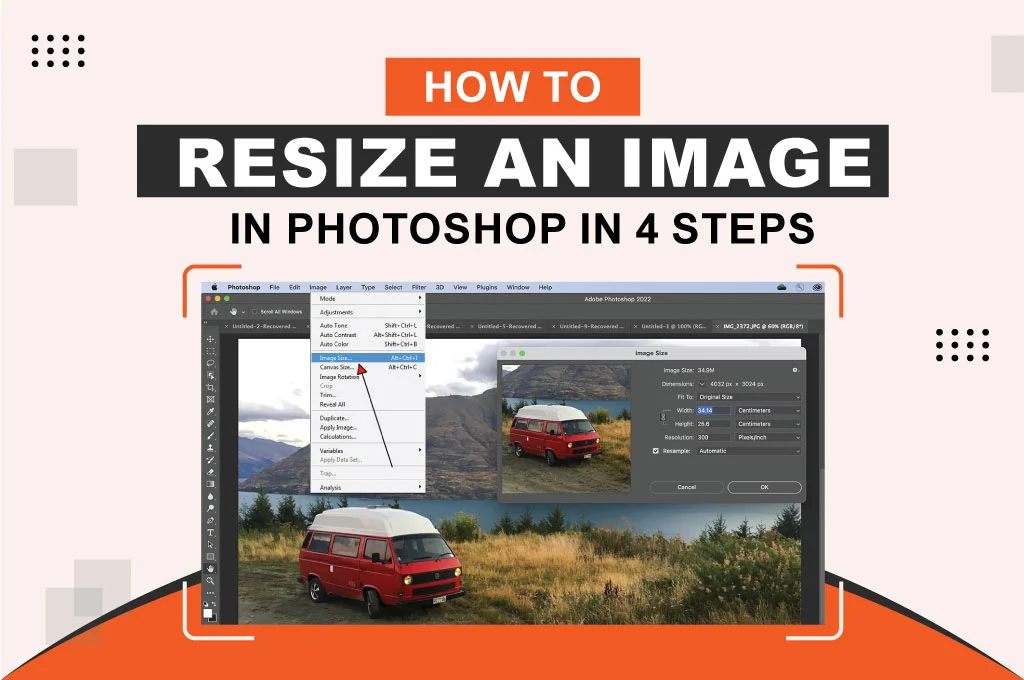
Altering an image file size allows you to make it smaller or larger without affecting the main visual content. However, it affects the original file size. People generally rescale photos to decrease the file size for easier sharing and better optimization. Get a brief overview of how to resize an image in Photoshop step by step.
Resize an Image in Photoshop Step-by-step.
The procedure for changing picture sizes in Photoshop is the same for all purposes.
The following are the sequential steps to scale images in Photoshop.
Step 01: Import the Photo
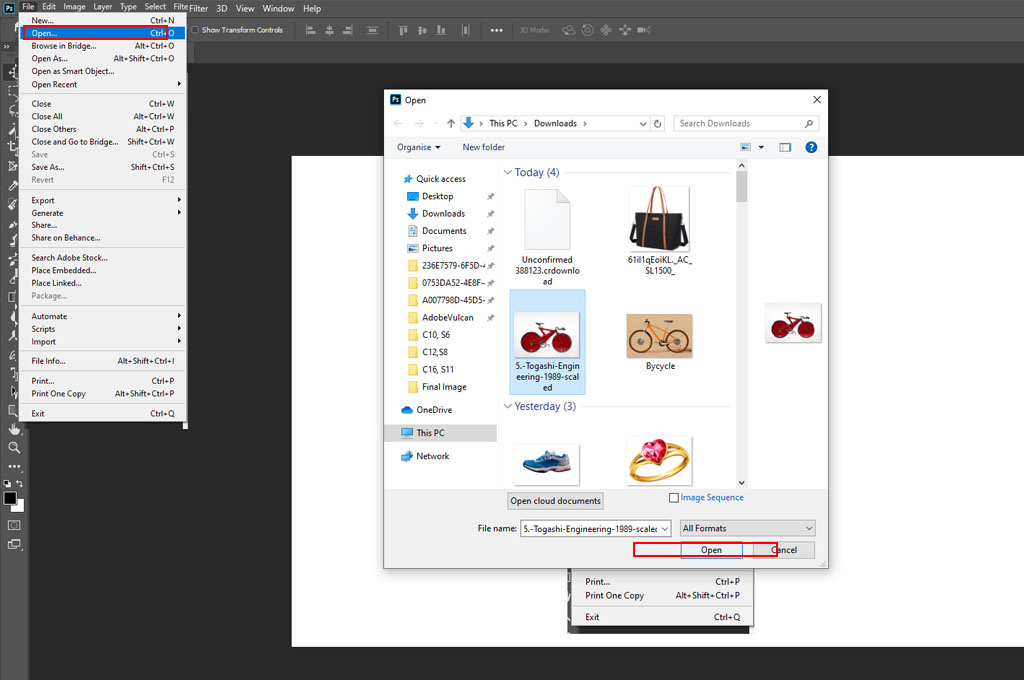
- Open the Adobe Photoshop software on your Windows or Mac. Import the image you want to change size.
- Hit the ‘File’ icon from the upper menu panel and select the ‘Open’ option. Finally, import the photo.
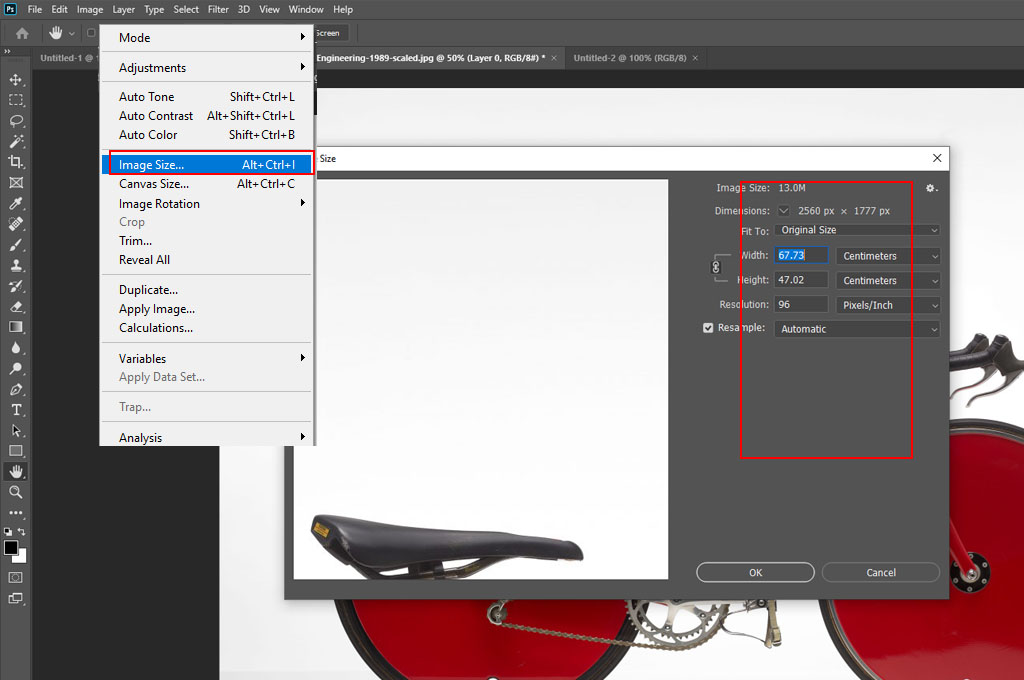
- When the picture appears in the Photoshop software, head to the top menu bar again. Hit the ‘Image’ icon and choose the ‘Image Size’ option from the drop-down lists.
Step 02: Modify the Photo’s Dimensions
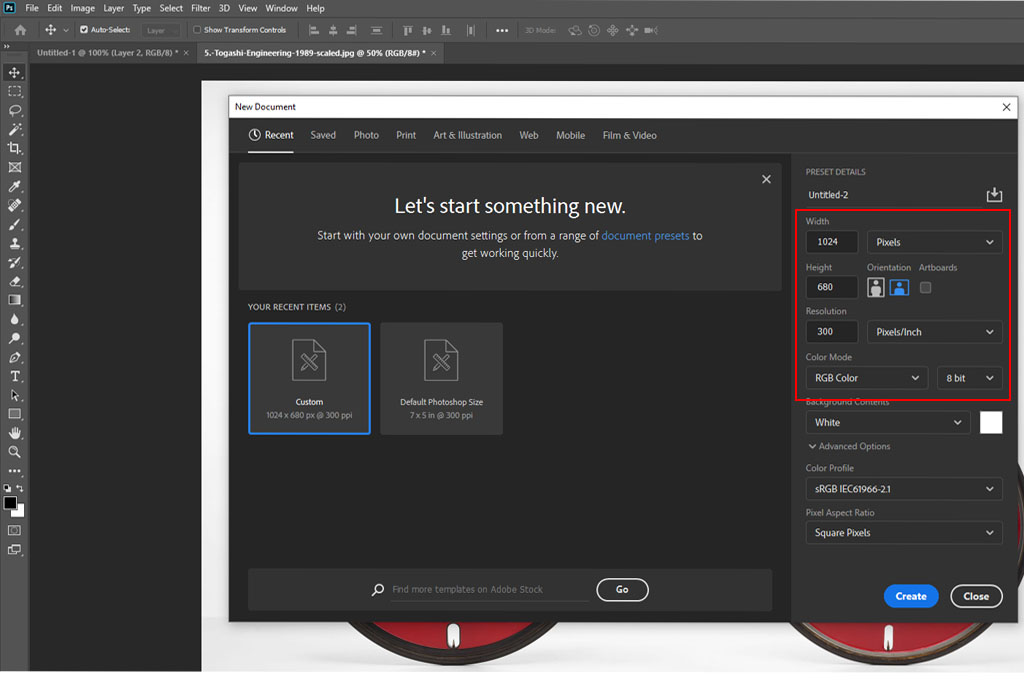
- A new window named ‘Image Size’ will pop up. Set the Height, Width, Resolution, and Resample based on your requirements and preferences.
- You can set the Height, Width, and Resolution of the photo data in different units of measurement, like percentage, pixels, inches, centimeters, millimeters, etc.
- Before choosing a particular option, define your objective. For example, if you are making a thumbnail for a website or social media. You may reduce the file percentage by 50% for faster loading.
- Likewise, when designing a business card, adjust the visuals in centimeters to match the standard business card dimensions.
Step 03: Apply the Scale Styles Option
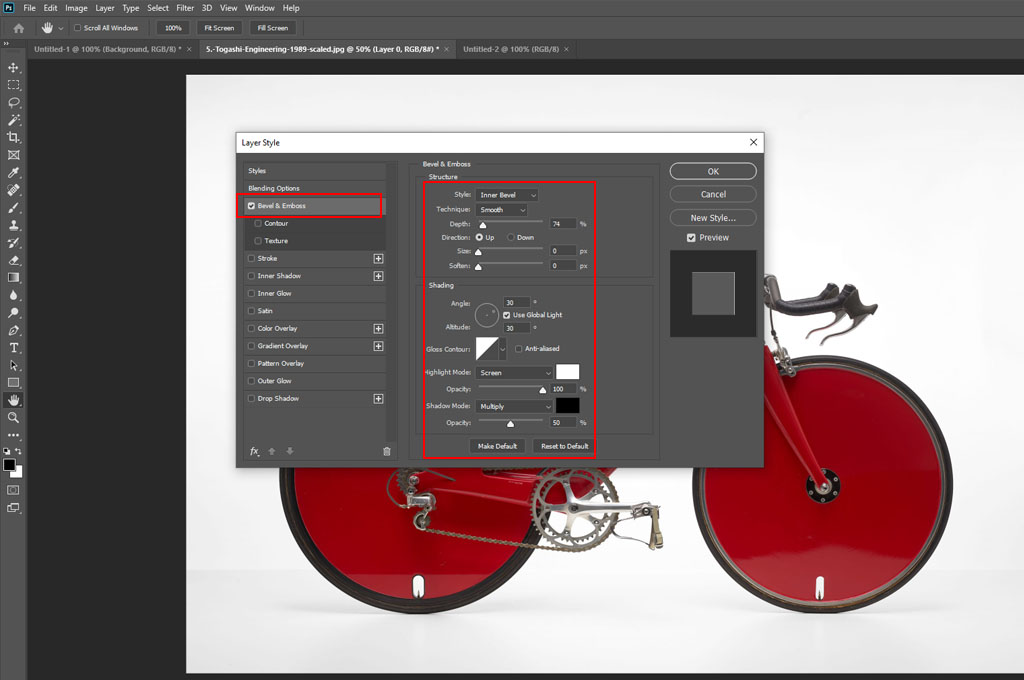
- If you have added any layers and styles to the picture, apply the Scale Styles option to resize layer effects proportionately to the picture layer.
- For instance, if you apply a Bevel & Emboss effect, the bevel will adjust accordingly.
- However, make sure to use the Constrain Proportions option to avoid stretching or shrinking the picture. After altering the photo’s size and resolution, it won’t affect your photo quality.
Step 04: Apply the Changes
- Once you are done with photo resizing, tap on the ‘OK’ option.
- Then, save the adjusted picture by pressing the ‘Save’ icon from the File section in the top menu bar.
- If you want to return to the original size and resolution, hold down the Alt button on Windows or the Options button on Mac and hit the Reset icon.
You may also like to read… How to Change Color in Photoshop
Pro Tips on Resizing Images in Photoshop
You have already learned how to decrease or increase a photo in Photoshop. Here are a few bonus tips to achieve better results.
Use the Export Function
- If you just want to reduce the picture data size, use the ‘Export’ option.
- Don’t rescale the photo’s dimensions or resolution. It may make the picture distorted or blurred.
- Navigate to File > Export > Export Preferences and set up format, quality, destination, and other options.
Determine Using Purpose
- Carefully choose the unit of measurement depending on the purpose.
- For instance, inches and centimeters are used for print designs, whereas pixels are used for digital designs.
- People use Points for typography and designing documents and Picas for traditional print designs and layouts.
Be Careful About Quality
- Just because you are reducing the photo size doesn’t mean you will downsize its quality too much.
- Track how the final output will look before saving it. Zoom in on the important areas of the picture to preserve the standard quality.
Backup The Original Photo
- Keep a backup of your original photo data. Adobe Photoshop may prevent you from editing the photo to be as close as possible to the original shot.
- To avoid such consequences, storing a duplicate file of the original picture is best.
Similar Reads for You
-
Photoshop vs. Lightroom: Best Choice for Photo Editing
-
A Simple Tutorial on How to Extend Background in Photoshop
-
How To Professionally Retouch Photos
Conclusion
Before changing a picture’s size, you must consider important attributes, such as image size, file size, aspect ratio, etc. Altering the photo size will increase or decrease the amount of data in the photo. Hopefully, you got a clear overview of how to resize an image in Photoshop.