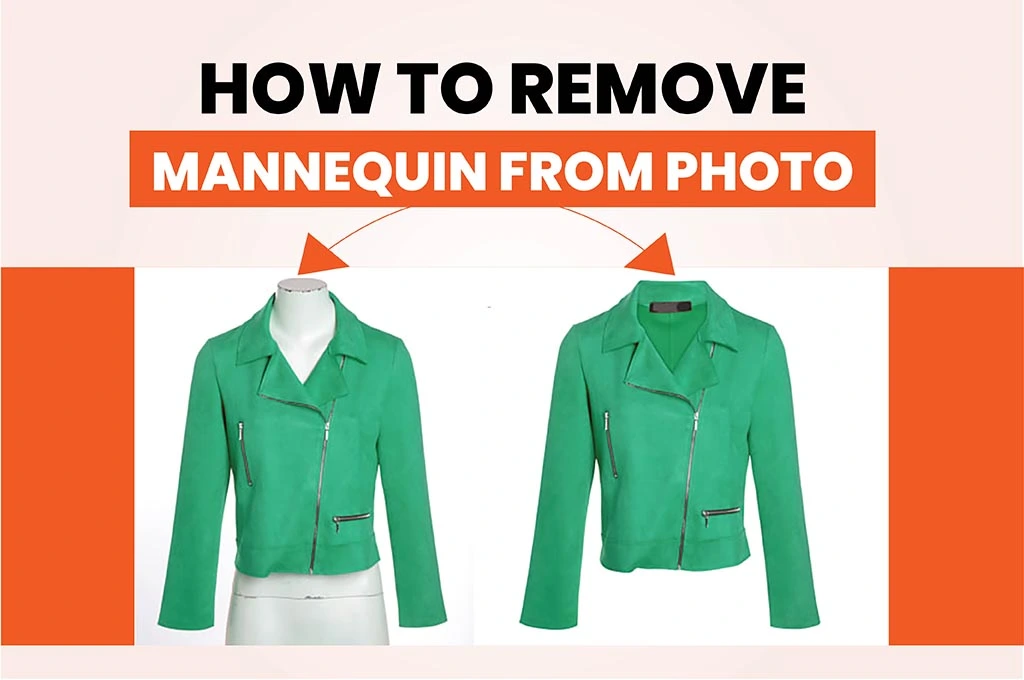
A few days ago, I browsed an online store, trying to find a perfect dress. But I didn’t like the mannequin’s unrealistic posture. It made me sigh, feeling disconnected as the dress didn’t match my body type. I was wondering if the clothing was ever meant to fit someone like me. If there were no mannequins, it would help me see the dress’s details, fit, and design appropriately. Wondering how to remove mannequin from Photo? I know it is a tedious job, but it’s not something you can’t grasp. This post will give you a brief overview of this topic.
Essential Steps of Remove Mannequin from Photo
You can use Adobe Photoshop to eliminate mannequins from a clothing photo. Let’s learn the procedure step-by-step
Step_01: Import And Prepare the Image for Editing
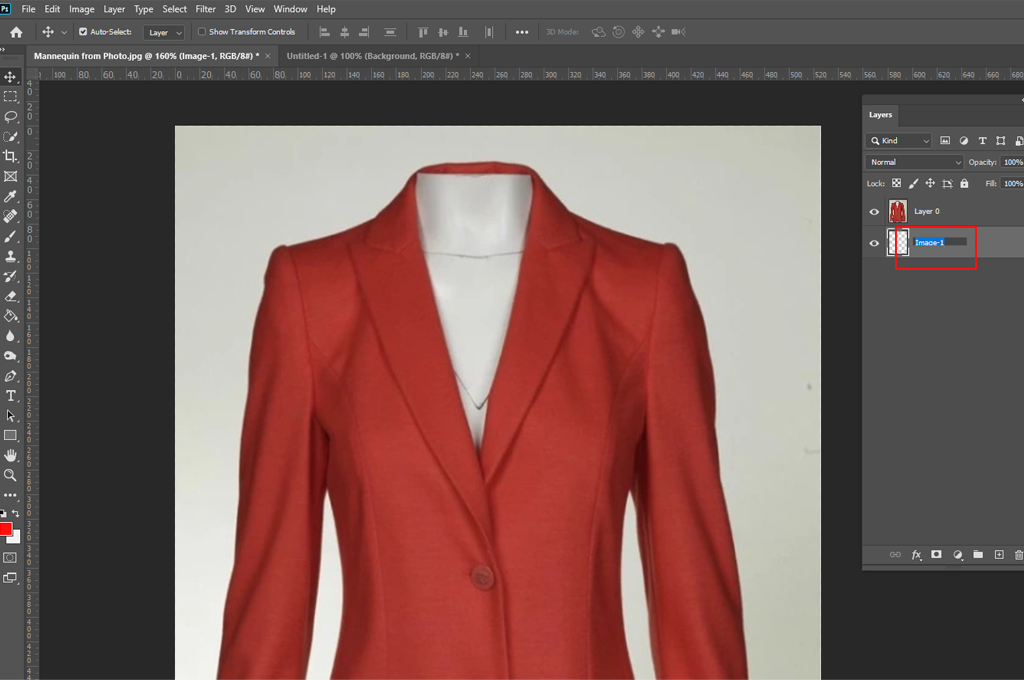
Import your preferred clothing image in Photoshop. Double-click on it to create a background layer. It will help you edit the photo. Change the layer name to ‘image 1.’
Step_02: Set Up the Layer and Fill the Background
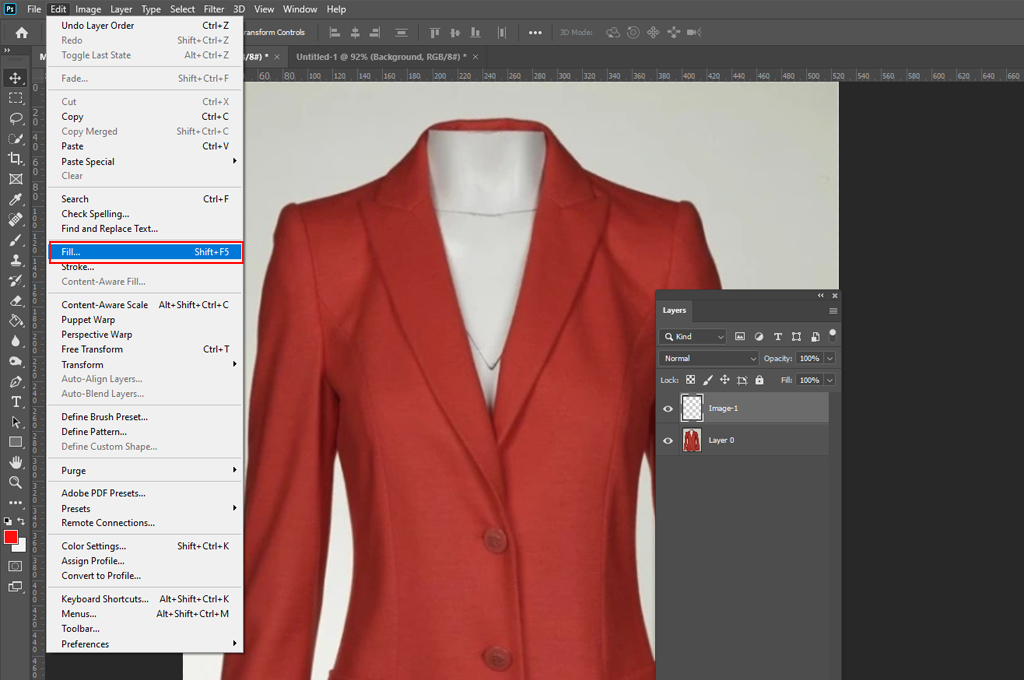
Make another layer under ‘image 1’ and name it ‘image 2.’ Choose Edit > Fill Layer or directly command Shift+F5 for Windows and FN+Shift+F5 for Mac.
Step_03: Set Up the Layer and Fill the Background

- Tap on the ‘image 1’ layer and navigate to the left side Toolbar section to choose the Magic Wand tool. Then, visit the upper area and press the “Select and Mask” icon.
- When a preview window pops up, the entire screen will look black. Nothing to worry about! Visit the upper section and choose the “Select Subject” option to isolate or highlight a specific image area.
Step_04: Refine Selections with the Refine Edge Brush Tool

Navigate to the left side section and hit the Refine Edge Brush tool to make a precise selection. Use the Undo command to correct any accidental errors.
Step_05: Use the Layer Mask to Reveal and Conceal Parts of the Image
- Head to the lower area and click on the layer mask icon of the ‘Image 1’ layer to control the opacity of raster layers and hide or remove parts of a layer. Then, tap the masked icon next to the ‘Image1’ layer icon.
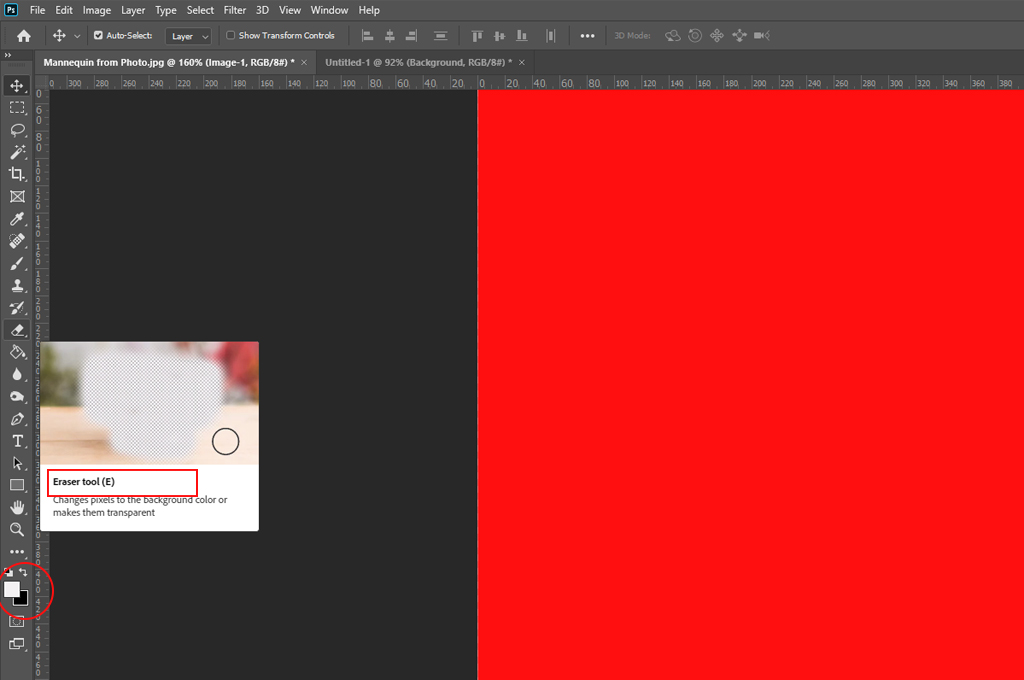
- If the mannequin still has any exposed portions, erase them using the Eraser tool. Don’t forget to keep the foreground color white and the background black for accurate revealing and concealing.
Step_06: Fix the Flaws with the Clone Stamp Tool
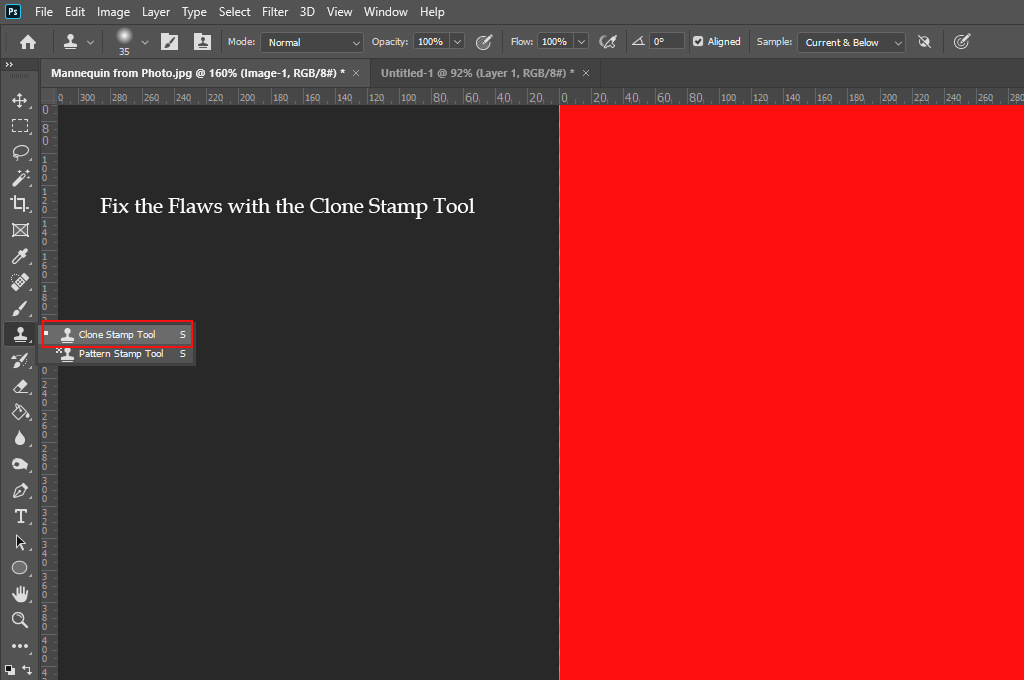
Move to the left side section and use the Clone Stamp tool to fix flaws. The above steps are the guidelines for working on the outer section of clothing.
Step_07: Create and Adjust the Inner Section of the Clothing
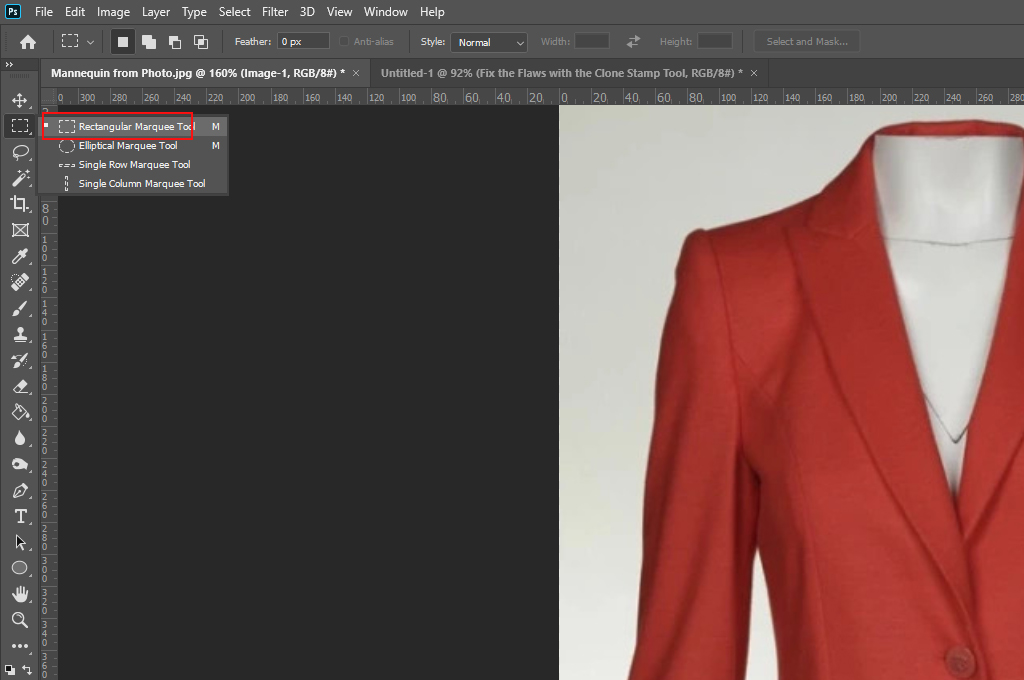
Follow the same steps to create an inner section of clothing. Generate a layer mask. Use the Rectangular Marquee tool to position and match the front of the neck and shoulders. Copy the selection using Shift+Ctrl+C for Windows and shift+Command+C for Mac.
Step_08: Match the Front and Back Neck for Proper Alignment
- After that, select the background Layer and command Ctrl+V for Windows and Command+V for Mac to paste the selected portion. Change the layer name to ‘Image 3’ or anything you prefer.
- Type Ctrl+T for Windows and Command+T for Mac to change the size and shape of the ‘Image 3’ layer. Adjust the back neck position appropriately to match with the front neck and shoulders.
You may also like to read… 5 Pro Tips for Perfect Invisible Mannequin Photography
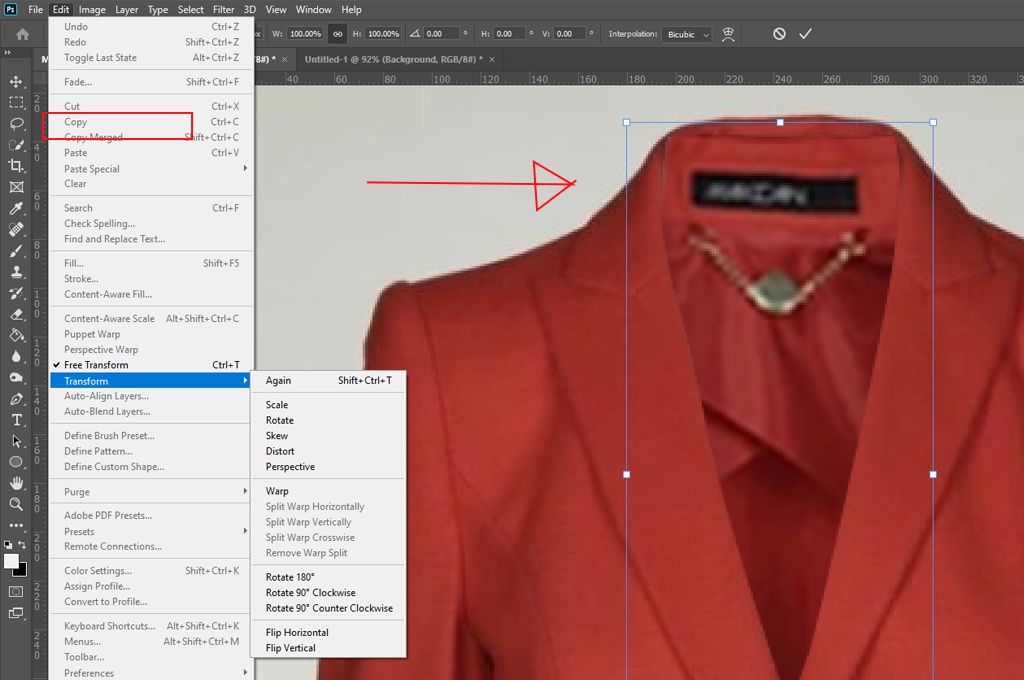
Step_09: Warp the Inner Sections for a Realistic Look
- Follow the same procedure for other sections to reveal the back area, such as the sleeves.
- Create a proper adjustment using the Warp transform tool. You can also add a filled-out structure to the inner area of the clothing. The front and back sections should match each other. First, work on the neck area and choose your preferred layer for warping purposes. Select the Transform option from the Edit panel and tap the Warp option.
- Use the anchor points at the lower section of the box to shape the edge around the object. If you make any accidental mistake, use the Eraser tool immediately.
Step_10: Add Drop Shadows and Final Adjustments to the Clothing
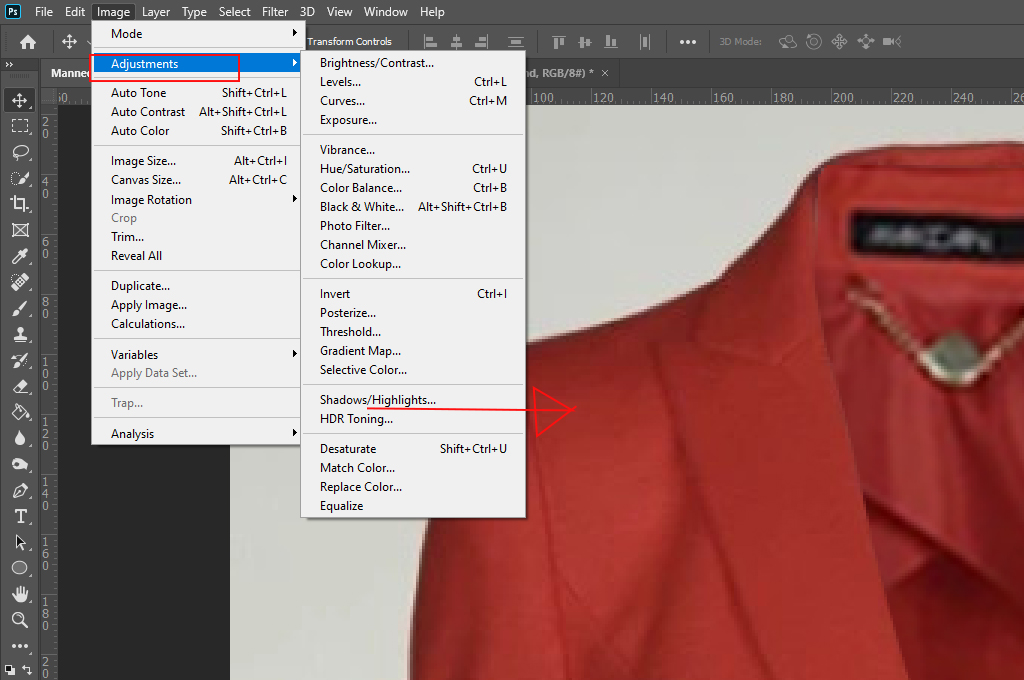
- Follow the same procedure for other visible parts of the inner clothing.
- Create a drop shadow on the inner part of the clothing. Select Neck layer → Image → Adjustments → Curves. Adjust the curve downward to achieve your preferred level of darkness. Don’t forget to tap on the ‘OK’ button.
Similar Reads for You
-
Dos and Don’ts in Ghost Mannequin Photography
-
Ghost Mannequin Photography – Complete Guideline
-
How to Create Ghost Mannequin Effect in Photoshop
Conclusion
We have mentioned how to remove mannequin from photo using the Photoshop Magic Wand tool. You can also use other tools such as Photoshop’s Pen Tool. But the Magic Wand tool is the simplest and quickest option for beginners.