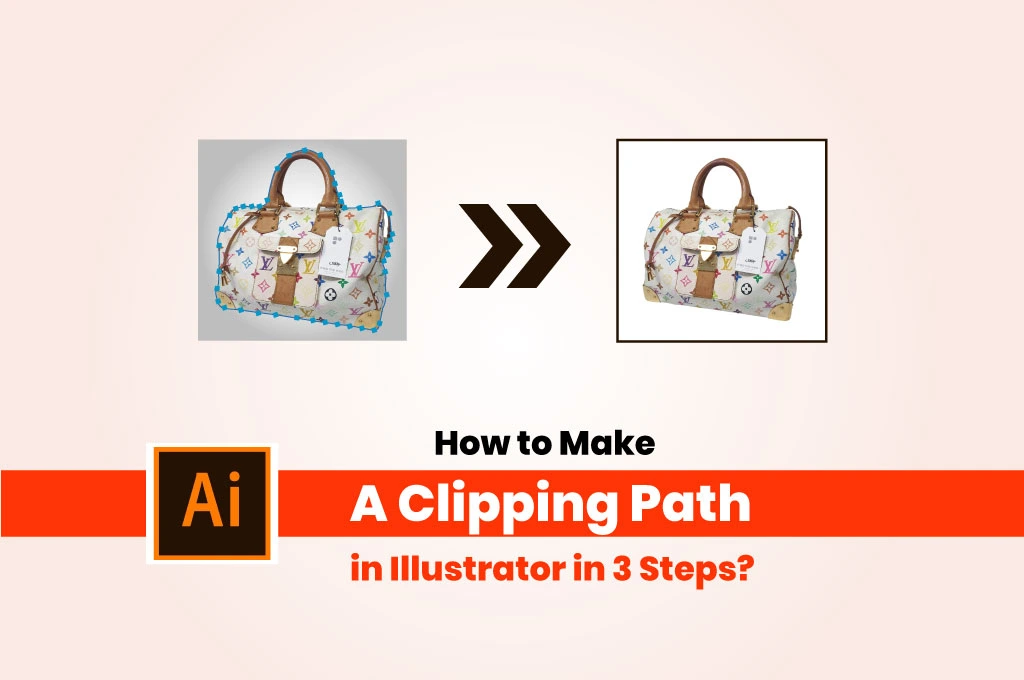
Clipping paths is a well-known image-editing technique for better image cutouts. You can achieve clean, isolated subjects using deep etching. One of the most popular software is Adobe Illustrator, which is used for this photo retouching method. However, knowing the right way to use the app is the key to tracing around the object. This article will walk you through how to make a clipping path in Illustrator.
Why Use Illustrator to Make Clipping Paths?
This deep etching technique is highly popular among various types of professionals. It allows them to create focused and customized objects while concealing unwanted items from the photo. Let’s learn the benefits of using professional image editing software to create deep etching.
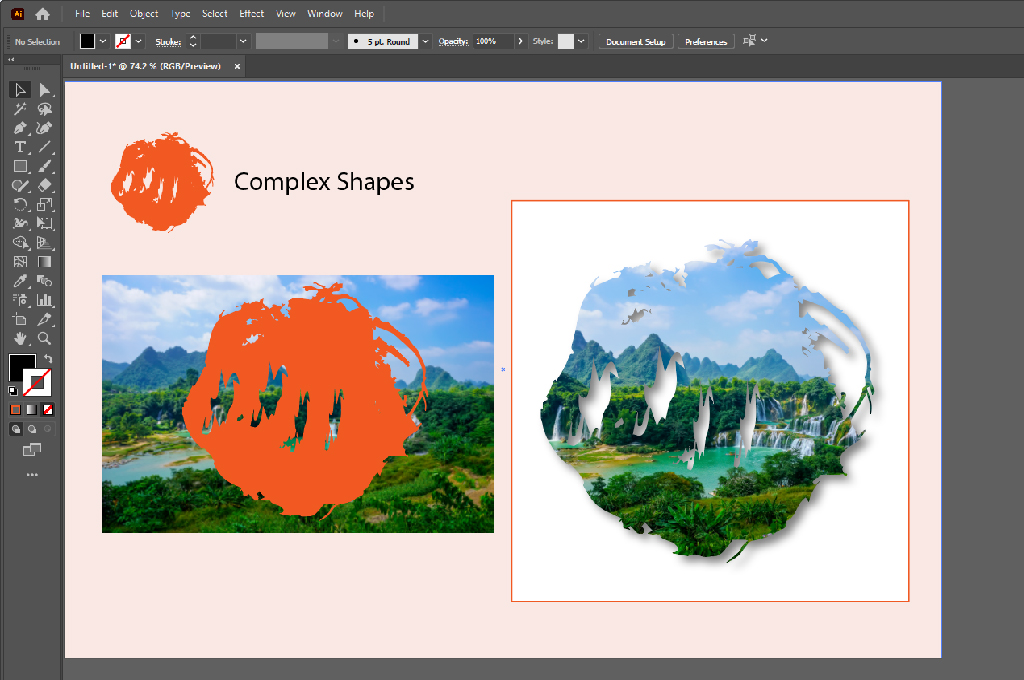
Complex Shapes
Does your image have a tricky shape or multiple shapes? You can use the compound clipping path options in this software to tackle this hassle.
Intricate Details
Items like bags, sunglasses, rings, necklaces, chairs, etc., contain small details. Making deep etchings on such items requires careful attention. It can help you create precise deep etchings for such items.
Vector Graphics

Want to create logos, icon packs, clipart graphics, infographics, product illustrations, etc? This app is a perfect choice for these vector-based designs.
Customization
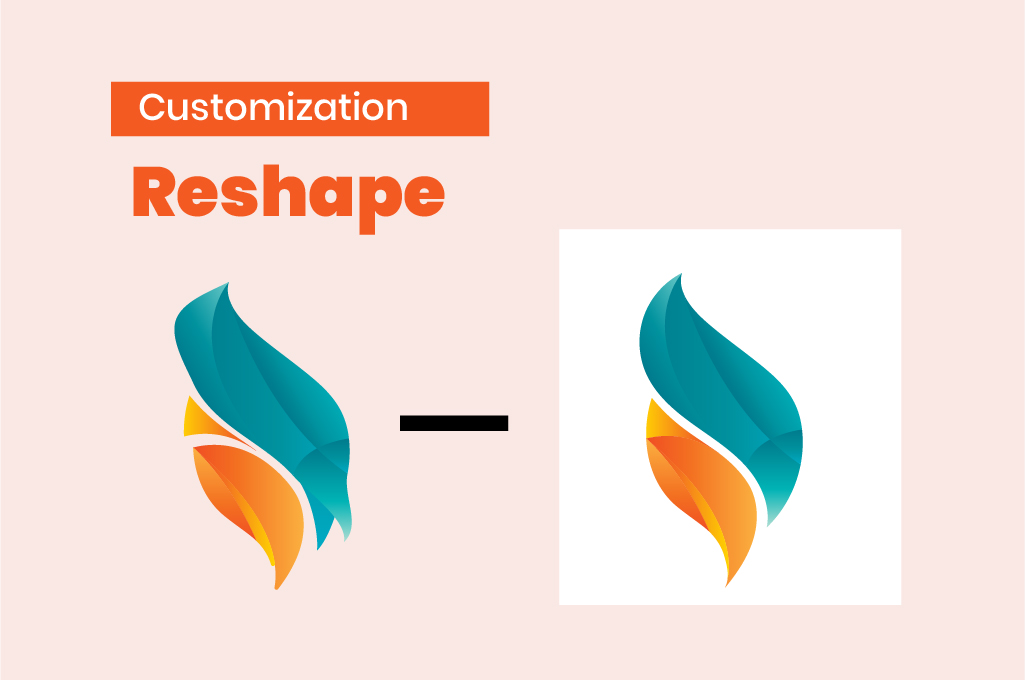
This professional software allows you to edit and reshape your already-created deep etching. It lets you change anchor points, add curves, or combine paths to fit intricate designs.
How to Make a Clipping Path in Illustrator Step-by-step?
Deep etching is a popular image editing technique to cut out or remove an object from the background. It allows you to hide unwanted parts of a photo and focus on the main subject.
The following are steps to create a clipping path using this professional software.
Step 01: Import the Image

Navigate to the menu panel from the top area, select File > Place, and then tap on the image you want to edit. Finally, hit the “Place” button.
Step 02: Create A Clipping Path
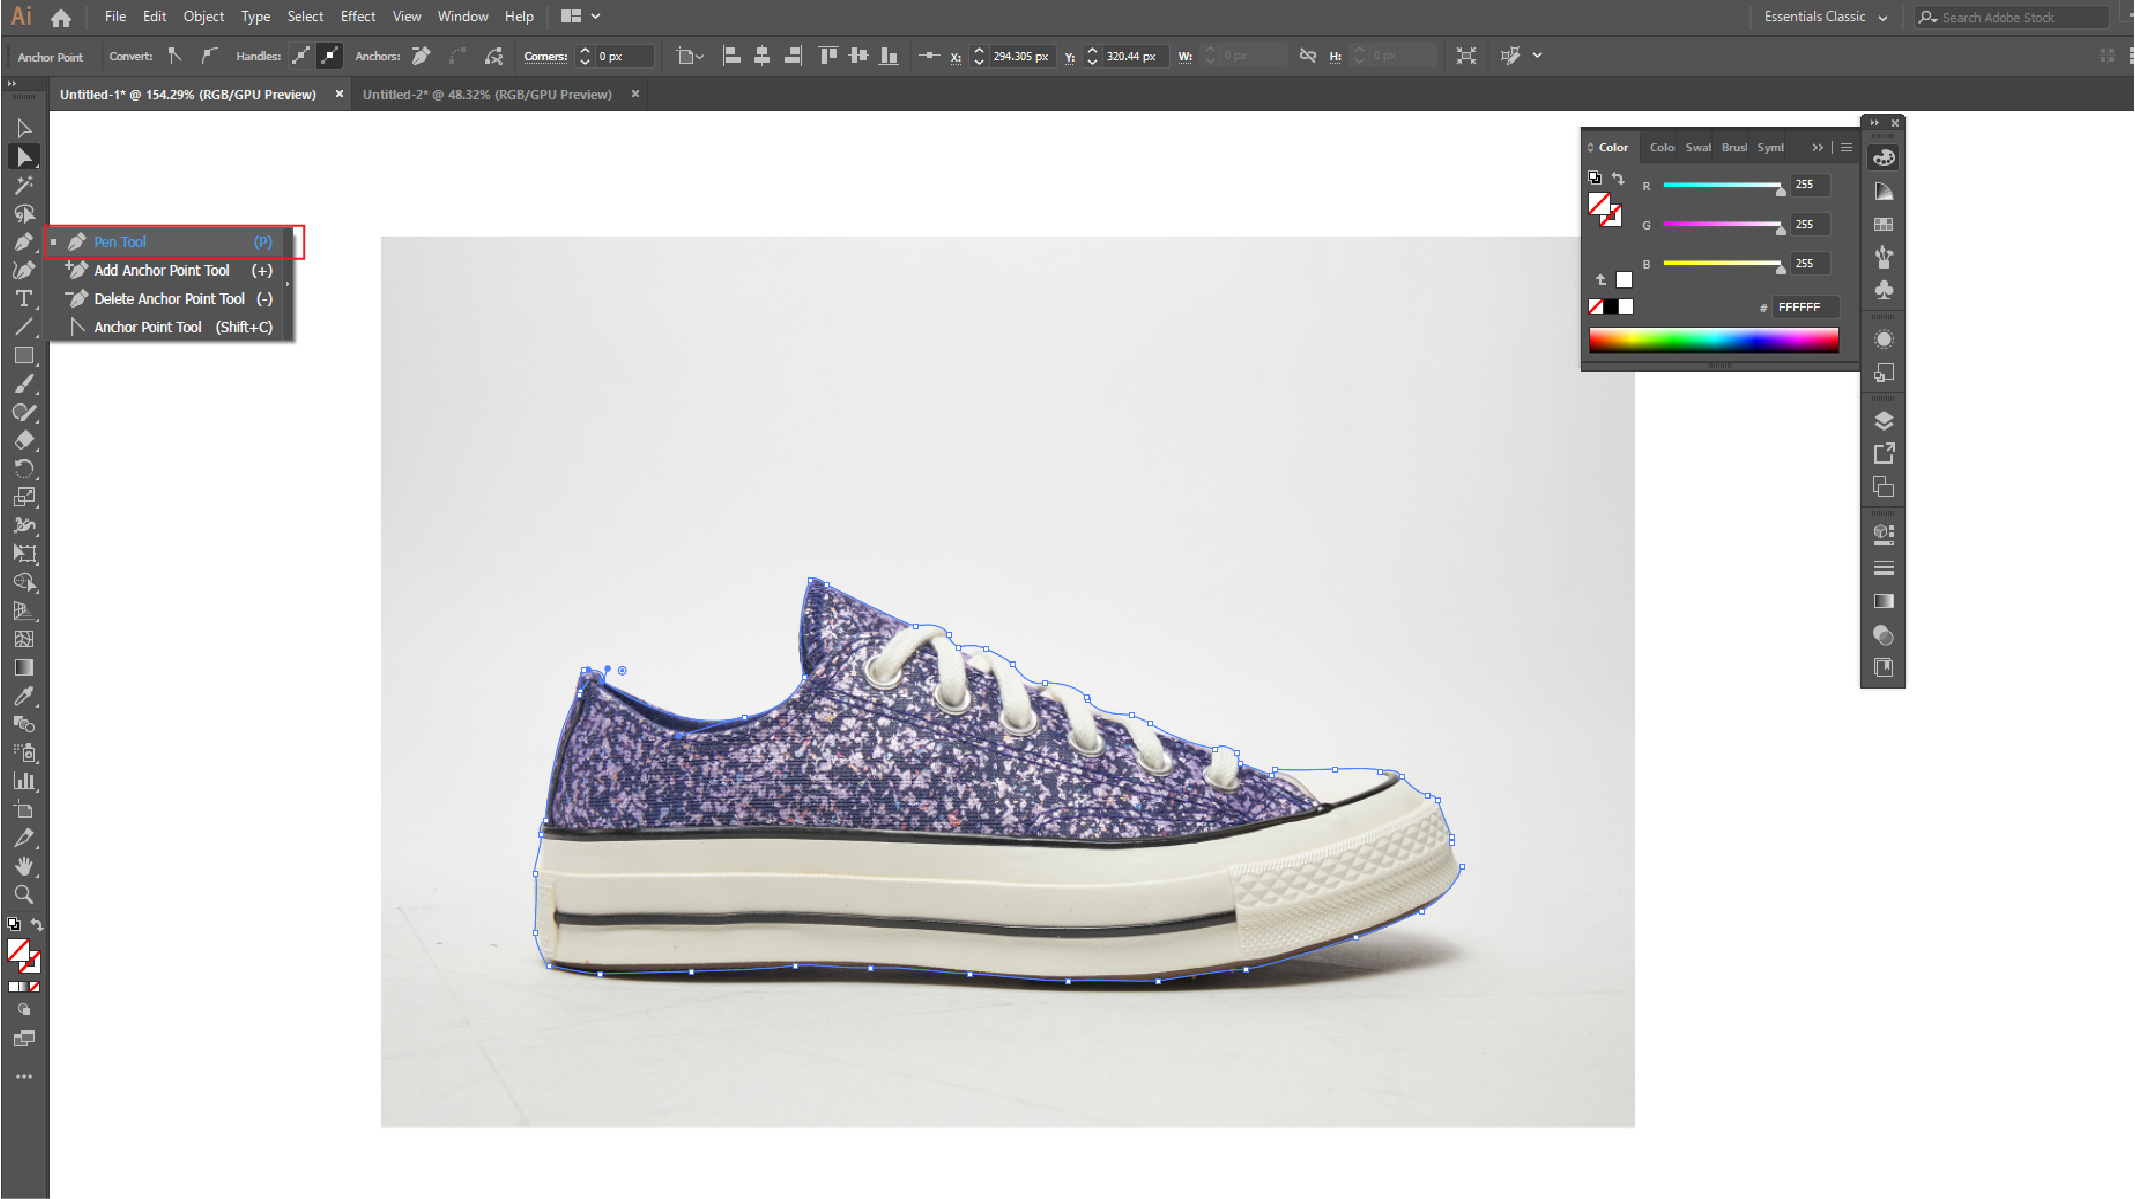
- Head to the left toolbar area and choose the Pen Tool. Or type P from your keyboard to select it.
- Make a vector graphic for the particular object of the image that you want to isolate or remove.
- If your image object has several shapes, select object> Compound Path > Make.
- Select Window>Fill and Stroke and keep the fill and stroke options deselected in this image editing software to avoid unintentional edits and simply deep etching creation.
Step 03: Create a Clipping Mask

- Select the vector graphic you have created along with the image.
- Navigate to the top menu bar area and select the ‘Object’ option. Then, click ‘Clipping’ and finally hit the “Make” icon.
- If you want to create a deep etching manually, right-click on the image and select “Make Clipping Mask” from the drop-down lists.
Pro Tips for Better Creating Clipping Paths in Illustrator
- Choose high-resolution images for editing. They contain more pixels and details. It ensures better post-processing work.
- Practice and learn how to use the pen tool perfectly. It helps you create and fine-tune smoothly curved paths and shapes.
- Always zoom in on the image to evaluate the picture quality. It also allows you to remove imperfections from complicated edges.
- Creating straight lines is easy. Play with tricky curve lines to lift your image-editing skills and achieve accuracy around rounded edges with natural outlines.
- Use different types of brushes to stylize or change the look of your deep etching. Create customized brushes to maintain consistency across the edited areas.
Similar Reads for You
-
How Do I Create a Clipping Mask in Photoshop?
-
What is Image Clipping and Why Do We Need It?
-
Clipping Mask in InDesign: A Beginner’s Guide
Conclusion
Mastering the art of deep etching doesn’t happen overnight. You have to practice a lot and learn from your mistakes. Creating a perfect hand-drawn vector graphic helps you achieve a realistic look. Hence, give yourself enough time to make an out-and-out path around tricky edges. We have already outlined how to make a clipping path in Illustrator in 3 steps. Make sure to follow each step carefully to get the best result.