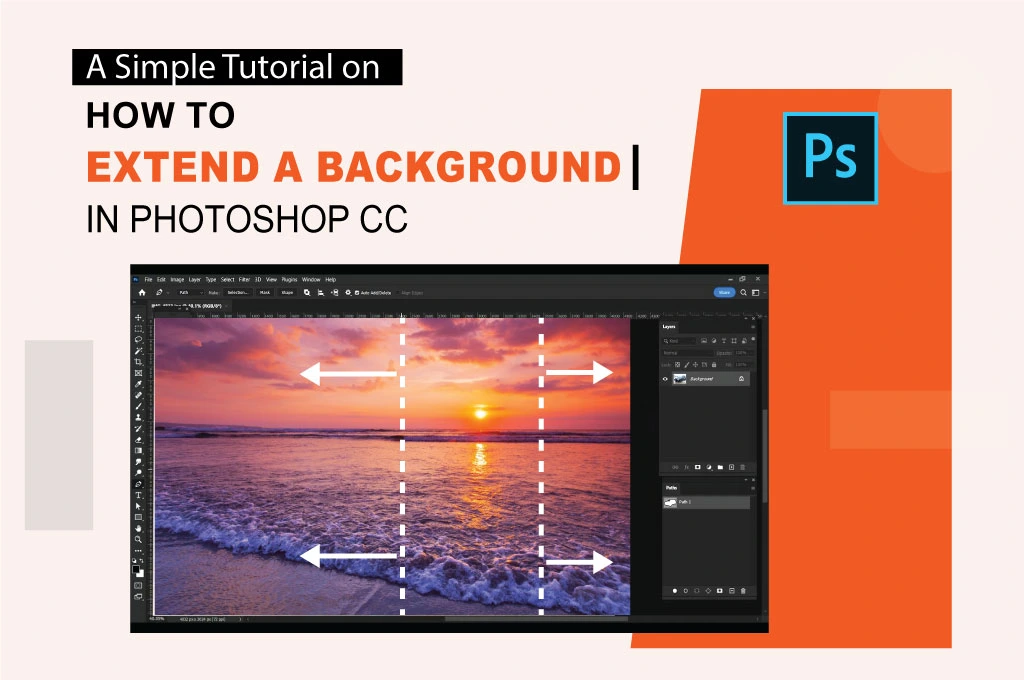
I took a great photo of an evening twilight. But when I looked closely, I realized the background didn’t fit right. It felt too tight. I wanted to make it bigger and was looking for an easy way to fix it. Learning how to extend background in Photoshop solved my problem. If you are also facing the same issue, follow this post to get a quick solution.
Why Extend a Background in Photoshop CC
Extending an image background can help you achieve a clean and clutter-free backdrop, especially for portrait and product photography. For instance, a product with a clean background allows you to present the key features and details of the item appropriately.
Likewise, if you have captured a mountain range, a seascape, or any architectural landmark, making the backdrop bigger can add character and context to the photographed environment. If you are working on composite imagery, adding an extended background will create more space to include elements and improve composition.
You may also like to read… A Complete Guide to Download Beta Photoshop AI Free in Adobe
How to Extend Background in Photoshop in 5 Steps
Before creating a bigger backdrop, keep in mind that the main subject of your image must be the same as before. An incorrect background-extending process will distort the primary object. No matter what you do, don’t change the core element of the picture.
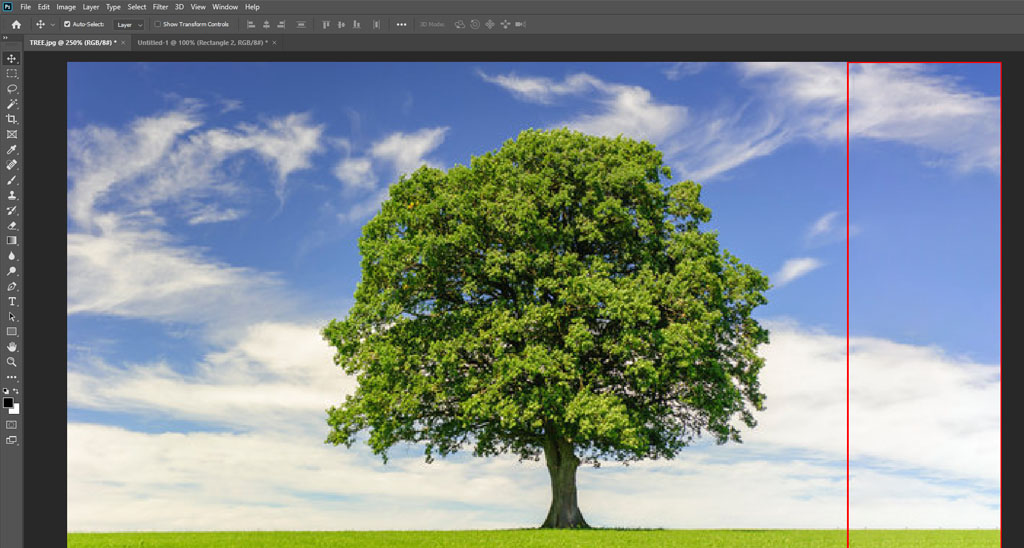
Step_01: Import The Image
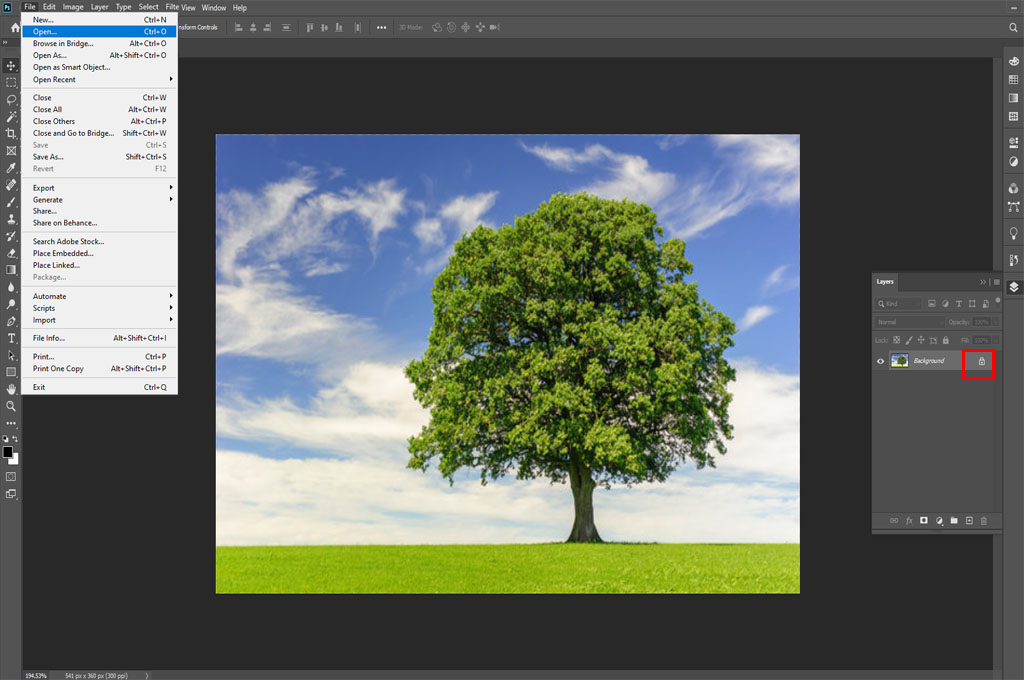
- Import your photo using Photoshop CC by simply dragging it. Alternatively, select the ‘Open’ option from the File menu bar.
- Tap the lock icon from the right layer panel to unlock that layer and edit the image.
Step_02: Set Up the Anchor Direction
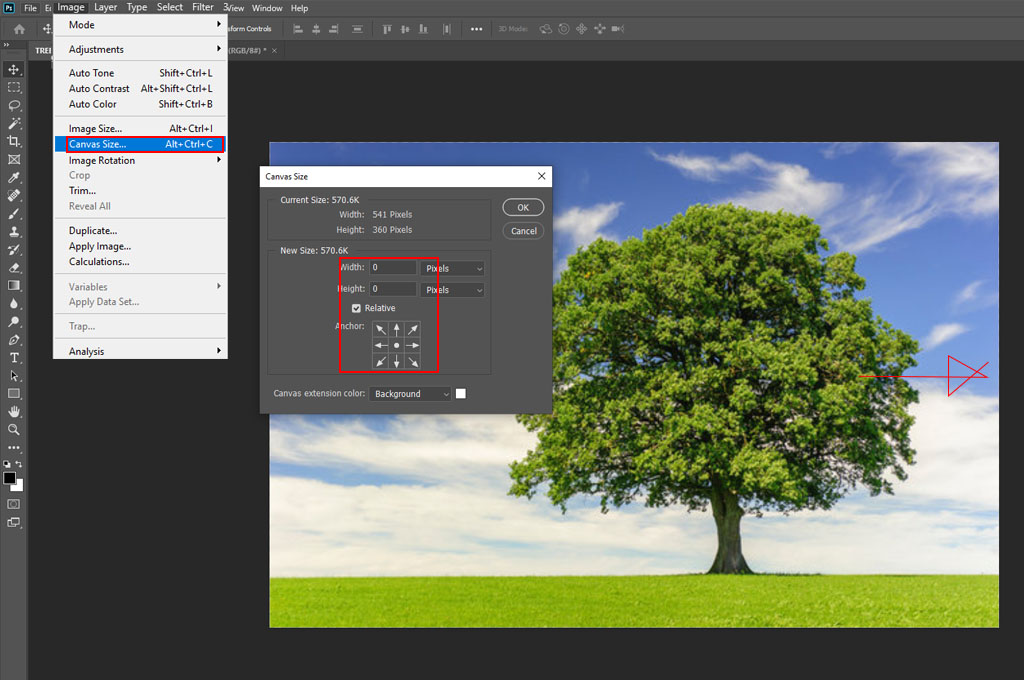
- The next task is determining how much additional space you want to add to the background. Maintain a balance between both sides to look natural.
- Navigate to the menu bar and select the ‘Image’ option. Then, tap on the ‘Canvas Size’ icon from the drop-down lists.
- A new box window will pop up. Click on the Arrow section to decide where to add the new blank space.
- For example, if you want to make the left side of your image’s background bigger, tap on the arrow pointing to the right.
You may also like to read… How to Change Color in Photoshop
Step_03: Add Background Width Value
- Input the background Width value on the same box to create a particular size.
- Deselect the Relative option to avoid affecting the entire photo size. The system will only adjust the specific selected area.
Step_04: Fill up the Extended Space
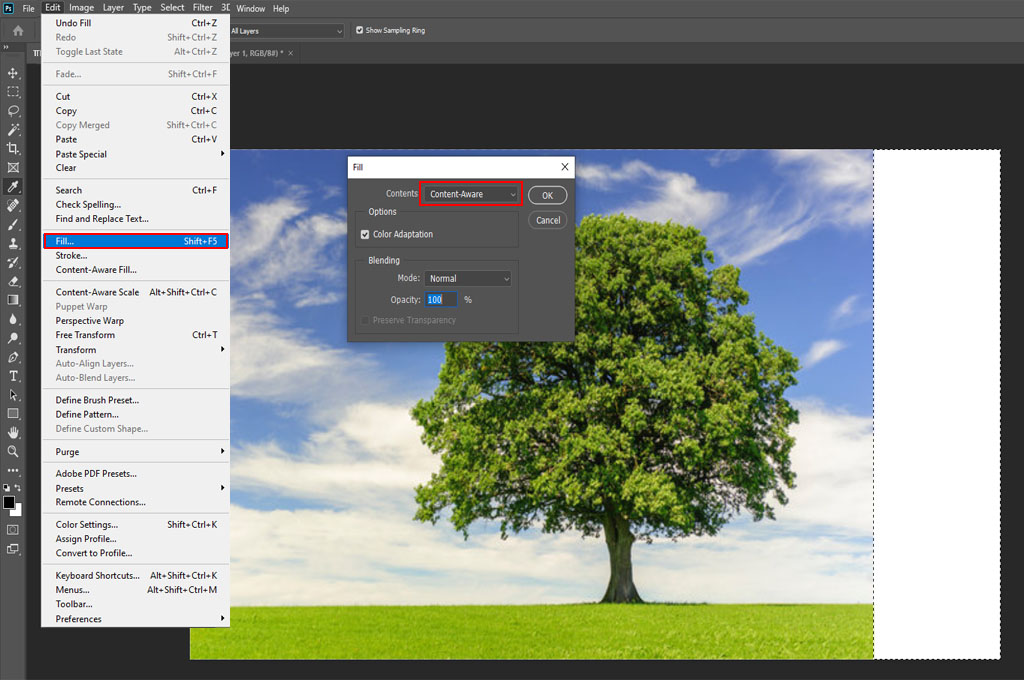
- After creating an extended space, fill it up through stretching. Head to the menu bar and select the ‘Edit’ option. Then, tap on the ‘Content-Aware Scale’ icon from the drop-down lists.
- Navigate to the control or option bar and deselect the chain link icon between the width and height in Adobe Photoshop CC. It will help you adjust only the width. The length of the image won’t change, corresponding to the weight.
You may also like to read… Everything You Need To Know About Free Download Of Photoshop
Step_05: Drag The Edge
- The last step is dragging the edge to fill up the extended space. Be cautious in this step. After a few drags, carefully review the change.
- Stop immediately and hit the Enter key if there is any distortion effect.
- Follow the same method again, as mentioned above, to use the Content-Aware Scale option and extend the background.
- Stop immediately and hit the Enter key once you reach the maximum extension limit.
- Visit the toolbar section from the left side and select the Cropping tool to crop any unfilled space.
Similar Reads for You
-
What is Masking in Photoshop, Guide for Beginner
-
How to Use Pen Tool Photoshop for Product Photography
-
What is Photo Clipping Path in InDesign? Everything You Need to Know
Conclusion
You can’t extend all the backgrounds of images to the same extent. Some may be suitable for extensive background extension, and some for limited background extension. When increasing the backdrop of a picture, visualize how the final output will look. It must look natural and be consistent with the main subject. Now, you know how to extend background in Photoshop.