Did you see a noticeable difference between the picture you have taken and the view you saw through the live camera? Or there might be an unwanted tone presence in your image that is making the photo distracting or bland. You can add your preferred vibe and bring the feel you crave into the photo by altering the color palette. This post will cover how to change color in Photoshop.
Why Change Color in Photoshop?
An image tone can be cool, mute, warm, bright, gradient, pastel, and so on.
Your captured picture might not have the same hue as you want it to have. But you can transform the boring shade into a stunning one to achieve your desired result.
People alter and adjust a photo’s tone for various reasons, such as
- Portraits with unnatural hues or unappealing tones that clash with the subject
- Unaligned shades that don’t match a brand vision
- Improvement of the tone grading to create a mood with the hue palette
- Experiment with new options to create a unique style
How to Change Color in Photoshop?
When it comes to altering tones or hues in Photoshop, you have many options. You can use a hue/saturation adjustment layer, color replacement tool, color replacement brush, blending modes, color fill layer, etc. However, beginners may struggle to use complicated methods for adjusting tones in images. Here is a simple way to change shades in Photoshop.
These are just a few of the many ways you can change colors in Photoshop. With practice and experimentation, you can develop your own techniques and achieve stunning results.
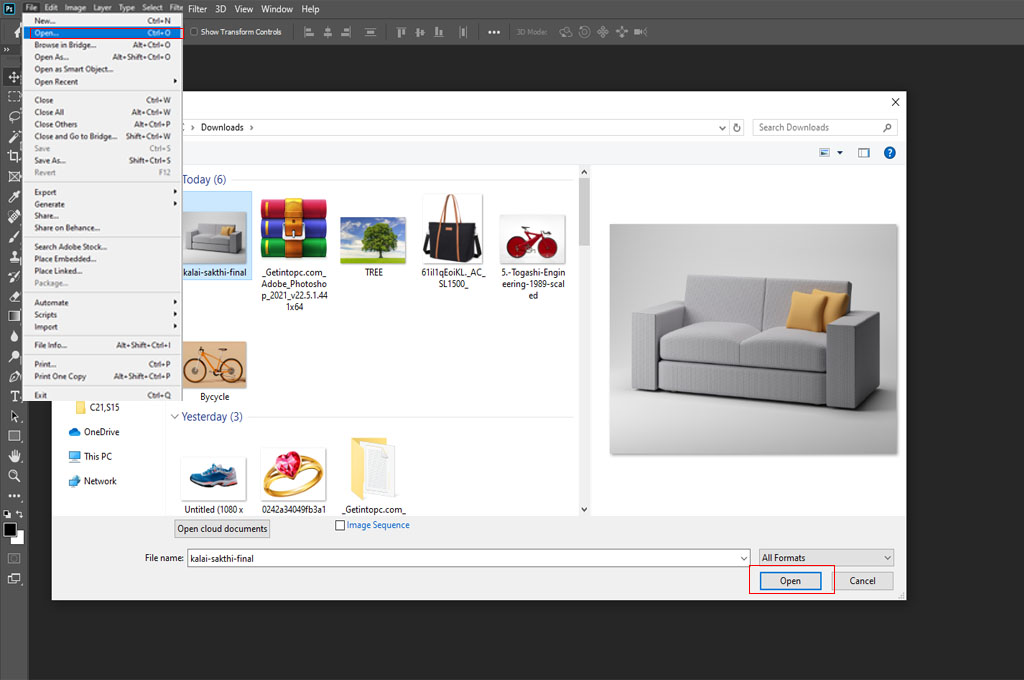
Step_01: Import The Image
- The first step is importing the image whose coloring grade you want to change. Follow the drag-and-drop method to import the photo.
- Or navigate to the menu bar and select File › Import › Images from Device.
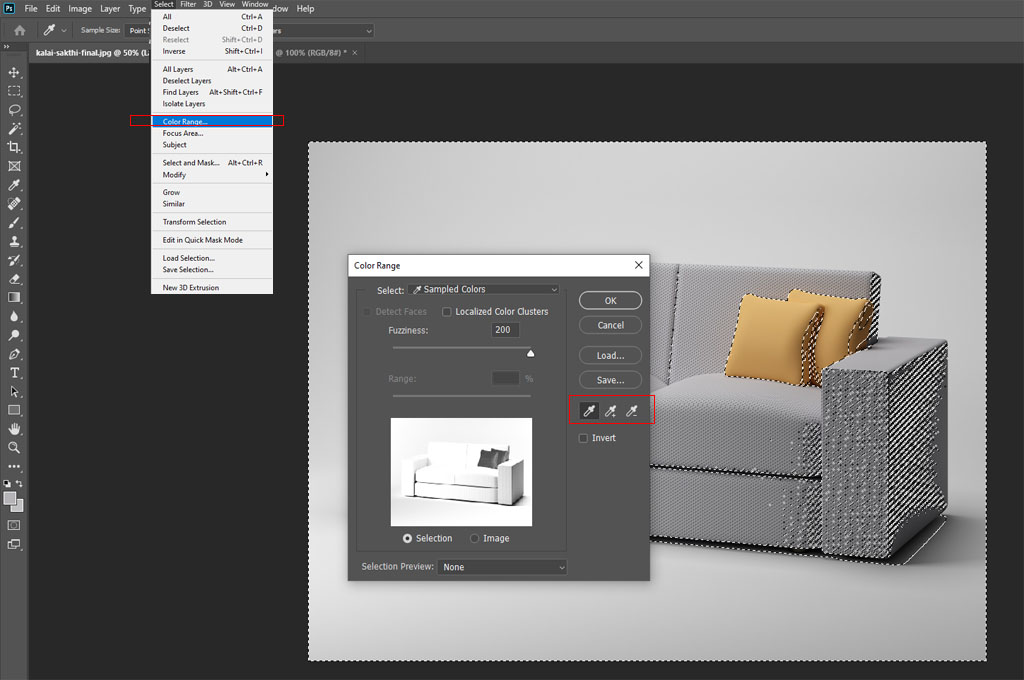
- Again, head to the menu bar and tap Select › Color Range.
You may also like to read… A Complete Guide to Download Beta Photoshop AI Free in Adobe
Step_02: Pick Your Preferred Coloring Range
- A Color Range window will appear on the screen’s right side.
- Go to the left-hand vertical toolbar section and select the middle-eyed dropper tool. It has an eyedropper icon.
- This powerful tool allows you to pick the exact tone from your image and use it in other areas.
- Once you select the sample tone, it will be the foreground section. You can add it to your Swatches panel.
- Changing the intensity of the tone is also possible by tapping on various shades.
Step_03: Make Your Selection Precise
- Move the Fuzziness slider left or right to increase or decrease the range of coloring around your sample one.
- Keeping the Fuzziness slider value high will extend the sample shade to the surrounding areas.
- In contrast, if you set the Fuzziness slider value low, the specific sampled tone will be narrowed down to the surrounding zones.
- Once you are happy with the result, tap on the OK button and close the pop-up window.
You may also like to read… Photoshop vs. Lightroom: Best Choice for Photo Editing
Step_04: Save the Layer
- Navigate to the menu bar and select Layer› New Adjustment Layer› Hue/Saturation.
- It allows you to adjust the Hue, Saturation, and Luminance of a specific range of hues in the photo.
- Give the name of this layer and hit the OK button. It will create a Hue/Saturation adjustment layer along with a separate mask layer.
Step_05: Change the Tone
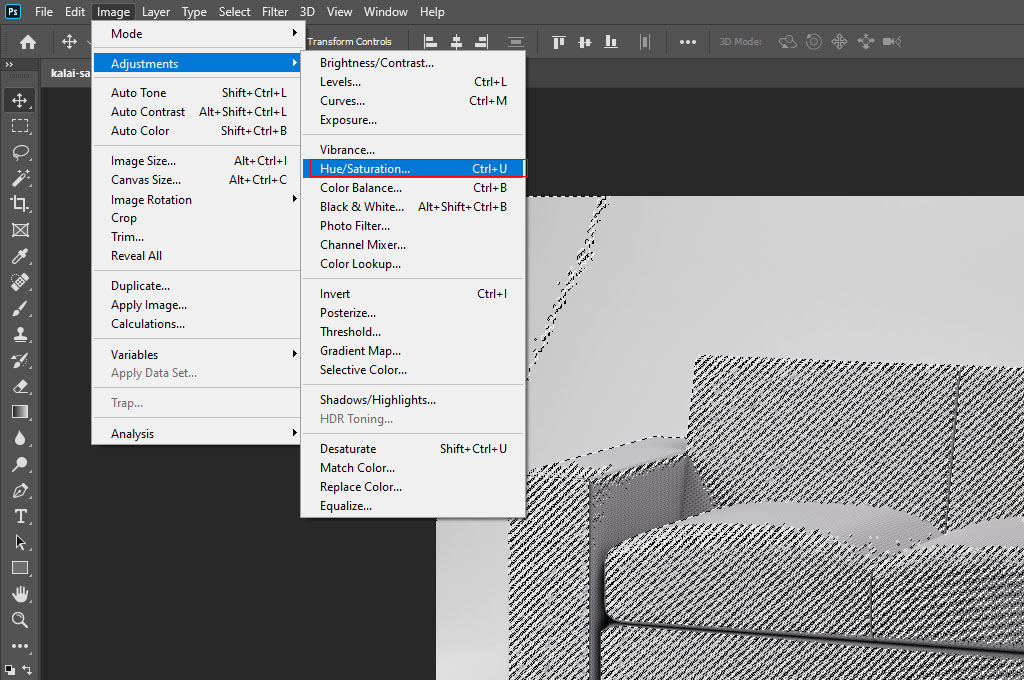
- Tap on the newly created Hue/Saturation adjustment layer and go to the top right corner.
- Hit the Properties icon and choose your preferred tone choice from the second option, such as Blues, Yellows, Greens, Reds, etc.
- Adjust the Hue, Saturation, and Lightness slider to achieve your preferred result. Once you are done with changing the shade of your image, save it in your desired format.
Similar Reads for You
Final Words
Photoshopping images is a time-consuming job. But knowing how to change color in Photoshop doesn’t require you to be an expert photo editor. We have mentioned a simple step-by-step guideline to adjust the hue palette of images. Make sure not to over-touch or under-touch the photo. The final result should look natural and show fine details with minimum imperfections.