Antique furniture is not just well-known for its timeless aesthetic appeal. Their quality craftsmanship ensures long-lasting durability. The value of antique furniture is higher than vintage and mass-produced modern pieces. If you are planning to sell your antique furnishing items online, at an auction, or a flea market, proper photo editing can attract buyers and highlight the furniture’s true value.
Which Factors Affect the Value of Antique Furniture?
Wondering how to identify valuable antique furniture? Determining the value of old furniture is a tricky job. You must have in-depth knowledge of the antique valuation factors mentioned below. Let’s learn the furniture value guide.
Rarity
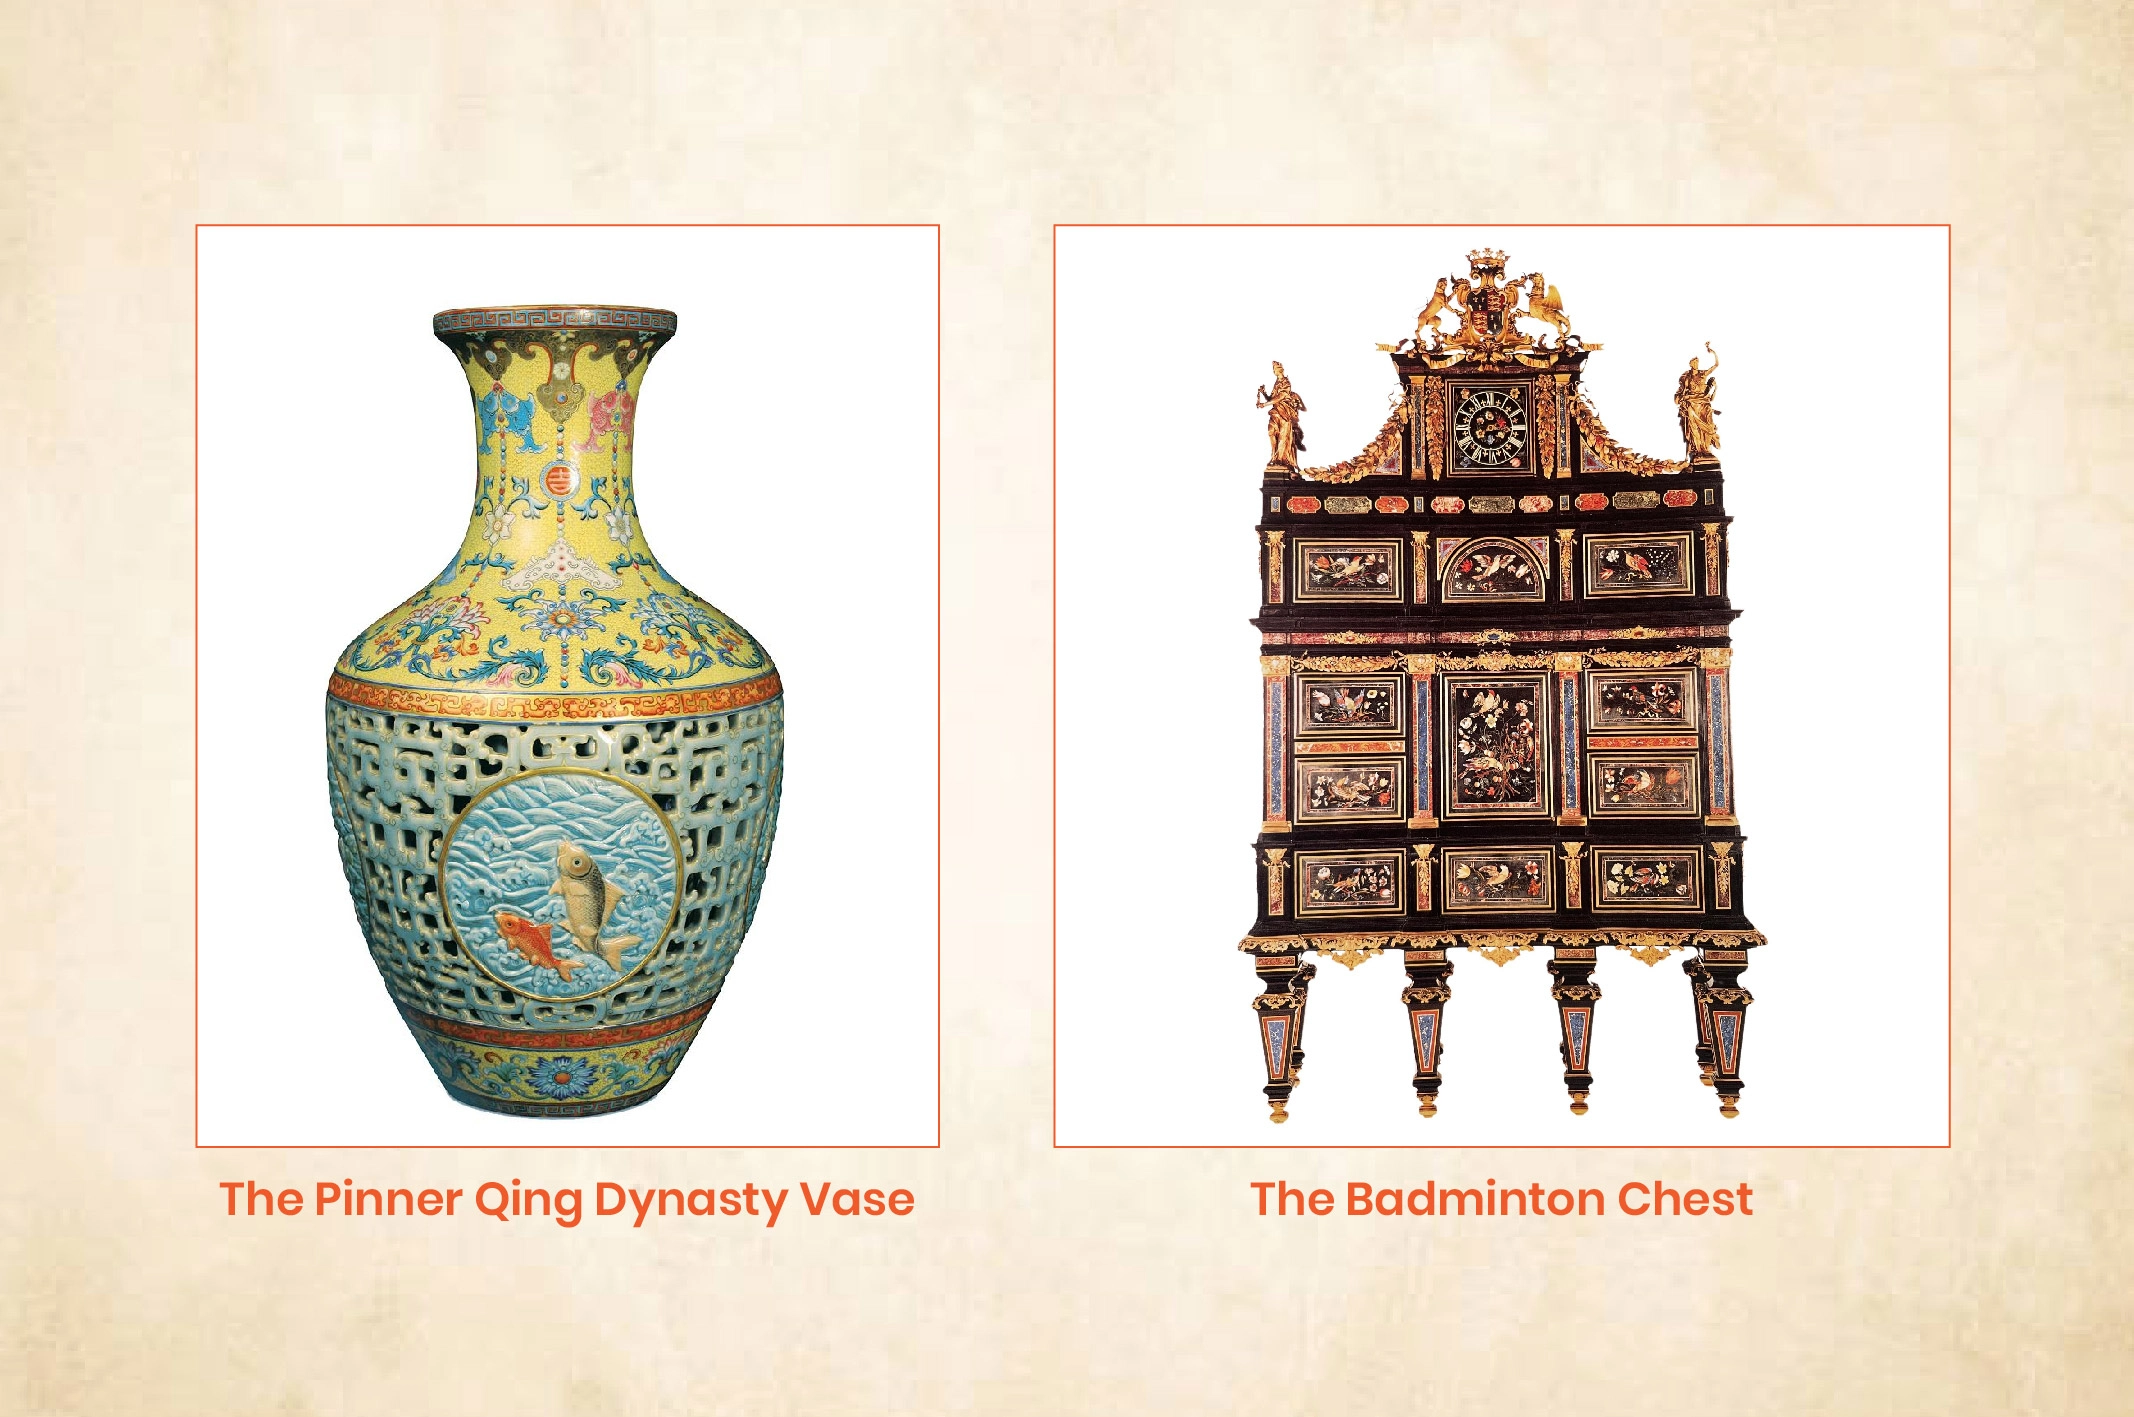
Some hand-made antiques have very limited editions. Collectors are ready to pay a high-end price due to their scarcity. The Pinner Qing Dynasty Vase, The Badminton Chest, The Hadley Chest, etc., are the most expensive furniture.
Historical Connections
Older antiques might have a tangible connection to the past. Specially, they are made in a particular era or for notable figures. These special antiques hold significant historical value and don’t come up for auction very often.
Materials

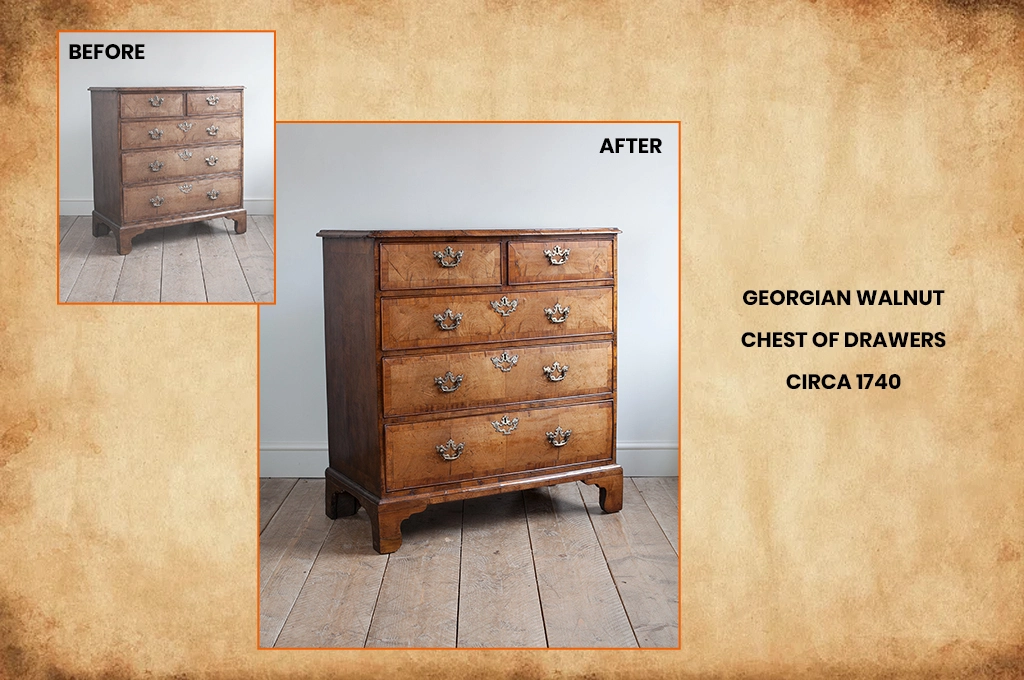
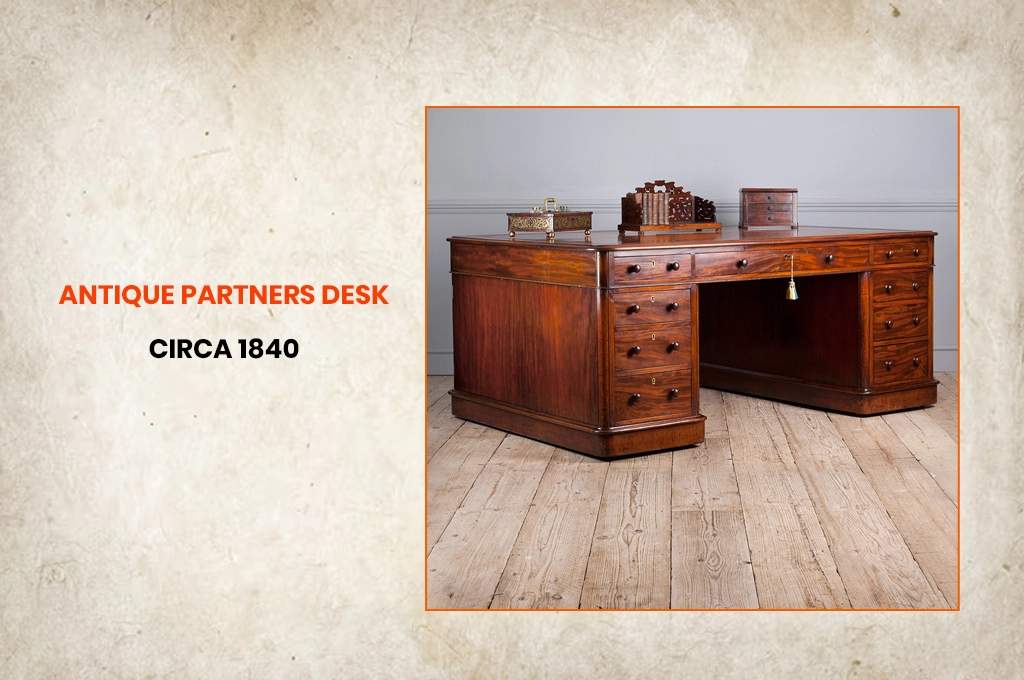
Furniture makers used to use different high-end woods, like mahogany, oak, walnut, etc., to craft antiques. These high-quality materials contribute to long-lasting durability, rich grain patterns, natural resistance to decay, and luxurious appeal.
Craftmanship
Wooden materials alone won’t do much if the craftmanship is not good enough for making such antique furniture. Those craftsmen worked for months to make precision joinery, intricate carvings, and fine detailing. They aim at bringing out the wood’s true beauty.
Condition

A piece of antique furniture can be as old as 100+ years. It might be made in the 18th, 19th, or 20th century. However, old antiques may have a better physical condition than newly made ones. It depends on how the quality is preserved. Too much wear and tear reduces its resale value.
Design & Style
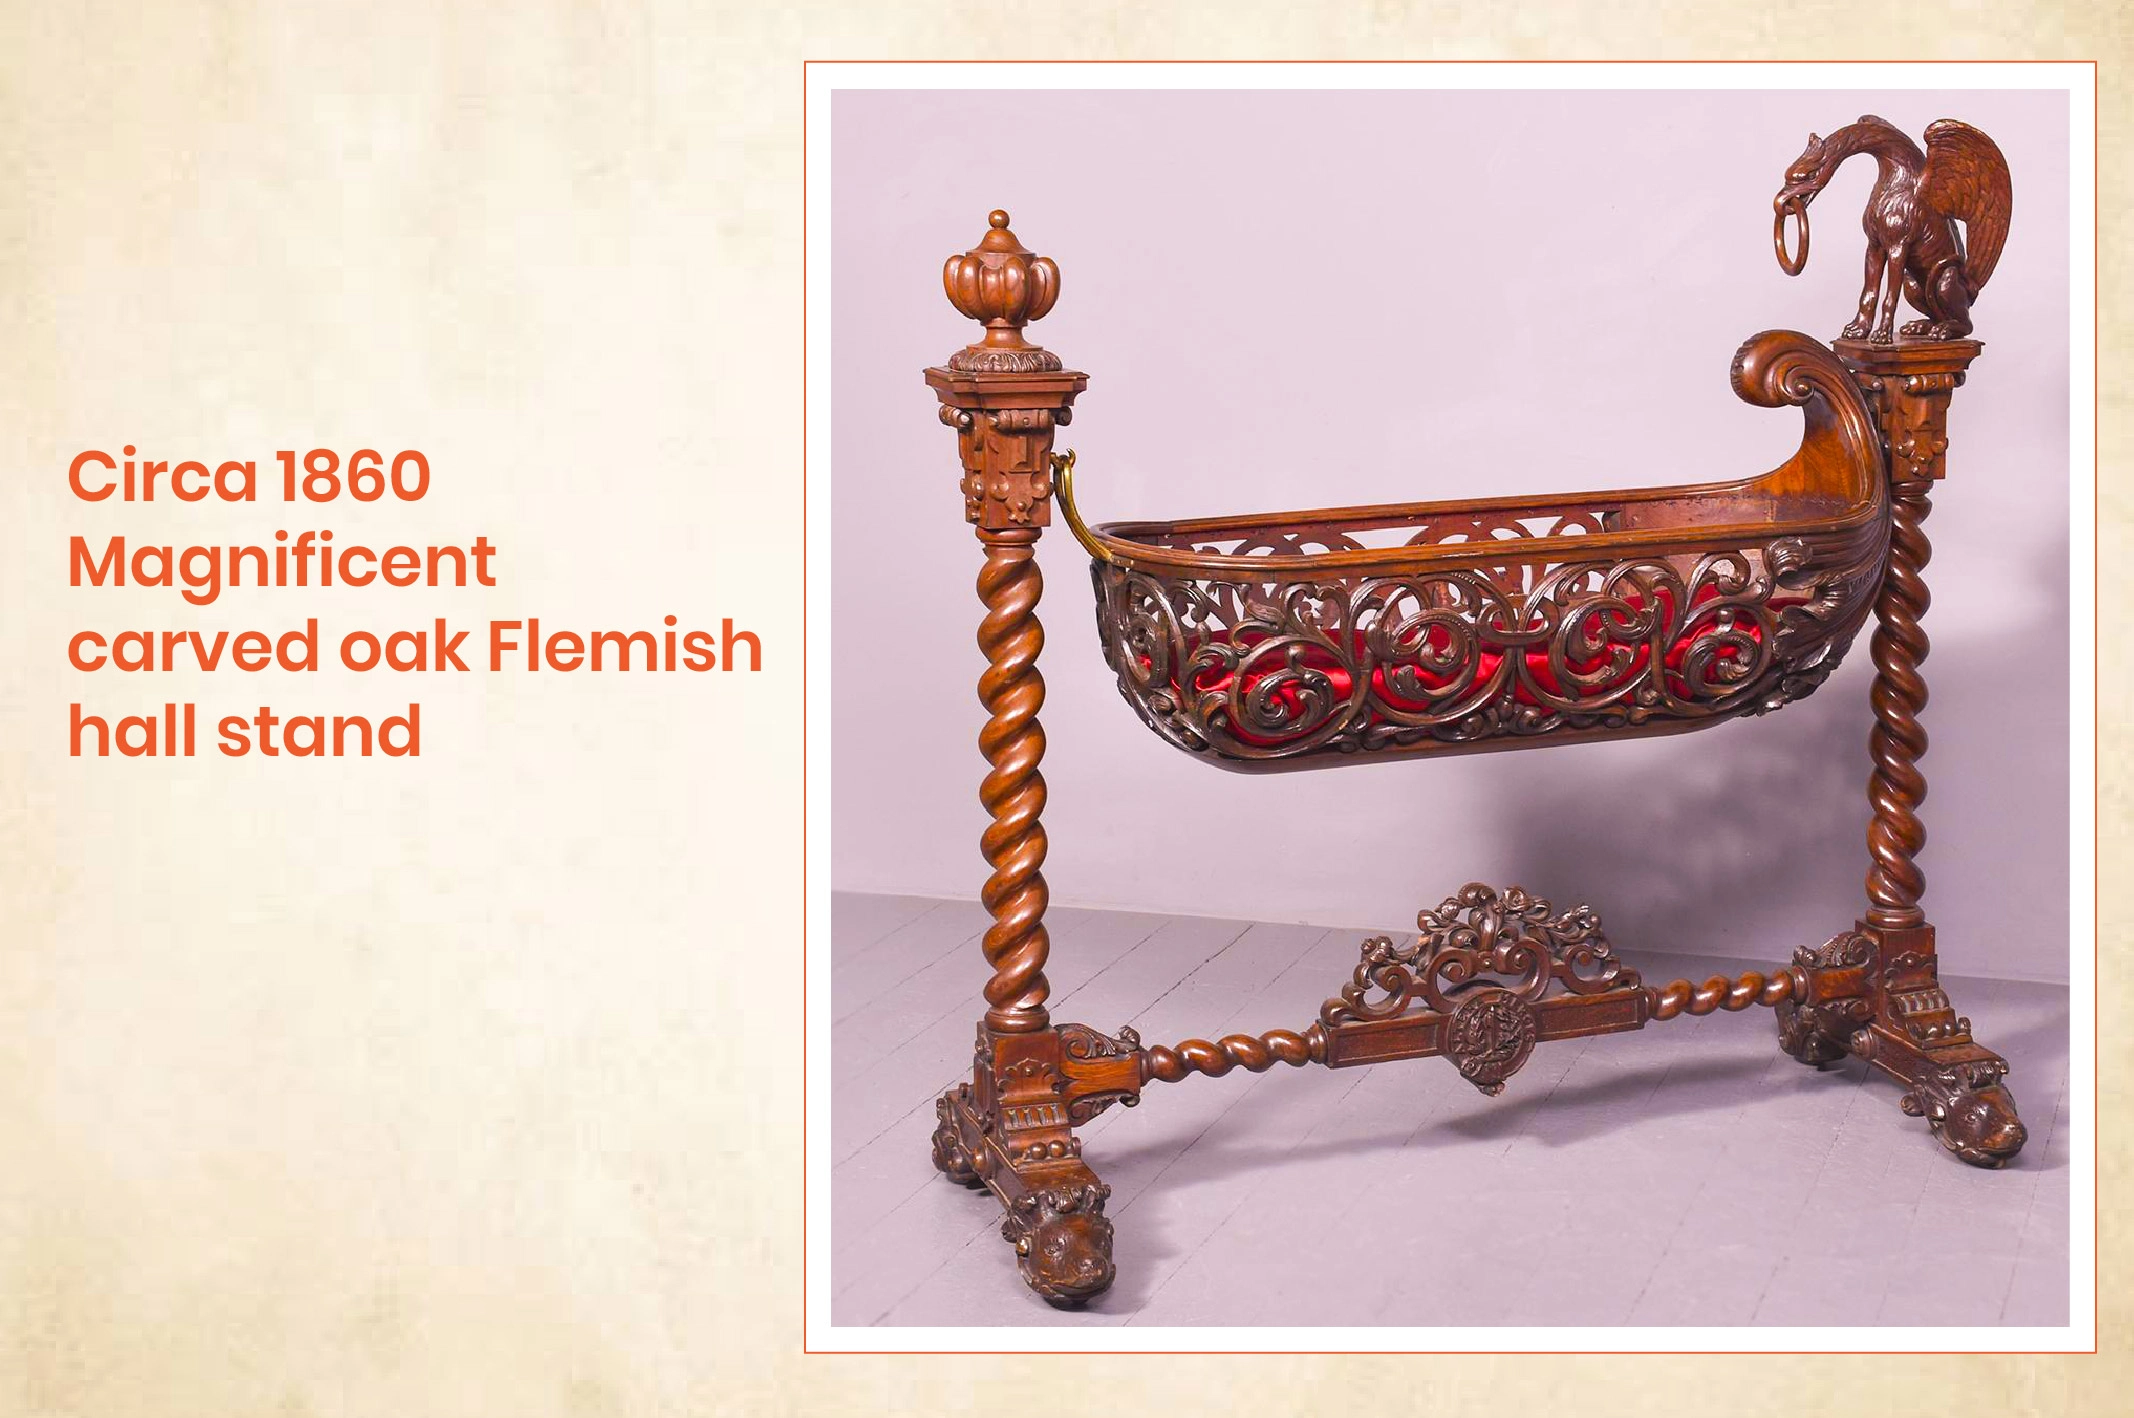
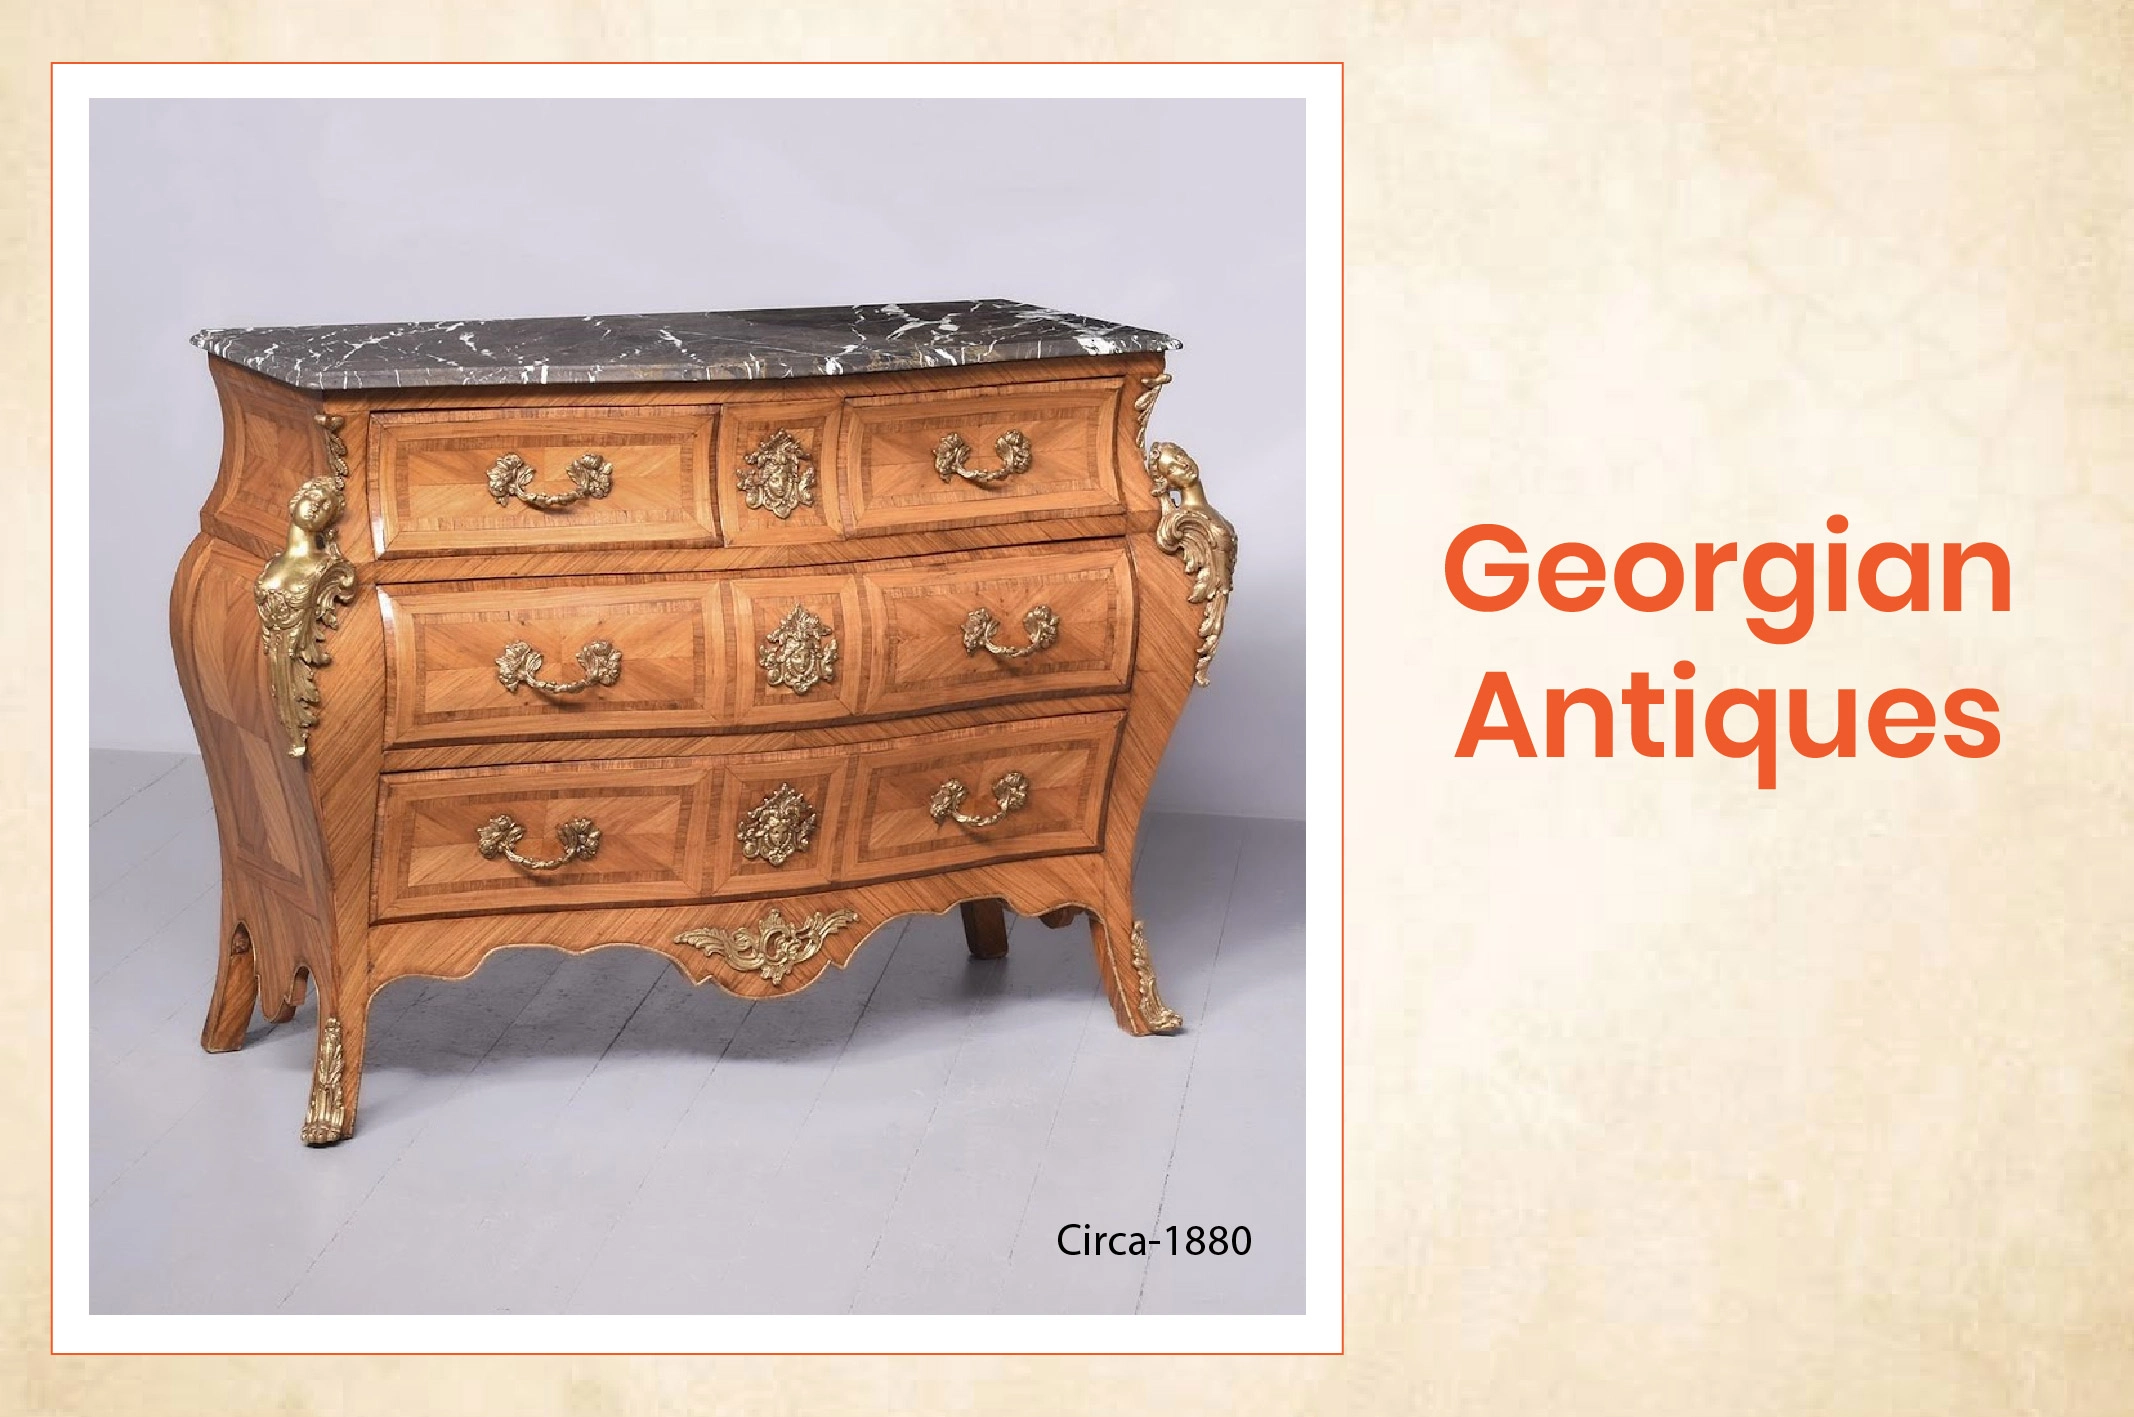
Antique furniture comes in different designs and styles. You can determine the value by inspecting their shape, legs, and feet. For instance, Victorian or Georgian antiques have a high resale value due to their timeless design.
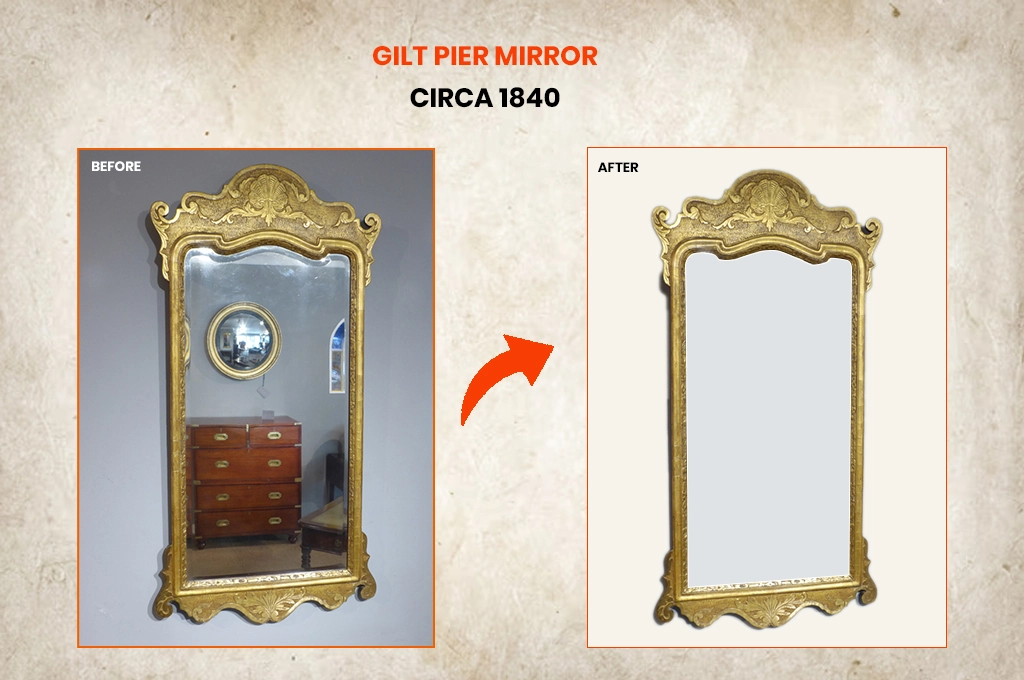
Why Photo Editing Increases Antique Furniture Value?
Online buyers rely solely on visuals before making a purchasing decision. Hence, your antique furniture photos will be a major driving force in whether you make or break the sale. Let’s explain why professional photo editing matters for vintage furnishing item value.
You may also like to read… Different Types Of Photo Editing For E-commerce
Clarity
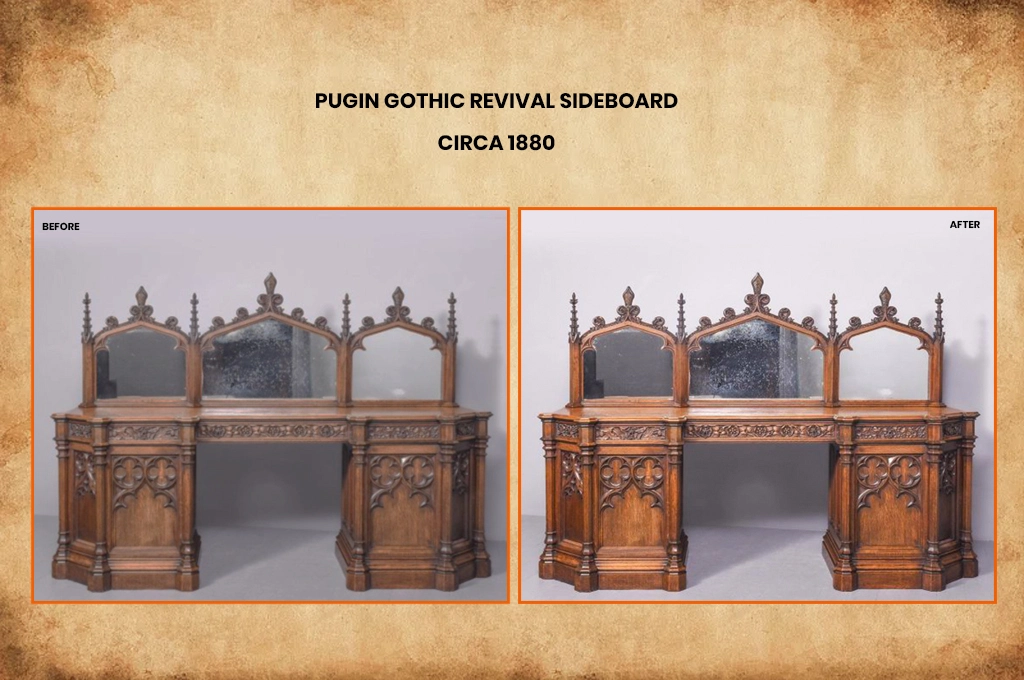
- Your vintage furniture may lack clarity from camera shake, inappropriate focus, lighting conditions, etc.
- Proper photo editing can improve its clarity level. It helps you highlight unique features, design elements, and conditions.
- Customers can visualize the product accurately. It makes buyers more confident and increases conversion rates.
Improve Focus on Texture and Details
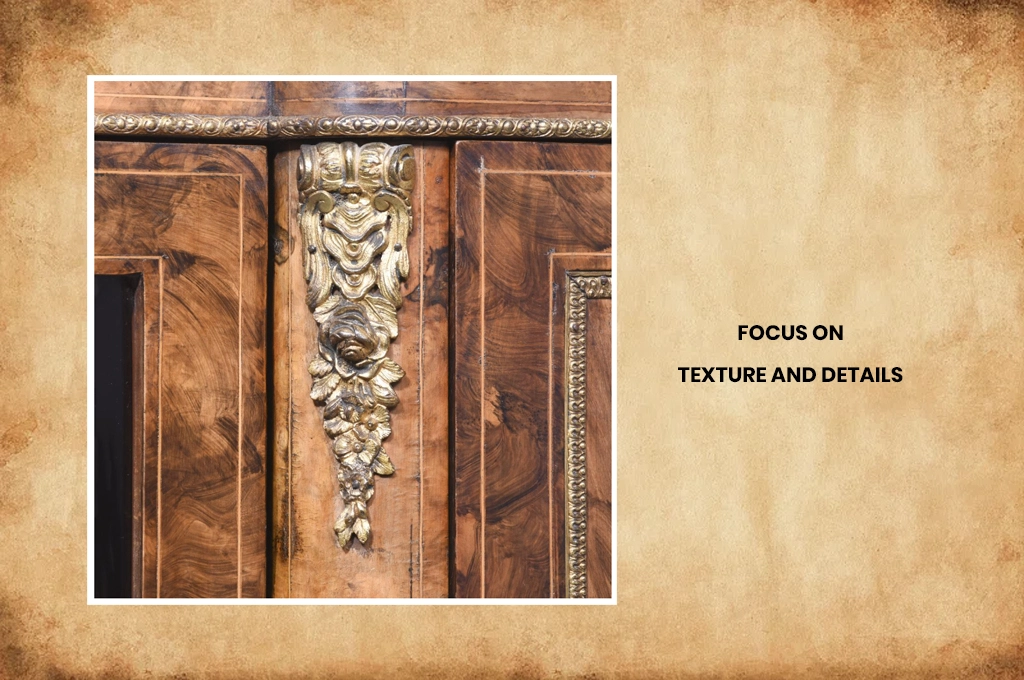
- The texture and details of antique furniture create a special feel, mood, and depth. Plus, it shows the material quality, craftsmanship, and finish of the wood piece.
- Well-planned post-processing work can improve such flaws. For instance, a photo editor can adjust brightness and contrast or sharpen edges to bring out the true beauty of the old furnishings.
- High-quality furniture photo editing can help you highlight clear close-ups of texture, such as wood grain, upholstery, or stitching.
Balanced Lighting and Shadows
- Does your furniture have an unnatural shadow? Or it may have imbalanced lighting. If so, you will struggle to produce striking visuals.
- Adding soft and even lighting through editing creates a more appealing look. In addition, a proper shadow in antique items enhances the visual complexity. It adds depth and composition as well as gives a more realistic and balanced look.
- In contrast, harsh shadows will negatively affect the product details and add more noise to images.
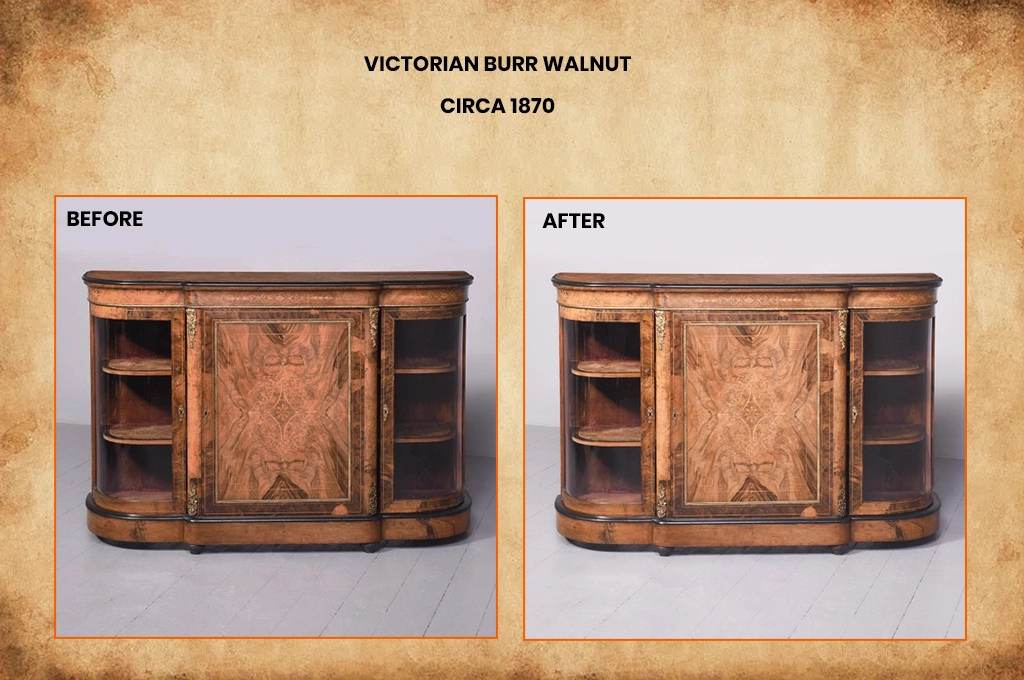
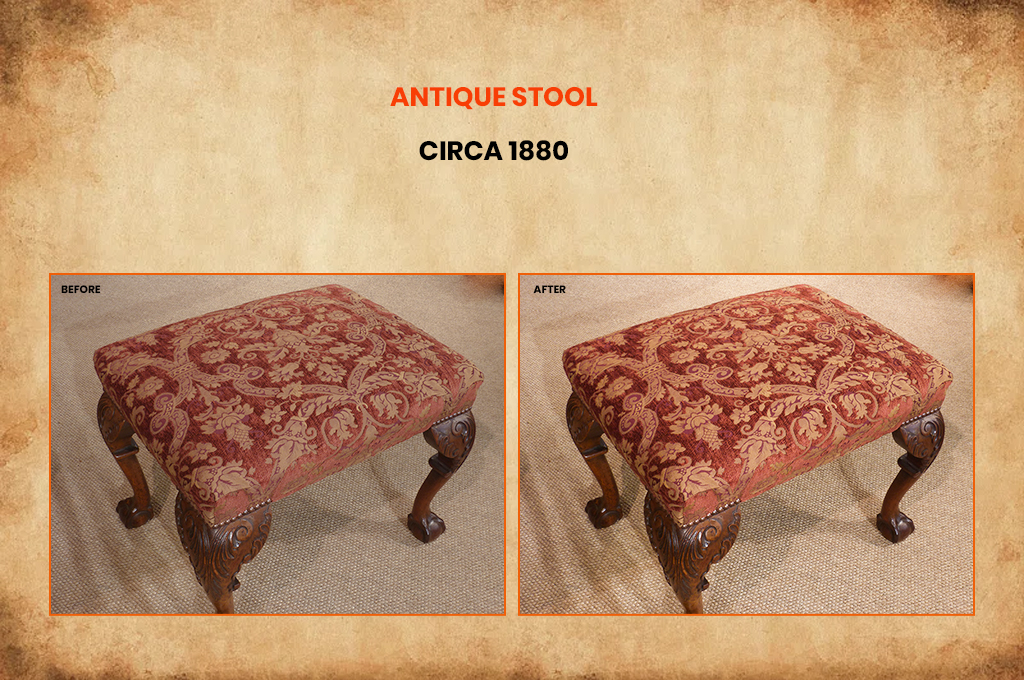
Color Accuracy
- Bad lighting, camera limitations, white balance settings, etc., can cause inaccurate color in furniture photography.
- You have to edit the furnishing item appropriately to showcase the true beauty of the material and design of the antiques. It must closely resemble the main product.
- Otherwise, it will disappoint customers and lead to higher product returns. The main problem will be the vast difference between their perception and the actual product.
Removal of Visible Scratches or Imperfections
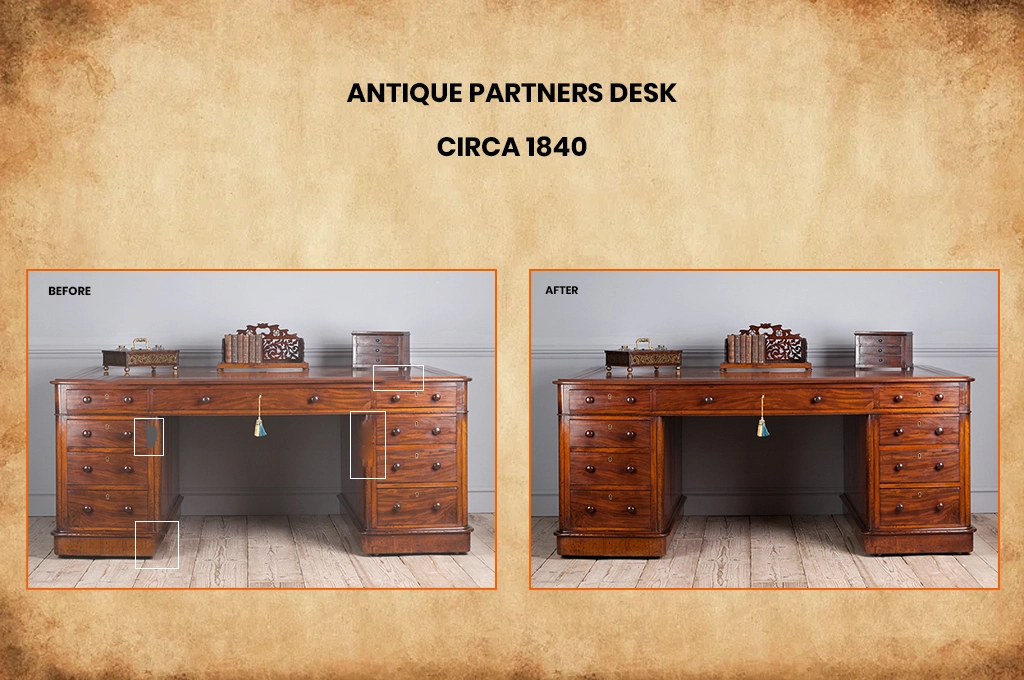
- Sometimes, tiny flaws or blemishes in furniture make the overall image unappealing. These minor imperfections create a bad impression and influence customers to change their purchasing decisions.
- A professional photo editing approach can help you conceal these unwanted defects. It will improve smoothness and help you maintain a natural look.
How to Edit Antique Furniture Photos to Increase Their Value?
You could have spent several days perfecting your old-aged vintage furniture shots. But it is still not enough to make the best impression until you edit and retouch them.
Here is how you should edit your pictures to increase the value of antique furniture.
You may also like to read… A Complete Guide to Product Photo Editing for E-commerce
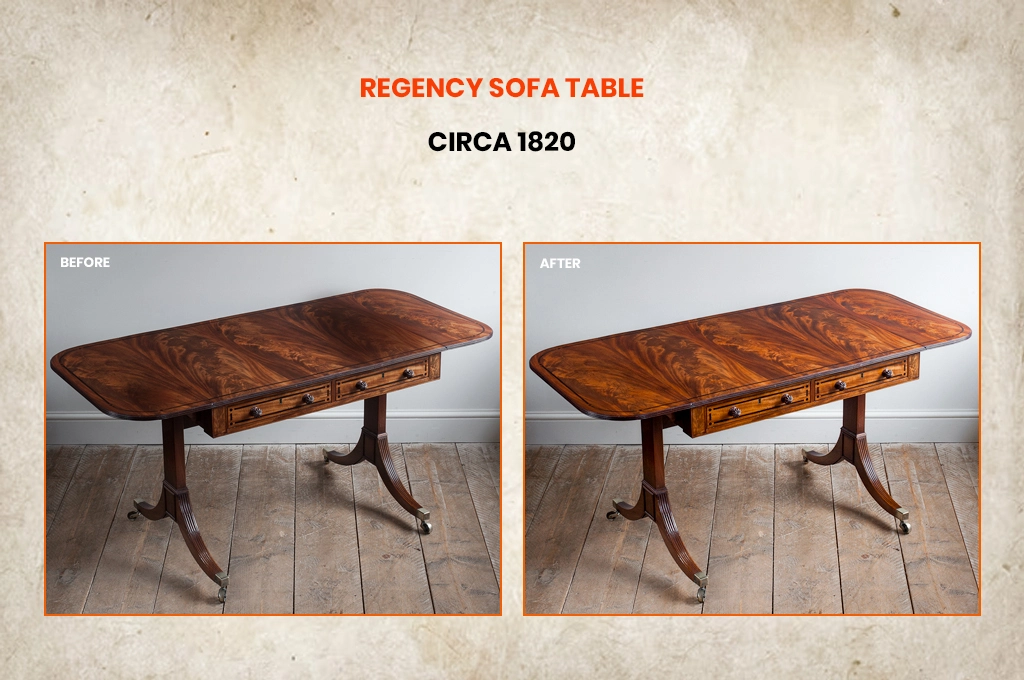
Adjust Exposure and Contrast
- A specific exposure level determines how bright or dark your vintage furniture looks. Your furnishing items should not appear over-exposed or under-exposed.
- For example, too much exposure level may wash out the original color. Or it can reduce the texture visibility.
- In contrast, a too-low exposure level may hide important details. The textures may appear unclear.
- Set a luminosity black point to create a well-balanced contrast in old-aged furniture photos. It will make furnishing items look appealing and high-quality.
Enhance Shadow and Reflections
- A proper natural shadow can create a sense of mystery and drama. It adds richness and shade to the visuals.
- Adjust the shadow intensity, especially around the edges of your selection, to create a natural, realistic look.
- A bad reflection can distort the antique image and look unnatural. In addition, it disrupts buyers from seeing the true texture, color, and design.
- Use the “Distraction Removal” function in Adobe Photoshop to remove reflections.
Incorporate 3D Edits
- Adding 3D effects to antique images can provide immersive viewing experiences. It allows customers to view furniture from all angles.
- Buyers can better understand the design, scale, and shape of the home decorative item.
- Use the 3D panel or Repoussé function from Adobe Photoshop to add 3D effects to your furnishing item photos. Make sure to adjust the lighting, shadows, and textures to keep it well-balanced.
Remove Blemishes
- Are there any visible fingerprint streaks or unsightly blurs from last-minute adjustments on your antiques?
- Use the Clone Stamp tool to eliminate such blemishes and “stamp” them over the imperfection. It is especially effective near sharp edges because it blends with the texture perfectly.
Enhance Furniture Color
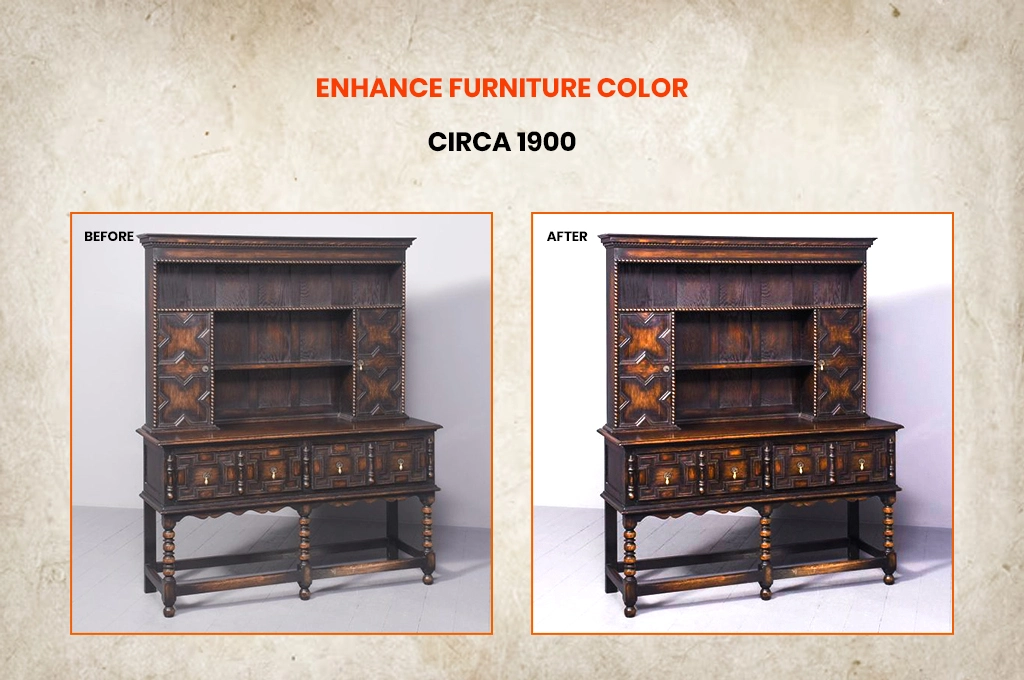
- A study revealed that 22% of online shoppers return products due to a mismatch between the image and the actual product.
- Maintaining an accurate depiction of color is essential to satisfy customers. Use Hue and Saturation tools to adjust the hue, saturation, and lightness.
- It helps you adjust the color tones and vibrancy of the antique image. The final result looks polished and eye-catching.
Use 100% sRGB

- sRGB is a standardized color profile. It determines how the visuals will be visible across devices and platforms. The primary objective is maintaining consistency.
- But how much sRGB value should we maintain? It is a good rule to keep the value at 100%, especially for native content. Anything above 100% is considered as over-saturated, and anything under 100% is regarded as under-saturated.
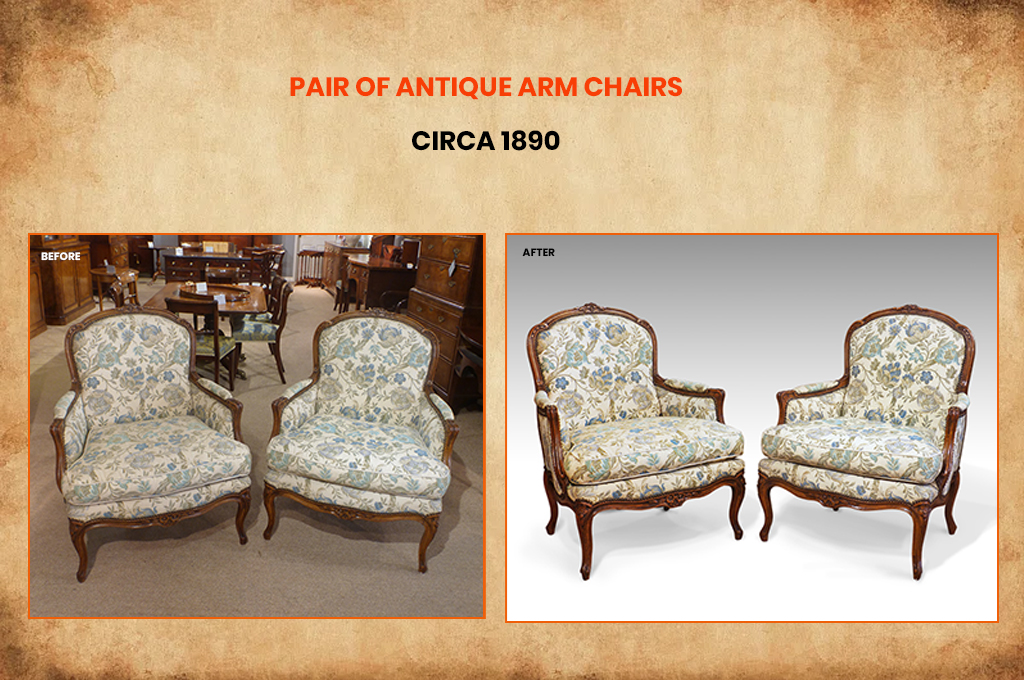
Remove or Replace the Background
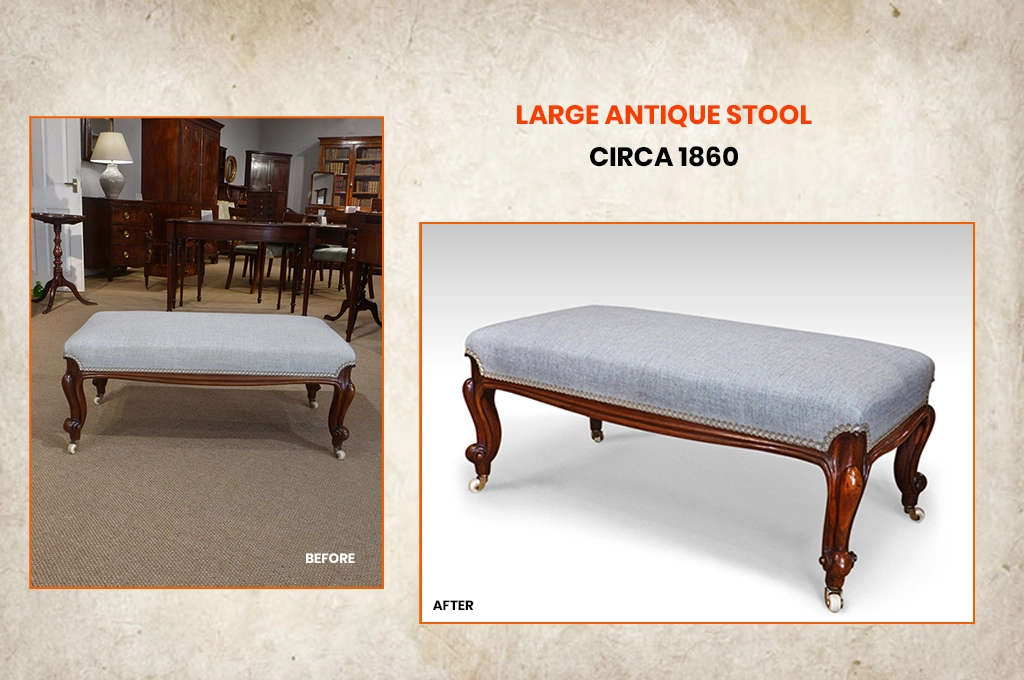
- A clean or neutral background is perfect for highlighting the details of old-aged furniture. Your furniture backdrop should not contain any distracting elements.
- Use a white, transparent, or vintage background for your furnishing product. You can also utilize a dark, moody backdrop with soft lighting to showcase intricate details and craftsmanship.
- Make sure to use layer masks to hide some specific areas of a picture without changing the original image permanently.
Clear Unwanted Things
- Does your vintage furnishing item have any scratches, dust, or patina? If so, use the Healing Brush Tool to remove such imperfections.
- This powerful tool can repair defective parts of an image quickly and give it a cleaner and more polished look.
- Make sure to maintain natural grain and avoid over-smoothing to preserve authenticity.
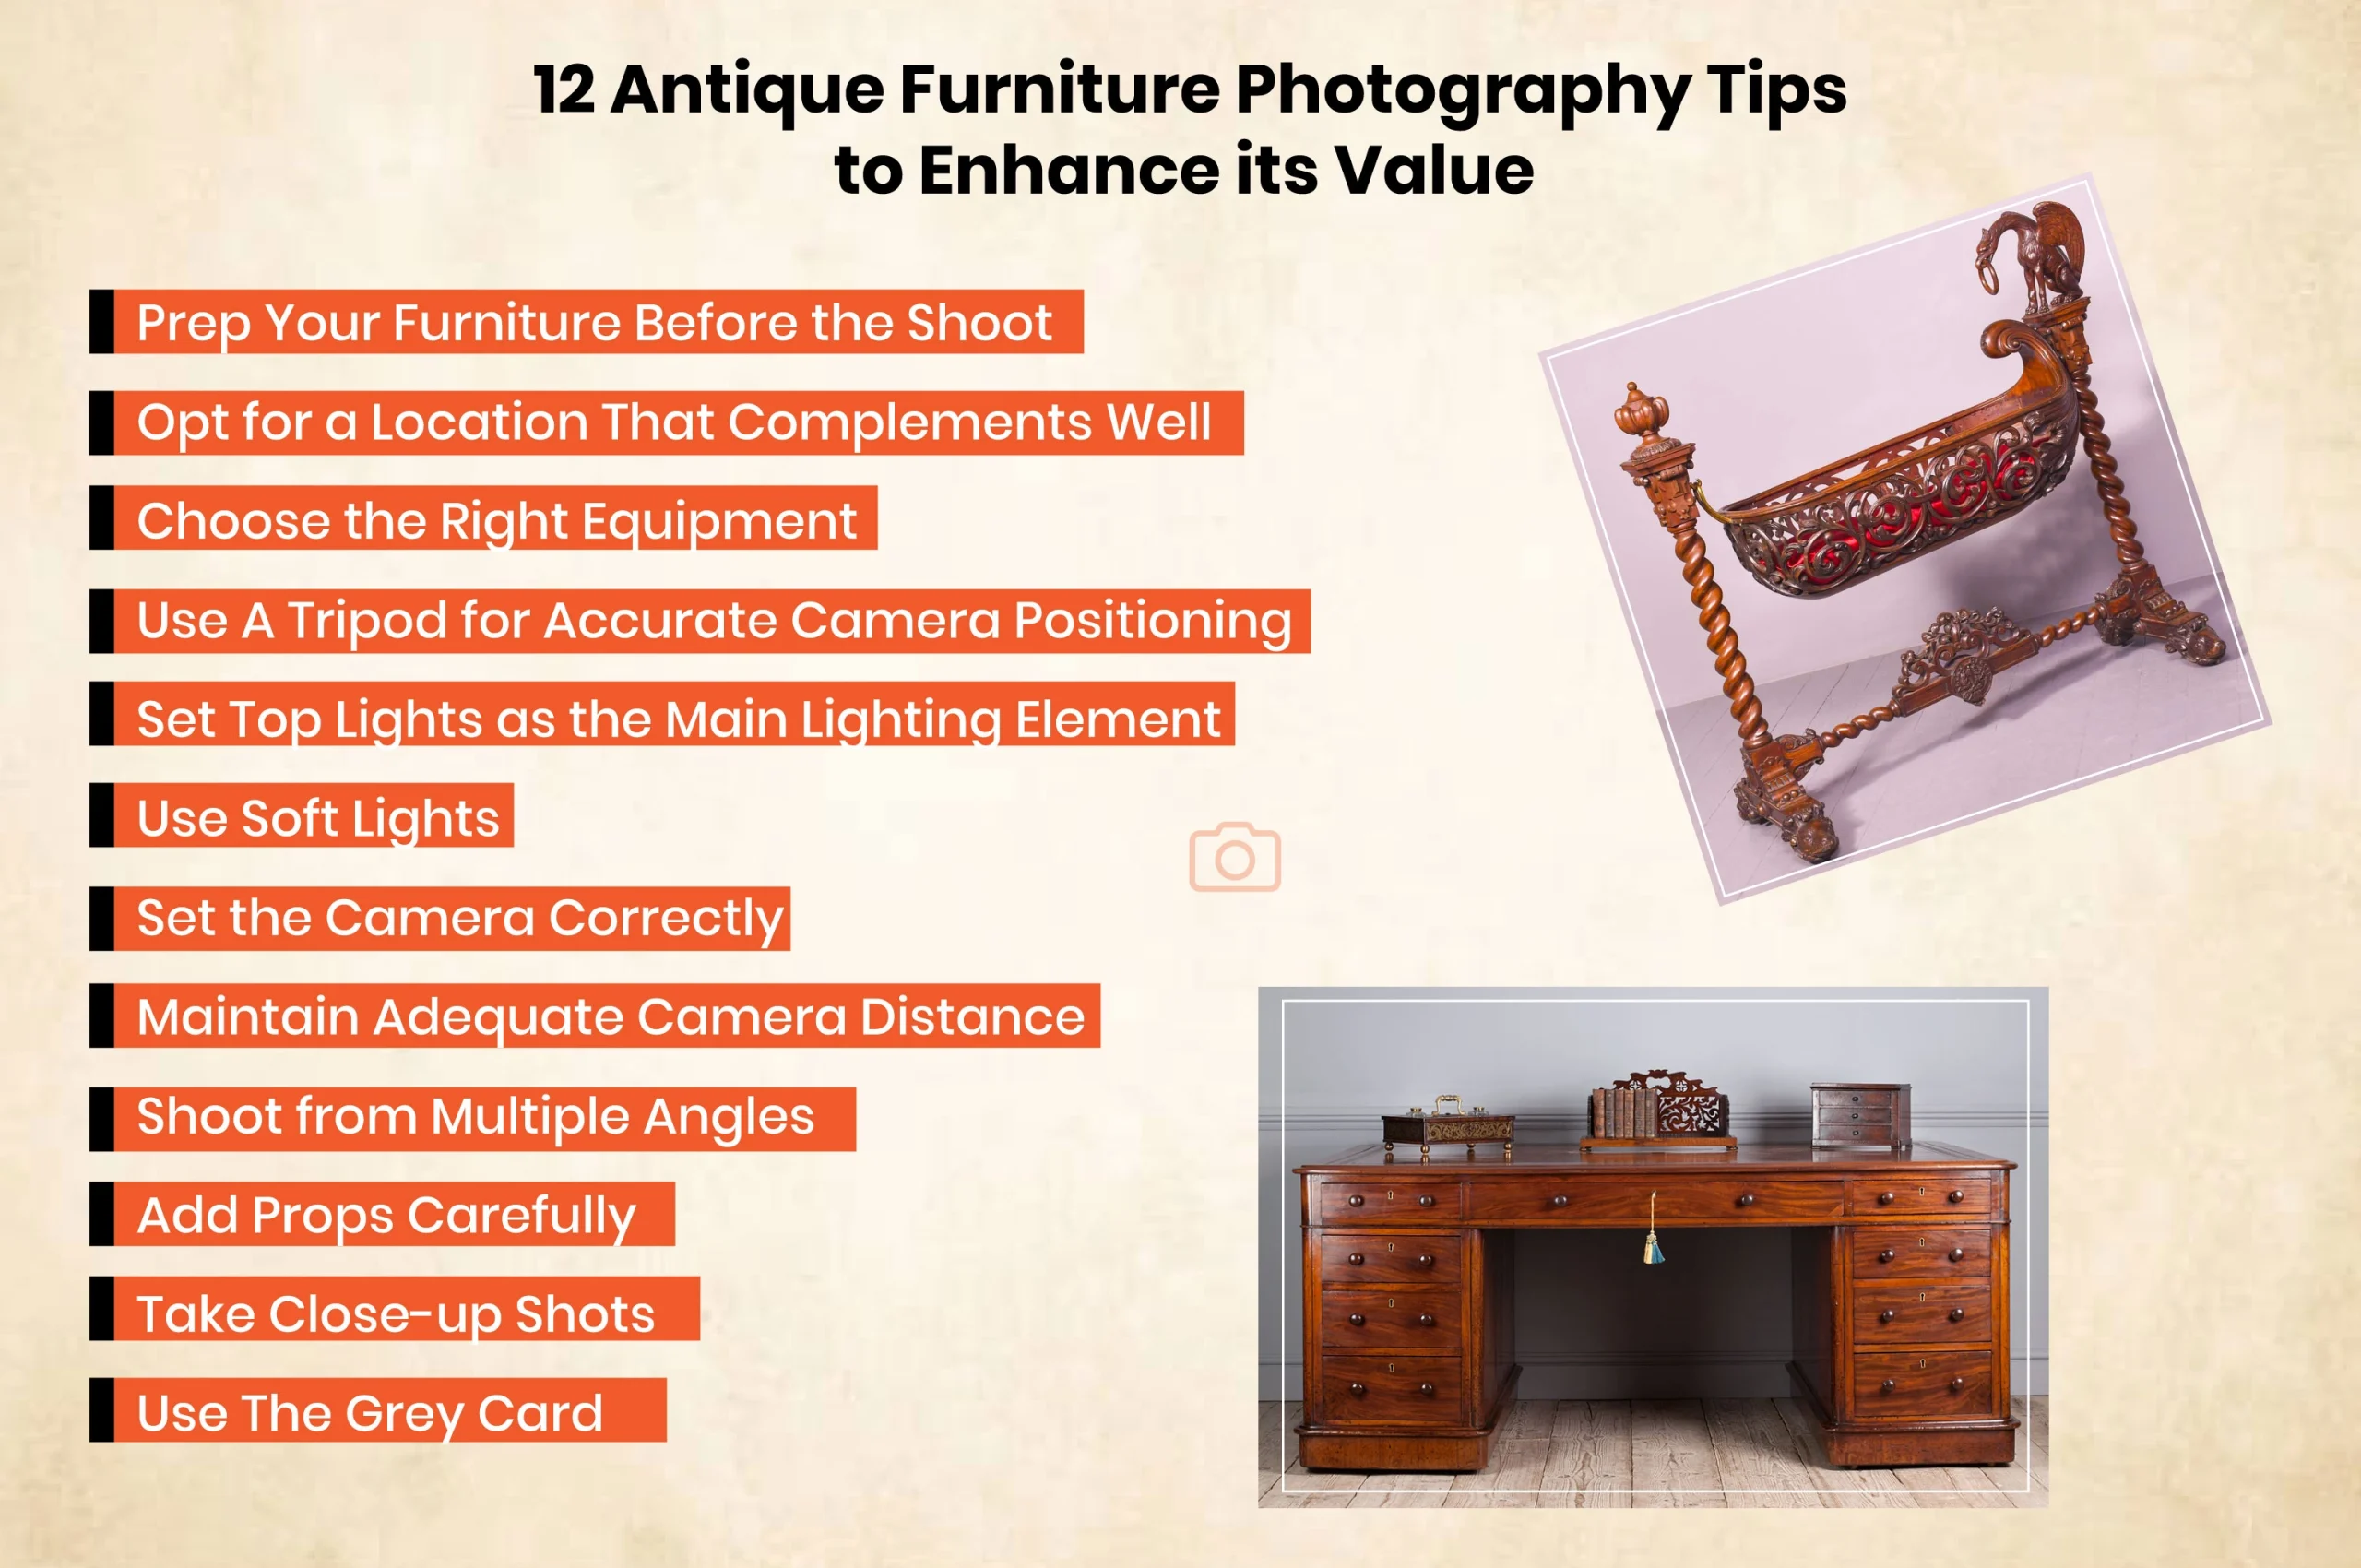
12 Expert Tips on Antique Furniture Photography to Enhance its Value
The better your old-aged furnishing photography, the easier the post-production. You will save a lot of time and effort. The following are the pro techniques to capture professional-quality images and raise the value of antique furniture.
You may also like to read… Ultimate Guide for Best E-commerce Product Photography
01. Prep Your Furniture Before the Shoot
The key to perfect antique furniture photography is extensive preparation. Before taking pictures, make sure they are correctly assembled.
Keep the furnishing item free from dust, allergens, grime, and stains. You can use a mild cleaning fluid to clean it.
02. Opt for a Location That Complements Well
Decide whether you will shoot indoors or outdoors. Indoor locations are the best choice for furniture photography as you have more control over lighting and background. Plus, you can maintain better consistency and a neutral backdrop.
But sometimes, outdoor photoshoots are good, too. Choose a well-lit outdoor area where soft, diffused sunlight will come naturally. It will highlight the key details without overwhelming the shot.
03. Choose the Right Equipment
Use a high-end DSLR or mirrorless camera to capture detailed textures, accurate colors, and sharp images.
You can utilize a 24-70mm f/2.8 lens to shoot various types of furnishing items photos. But a wide-angle lens like 16-35mm is excellent for tight spaces.
04. Use A Tripod for Accurate Camera Positioning
A tripod can help you capture images from various angles and perspectives. You can highlight its features and design. This tool also stabilizes the DSLR camera so that it can take sharp photos.
Maintaining consistent framing across several shots is also easy-going with this three-legged stand. It improves the caliber of your furniture photography, too.
05. Set Top Lights as the Main Lighting Element
When it comes to creating stylistic shots, top lights can be a game-changer. They create highlights and shadows to accentuate the texture and shape of the piece.
Overhead lighting can help you show details like intricate carvings, detailed inlays, wood grain patterns, surface textures, etc.
06. Use Soft Lights
Large lights create a pleasing glow on the primary object. They provide continuous lighting and mimic natural sunlight.
This type of lighting is gentle and adds a flattering effect to furnishing items. Plus, soft lights create smooth transitions to highlight textures evenly. Antiques will look more natural and visually appealing due to the low contrast.
07. Set the Camera Correctly
A good camera setup helps you capture high-quality images with better details. You have to consider important points, such as aperture, shutter speed, and ISO.
For instance, it is a good rule of thumb to keep the aperture between f/8 and f/16 to maintain focus across the entire piece.
Keeping the ISO as low as possible (around 100) is better to ensure sharp details and accurate colors.
Set the shutter speed to at least 1/100 to avoid blurry effects from the camera shake. But don’t go faster than 1/125. It will otherwise cause blackness in the picture.
08. Maintain Adequate Camera Distance
What should be the ideal distance between a camera and a piece of antique furniture? It will vary depending on the lens’ focal length and the available space.
However, a general rule of thumb is to maintain around 2-3 times the length of the piece furnishing product from it.
You can use a 70-200 mm focal length to position the camera farther away. It allows you to capture the entire piece without perspective distortion.
If you want to capture smaller items, use a 50mm lens for a natural perspective.
09. Shoot from Multiple Angles
Capture antique photos from different angles to provide customers with a complete view of its design, craftsmanship, and details.
It also helps you visualize textures, wood grain, intricate carvings, engravings, and other unique features.
For instance, shooting a piece of furnishing product from a 45-degree angle allows you to showcase the front, side, and depth of the antique.
Use a wide-angle lens for a better view of the entire piece. It makes the item spacious and well-proportioned.
A 24mm or 35mm prime lens can help you get superior image quality with sharper details
10. Add Props Carefully
There is a high debate about whether you should add props or not. The wrong ones can even conceal important details of antiques and create distractions.
For instance, you can add rugs, plants, and books for options, like Victorian armchairs, rustic wooden tables, etc. They can create a warm ambiance.
A painting, pillows, or a vase of flowers complement old-aged furnishing products like French provincial sofas, colonial-style beds, etc.
The proper placement of props is vital to create a realistic, relatable environment.
11. Take Close-up Shots
Capture close-up macro shots to highlight important details, like materials, textures, and other distinctive features. It enables you to showcase the piece in all its glory.
Customers can better evaluate the finishes, fabrics, and design of the antique. They will become more confident about buying the product and make an informed decision.
12. Use The Grey Card
Are you shooting RAW? You can use a gray card as a reference point. It allows you to set a standard white balance, color, and exposure level.
You won’t have to worry about color casts from lighting. Grey cards help you consistently showcase the true colors of fabrics, finishes, and textures for item images.
Similar Reads for You
Frequently Asked Questions
How does photo editing help preserve the aged look of antique furniture?
Old-aged furnishing items contain natural patina and wear marks. However, professional photo retouching enhances these characters and presents them accurately.
Can photo editing increase the perceived value of antique furniture?
Yes, professional photo editing can make antique items look well-polished and attractive to collectors or buyers.
What role does background removal play in showcasing antique furniture?
Erasing an unwanted backdrop helps you highlight the key features, design, and style of old-aged furniture. It removes distracting elements.
Why is color correction essential in antique furniture photography?
A proper color correction enables you to showcase the item’s true hues and preserve its historical value in digital images.
How can photo editing adjust lighting to enhance antique furniture photos?
Professional photo editing allows you to increase or decrease the exposure and contrast level to correct lighting issues. It will enable you to represent the piece’s details accurately and clearly.
Conclusion
Antique furniture hold a special place among collectors and history enthusiasts due to their rarity and craftsmanship. After all, they create tangible connections to the past. If you are not expert enough, hire a professional photo editor to edit your antique visuals. The edited images must be attractive enough to create images at first glance. Hopefully, you got a clear overview of how photo editing elevates the value of antique furniture.