white background is one of the best choices for showing the actual colors of products. This neutral backdrop eliminates distracting elements and highlights the main subject. But your product photos must align with the white background. You need to work on both in the post-production process. We will walk you through how to edit product photos white background.
How to Make Product Photos White Background Pure White in Photoshop?
Just because you have set up a perfect white background doesn’t mean it will appear pure white. Lighting, subject-related elements, camera settings, and other attributes can prevent you from achieving a perfect, pure white background. Hence, you need to edit them.
Step_01: Import the image using Adobe Photoshop. Create a new layer.
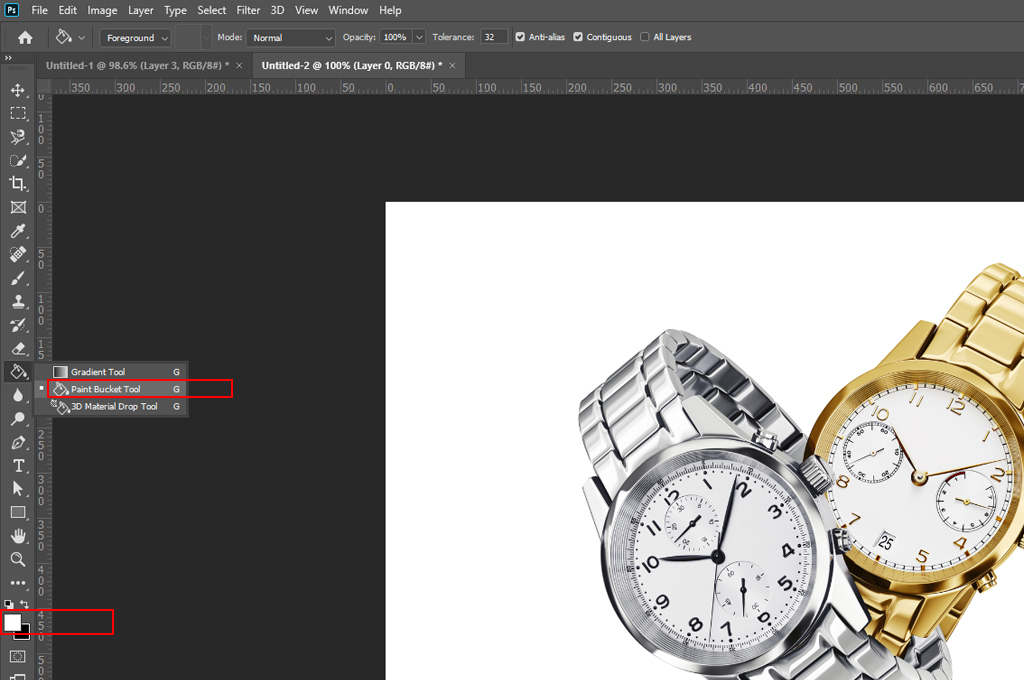
Step_02: Navigate to the toolbar area on the left side and choose the Paint Bucket tool.
Step_03: Set up the foreground color to white.
Step_04: Tap on the Canvas to fill the background layer with white.
You may also like to read… How to Use Affinity Photo to Remove Background Easily
How to Make Product Photos White Background to Pure White in GIMP?
GIMP is another popular image manipulation application to transform a dull white backdrop into a pure white background. Here are the steps:
Step_01: Launch the software on your desktop or laptop.
Step_02: Select the image you want to edit.
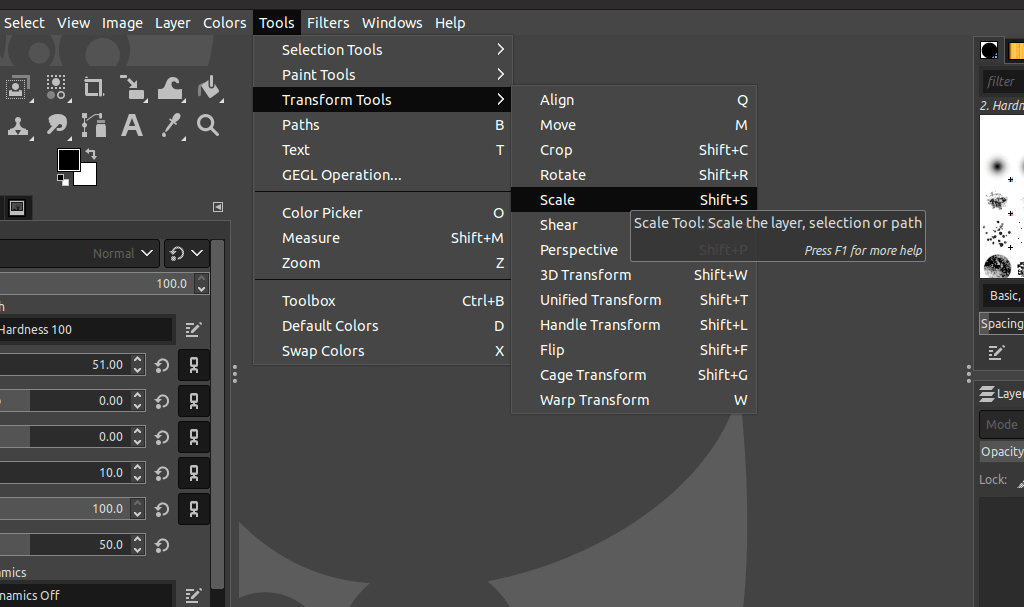
Step_03: Select Tools> Transform Tools> Crop to resize the image if needed. It helps you keep the main subject front and center.
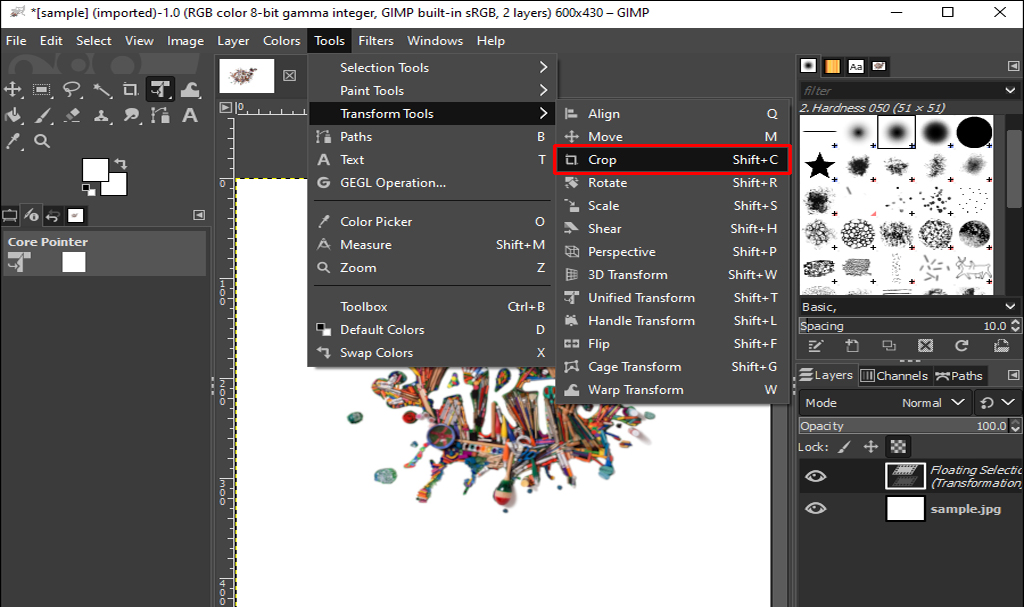
Step_04: Drag and select the area you want to cover. Then, press the “Enter” button on the keyboard to crop the photo.
Step_05: Next, click Colors> Levels. A new window will pop up.
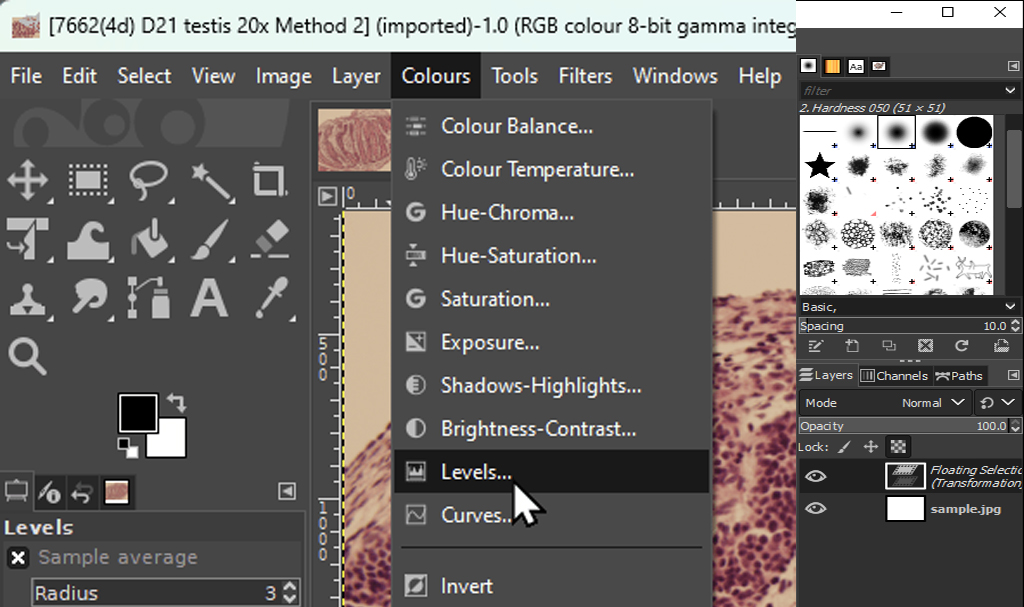
Step_06: Choose the “Pick White Point” and apply it to the background area. It will totally transform the selected area into a white background.
Step_07: Finally, select the OK button and choose File > Save to save the edited image.
A Few Tips to Edit Product Photos for White Background
Once you create a perfectly pure white background for the product photo, you must also retouch the main product. Here is how you should do it.
Phase_01: Erase Imperfections with the Spot Healing Brush Tool
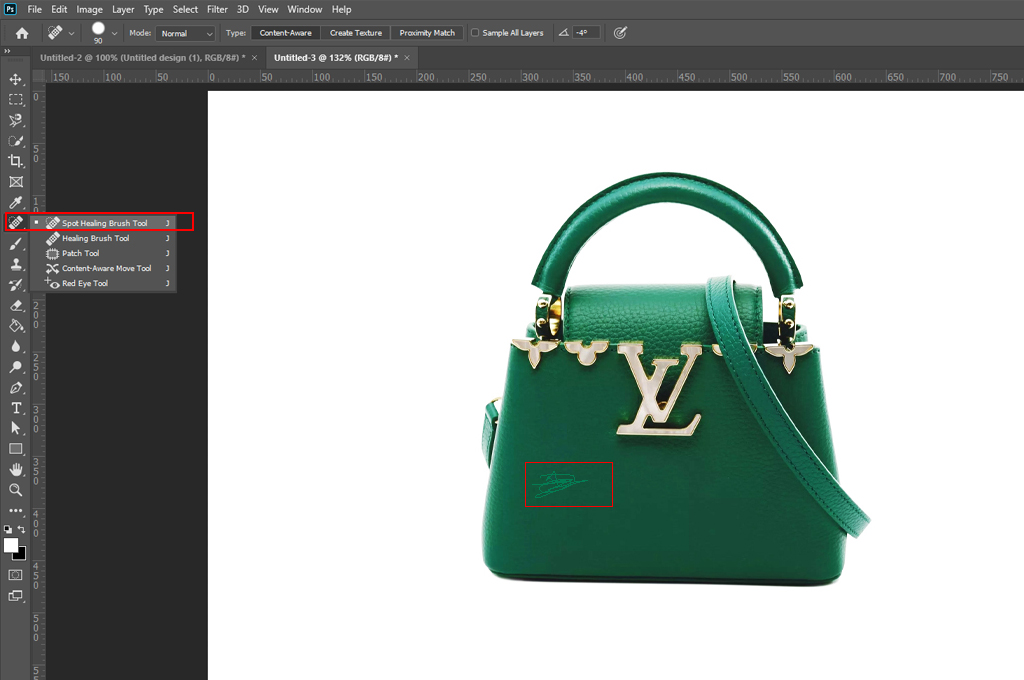
- If your product contains imperfections or unwanted elements, use this tool. You can adjust this brush tool’s size, hardness, and pressure.
- For minor areas like creases, fingerprints, or small stains, simply click on each one separately to fix them.
- If you want to remove flaws from larger areas like cracks, heavy stains, etc., choose and drag over the area to smooth and erase the imperfection.
You may also like to read… 4 Best Photo Background Removal Apps for Mac for Beginners
Phase_02: Improve Details with Clone Stamp Tool
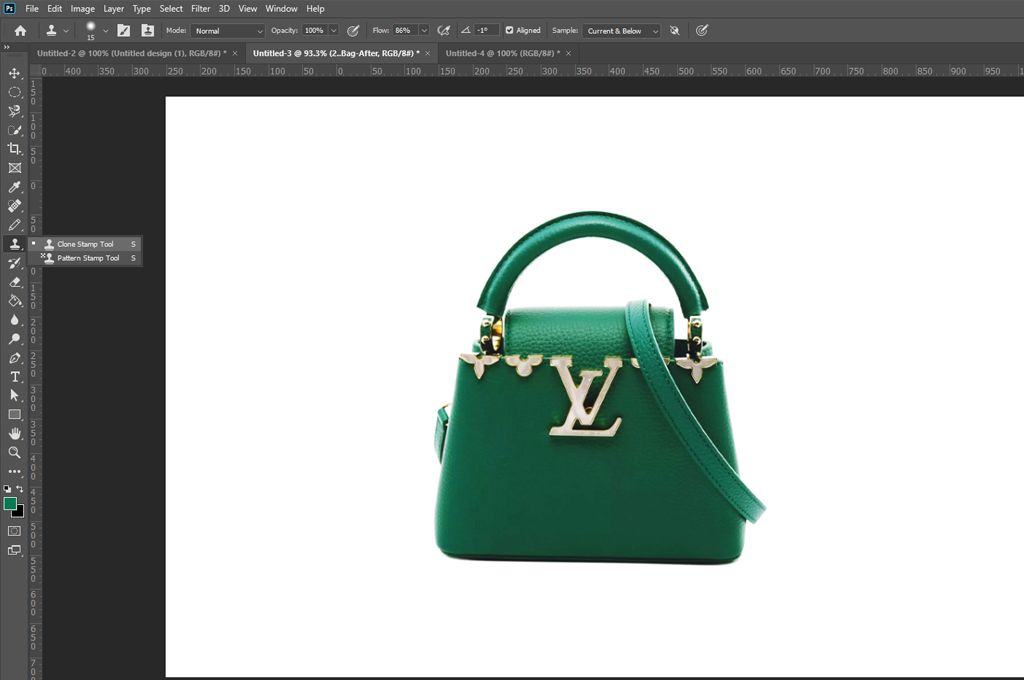
- Some areas of an image may not be the same as others. There might be some damaged sections.
- You can use the clone stamp tool to copy the same detail from one photo segment to another sector.
- This special tool comes in handy to match textures or patterns across different parts of an image for consistency.
Phase_03: Refine Image Focus with the Sharpen/Blur Tool
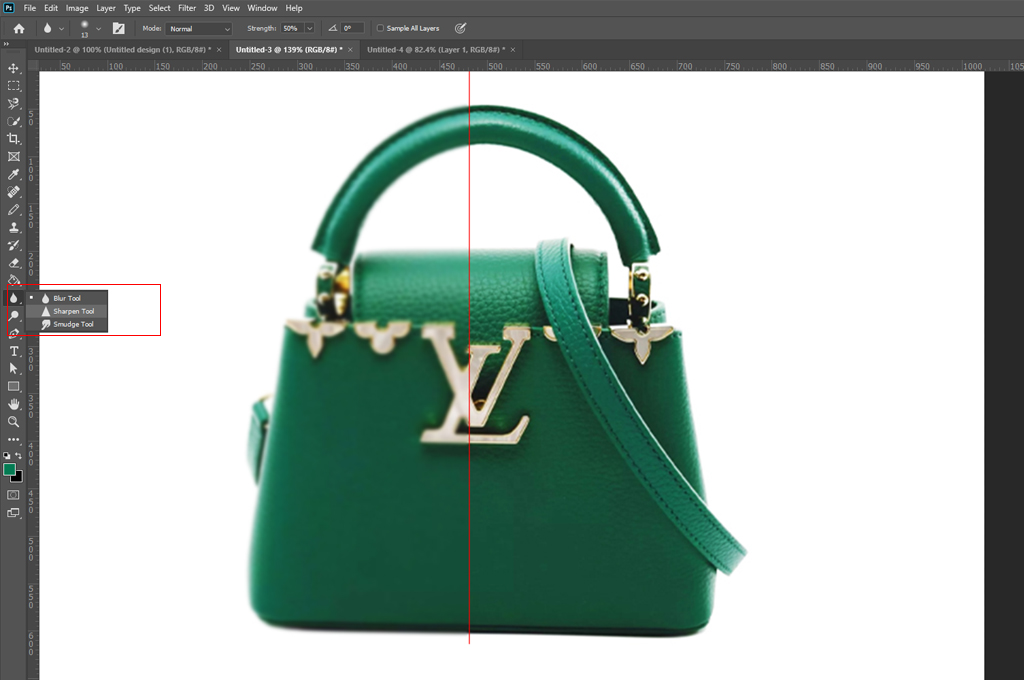
- Does your picture look blurry or unclear? Use the sharpening tool to enhance clarity or focus and bring out fine details without changing the overall photo structure.
- But don’t make the image too grainy. It may make the photo appear with unnatural halos and increase noise.
- You can use the blur tool to adjust fields of depth in a picture, blend edges, and create a smoother look.
Phase_04: Lighten/Darken with Dodge/Burn Tool
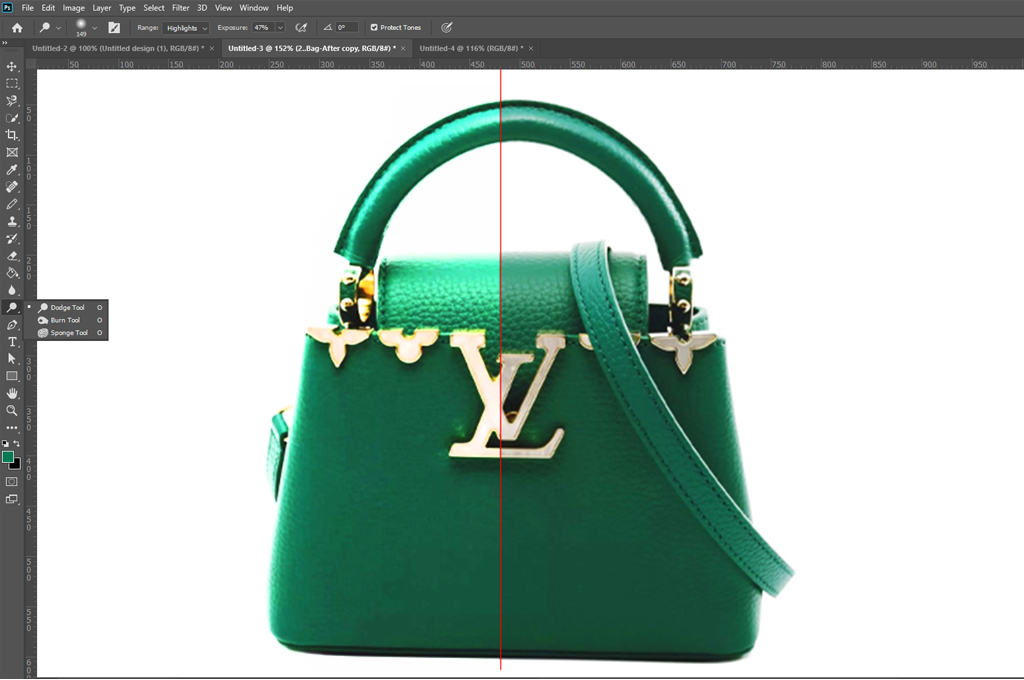
- If you want to lighten some specific areas of an image without changing the saturation or hue, use the Dodge function.
- In contrast, the Burn option comes in handy to selectively darken a particular section of a picture. It lets you deepen shadows and add depth and contrast to an image.
- Make sure to choose the right brush size, range, and exposure for perfect results.
Conclusion
A right contrast in the product photo can determine how sharp and vivid the item will appear. You need to set up the right balance and harmony in your product image along with the background to make it stand out. It must have the correct color, texture, and lighting to highlight all important areas and attract customers. Hopefully, you got a clear idea of how to edit product photos white background.