eBay has more than 135 million users in 190+ markets worldwide. Selling products on this highly competitive platform is not easy. If your products don’t look good enough to attract customers, you will lose the race for business growth. Apart from taking good shots, perfectly editing the images is vital. This post will walk you through how to edit photos for eBay. Let’s dive in!
5 Steps for Editing Product Photos for eBay
After taking perfect product shots, you must edit them to match the eBay image guidelines.
The following are the steps for editing photos on eBay listings.
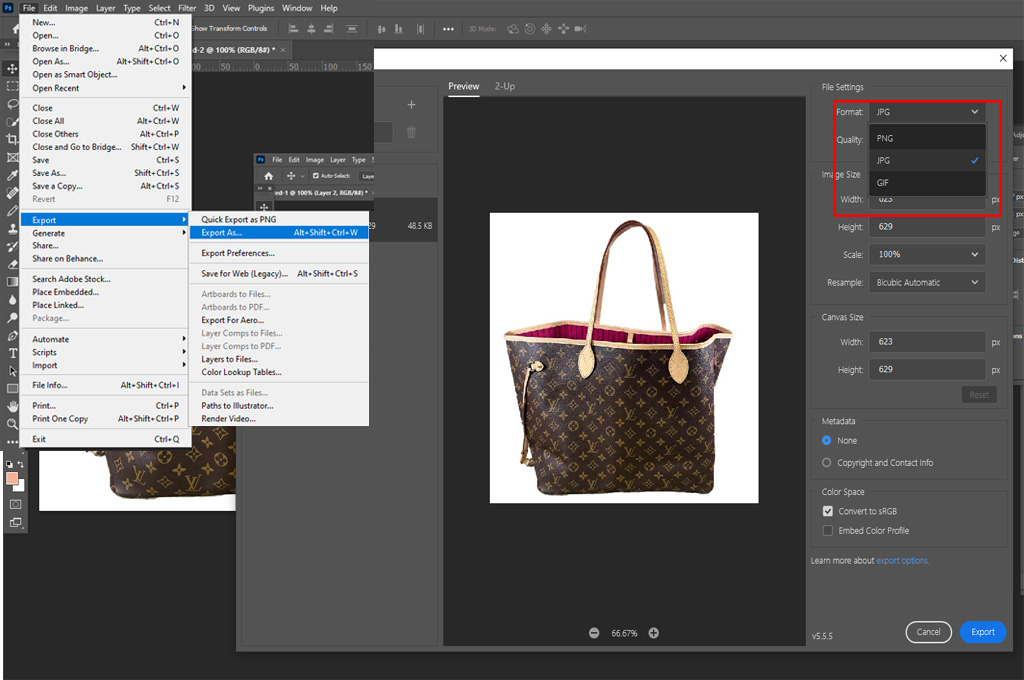
Step 01: Resize the image
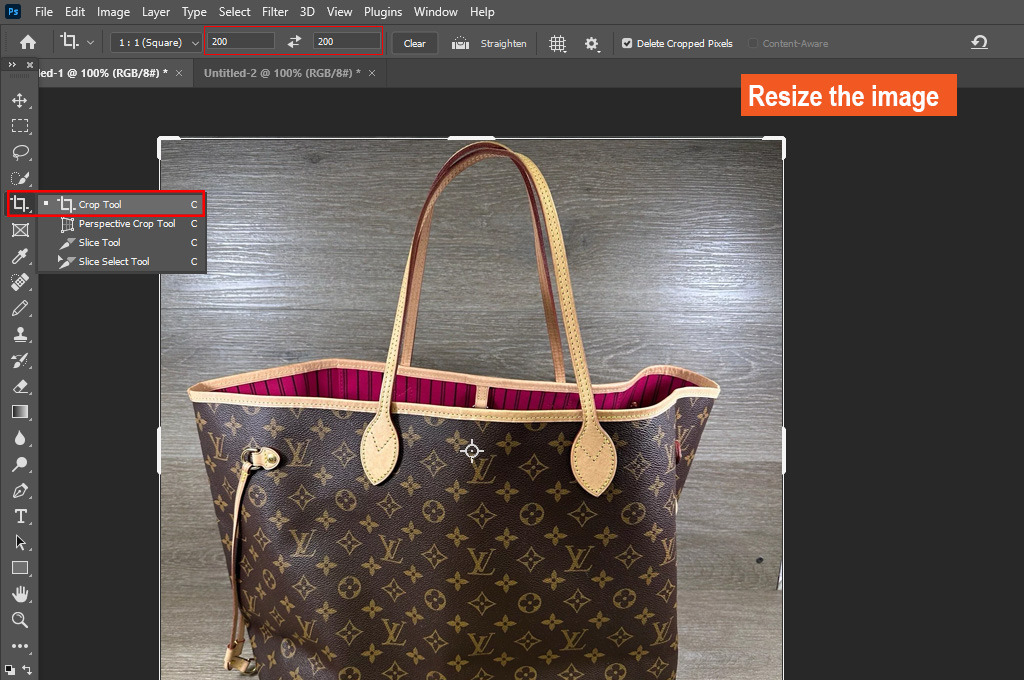
- Depending on the EXIF orientation data, you may need to rotate your product image. The dimensions of the photo can be landscape, portrait, or square. But maintaining consistent orientation and size is crucial for all eBay product photos.
- Crop and resize the image using your preferred photo-editing software. Keep the product fully focused and remove unwanted objects by changing its aspect ratio.
- An eBay picture must be at least 500×500 pixels but not more than 9,000 x 9,000 pixels. Try to keep 800-1600 pixels for both vertical and horizontal sides.
- The image file size can’t exceed 12 MB. Keep the padding size between 10% to 20%, whereas the product should cover around.
Step 02: Adjust Brightness, Color, or Contrast
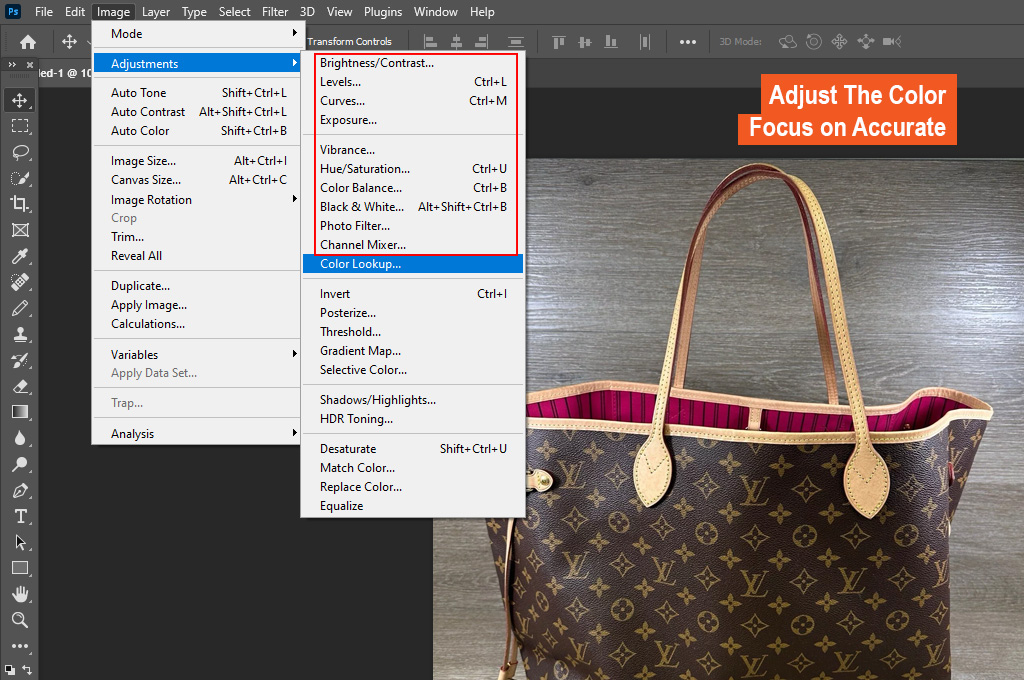
- Uploading bright and clear images on the eBay platform is necessary. You may need to adjust the brightness, color, and contrast levels. But focus on accurate representation of the product.
- Besides, work on the sharpness level. It should be sharp enough to see its textures and fine details clearly. However, avoid over-sharpening it. Otherwise, it will introduce noise or artifacts.
- Another important thing is to skip using any special filters. It may completely change the product’s look.
Step 03: Remove or Change the Background
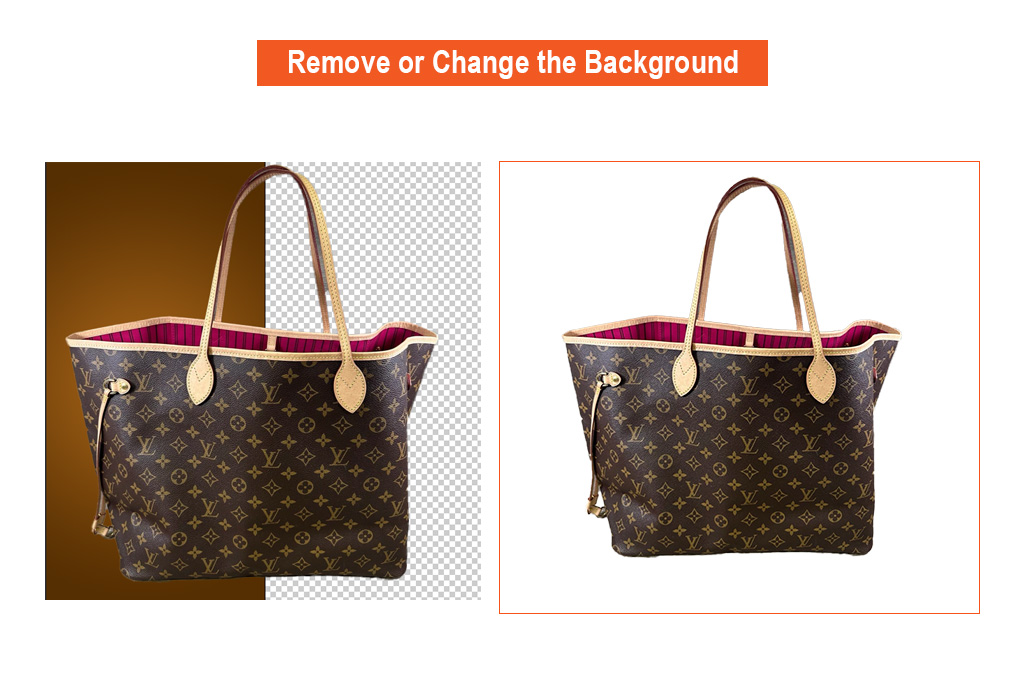
- It is always best to use a solid background for eBay product photos. You can choose white, black, beige/canvas, or neutral tones. But regardless of the option you choose, it must complement the item.
- A clutter-free background is a must to focus on the main product. Remove extraneous stuff or the entire backdrop and replace it with a solid option. Keep it as simple as possible.
Step 04: Save Images in The Right Format
- Once you are done editing, save the product photos in PNG, JPEG, TIFF, GIF, WEBP, HEIC, AVIF, or BMP format.
- The quality scale of eBay images must be 90+ for JPEG format. Plus, keep the size lower than 12 MB.
You may also like to read… Step-by-Step Guide: How to Sell Used Books on Amazon
Bonus Tips for eBay Product Images
- Make sure the photo accurately matches the main product.
- The item image should not contain any borders, extraneous stuff, copyright marks, or barcodes.
- Upload only the original product images that have only your intellectual property rights.
- Crop the pictures carefully to avoid cutting out any important areas.
- Don’t add people or body parts unless it is necessary.
- Avoid using any sensitive or nude content in the eBay images.
- Keep photos free from props and other distracting elements.
- The entire image should not contain overly bright areas to prevent distortion.
- If you add two product parts in the same photo, make sure both are visible clearly.
- Adding secondary images is okay if they do not have the same angle as the primary images.
Similar Reads for You
Conclusion
Regardless of how perfect your product shots are, editing those photos for the eBay platform is necessary before uploading them on eBay. We have already outlined how to edit photos for eBay in simple steps. Make sure your captured pictures are high-resolution to avoid losing important details.