Even after taking professional-quality cupcake photos for my bakery business, I was not happy with the results. They needed some retouching. The background has cluttering elements, such as messy counters, stray crumbs, overlapping decorations, etc. I knew clipping masks in Adobe Photoshop could solve this problem. But a question popped up: “how do i create a clipping mask in photoshop?” This is how I edit my cupcake images and make them perfect for advertisement.
Create a Clipping Mask in Photoshop Step-by-Step
- Install Adobe Photoshop on your PC. It should work smoothly and avoid disrupting your editing task.
- Always choose high-quality photos for the post-production process. It helps you achieve better quality.
- Make sure to learn the right way of using the Pen Tool in this photo-editing software. Take help from online tutorial videos to learn how to use the tool.
The following steps are to create a clipping path in an Adobe image-editing app.
Step_01: Import Your Image
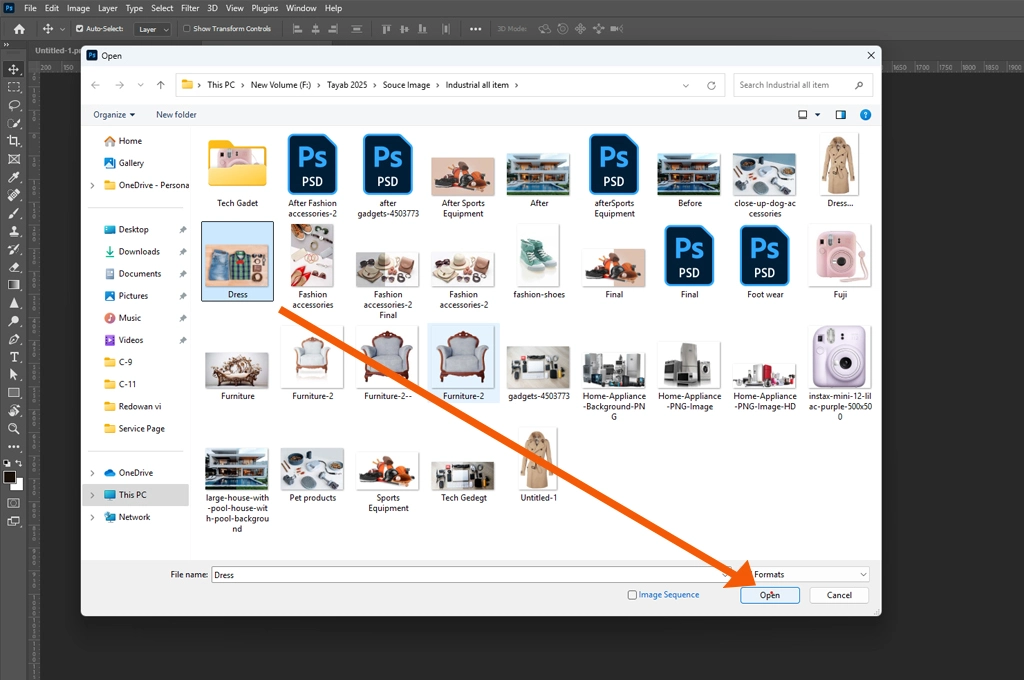
- Open the software on your computer or laptop. Select File > Open.
- When a new window appears, tap on the picture you want to edit. Then, choose Open.
- Alternatively, use the drag-and-drop option to import the image.
Step_02: Select the Pen Tool
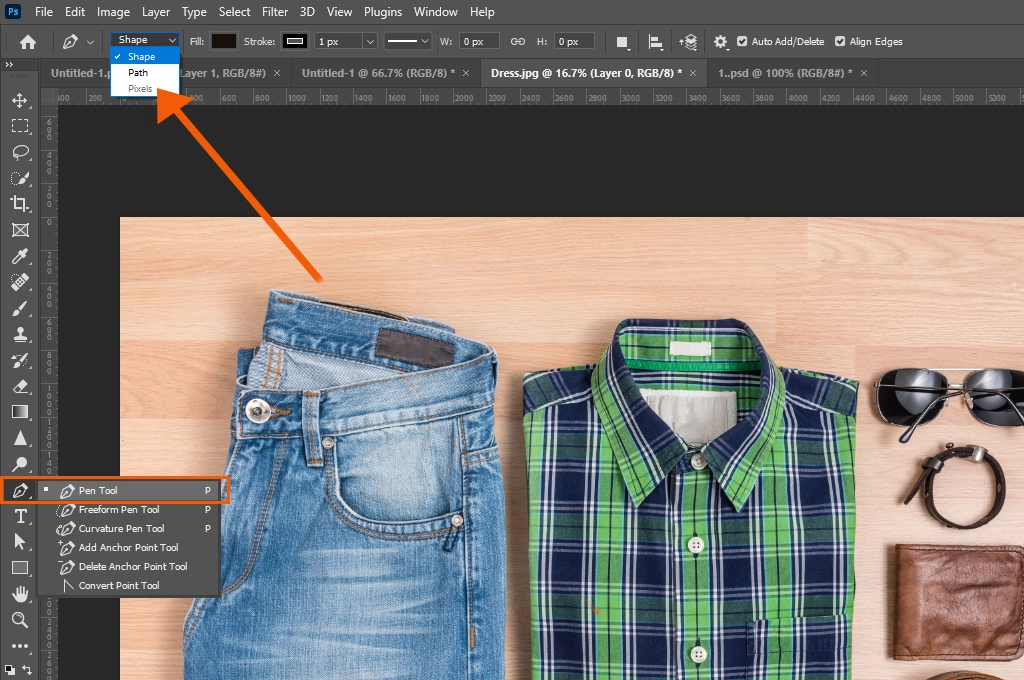
- Navigate to the left side of the window and select the Pen tool from the lower half of the toolbar section.
- You may use other tool options. However, the pen tool is one of the best choices for making smooth, curved lines and drawing paths with sharp corners.
Step_03: Choose a New Path
- Zoom in on the photo and focus on the area where you want to create a vector mask.
- Use the Pen tool and carefully track down the area where you want to make a deep etching.
- If you need to manually select the deep etching option, head to the upper menu panel and choose the Path from Window. Don’t change the value for the flatness setting; tap on the OK option.
You may also like to read… Professional Cropping and Resizing Images for E-commerce
Step_04: Draw a Clipping Path
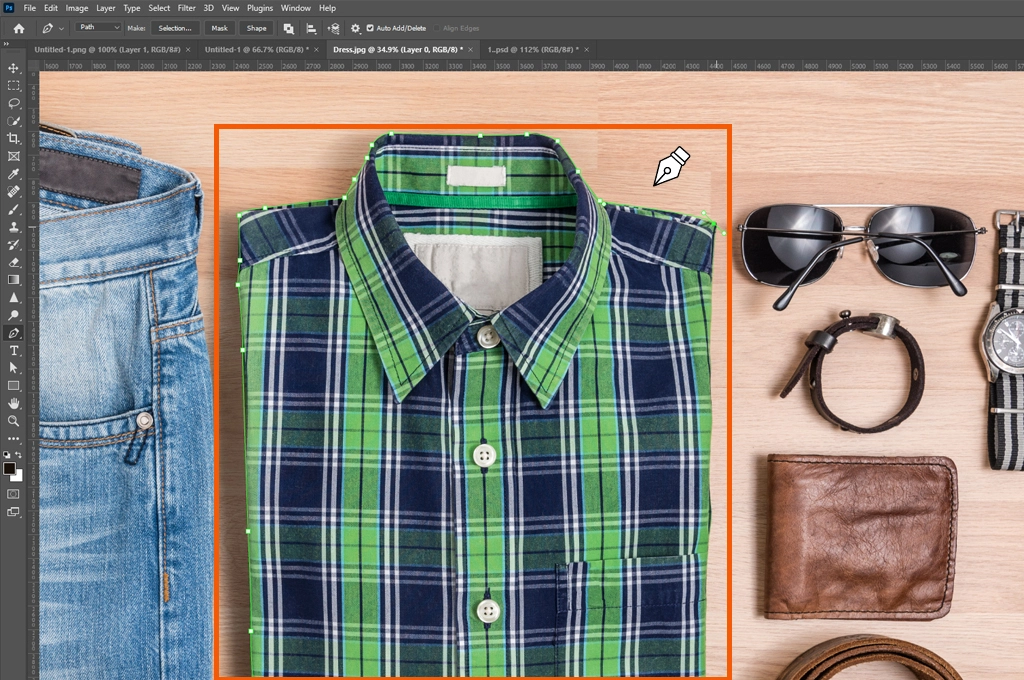
- Use the Pen tool and slowly move it along the object’s edges. Place anchor points along curves and corners and make a quick clipping path in Photoshop.
- Add as many anchor points as you need to cover the entire object. Use the direction handles to modify the shape and direction of the curve.
- Use the control handles to adjust the size, rotation, and perspective of the vector mask.
Step_05: Soften the Hard Edges
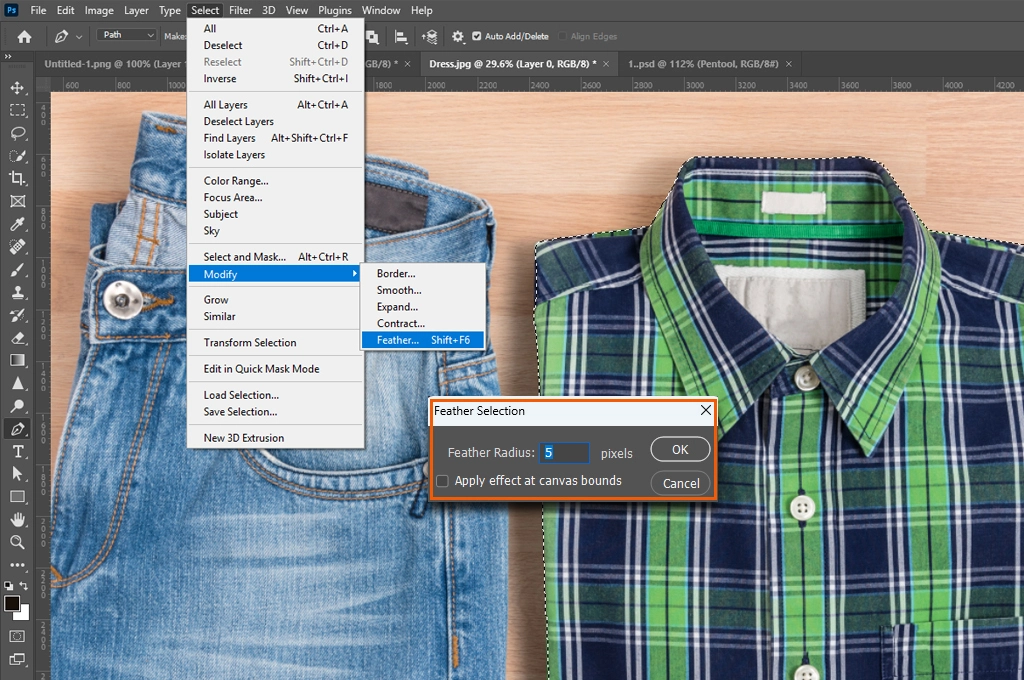
- Once you make a perfect deep etching, create a selection by pressing “Ctrl + Enter” on the keyboard.
- Navigate to the upper menu panel and choose Select > Modify > Feather. Or press “Shift + F6” on your keyboard.
- Then, enter a value of 0.5 pixels on the dialogue box to soften the hard edges. Don’t go for pixel-precise sharp edges, as they look unnatural.
You may also like to read… Benefits of Multi Clipping Path for Photography
Step_06: Convert Path to Selection
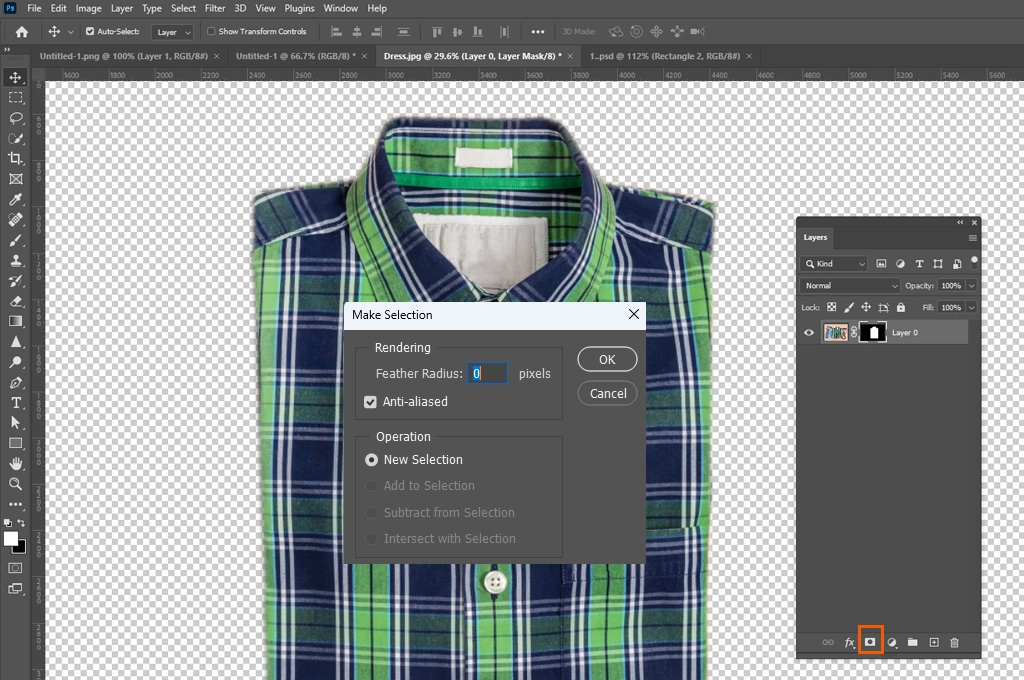
- After smoothening the edges perfectly, right-click on your vector mask and select “Make Selection” from the drop-down lists.
- A new dialogue box will pop up. Enter the feather radius value to 0 and tap “OK.” Go to the layer panel and create a copy of the backdrop.
Step_07: Save the Clipping Mask
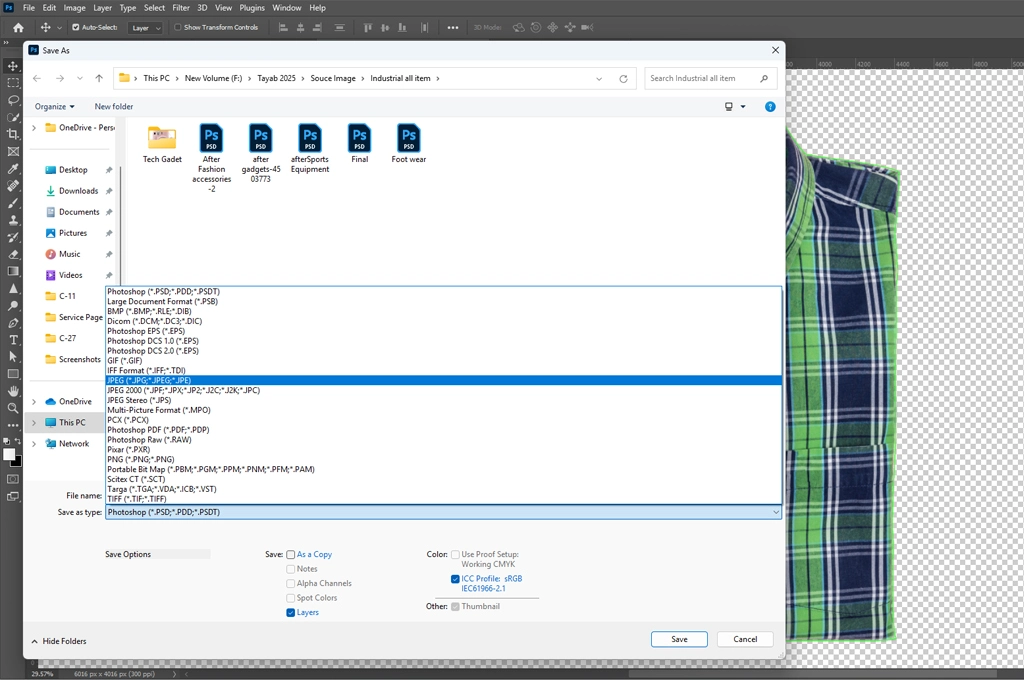
- Wondering how to save a clipping path in Photoshop? If you do not see the paths panel automatically, navigate to the Window area and select Paths.
- A new option, named “Work Path,” will be visible on the screen. Right-click on it and select the “Save Path” option. You can use this vector mask in the future.
Similar Reads for You
-
What is Image Clipping and Why Do We Need It?
-
How to Make a Clipping Path in Illustrator in 3 Steps?
Conclusion
Make sure to save your work frequently to avoid losing progress during editing. Don’t rely on automatic selection if you want to create a precise vector mask. Use the Pen tool for better results. Give yourself enough time to practice and learn the art of the perfect deep etching technique. Hopefully, you got a clear answer to the question, “How do I create a clipping mask in Photoshop?”