In the online retail world, customers rely solely on clothing images to buy the product. If your items are not good enough to impress buyers, they will walk away and look for competitors’ options. Taking perfect apparel pictures is not easy. It requires a lot of planning, clothes photo editing, and techniques to capture perfectly. However, you can’t make apparel images pixel-perfect without professional editing. Your attire color might look unnatural. Or the clothing image may have harsh shadows or overexposed areas. There might be some fabric wrinkles or creases.
So, how do you deal with this problem? You must follow the correct approaches to remove these flaws through professional clothes or apparel photo editing. This article will help you perfectly retouch your apparel photos and prepare them for e-commerce.
What is Clothes Photo Editing?
Clothes photo editing is a special type of image editing that edits and retouches garment products. Its primary purpose is to show apparel items in the best possible way without manipulating the original appearance. A fashion brand needs various types of clothes photo editing to create a compelling visual representation. The key is improving the overall image quality and attracting customers to purchase the attire.
Why is Editing Important for Clothing Photography?
Your garment items may have a perfect style. The lighting was also perfect. But clothing photos still need a final touch-up. Even a tiny edit can make a big difference to the product’s visuals. Editing clothing images before publishing them on the ecommerce site is essential to maintain a consistent brand image. The following are common corrections professionals do during post-production for clothing photographs.
- Color correction to retain the original color of the apparel products
- Adjustment of brightness level or shadow, and clarity to ensure consistency across all digital devices
- Removal of wrinkles, stains, or other flaws
- Texture, pattern, and detail enhancement
- Shadow and reflection adjustment
How to Clothes Photo Editing Step-by-step?
The following are steps to edit clothing images and transform your boring apparel photos into visually eye-catching ones.
Step-01 Identify What Needs to Be Fixed in the Photo
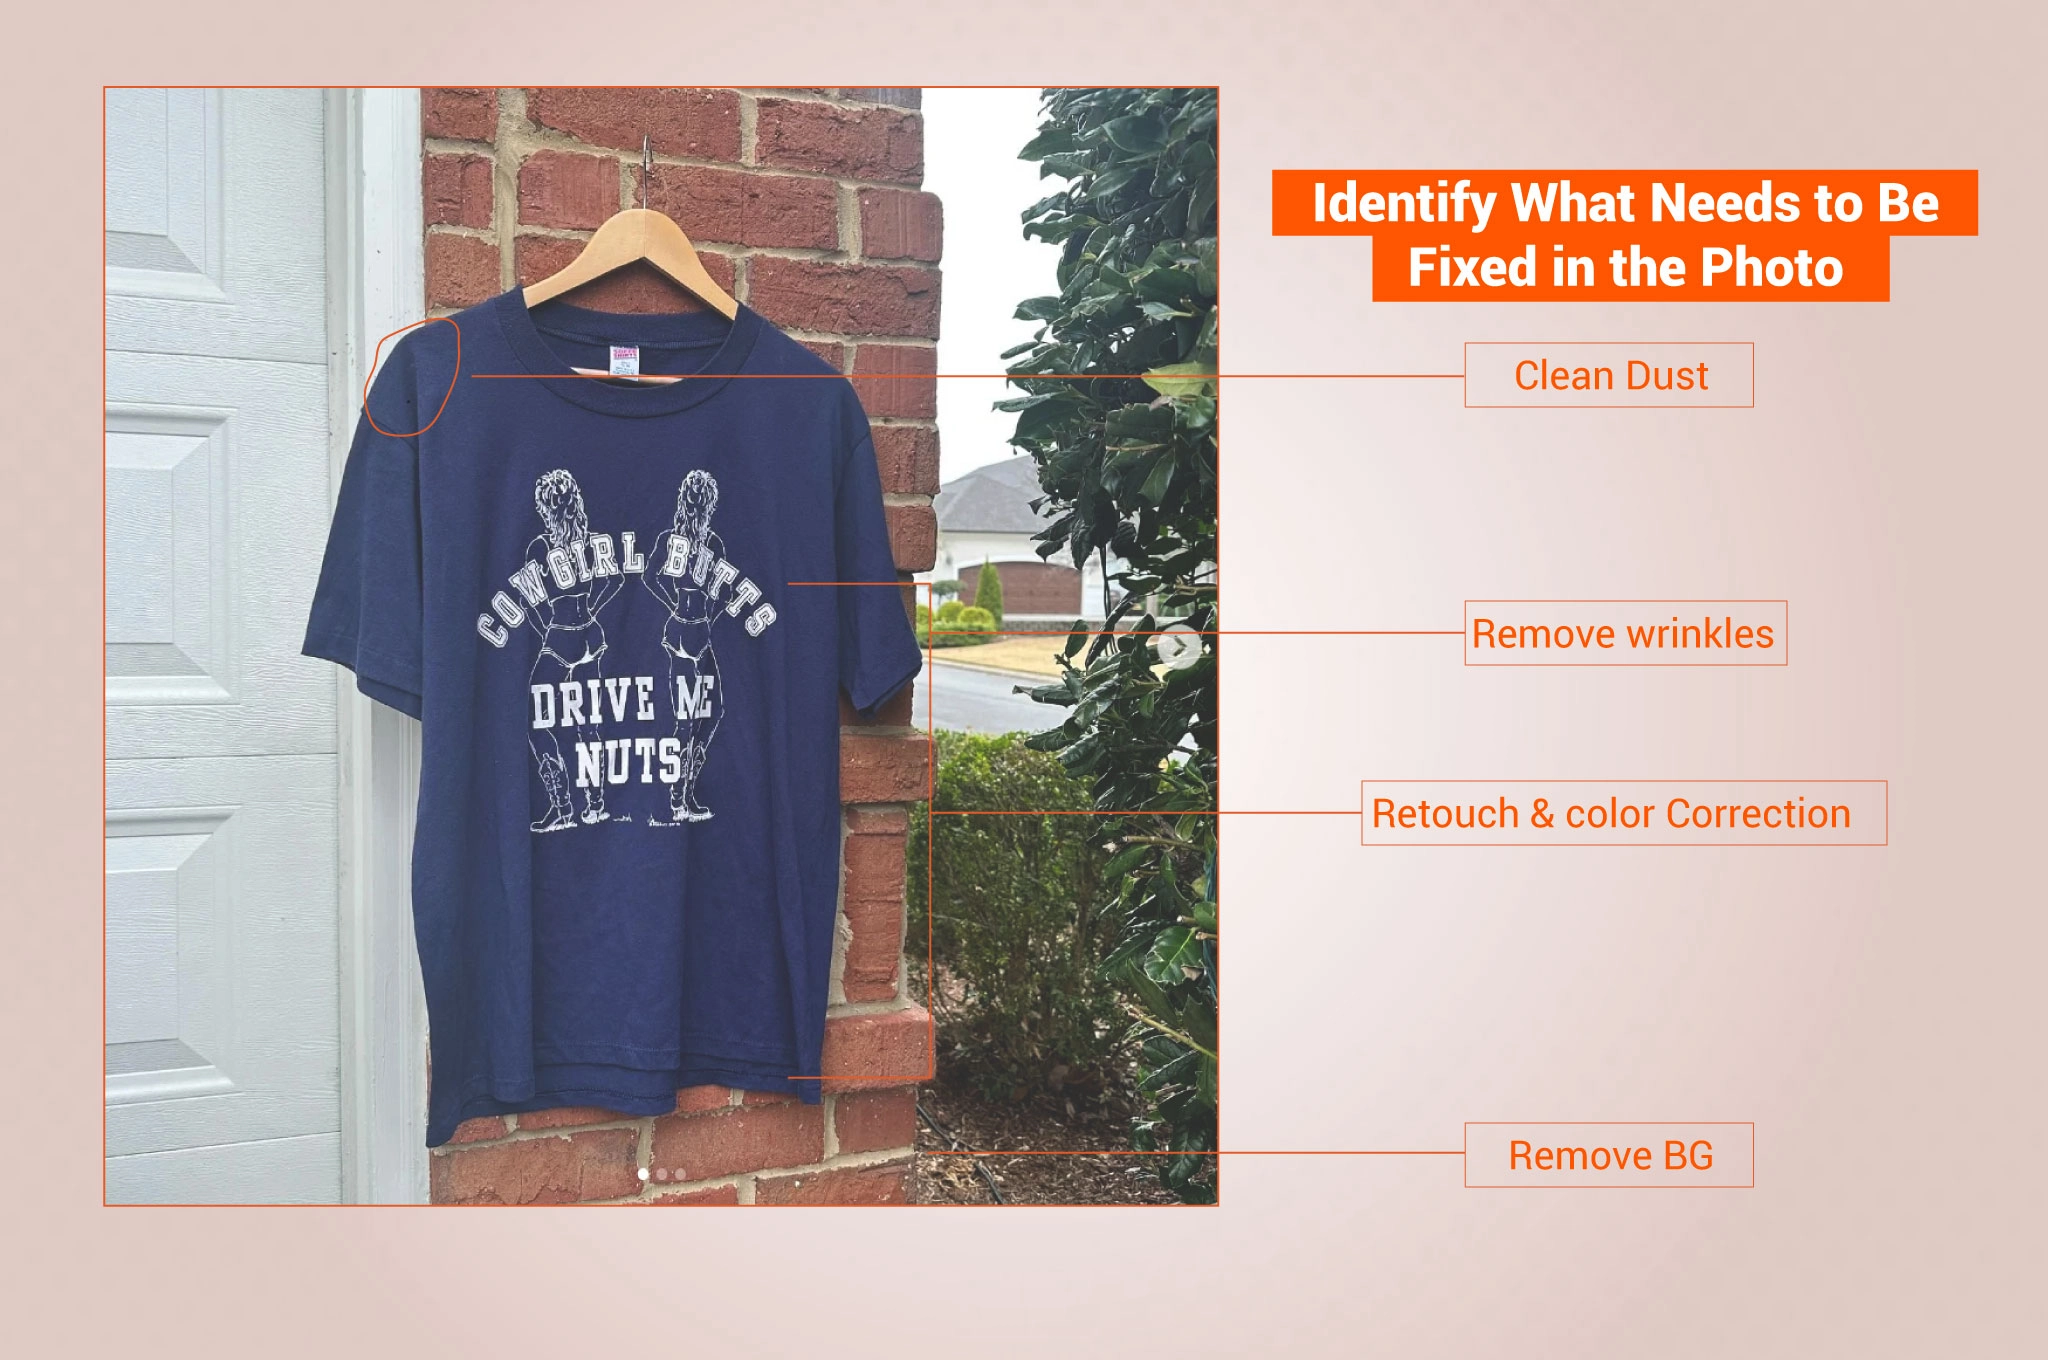
Remember, you fix half of the problem when you understand the exact problem. Closely analyze the clothing images to figure out the flaws. Note down about the areas you need to work on during the post-production. You may need to change, remove, or adjust those marked areas. Go for another revision if you can spot any additional issues. This will help you avoid unwanted hassles later.
Step-02 Cut out the Subject
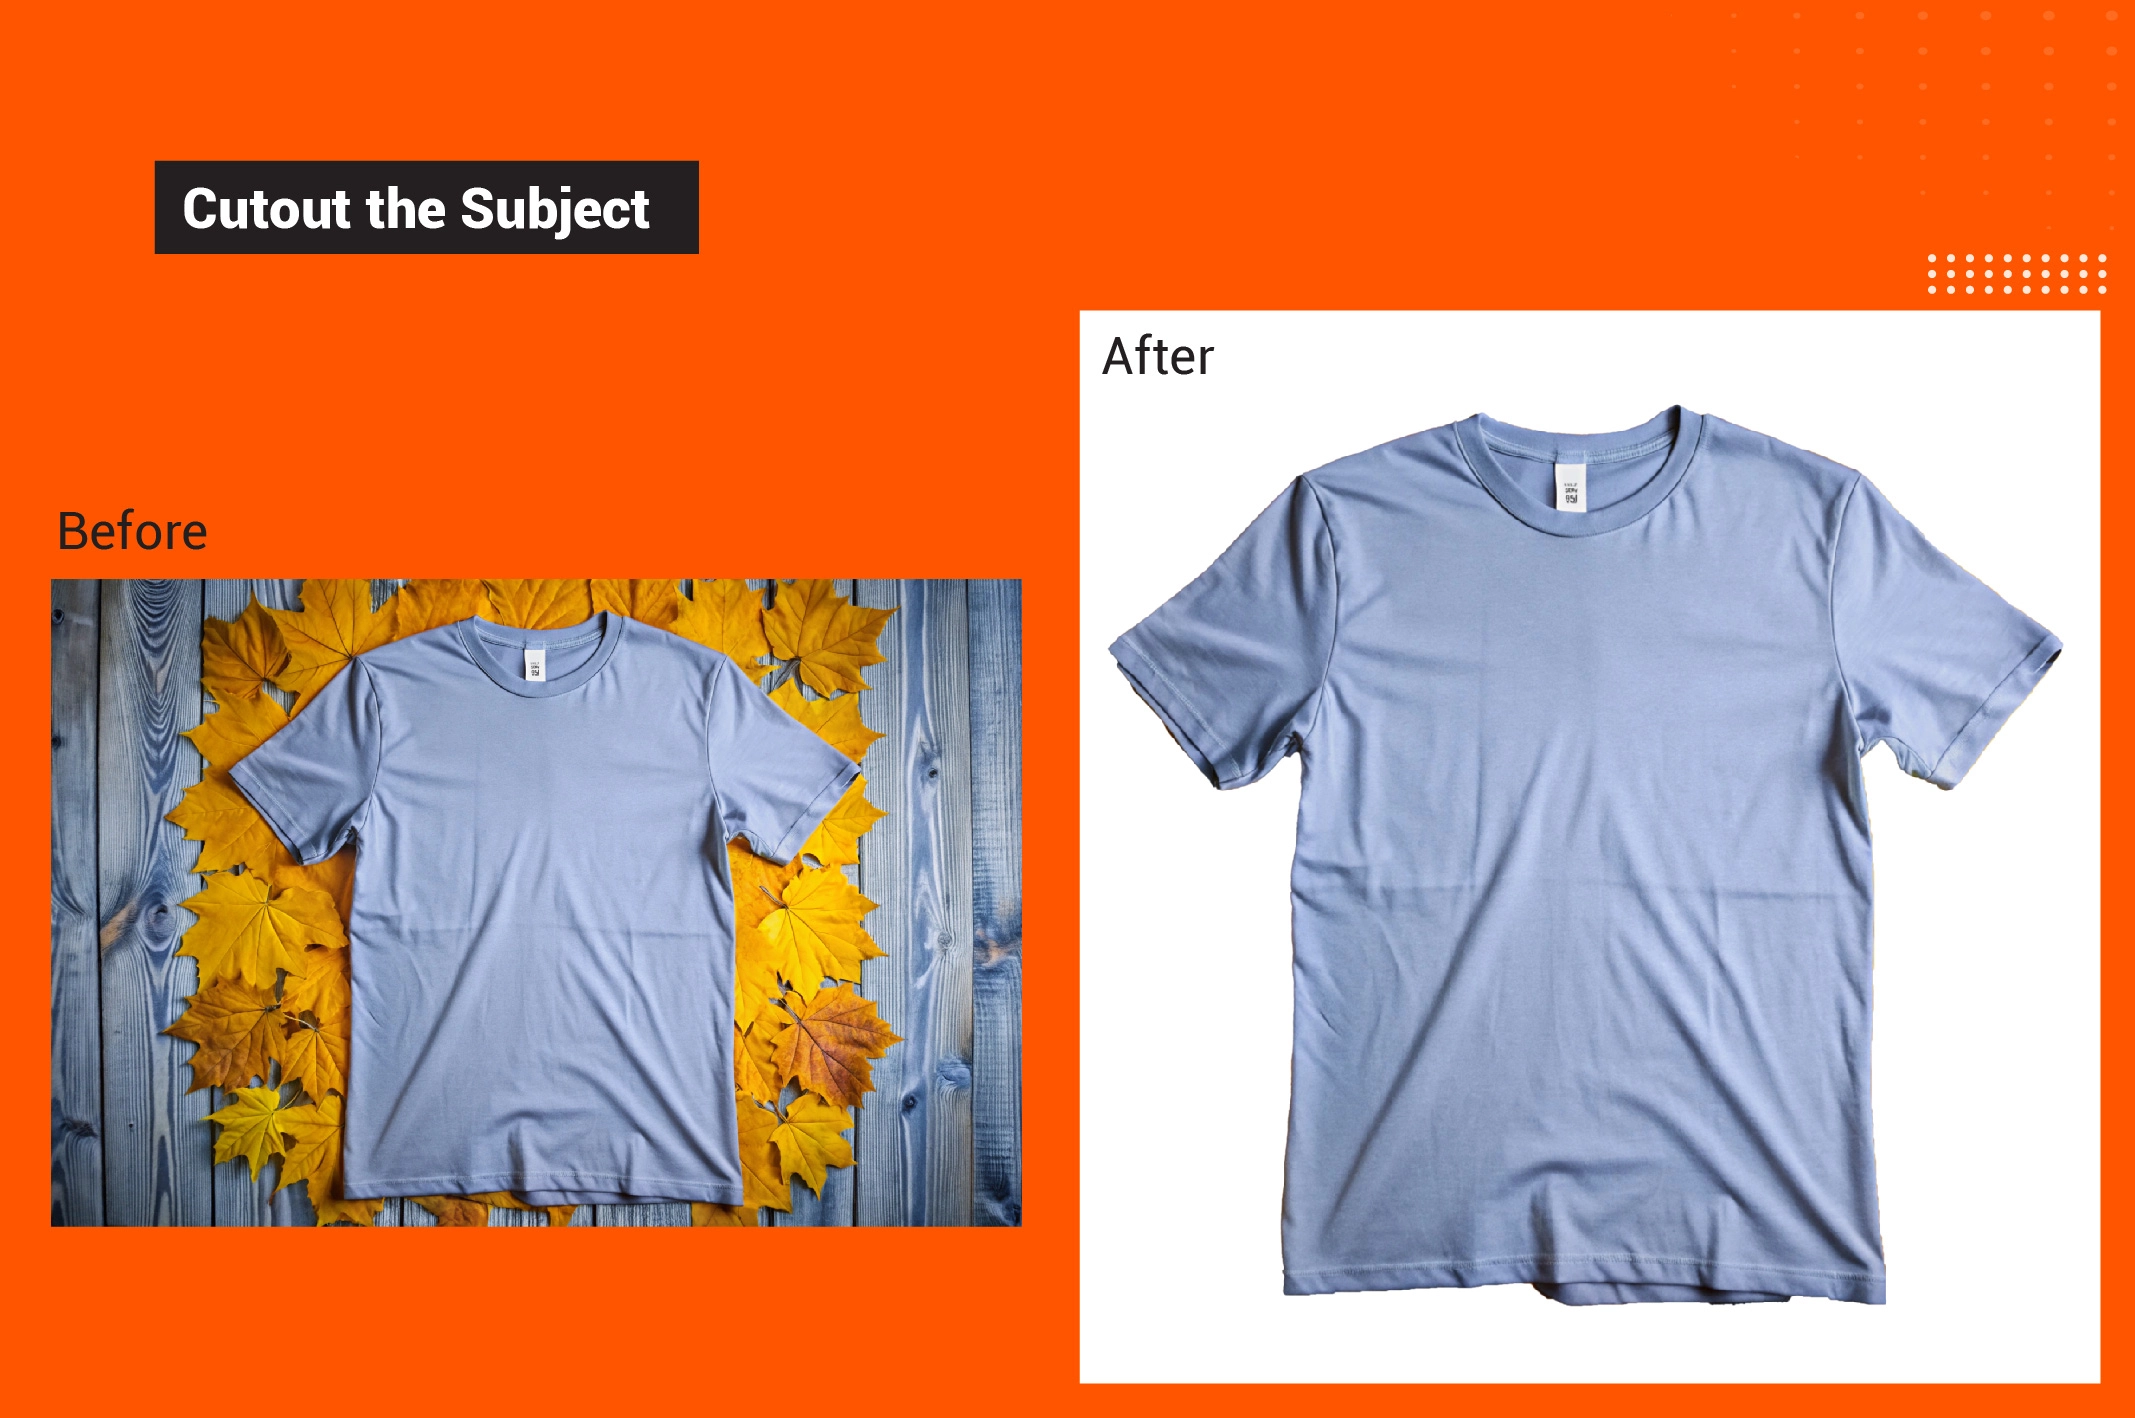
Do you want to sell your product items on standard e-commerce platforms? If so, adding a white background is a must. This universal backdrop color creates a clean, uncluttered aesthetic. Customers can see the true hue of the apparel item without any disturbing shadows and color casts. Remove the background to isolate the main subject. It enables you to add creative touch-ups, like adding a new background that aligns with the brand image.
Step-03 Smooth Wrinkles
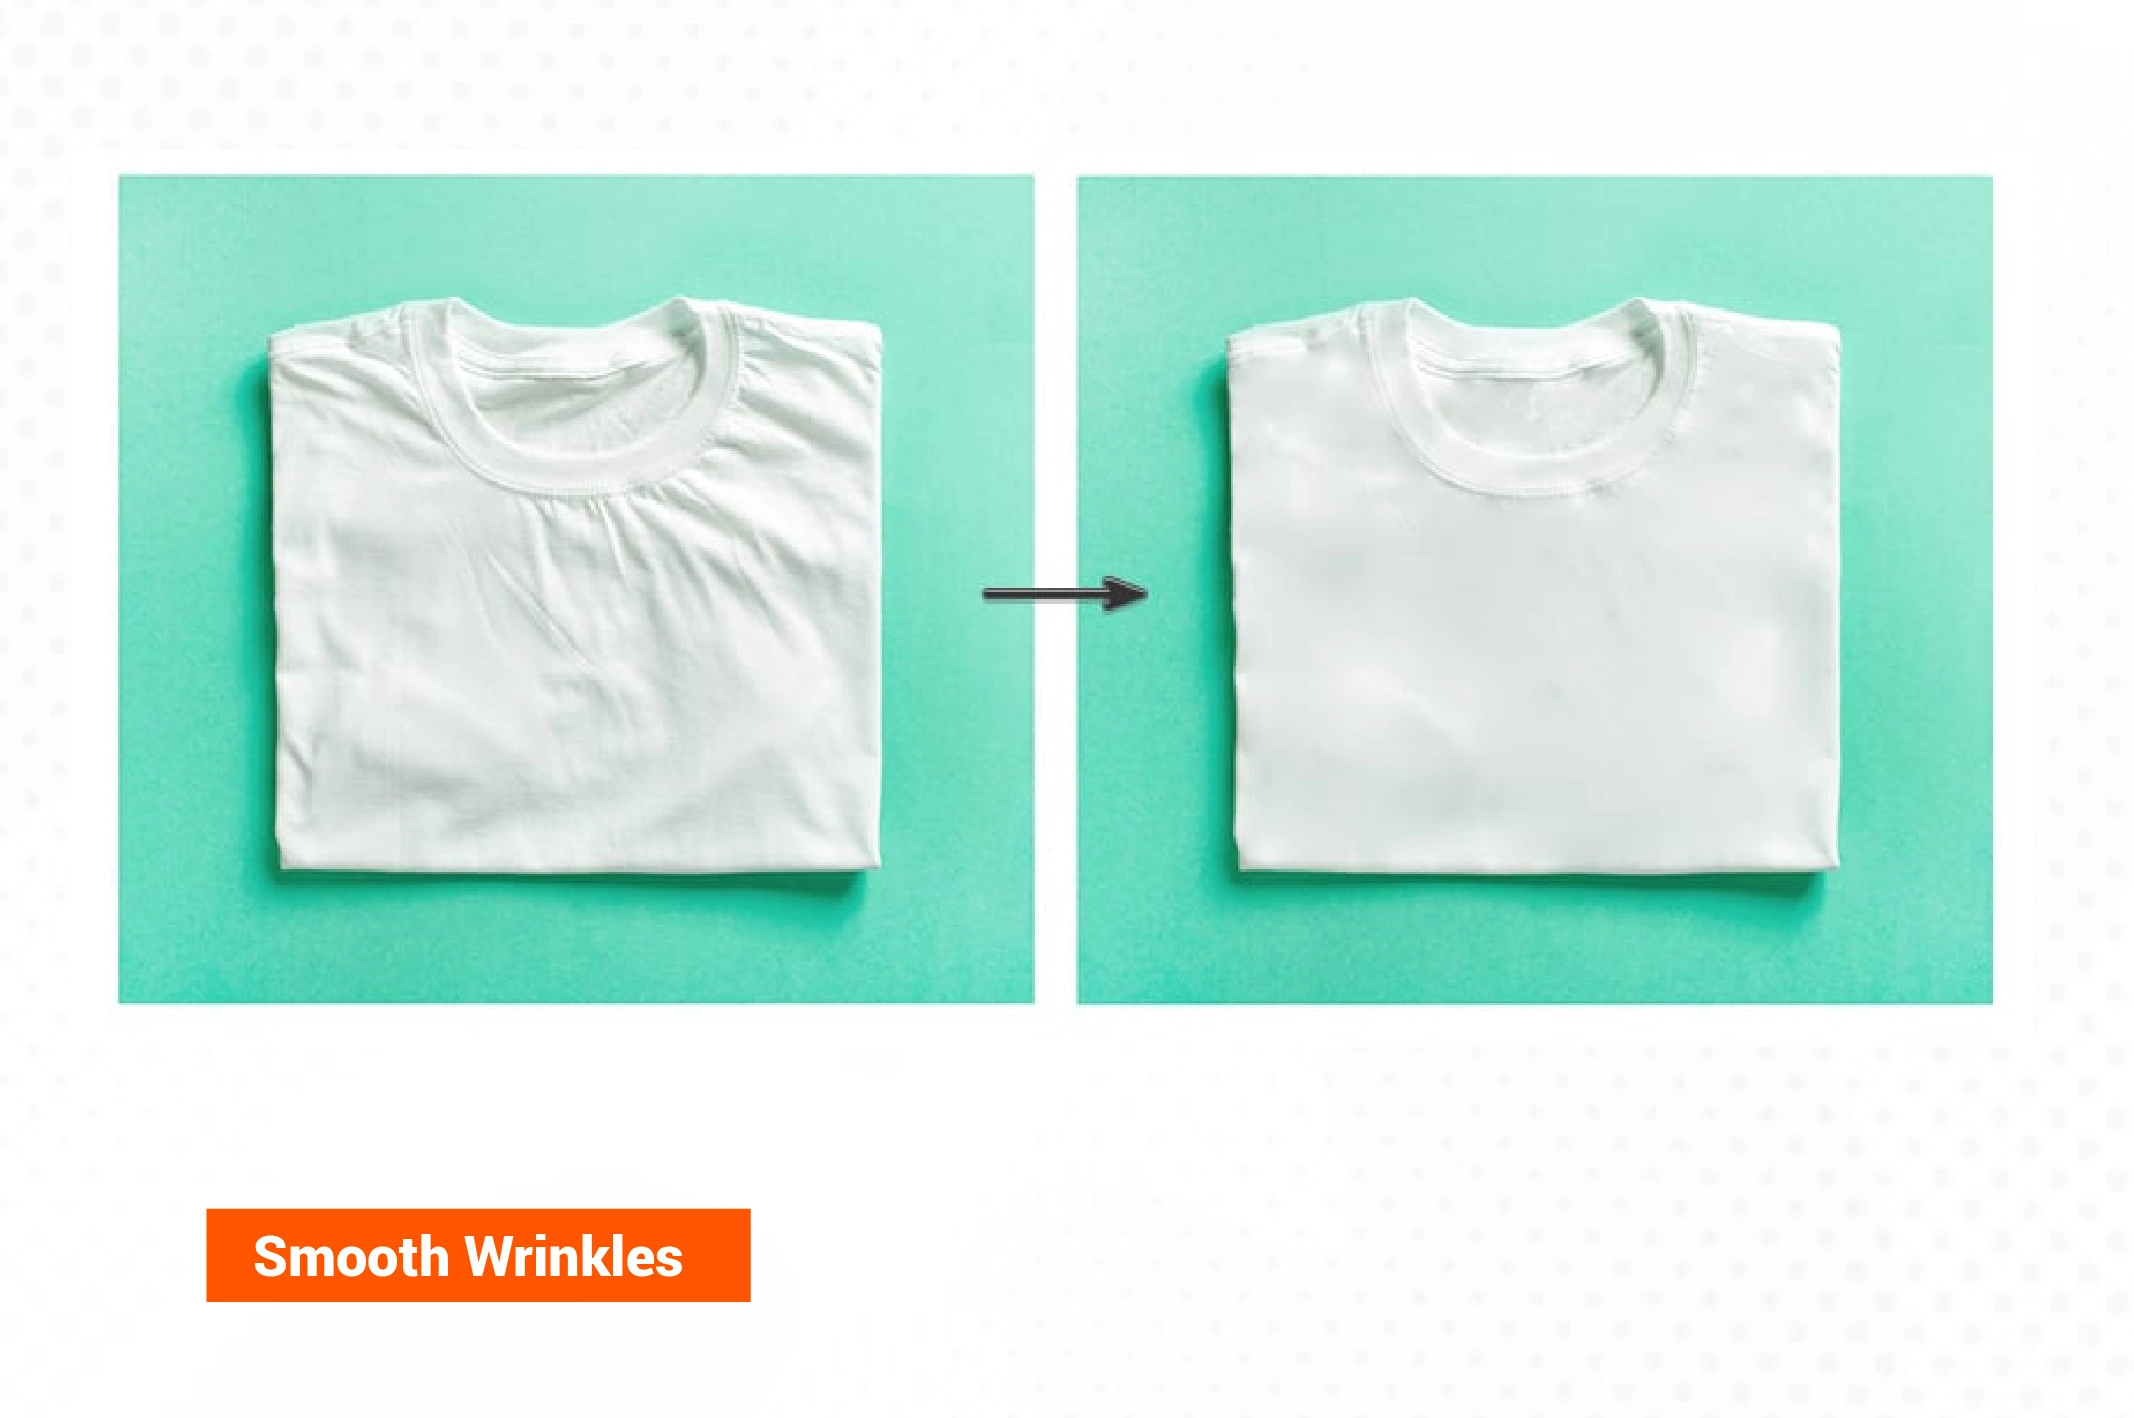
Wrinkled fabrics are a sign of sloppiness and unprofessionalism. You must eliminate such ridges or folds before uploading cloth images to any e-commerce site. It is best to steam or iron the garments to remove wrinkles or creases. But some wrinkles are inevitable regardless of how careful you are.
So, how do we deal with such problems during post-production? One effective solution is using a spot-healing brush. This tool lets you quickly remove wrinkles and replace the area by copying pixels from nearby spots that look clean and fresh.
Step-04 Remove Stains and Other Imperfections
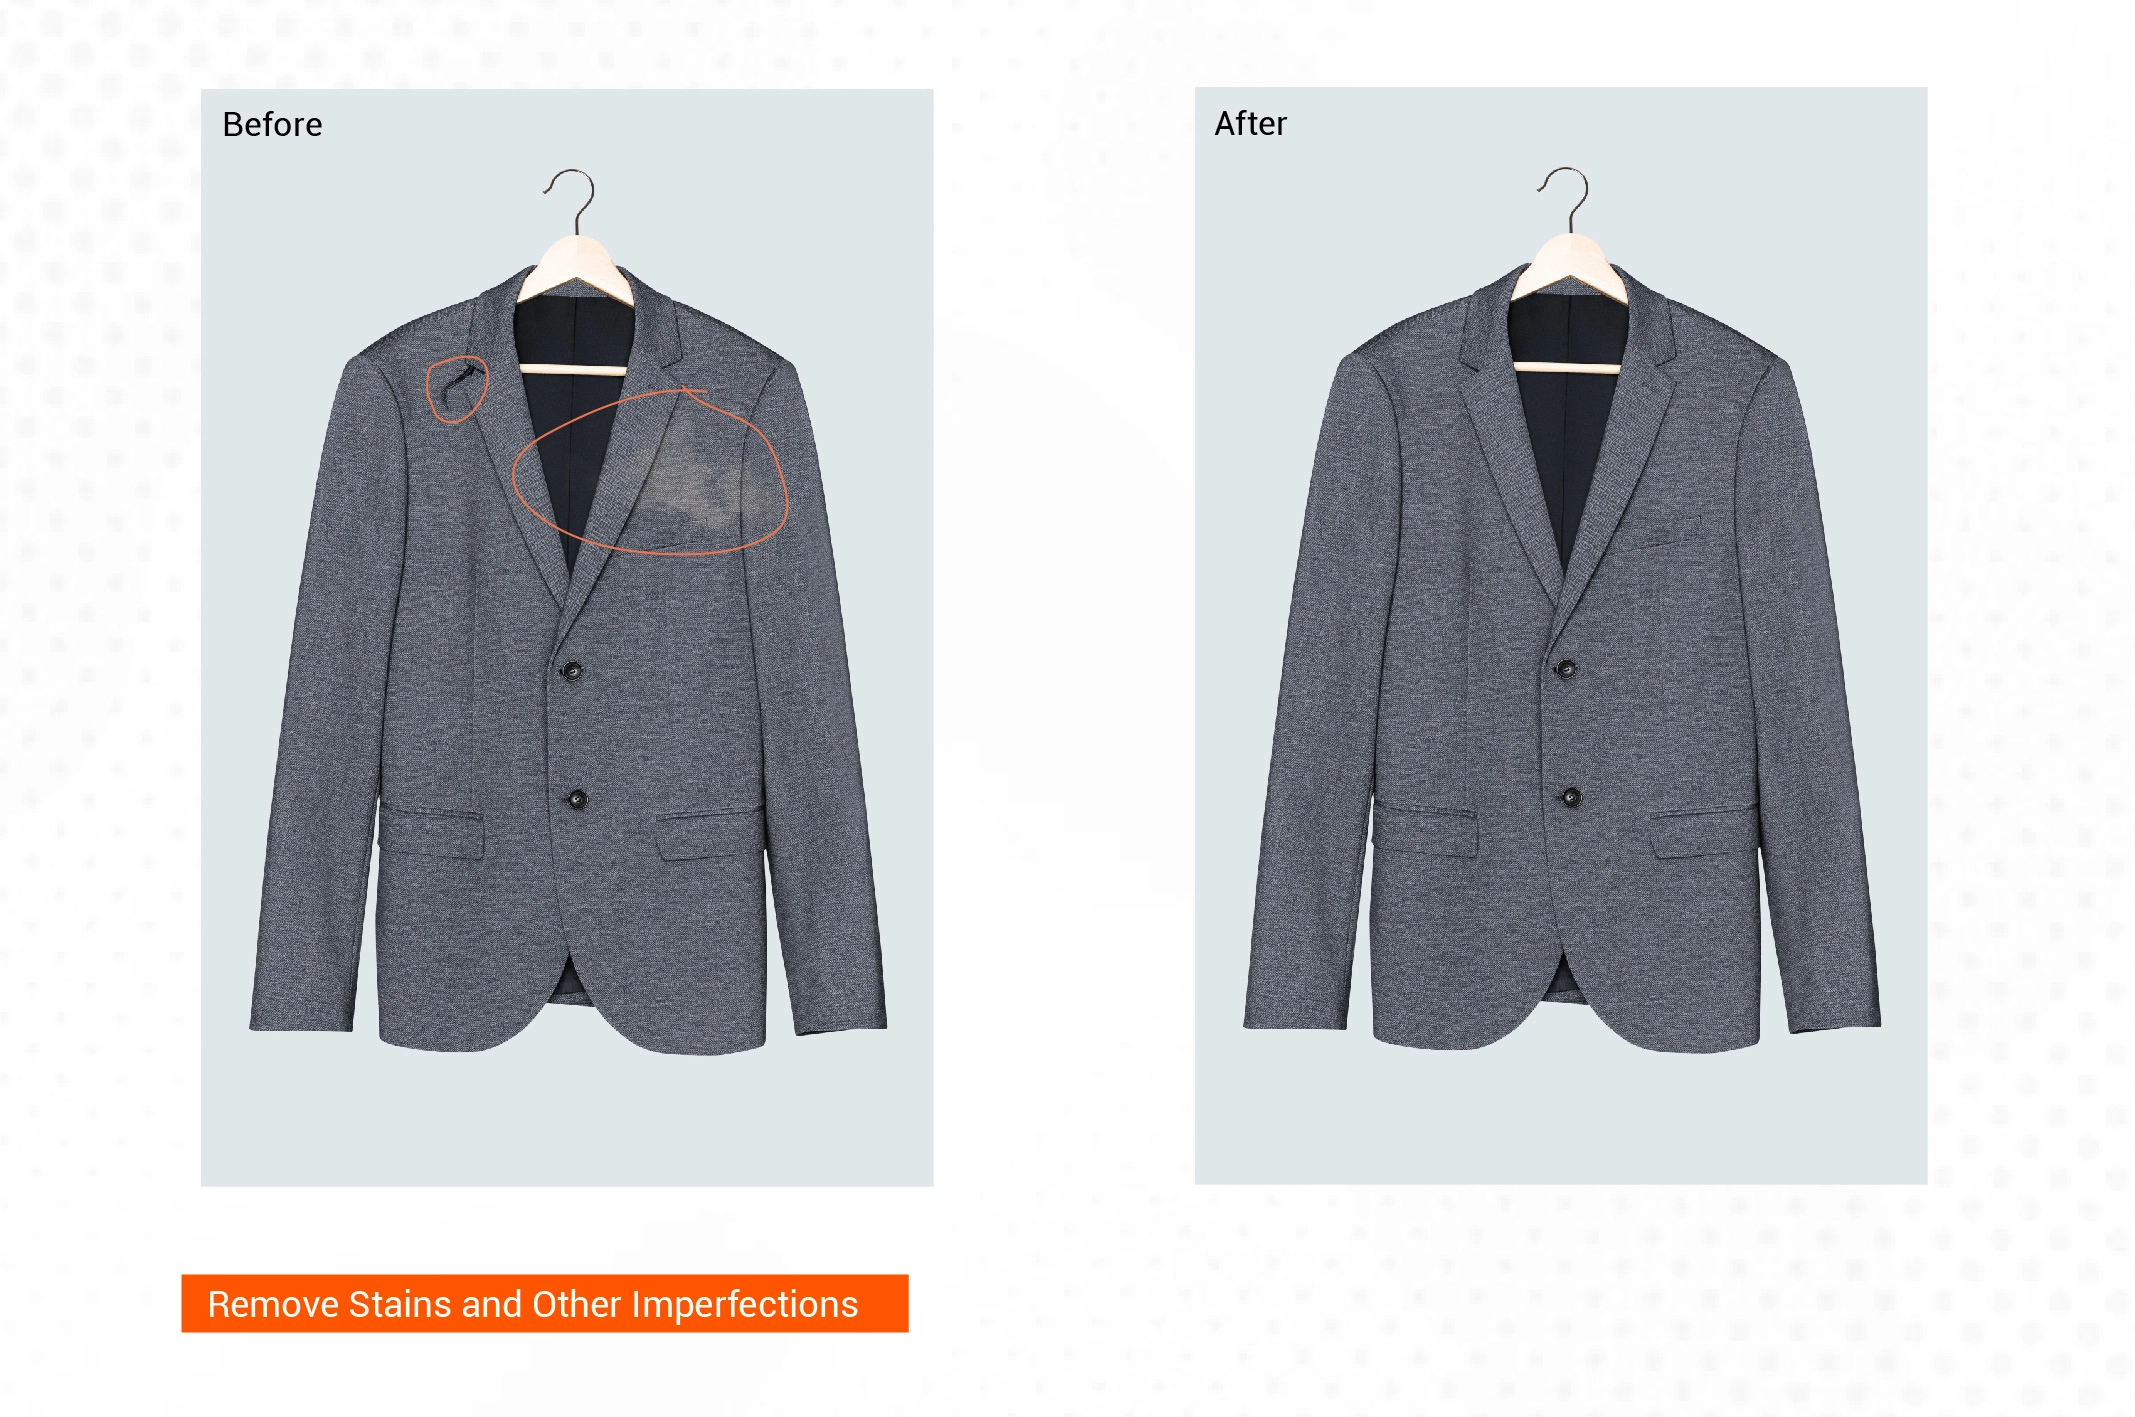
Do your clothing images contain stains, dirt, dust, hair, drink spills, or faded areas? Some imperfections are hard to avoid. Should you keep it as a natural look? Well, your customers are unlikely to be impressed with such realism. Remove such blemishes in post-processing. You can remove them with a spot-healing brush or clone stamp tool. Another handy tool is the patch tool to repair such imperfections in apparel images.
Step-05 Color Correction
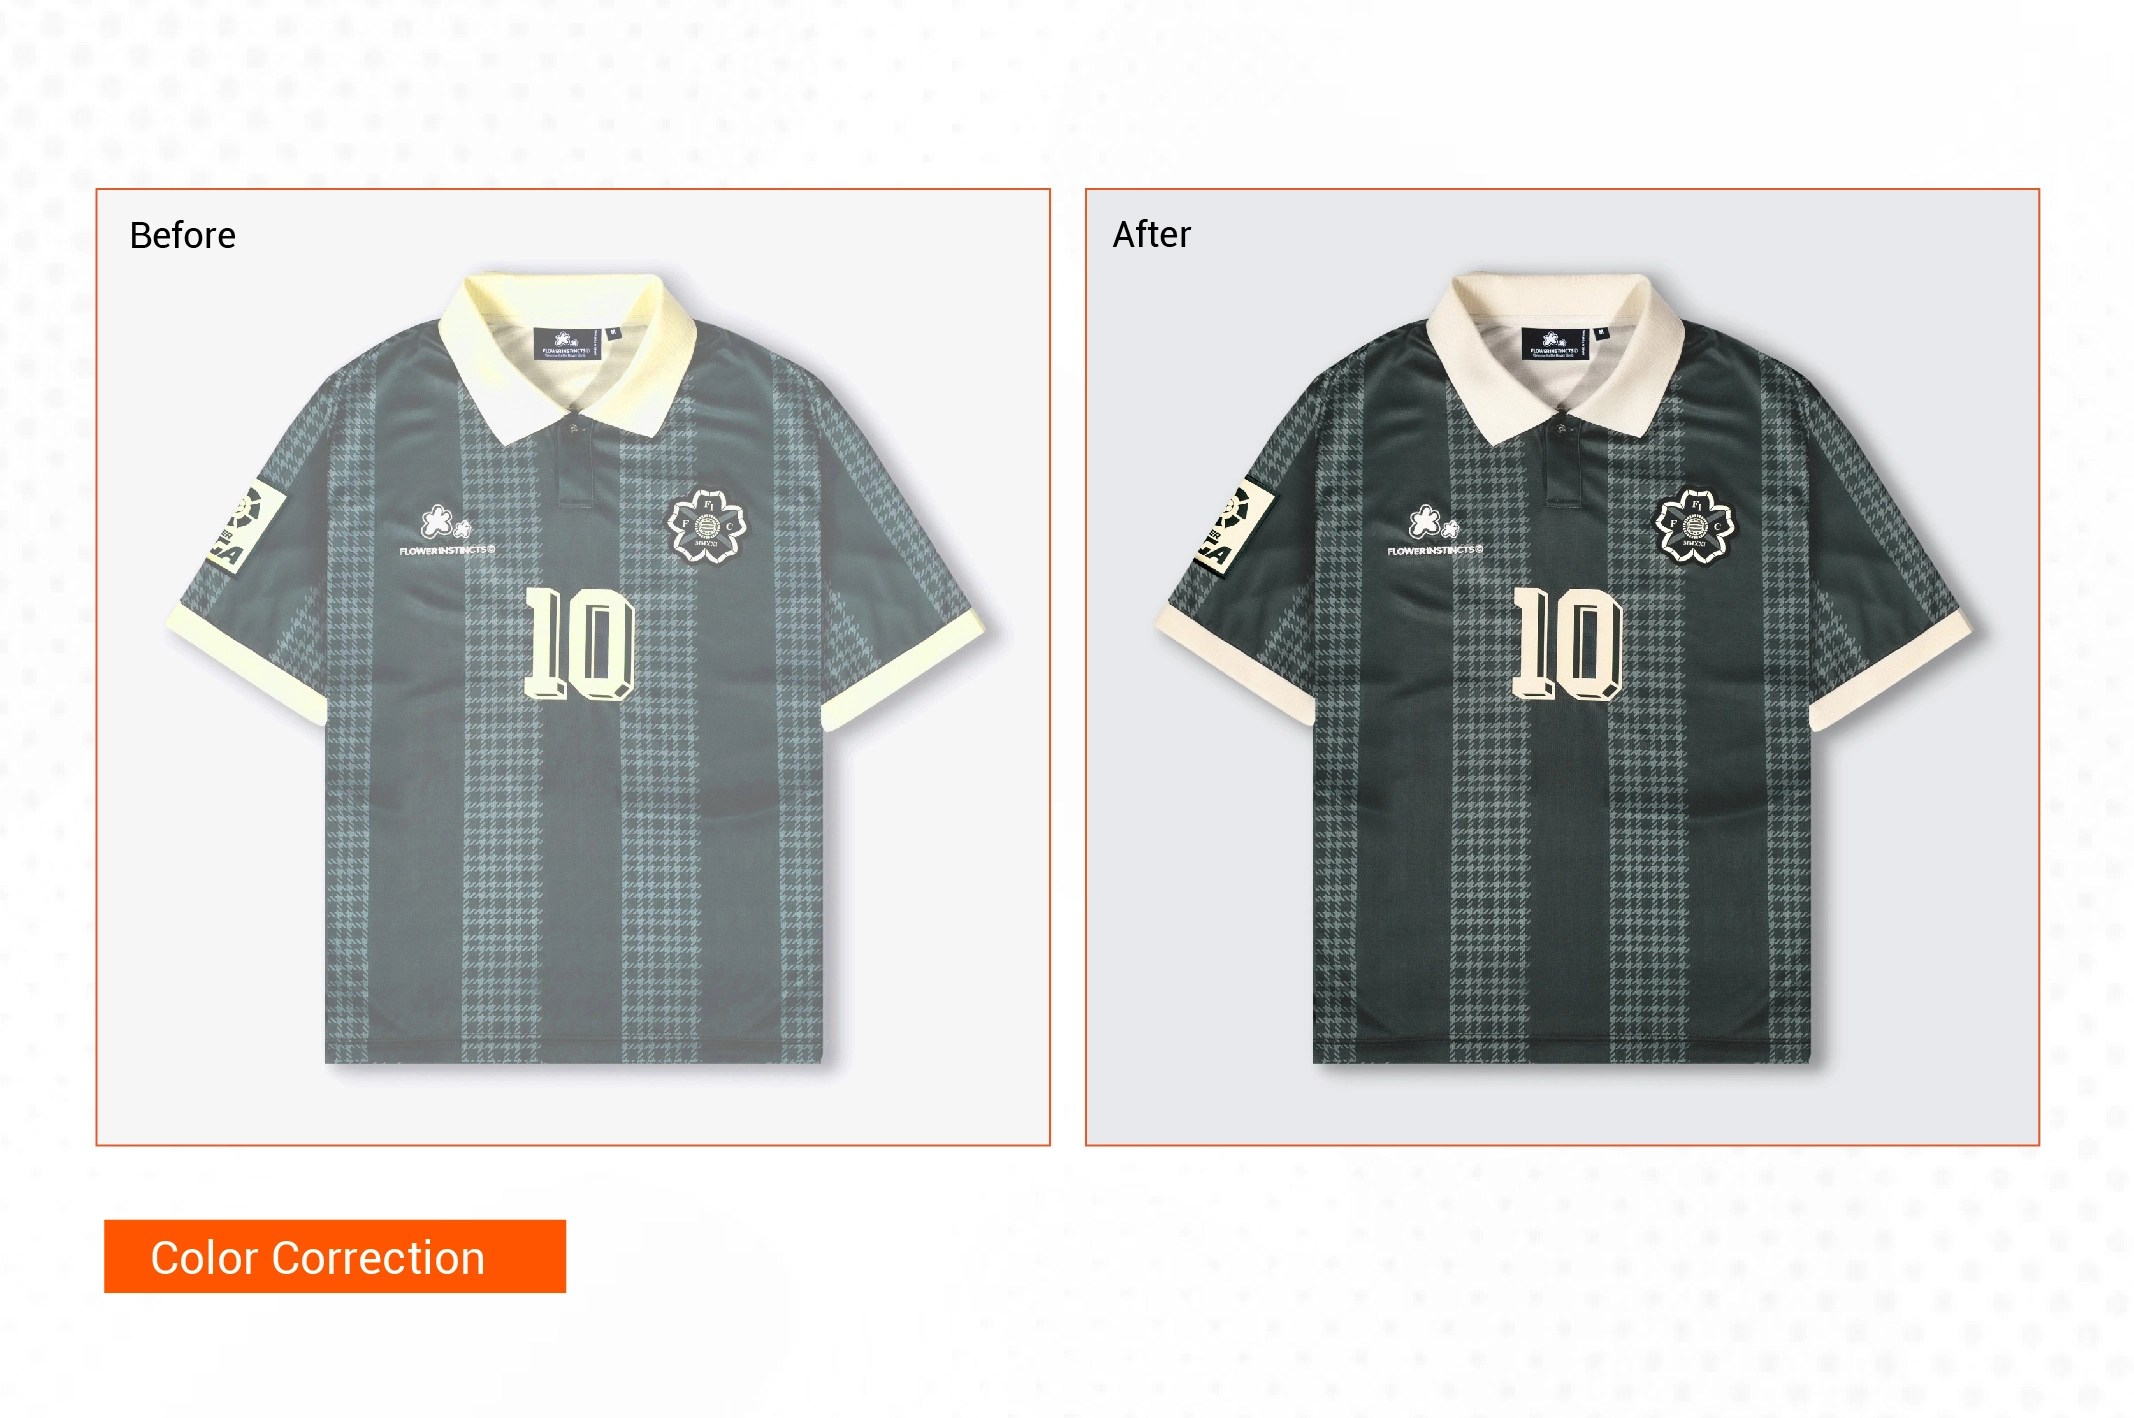
According to EJM, inaccurate color presentation contributed to approximately 11% of product returns. There might be subtle to moderate color differences between the actual product color and the captured image. It can occur due to different lighting conditions, camera settings, monitor calibration, etc. Use the Exposure slider from Adobe Lightroom to adjust the brightness level of your clothing photo. Next, head to the menu bar and select Image > Adjustments > Color Balance.
Alternatively, select Filter > Camera Raw Filter. Move the Temperature and Tint sliders left or right to adjust the clothing color accurately.
Step-06 Create Shadows for Visual Depth
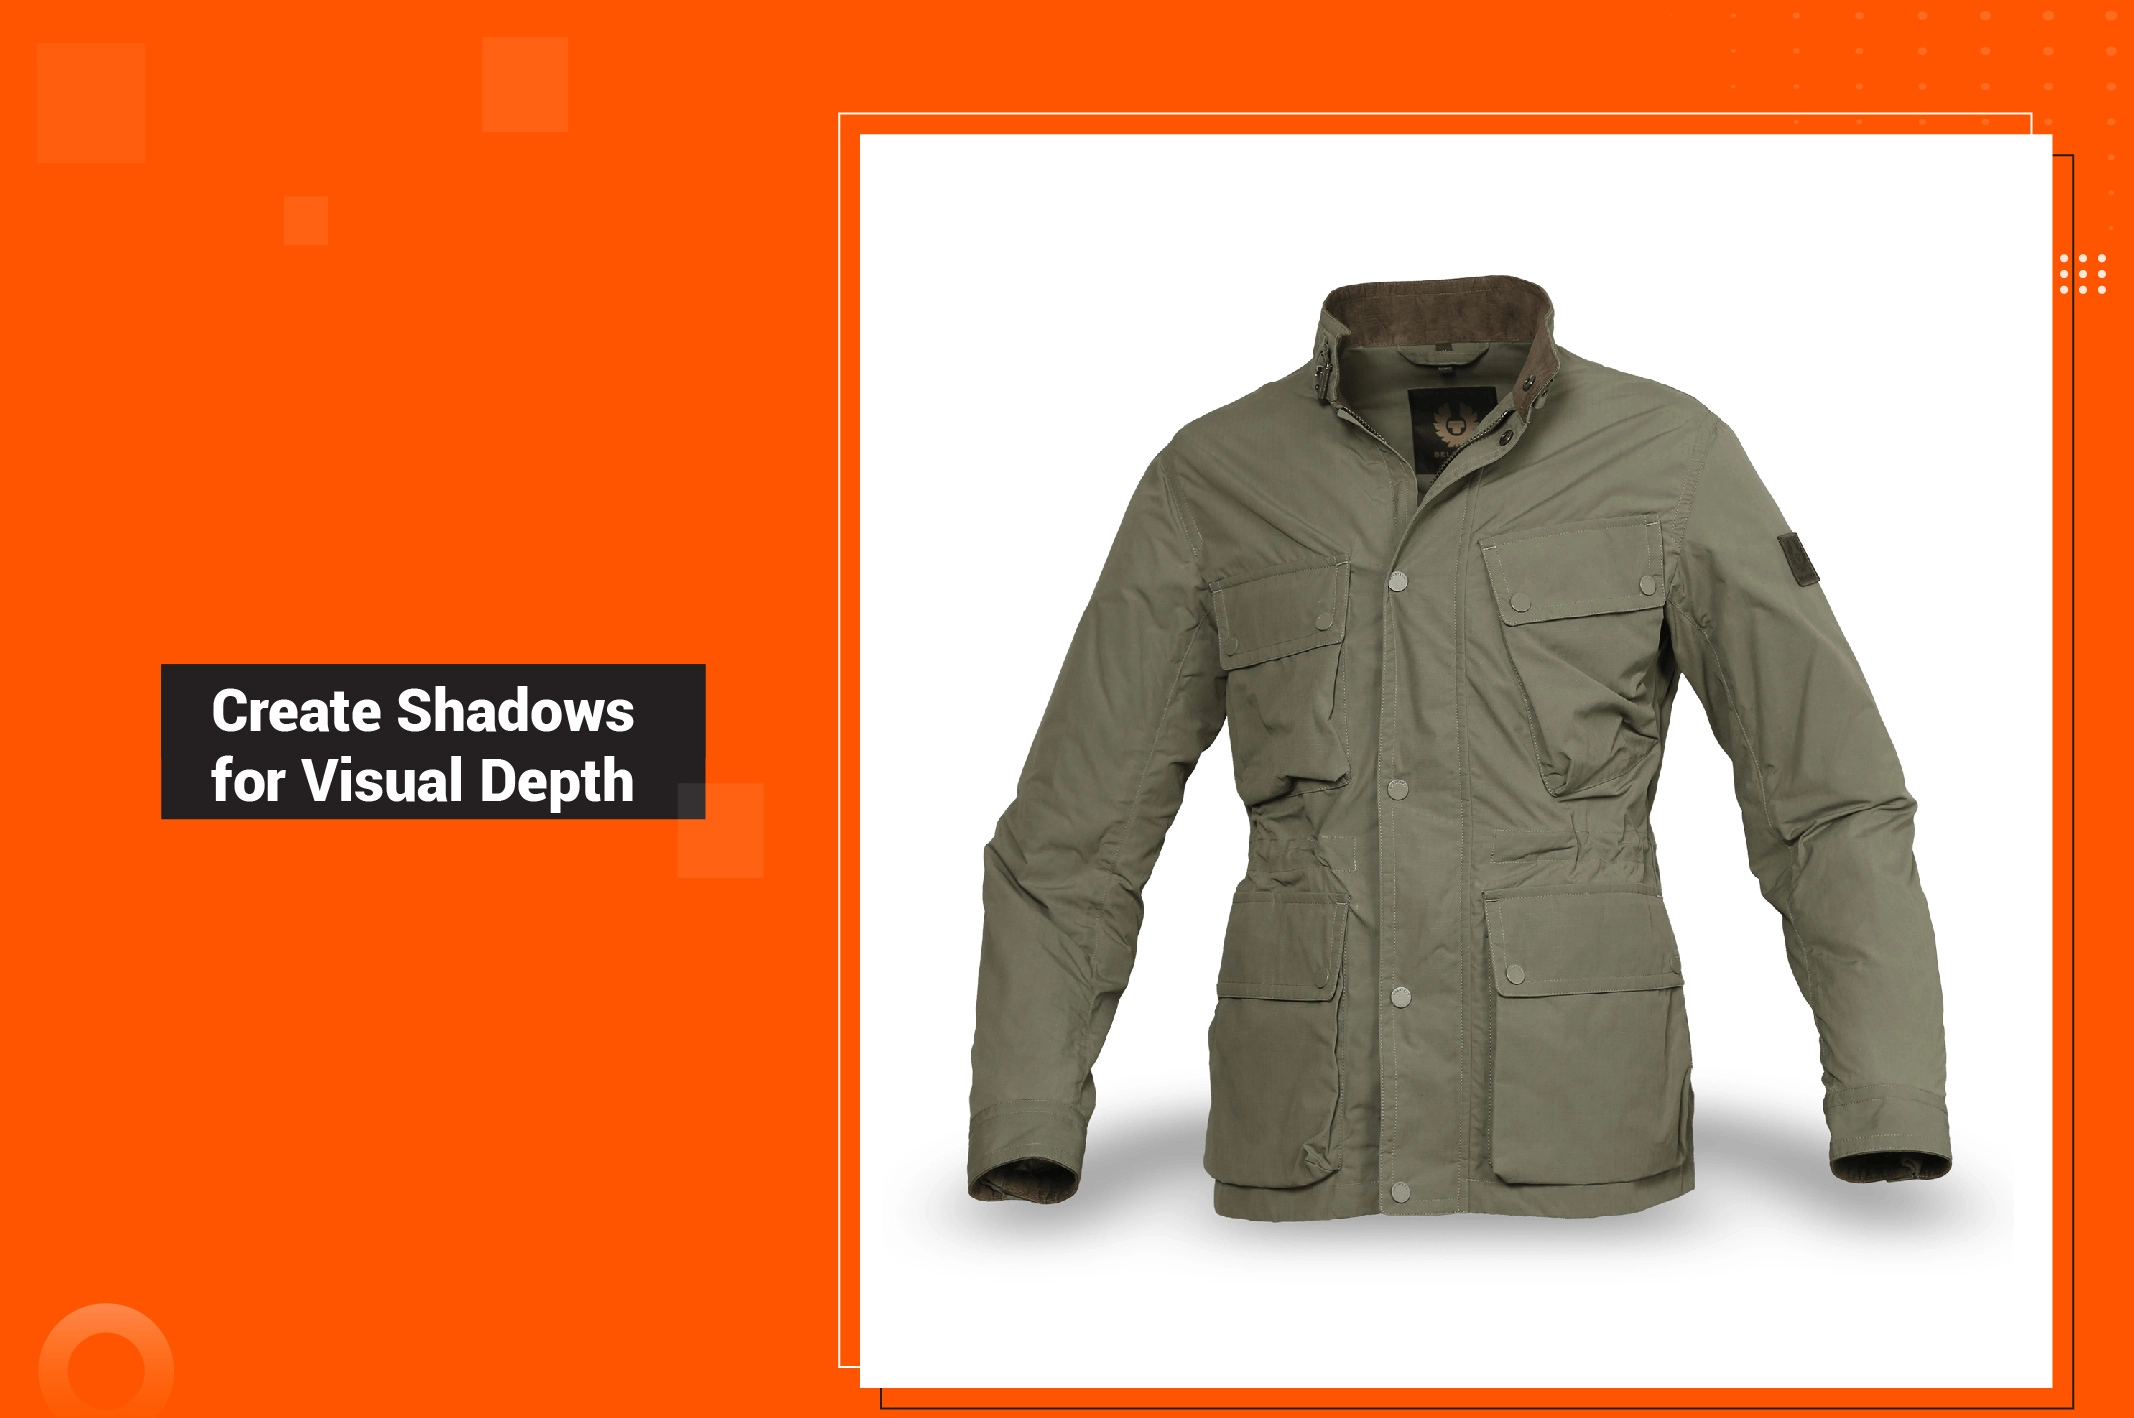
Does the apparel product look a bit dull with a white background? A shadow can make it less artificial and flat. Adding a simple shadow in Photoshop can make the clothing item pop better with a white backdrop. It fosters a laid-back and welcoming vibe. The best part is that you can control the direction of the shadow. Maintaining the right shape and form will be easy. It doesn’t matter what the lighting condition is.
Step-07 Remove or Change Brand Tags
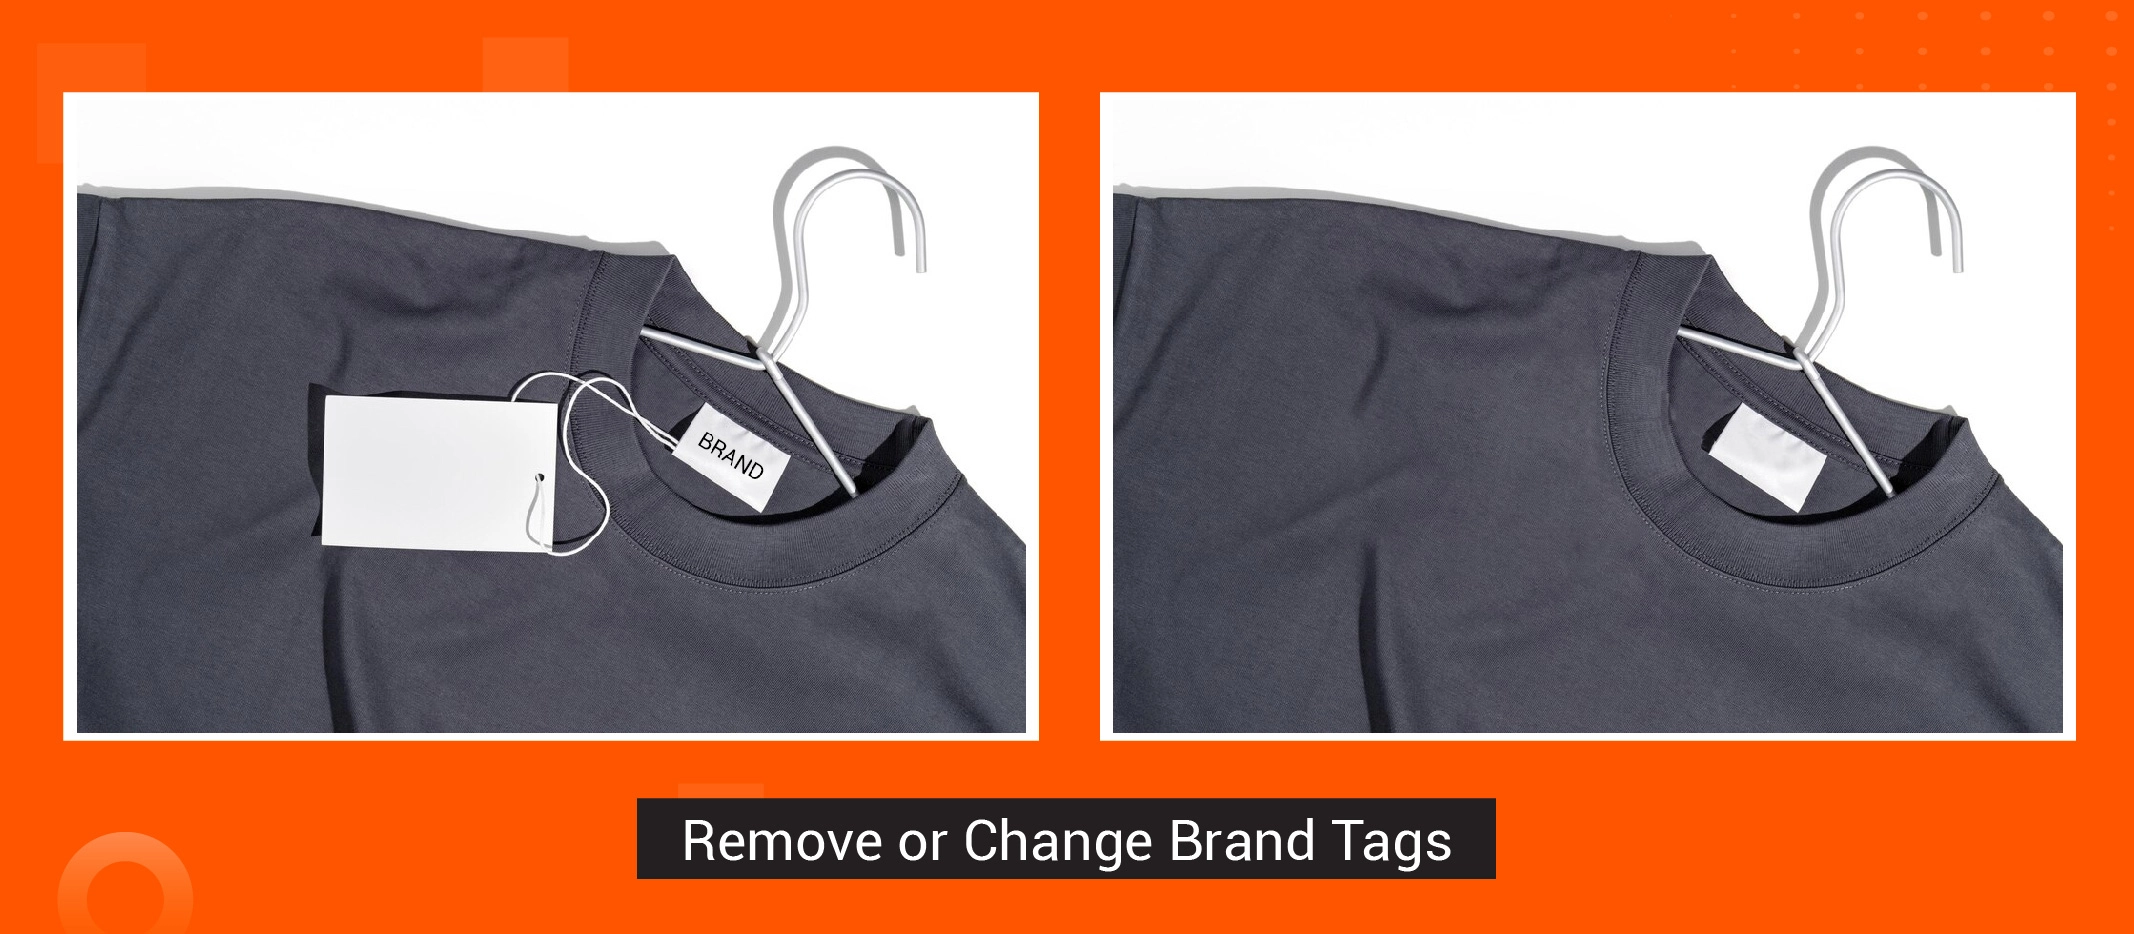
Do you want to remove or change the brand tag of your clothing? Some businesses prefer erasing such labels and tags to focus solely on the product. Customers can see the texture, pattern, and color of the apparel. This approach is especially helpful for e-commerce websites and social media platforms. On the other hand, you may want to add or change the label or brand logo on the product tag. It enables customers to identify and remember your brand. After all, brand recognition is paramount.
However, whether you are removing, adding, or changing the labels or tags, a careful inspection of detail is a must. You have to follow advanced post-processing techniques to perform such a complicated task. After editing the clothing image, it should be natural and satisfying.
Step-08 Get Rid of Hangers
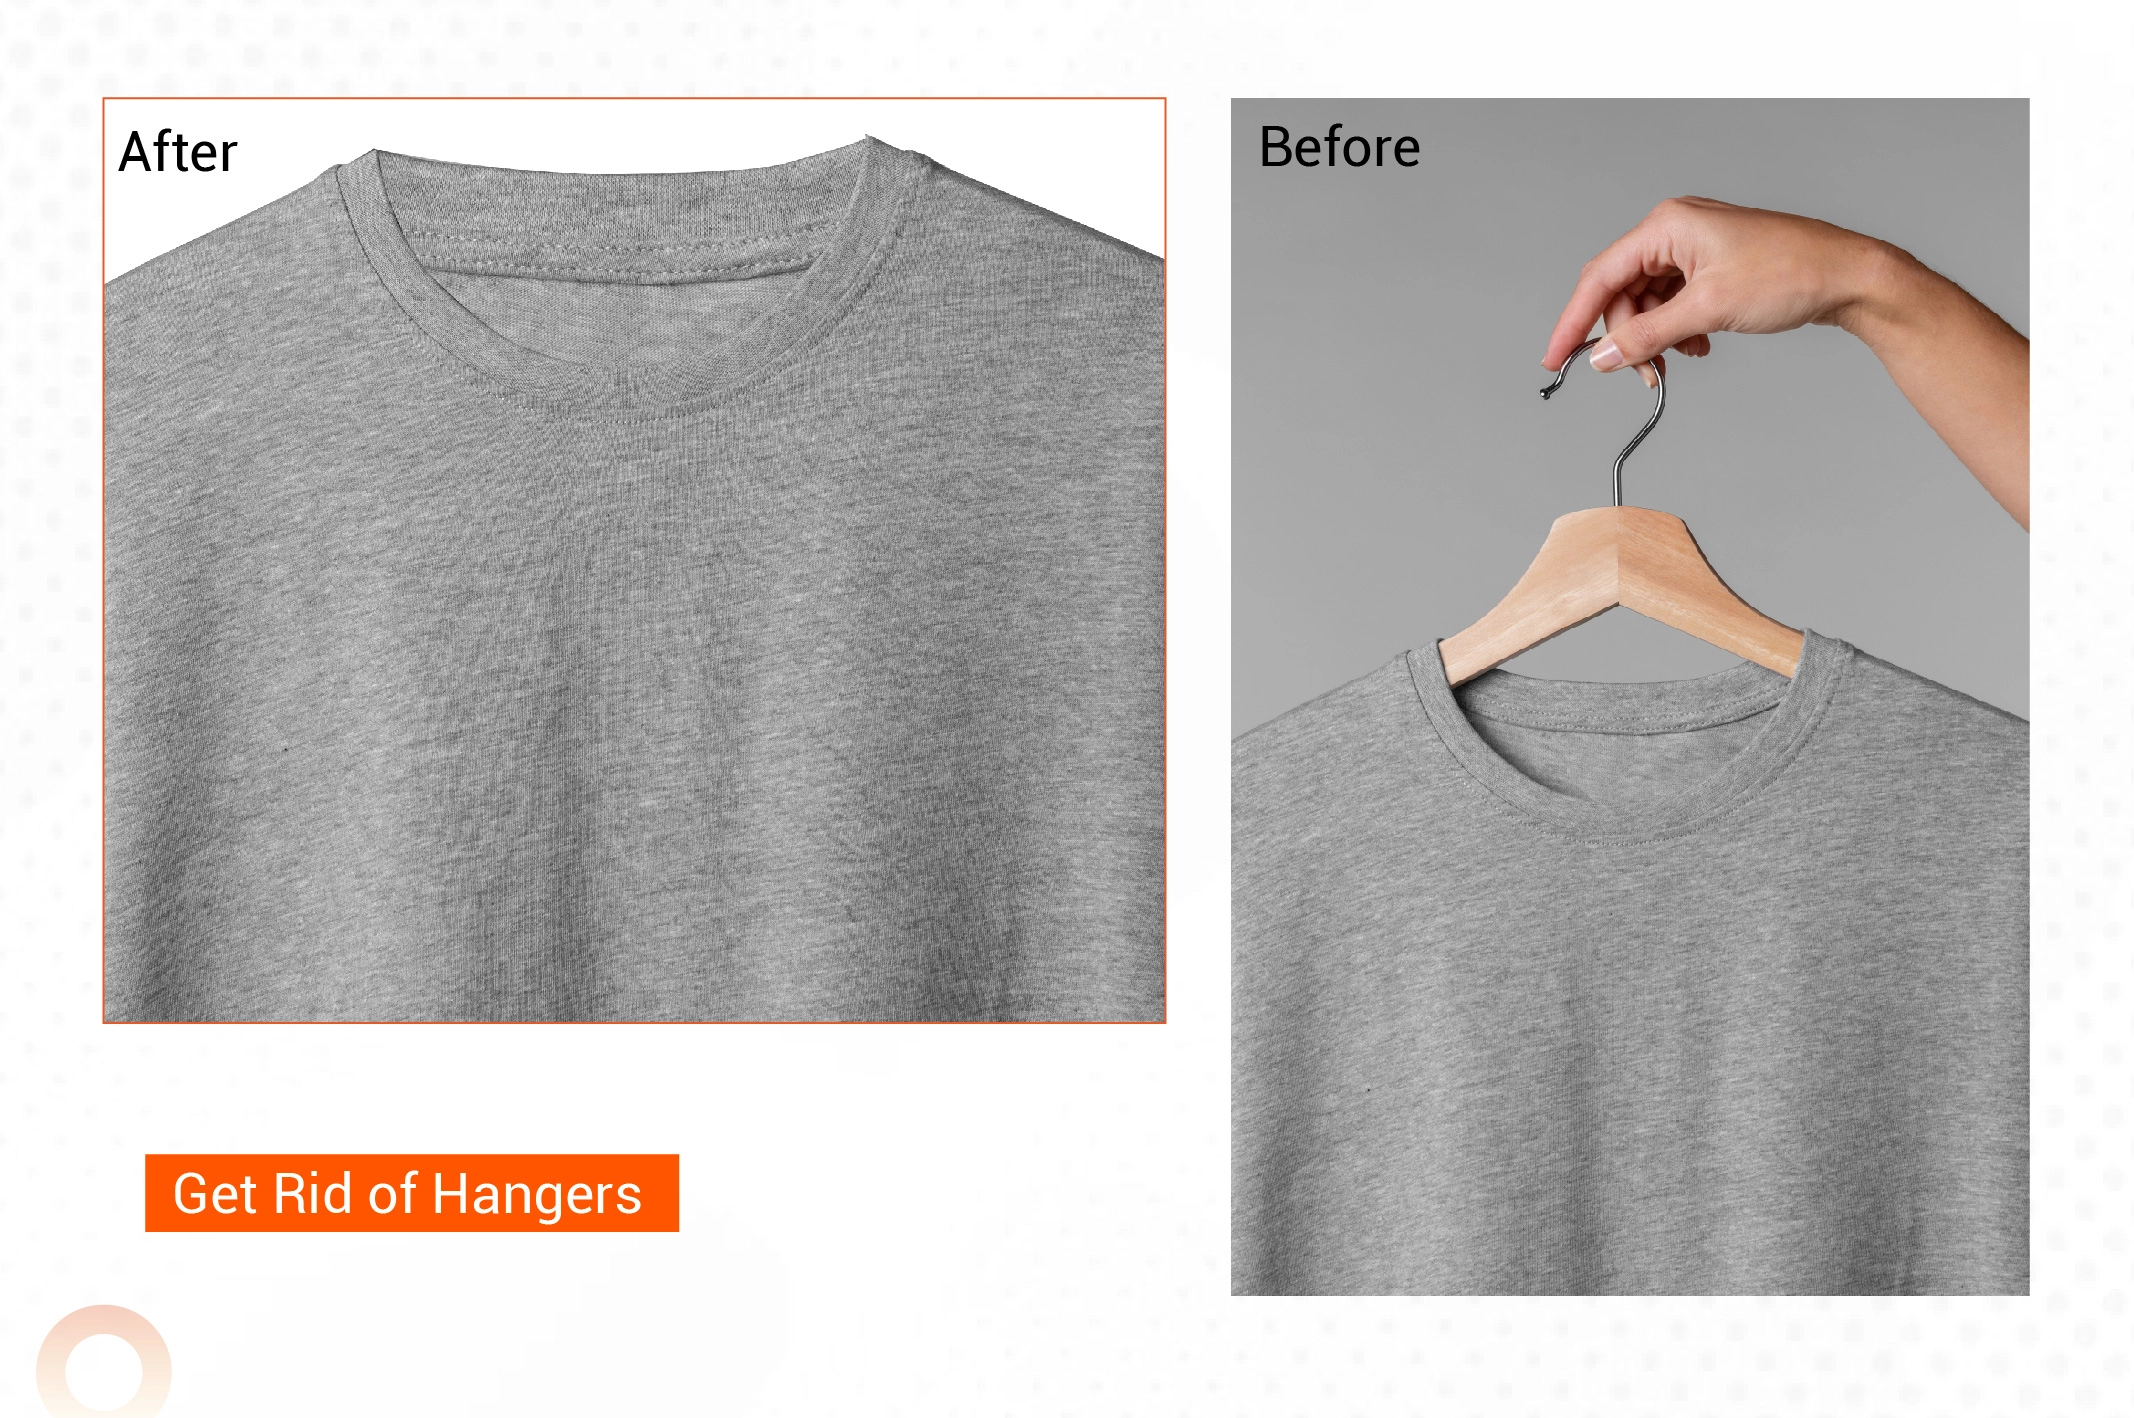
Did you use any hangers to capture clothing images? Many photographers use them to showcase the garment’s shape and design. Customers can visualize how the garment will fit and flow naturally.
However, removing the hanger in post-production is essential to focus attention on the garment itself. You can use the clone stamp tool in Photoshop to erase the hanger, hand, arm, and other unwanted elements from the apparel image. Make sure to zoom in on the garment photo for precise editing, especially for the neckline areas.
Step-09 Add a Ghost Mannequin Effect
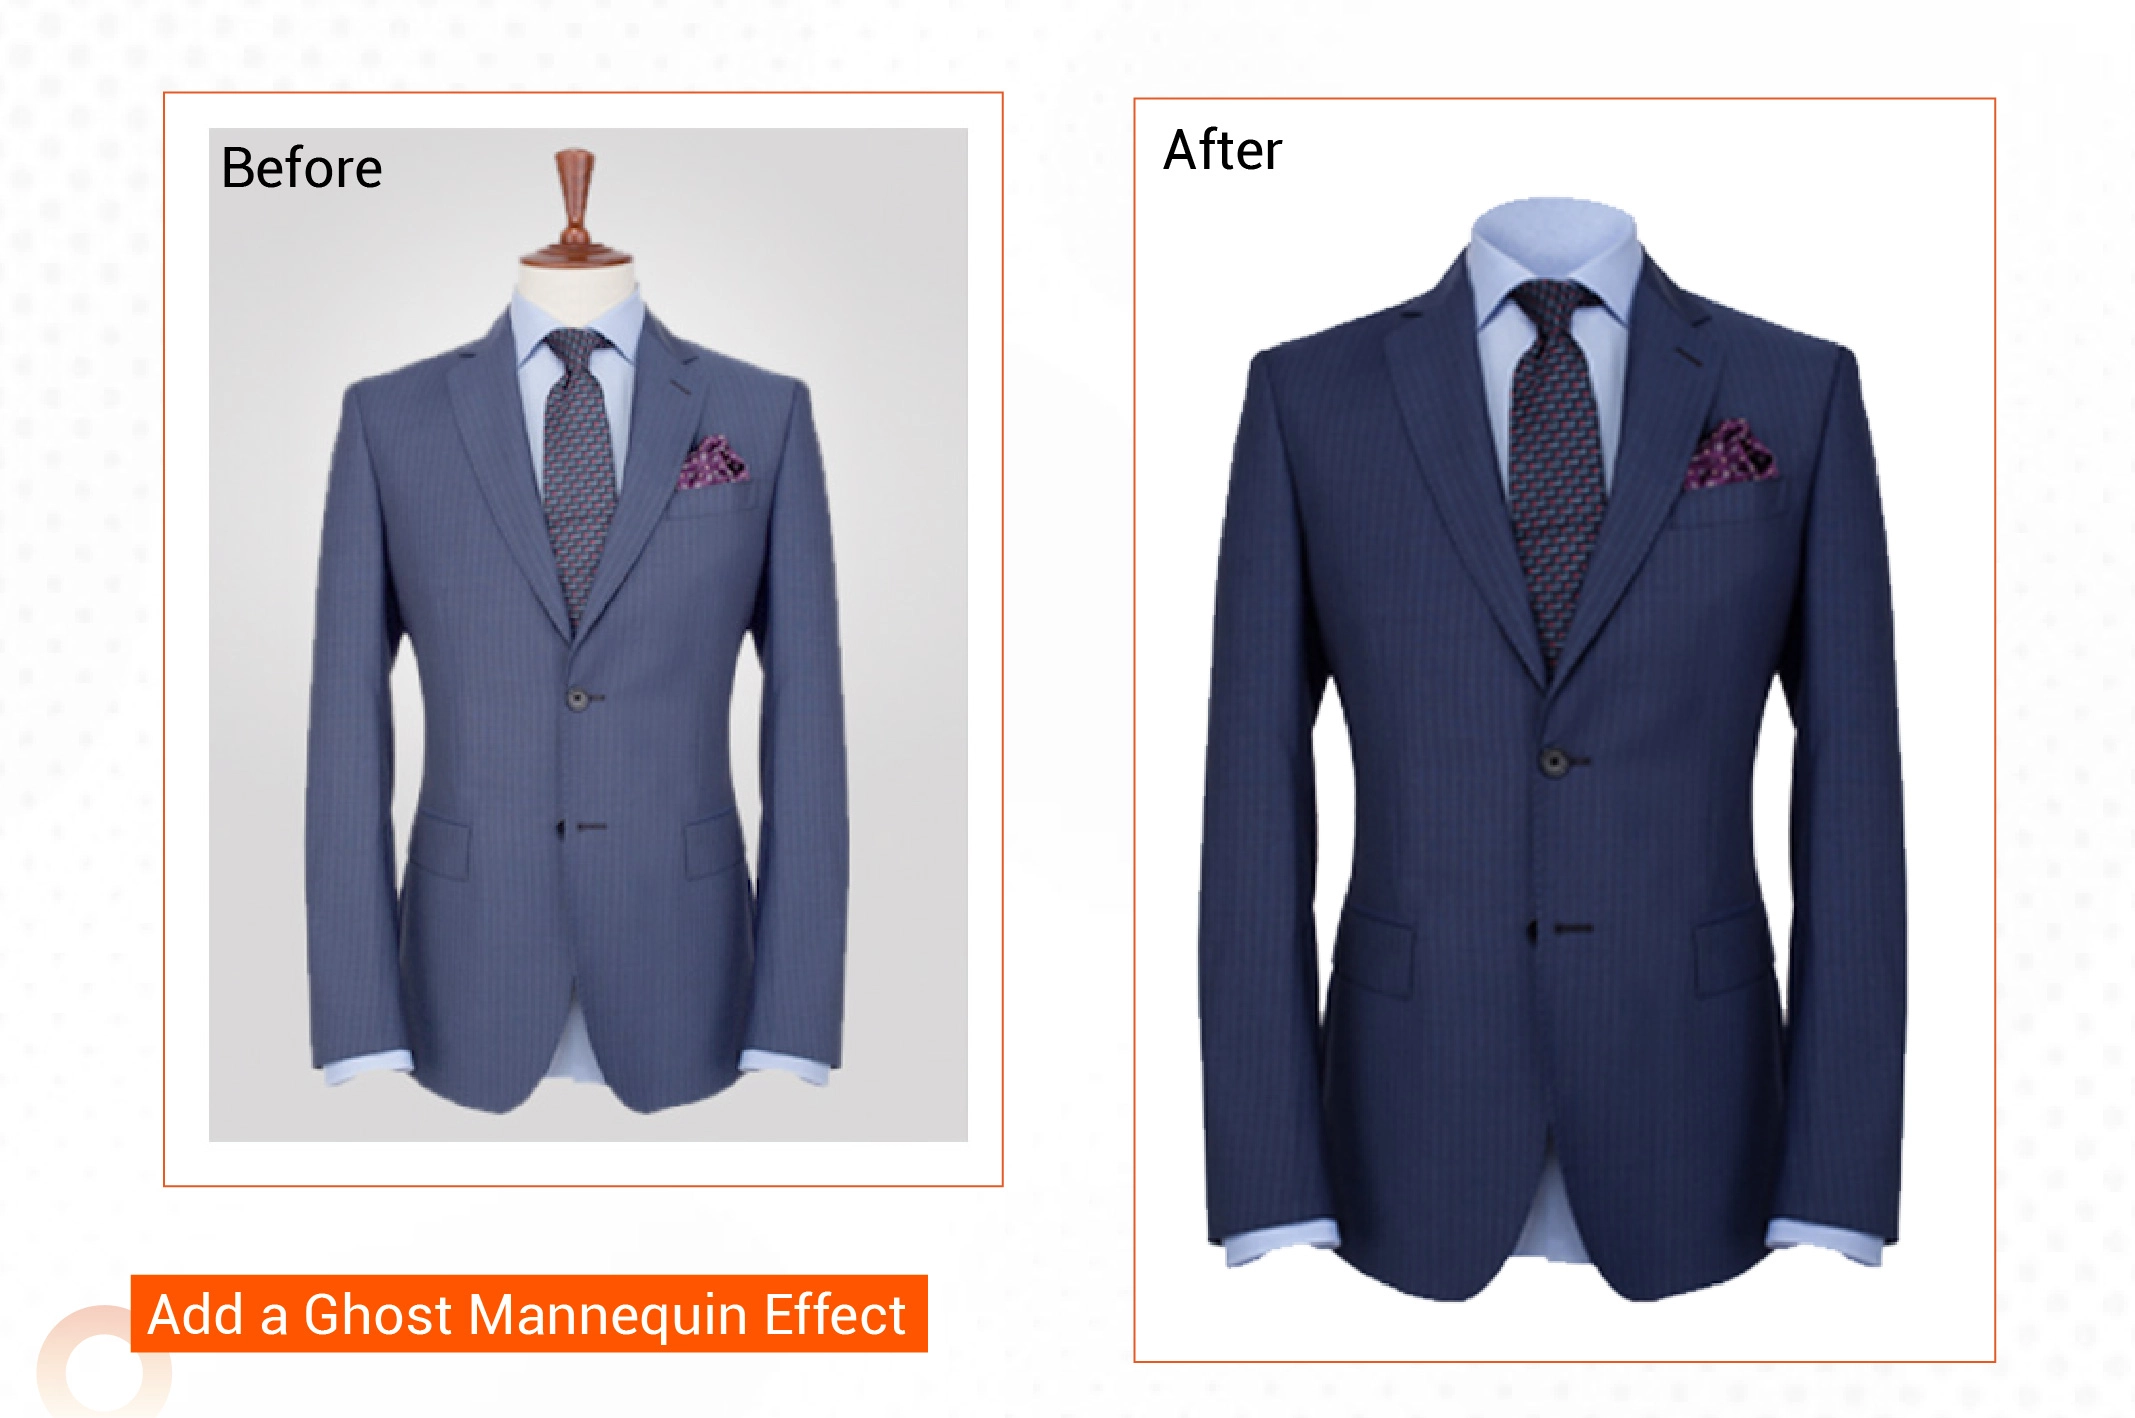
Did you capture the clothing into a mannequin? Or your clothing image may be looking too flat even after removing the hanger. So, what is the solution? You can add a ghost mannequin effect to clearly show the apparel’s shape and details. It appears more structured and form-fitting. The floating effect makes viewers feel that an invisible person is wearing the attire.
However, skillful editing is a must to maintain clothes’ natural drape and fit. You have to create a seamless look without losing the details of the garment. Make sure to take photos of both the front and back parts of the clothing. Then, I used professional software like Adobe Photoshop to combine all the images.
Step-10 Replace Garment Color Variants
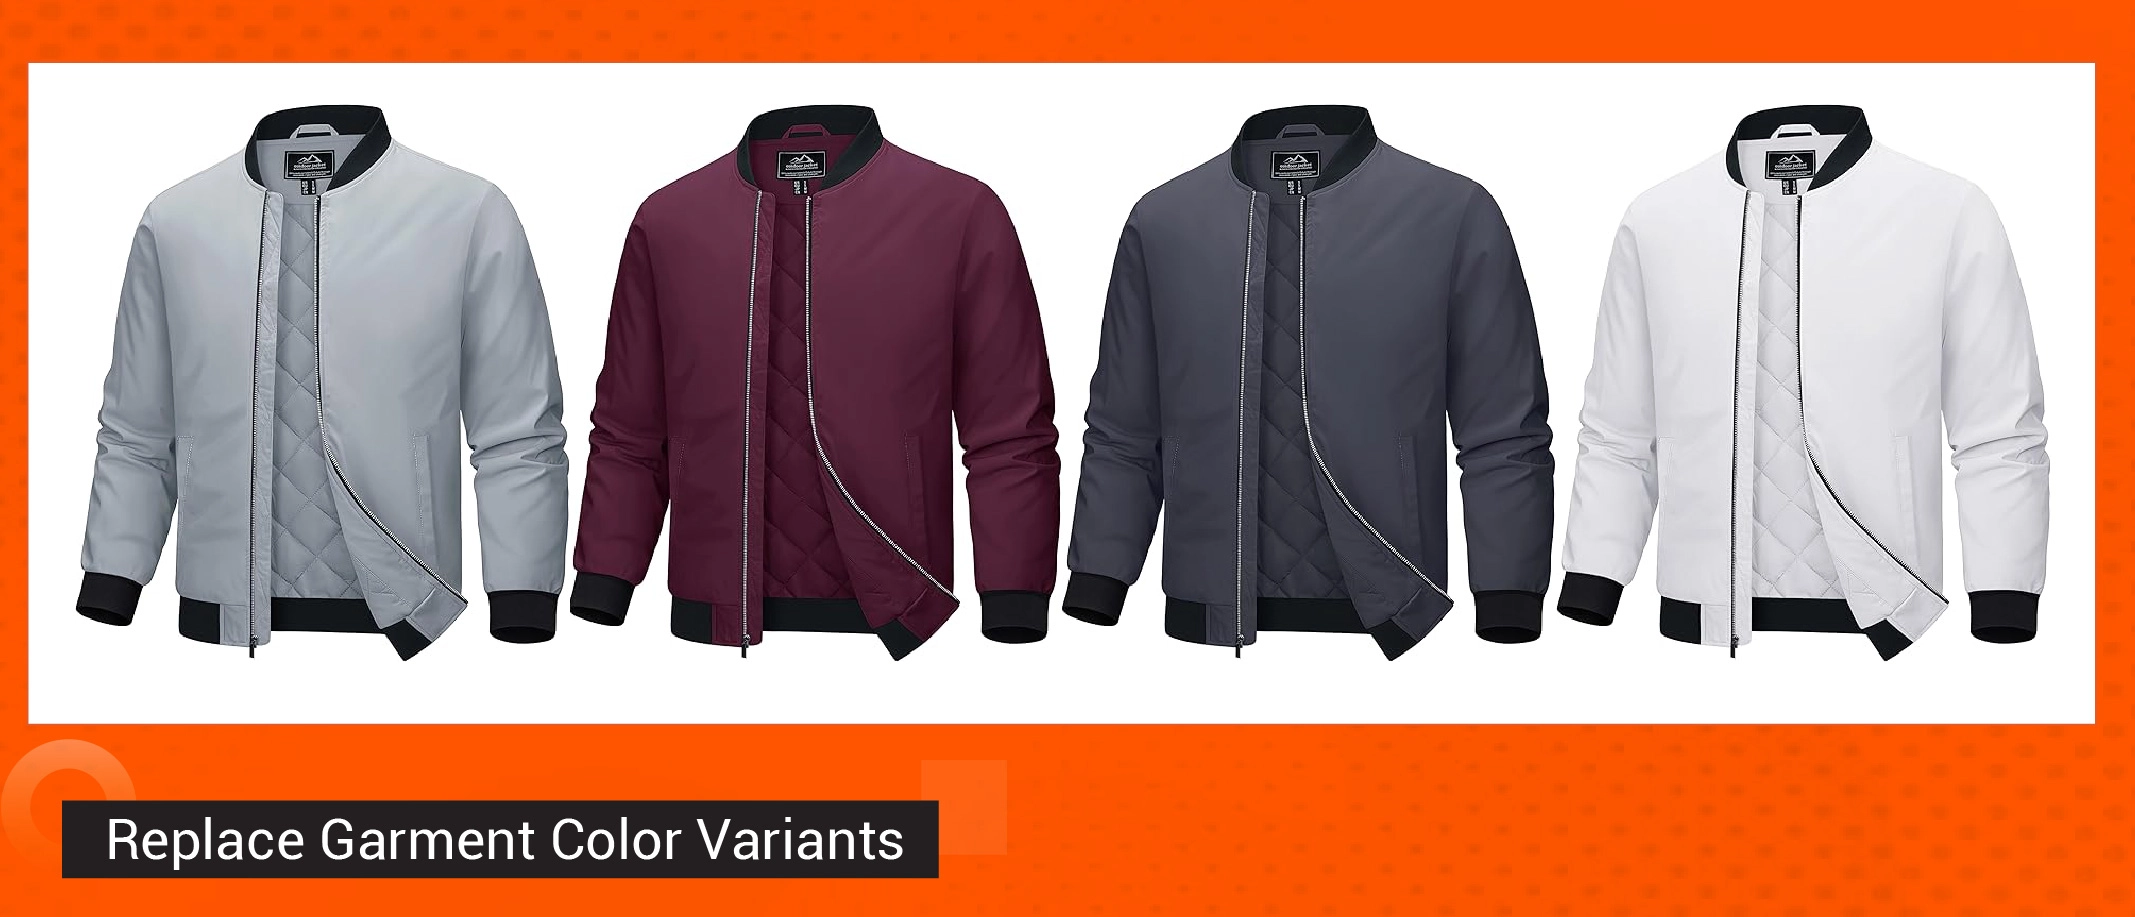
Will you photoshoot all color variants of clothing items like t-shirts, hoodies, or dresses? Won’t it be a bit hassle and time-consuming? The best solution is changing the color in post-production. Take photos of one specific color of clothing. Then, change it to different colors based on how many options you have in your collection. You have the flexibility to add new colors to your listings, too. Customers can see all available colors at once.
Step-11 Maintain Consistency Across E-Commerce Product Images
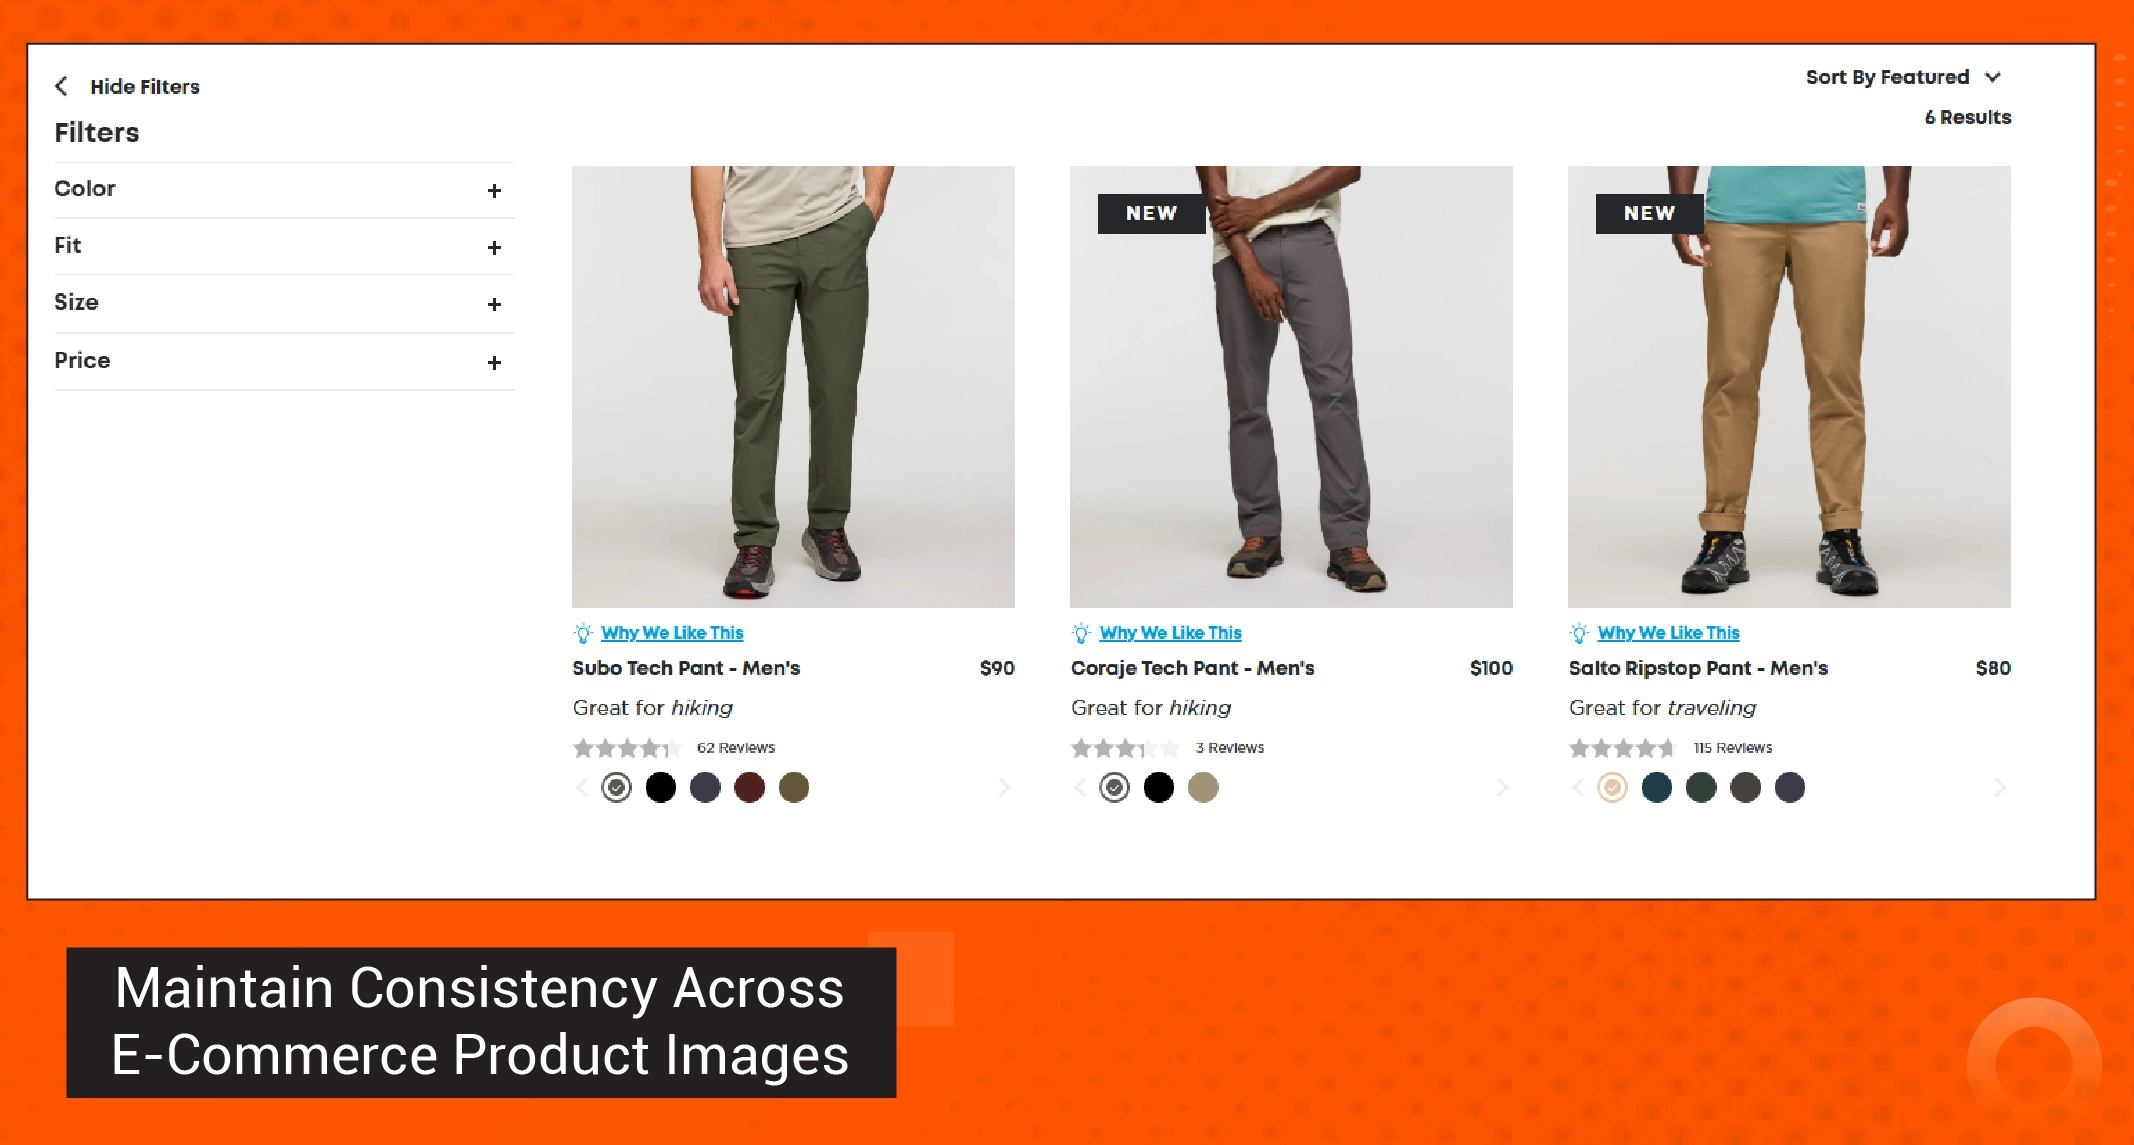
Did you hire several models for clothing photoshoots? They vary in size, shape, posing style, and other attributes. So, how will you stick to consistency across all photographs? A simple solution is to keep the garment item centered and limit the image frame ratio. Show what customers want to see. This enables you to showcase similar products using a similar approach.
Step-12 Show Close-up Details
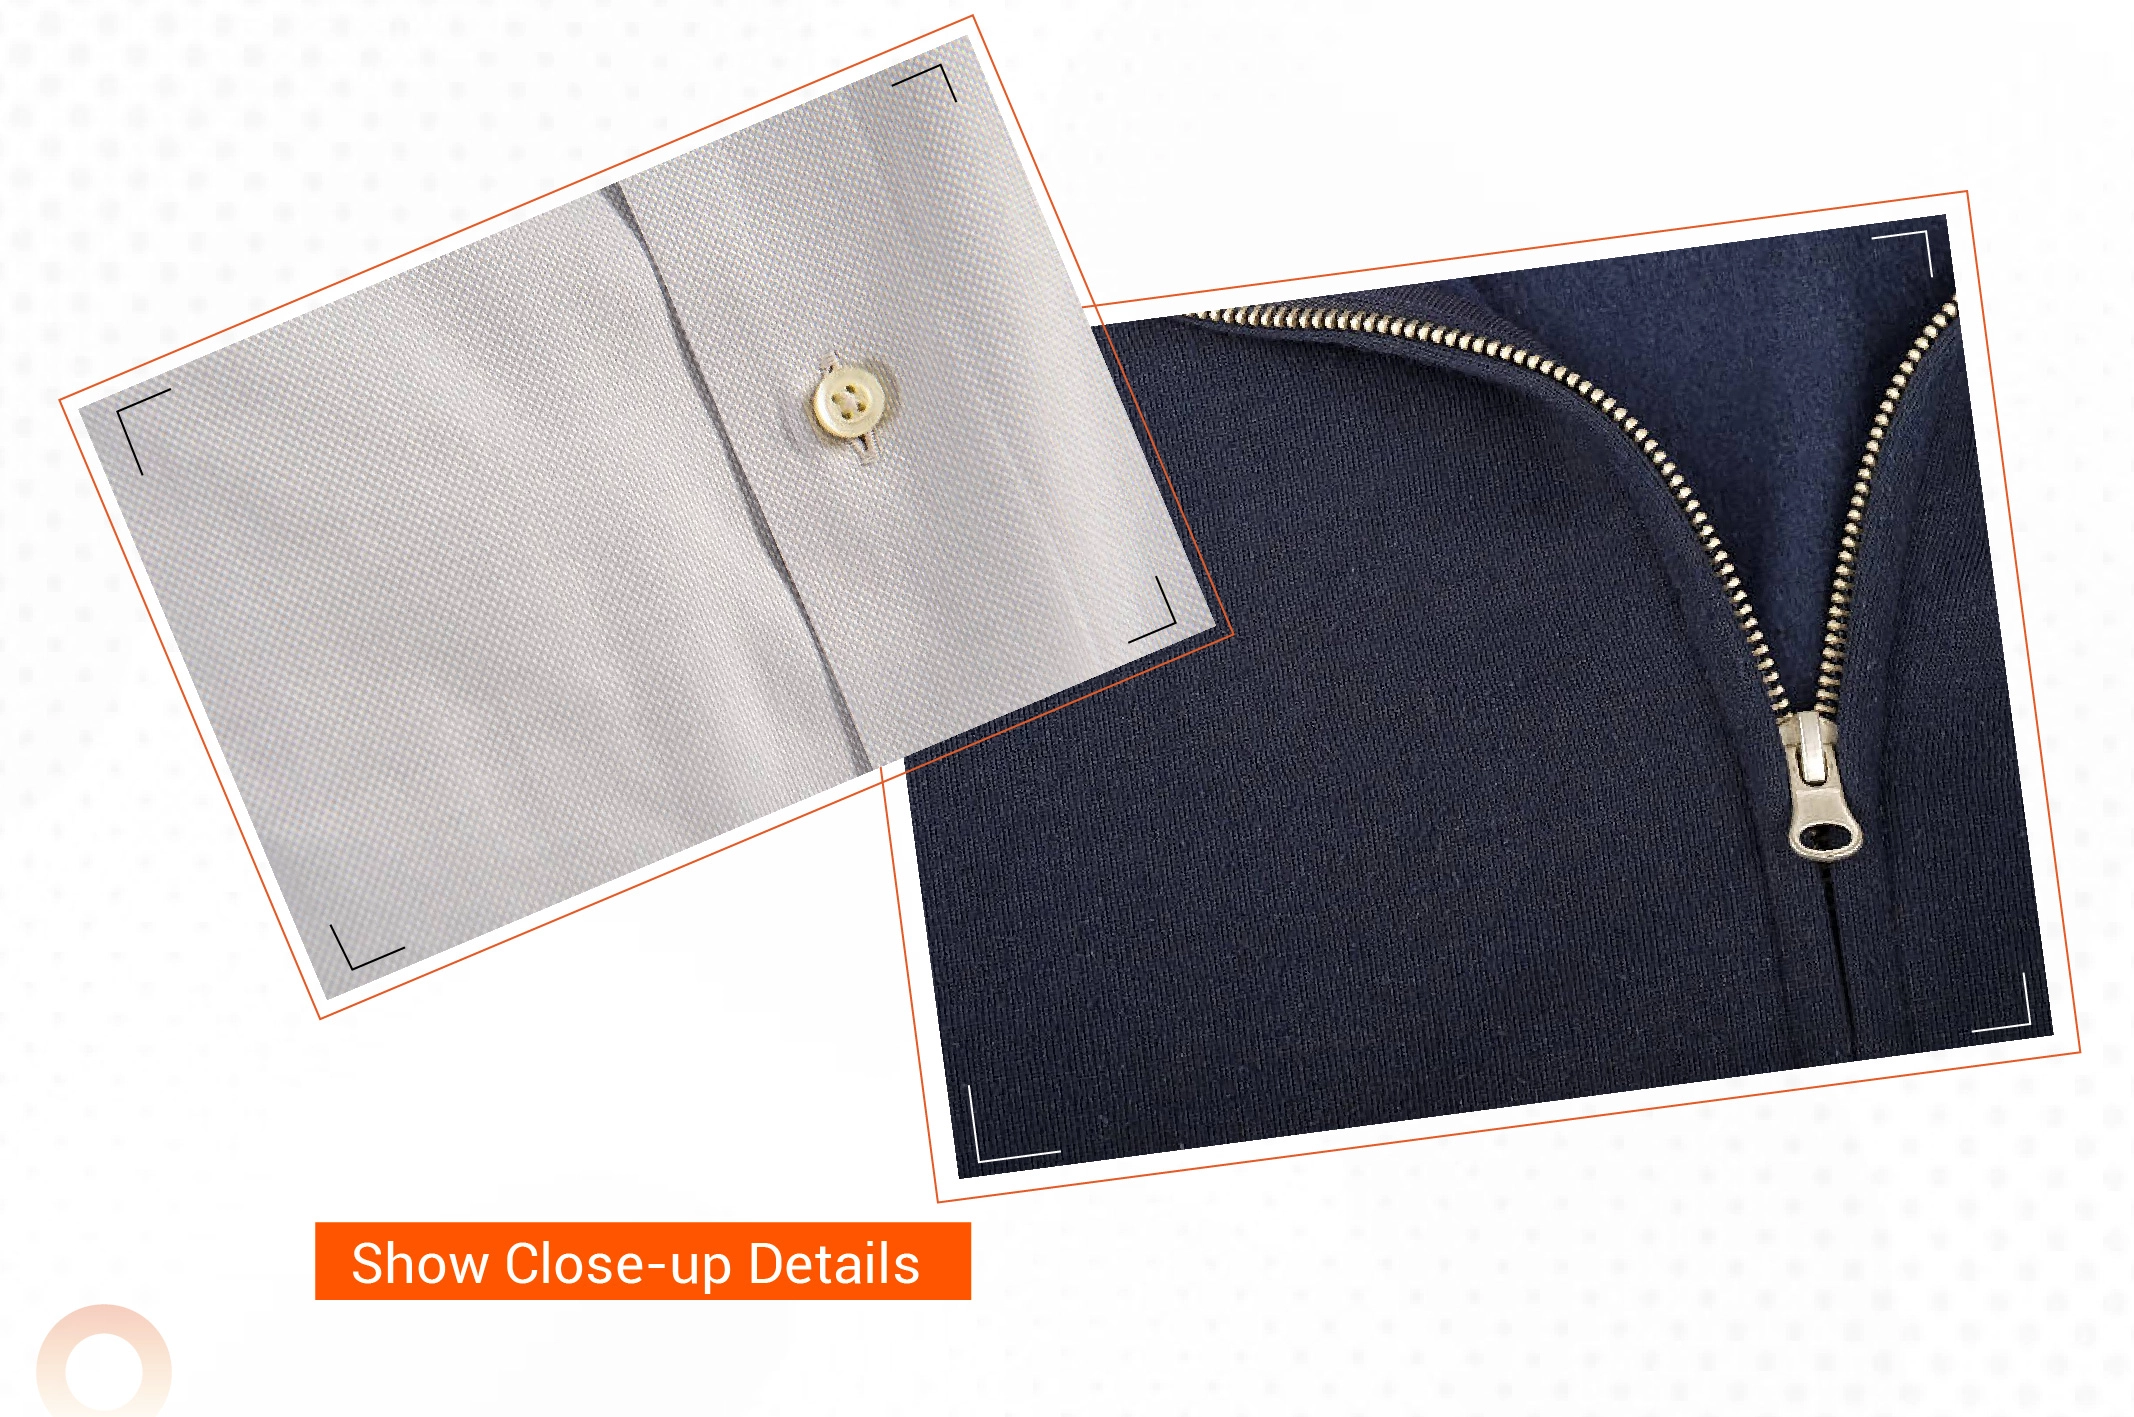
Customers may want to see intricate details besides the complete picture of the clothing. Take close-up shots of your clothing image to showcase better fabric texture, stitching details, and design features.
An alternative option could be cropping the full-sized images. However, the photos must have high resolution. Otherwise, it will result in pixelation. Poor quality images lead to a loss of detail in photos.
How to Choose a Clothes Photo Editing Service?
Clothes photo editing needs precision to showcase garment details accurately. Wondering how to select an apparel image retouching entity? Consider the points mentioned below to choose the best one.
01. How Much Experience Do They Have?
The way an experienced photo editor can convey the idea in image editing won’t be the same as a beginner. They can handle critical situations smoothly, such as complex image editing.
Plus, experienced image editing companies have skilled employees who can quickly catch up with clients’ requirements and submit tasks. They have many presets available to speed up the workspace. However, just because some companies completed a vast number of projects doesn’t mean they are the best. Quality work is the key. You can choose leading image editing service providers, like Retouching Zone, Path Edits, Pixelz, etc.
02. What Does the Portfolio Show?
Go through the portfolio of the image editing company carefully. It gives you an idea about their work quality and skills. You can also understand in what field they are highly expertized.
In addition, a portfolio helps you to set your expectations based on your editing style. It enables you to forecast whether it can align with your brand vision.
03. What is the Turnaround Time?
The standard turnaround time of an image editing company is 24 to 48 hours, even for bulk orders. However, some complicated projects may take additional time. Strictly maintaining quality is the key. If you need urgent delivery, you have to pay an additional fee. However, you may face delays during the peak season. Maintain clear communication regarding the delivery time. Set the priority level regarding which images you need first.
04. What Are the Pricing Options?
How much should you pay per photo edit? It varies depending on the type of photo editing and complexity. Most image editing service providers offer discounts for bulk orders. For urgent deliveries, there will be rush service fees. Many virtual photo editing studios provide different package deals. For example, they can set specific prices separately for 100, 500, and 1000 images.
If you need any corrections, they may charge you additional revision costs. Make sure you have a clear idea regarding the payment terms and conditions.
05. Is Customer Service Reliable?
You can determine the customer service quality by asking these questions:
- How fast do the customer support agents respond?
- At what Communication channels are they available?
- Are they available 24/7 or only for a specific timeframe daily?
- How fast can they resolve your problems?
- Can they provide personalized support based on your photo editing requirements?
- Do they offer continuous updates regarding the project?
- Are they available to make any corrections even after completing the project?
06. Are Security Measures in Place?
How safe will your images and additional files be with the image editing company? Bind a confidential agreement to safeguard your data. They must have a secure storage system to access the edited photos safely. Their payment processing system must be safe enough to protect your personal information.
Choose a photo editing company that has strict encryption protocols. It will protect your sensitive data from unauthorized access and potential breaches during processing and storage.
07. What Do Reviews and Testimonials Say?
Read the reviews and testimonials to gauge their credibility and trust. It helps you determine how satisfied the customers are. Are they committed to providing high-quality edited images? You can perceive the value of their photo editing service through these customers’ feedback. This enables you to make an informed decision whether to edit clothing images from them or not. Be careful about fake reviews containing generic language, grammatical errors, and too much praise.
08. Is Quality Control Ensured?
What quality control method does the image editing company follow? Most professional virtual photo editing studios use a multi-step quality control approach to ensure consistency across all clothing images.
Apart from maintaining standard editing, their experts can detect unwanted errors instantly. The quality assurance team will go for a final review before submitting the task.
FAQs
-
How can I remove wrinkles from clothes in a photo without losing texture?
You can use Photoshop’s spot healing brush or clone stamp tool to target wrinkles. Then, adjust opacity and flow to preserve the natural texture of the material.
-
Which editing tools help adjust clothing fit to look more flattering?
You can use tools like Adobe Photoshop’s Liquify filter or Adobe Lightroom’s Transform panel to adjust clothing fittings precisely. Apply subtle tweaks to create a natural look.
-
What techniques ensure clothing patterns stay undistorted during edits?
UV mapping and warp tools are excellent choices to align patterns with garment contours and avoid stretching.
-
How much does it cost to clothes photo editing?
Basic editing will cost $0.25 to $2.00 per image. However, if clothing images need advanced retouching or manipulation, they may charge around $10.00 to $50.00 or more per image.
Final Words
You can’t hook your customers unless your images are eye-catching enough to create an impression. Those photographs must be visually appealing to create a sparking desire in shoppers’ minds and engage them further. Apart from taking high-quality clothing photographs, you must edit them to create a professional and polished look. We have already outlined the right way to clothes photo editing and make them perfect for e-commerce sites.