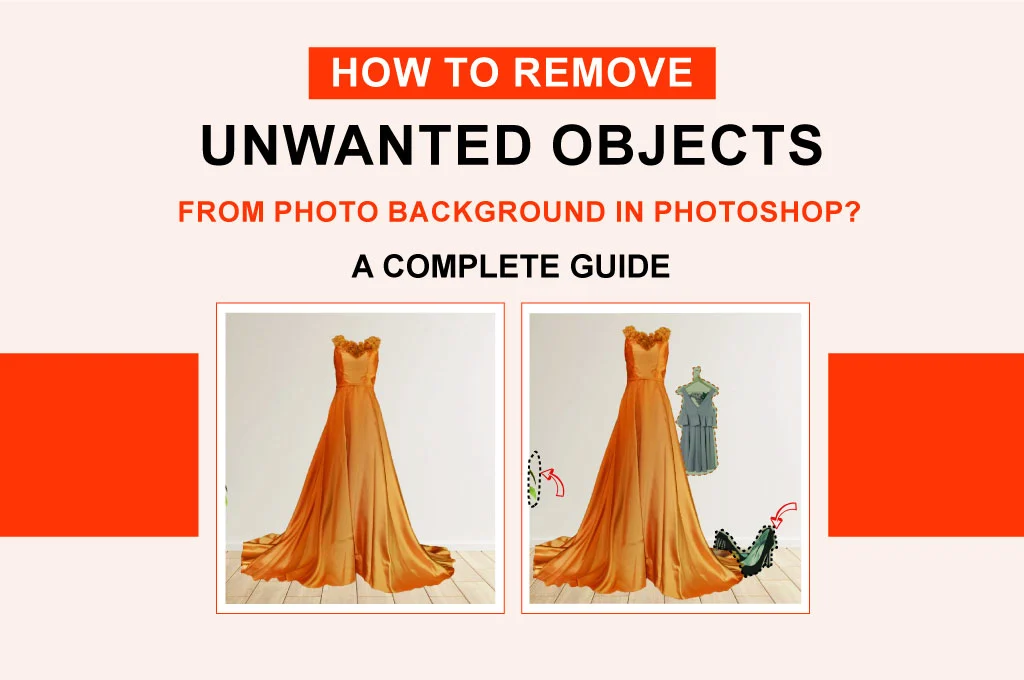
Does your photo background contain unnecessary elements? The cluttered backdrop may draw off the focus from the primary object and create visual distractions. So, how do you clear irrelevant items from your image background? The discussion below covers how to remove unwanted objects from the photo background.
Remove Unwanted Objects from Photos in Photoshop in 4 Steps
You may have used the Healing Brush, Clone Stamp, and Eraser Tool to clear objects from a picture backdrop.
The Remove Tool is a new function introduced by Adobe in 2023. It is integrated with artificial intelligence (AI) features for quick removal of objects.
Let’s learn how to use this function to erase unwanted elements from the photo background in Photoshop.
Step 01: Import the Image
- Launch the Adobe Photoshop software on your computer or laptop.
- Choose File > New and select the picture you want to work on. Or follow the drag and drop technique to open the image.
Step 02: Select the Remove Tool
- Remove Tool is one of the best functions for effortlessly removing nonessential objects or distractions from the picture.
- Navigate to the left side in the toolbar section and choose it from the right-hand list below.
- Use the “Size” slider to adjust the brush size. It should be a bit larger than the area you want to work on to cover the entire section. A good rule of thumb is to keep it within 90-95.
Step 03: Use the Remove Tool
- Once you select the function, paint over the area you want to erase unwanted things.
- First, paint over the lines or boundaries of the object and then move to the inner area.
- Do it without any pause or lifting the cursor to create a smooth, uninterrupted path.
- Later, work on the outside edge area, including the shadow. Try several attempts to achieve a perfect result.
Step 04: Evaluate and Re-edit
- If you are satisfied with the result, use the Remove Tool again. Try a different technique for better outcomes.
- Go to the Menu bar section and select Edit >Content-Aware Fill. Then, choose the “Content-Aware” option from the upper Fill dialogue box.
- The system will automatically erase the object. If it still leaves any small remnants or imperfections, use the Remove Tool again.
- Save the file once you successfully clear the entire object from the photo background.
Bonus Tips to Remove Unwanted Objects from Photo Background
You have already learned a simple way to erase unnecessary elements from an image background. Here are some bonus tips to help you get better at photo editing.
Choose The Right Size Brush
Adjust the brush size to achieve a more fluid workflow depending on how much area you want to cover. It should be neither over-sized nor under-sized.
Don’t Rush
Editing photos requires patience. Track your post-production progress and revise it several times to ensure it aligns with your objective.
Zoom In
Adobe Photoshop allows you to zoom in on an object up to 3200%. This allows you to magnify your view and precisely select and refine the edges.
Go for Multiple Passes
Some objects have complex edges or borders. You can’t cover the entire object with a single full motion. Go for multiple passes to cover all the outlines related to the subject.
Create A Duplicate Layer
Always use a copy layer to avoid affecting the original picture. When working on the duplicate version of the image, you can revert to the original photo.
Conclusion
Focusing on the main subject of an image is crucial to emphasize the subject. It allows you to catch people’s attention quickly. However, a picture with some irrelevant segments can steal away the focal point. We have mentioned how to remove unwanted objects from photo background in Photoshop using the Remove Tool. You can use other tools if you know the right technique. It will, in fact, speed up your editing.