Before we go through Amazon photo editing, ninja tenchinques, we have to know that there are over 600 million products listed on the Amazon Marketplace. How do you attract customers and sell your goods on this platform? If you want to stand out from the crowd and stay exceptional, properly presenting your items is the key. Hence, learning how to edit product photos for Amazon is important. It helps you boost sales growth. This article covers the right way to retouch Amazon items.
Amazon Photo Editing in 5 Steps
Originally captured pictures may not have the correct standard to upload to this e-commerce site. Your unedited photos lack the necessary editing to showcase the product accurately.
Here is the guide on how to edit photos for an Amazon listing.
Step 01: Import the Image
- The background area of an Amazon product photo must be pure white and RGB color values must be 255, 255, 255. It helps customers to enjoy a consistent shopping experience for product search and detail pages.
- Import the Image in Adobe Photoshop. Navigate to the toolbar area and tap on the Pen tool from the lower half zone. Press the P key on your keyboard to access the Pen tool.
Step 02: Create A Clipping Path
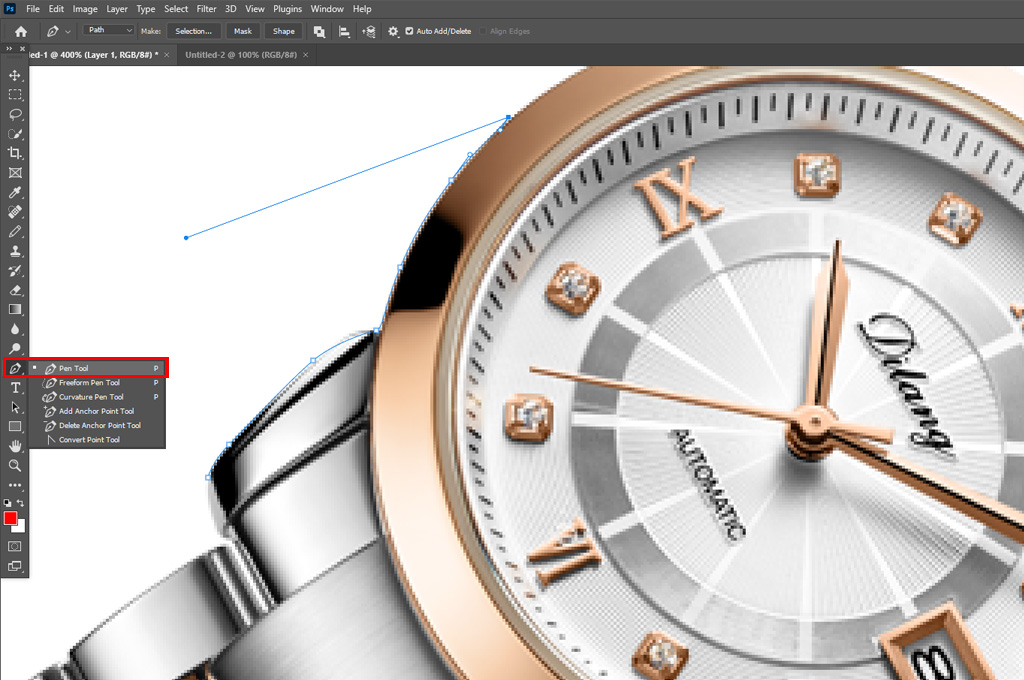
- Turn on the Rubber Band option next to the “Geometry options.” It helps you make smooth forms and previsualize the path you have created. Then, tap on the Auto Add field.
- Next, head to the Options Bar and select the “Exclude Overlapping Shape Areas” option to hide the overlapping areas of the shapes.
- After turning on the pen tool, click on the Image and use it to create a path and shape.
- Once you create a perfect path, hit the Ctrl button on the keyboard. Then, tap on the left mouse icon to deselect the path selection tool.
- If you want to invert the selection or select any area outside the initial clipping path, press “Shift + Ctrl + I.”
- Once you are done with creating a perfect clipping path, press “Ctrl + X” to eliminate the background and turn it into a white backdrop.
You may also like to read… How Do I Create a Clipping Path in Photoshop?
Step 03: Color Correction
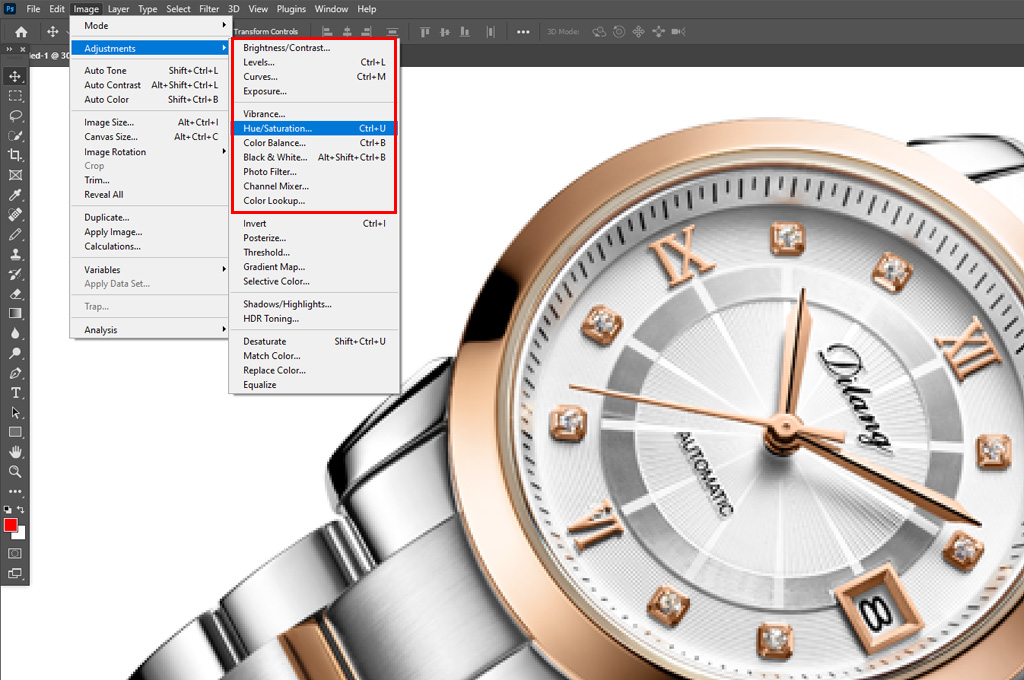
- If your products are too dark, too bright, or unnatural in color, Amazon is less likely to approve uploading the items’ photos.
- Maintaining natural and consistent color in Amazon product listings is the key. The items should be the same as the pictures.
- Go to Image > Adjustments > Hue/Saturation to adjust your product image’s hue, saturation, and lightness. Finally, press the OK button.
You may also like to read… Benefits of Photo Color Correction for E-commerce
Step 04: Work on Imperfections
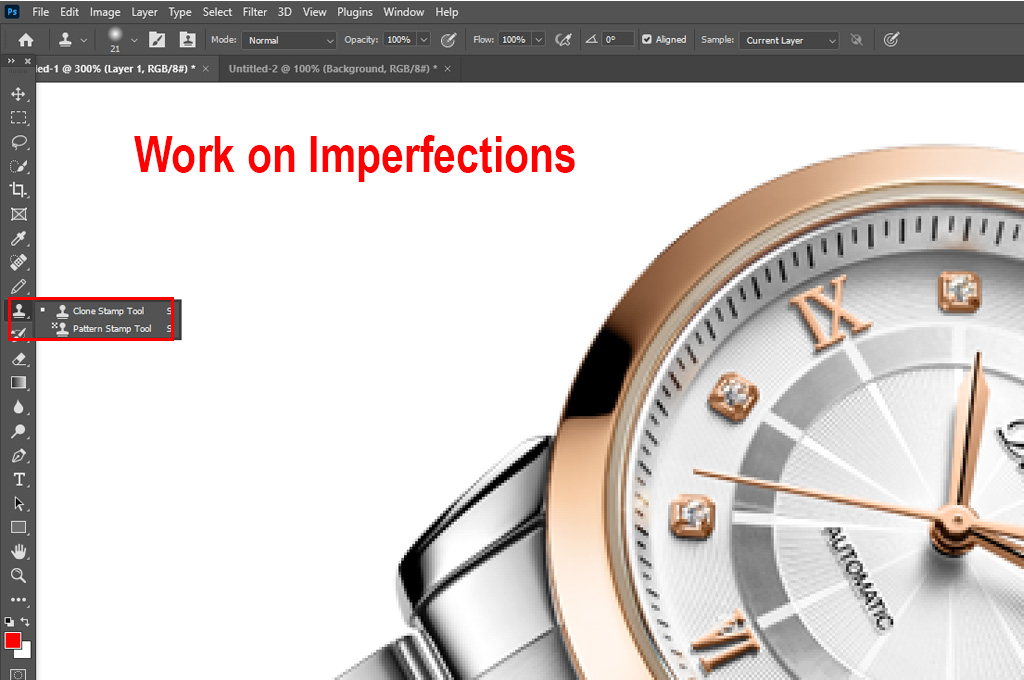
- Your Amazon product photos may contain unwanted things you don’t want your customers to notice.
- The best solution is to use the Clone Stamp tool. Navigate to the toolbar and select the rubber stamp icon.
- Finally, choose the Clone Stamp tool from the drop-down list. Alternatively, press the ‘S’ button on your keyboard to select it automatically.
- Work on various options, like size, hardness, blending mode, etc., for your desired result.
Step 05: Resize the Product Image
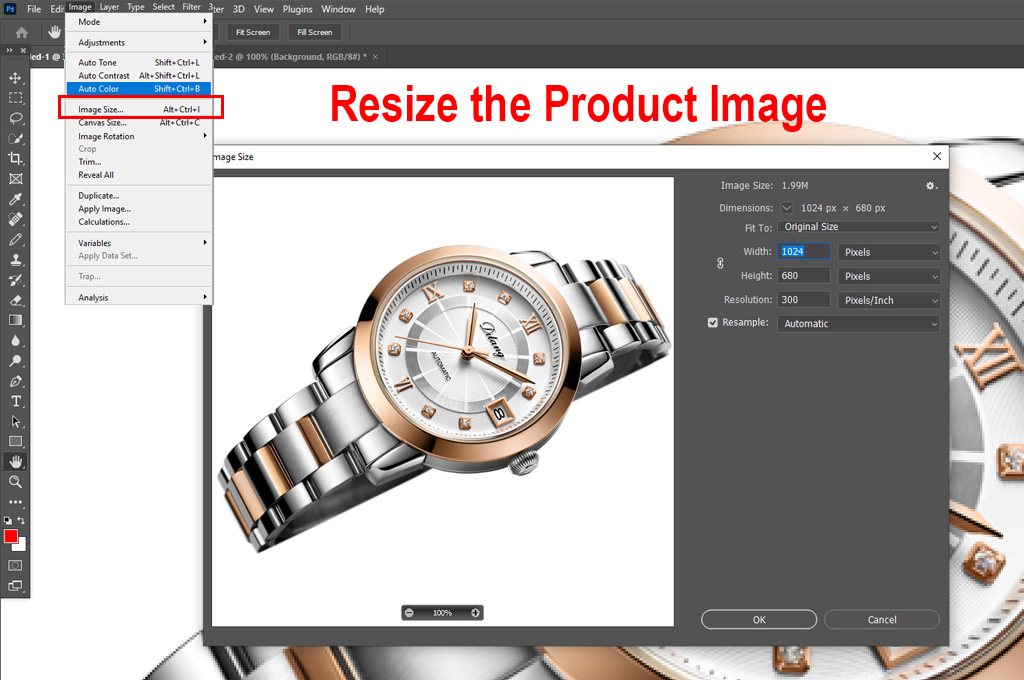
- Remember, your Amazon product must cover at least 85% of the frame size. It should not be cut off anywhere. Capturing a close and focused look at the photo is vital.
- If your product shots have more than 15% empty area, crop the unnecessary area.
- Keep the photo open and select Image > Image Size. Add your preferred value for height and width in the dialogue box. Press the OK button to resize the picture.
- Standard Amazon product images have 2,000 x 2,000 pixels with a 1:1 aspect ratio. The minimum pixels are 1000 for height or width. But it can’t be more than 10,000 pixels combined.
Similar Reads for You
Final Words
By maintaining Amazon photo editing, you can ensure that quality product images play a huge role in creating a positive image of your e-commerce business, attracting more customers and increasing your sales. We have outlined a step-by-step guideline on how to edit product photos for Amazon. JPG is the best-recommended image file for Amazon. But you can use PNG, TIFF, and GIF options. Another important thing is to keep the product color mode as either sRGB or CMYK.