When you have the perfect raw car photos to edit, half your job to give it a great finish is done. Remember, you need to spare a few minutes when retouching automobile pictures. Originally captured images lack the standard quality and consistency. They may contain imbalanced exposure, unwanted reflections, visible dust, or distracting backgrounds.
With careful editing, your raw car photos won’t depict the exact story and personality of the vehicle you want to highlight. Also, those imperfect visuals will fail to attract potential buyers. This guide provides the exact 10-step process used by professional automotive retouchers.
Why is Raw Car Photos to Edit Essential?
Don’t think your job is done once your automobile photography setup is perfect. Right angles and lighting are necessary for automobile photoshoots, but they are not everything.
You have to work on the post-production process with utmost care to
- Achieve consistency across motor vehicle photos
- Showcase important features of the automobile
- Erase unnecessary elements from the background
- Enhance the image quality to maintain industry standards and boost sales
- Fine-tune colors to reflect the car’s actual appearance
- Retrieve lost details in bright or dark areas
How to Do Raw Car Image Edit Step-by-step?
According to several statistics, 90% of automobile enthusiasts prefer high-quality photos when looking for an automobile online.
Compared to low-quality images, high-quality, professionally retouched vehicle visuals grab viewers’ attention up to 118% more.
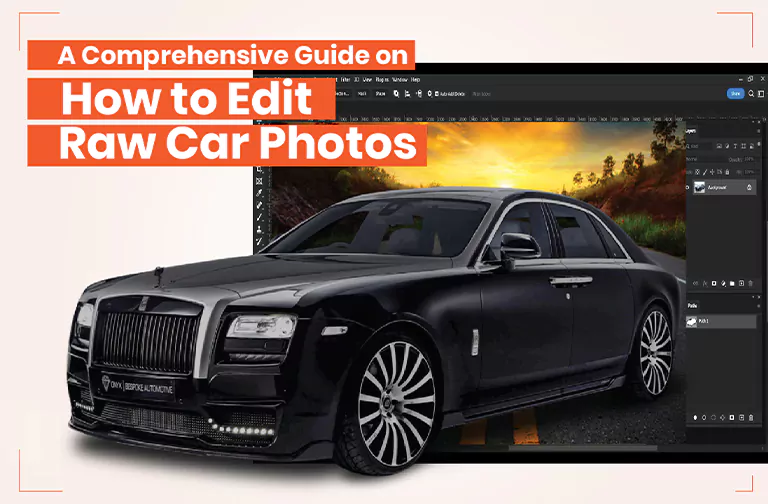
Let’s learn how to edit and retouch moto vehicle photos using Photoshop and other professional-grade software.
Step 1: Begin with Uncompressed RAW Format Images

- Many automobile photographers prefer shooting in JPEG format for easier sharing. They don’t have to work on extensive post-processing. This is helpful when you have time limitations. However, shooting and editing car photos in RAW format is the best choice. Firstly, your camera sensor can retain most data. It contains much more details than JPEG files. You also have zero chances of losing image quality.
- Secondly, you don’t have to worry about manipulating the original file, as the RAW format is non-destructive. You can reverse the change.
- Thirdly, RAW files have higher levels of brightness. Hence, adjusting the white balance is easy.
- Finally, even if your RAW image contains imbalanced exposure, it will be more forgiving for editing. Recovering shadows and highlights during post-processing is also possible.
Step 2: Fine-tune Exposure and Contrast

- Your camera settings determine how bright or dark your car images will be. Over-exposure or under-exposure can kill an automobile photo. Underexposed shots hide details in vehicle shadows. In contrast, high exposure levels in vehicle photos obscure details. Adjust the exposure level using Adobe Photoshop or Lightroom. Use the histogram option to avoid exposure and setting errors.
- Make the contrast level well-balanced to grasp viewers’ attention and set the mood. The automobile must have a perfect texture, highlight, color, and clarity level.
Step 3: Adjust Color Tones for Striking Vehicle Visuals

Correcting the color tone of a vehicle’s image is important. The paint should look stunning and true to life.
- The primary goal of editing the visual is to show the car color as accurately as possible. Increase or decrease the color intensity only at that level where it looks natural. You can use a special color grading technique to achieve the desired aesthetic.
- Another point to remember is that different colors tell different stories. Set a perfect color tone to express the exact story the viewers want to perceive.
- Various design elements of a vehicle may need unique color tones. Also, a specific color tone can set a special mood and emotion. You can’t use the same color contrast for classic, luxurious, and sporty automobiles.
Step 4: Erase Unnecessary Reflections to Highlight Car Details

An improper reflection can remarkably obscure a vehicle’s design and details. It can distort the original shape, misrepresent the design, and create an unflattering look. If lighting is reflected on your car from an uneven or rough surface, it can cause diffuse reflection. You will see inconsistent light patches. The vehicle surface may look wavy, dented, or scratched. Your jeep may lack the sleek appearance that you are craving for.
- The best solution is using Photoshop’s Clone Stamp to cover up glare quickly. Make sure to use the right brush size and settings. However, it may leave some harder edges if the reflection is too complicated.
- Alternatively, you can use the Patch Tool. But it might be a bit challenging to figure out the quirks, especially with curves and edges. Nevertheless, it is perfect for effective car photo editing. This special tool can blend the edges of your selection perfectly.
You may also like to read… Understanding Professional Photo Retouching and its Importance!
Step 5: Tidy Up the Background to Emphasize the Car

An automobile photo background plays a pivotal role in how potential buyers perceive the vehicle. Does a rugged SUV look good parked in a crowded urban lot with distracting elements? It is more likely to feel cluttered and uninspiring.
- Instead, a scenic off-road trail with towering cliffs can instantly grab people’s attention and show the true beauty of the automobile.
- Don’t use a poor-resolution, blurry, or pixelated backdrop, as it makes the automobile unattractive. Your main aim should be showcasing the primary features of the vehicle.
- Clean any background distractions using the Content-Aware Fill in Photoshop. Also, the Spot Healing Brush tool helps remove blemishes, such as tire marks, road debris, rubbish bins, unwanted people, poles, etc.
Step 6: Balance Lighting and Shadows to Add Depth

A well-balanced lighting lets you showcase a car’s true shape, curvature, and features. Correctly adjusting and manipulating the color helps you set the perfect tone, mood, and atmosphere. You can add dynamic lighting effects in car photos to create a dramatic mood. It also makes the car appear more striking, polished, and visually appealing to viewers.
- The Dodge and Burn tools are useful for selectively darkening or brightening some particular parts of a photo. They allow you to highlight the contours and features of a vehicle. These powerful tools add depth and erase distracting elements from the backdrop.
- You can also use the gradient overlays in Photoshop to create smooth color blending effects. Try the preset gradient fills to see if they align with your Moto vehicle’s looks.
- Another creative effect in Adobe Photoshop is Light Flares. It can draw attention to the car’s sleek contours. The unique soft bokeh or starburst appearance looks eye-catchy.
You may also like to read… Different Types Of Shadows In Photoshop
Step 7: Emphasize Subtle Elements to Enrich Automobile Photos

Zooming in the car image 100% or more is always good practice to edit every small detail precisely. For instance, zooming the headlights of a vehicle image helps you identify whether they need adjustment for glow intensity or enhancement for color temperature. Also, you want to consider their brightness, realism, and reflections.
- A wheel’s rims may contain scratches, dirt, and reflections. You can use the Spot Healing Brush tool to fine-tune these imperfections.
- Another practical approach is using Photoshop plugins like Micro Contrast. It can help you improve car photos’ texture, depth, and details.
Step 8: Use Lens Correction Tools to Fix Lens Issues

When it comes to getting a larger field of view of a motor vehicle, wide-angle or zoom-in lenses are helpful. This type of camera lens is effective for introducing more perspective features and emphasizing design lines. But they can cause some distortion, especially close to the borders of the frame for close-up shots.
- The best solution is using lens correction tools in Photoshop. It can fix lens issues such as distortion, chromatic aberration, vignetting, etc.
- Use the automatic correction option if your camera and lens match the setting. Otherwise, use the manual setting.
Step 9: Apply Motion Blur to Car Movement

A motion blur effect on the background is a special photo editing technique to convey a sense of speed and movement visually. It shows how fast a vehicle is moving.
- You can use the Path Blur filter to create blur effects and highlight motion and speed in a certain direction.
- Another option is the Radial Blur filter. If you want to create a motion, soft blur along a circular or a spoked path, this legacy filter is a perfect choice.
- Make sure to adjust the blur center for accurate motion direction. Plus, control the blur amount to evade over-blurring.
Step 10: Add Last Adjustments for Polished Automotive Photos

Once you are done editing the photo, add a vignette for artistic purposes. It is mainly a darker, subtle border around the edges or corners of a vehicle photo.
- Professional photo editors use it to highlight particular aspects of the visual and draw a person’s attention to the center of an image.
- Alternatively, you can use a subtle glow effect to softly illuminate the edges and details of an automobile picture. It makes the overall color of the image vibrant and adds visual interest.
- Make sure your final edited image has a balanced contrast to preserve rich highlights and deep shadows. It must show all the important details and texture.
Similar Reads for You
Frequently Asked Questions
Which app is best for Raw Car Photos to Edit?
Adobe Photoshop, Adobe Lightroom, GIMP, Capture One, and DxO PhotoLab are top professional-grade software for editing automobile photos.
How can I adjust a car’s exposure?
Move the exposure slider left or right in Adobe Photoshop to brighten or darken the motor vehicle. Make sure the important details are visible without overexposure or underexposure.
How do you remove dust and dents from car images?
Use the spot removal tool to eliminate spots, minor dents, sensor dust, or small blemishes. But if you want to remove a large number of dust spots or small objects from the vehicle surface, the spot-healing brush tool is the best choice.
How much time does it take to edit raw car photos?
The average is around 15 minutes to an hour per vehicle photo. However, it can be anywhere from a few minutes to a few hours, based on the complexity of the image and the type of result you want to achieve.
What techniques can I use to sharpen details in car photos?
You can use the “Selective sharpening” technique to sharpen the specific areas of a car image or the main subject without affecting other areas or the background.
Conclusion
Mastering the art of transforming raw car photos to edit into high-end automotive masterpieces requires patience and a sharp eye for detail. While these steps empower you to handle post-production internally, your brand’s visual identity depends on flawless execution.
Don’t let mediocre edits stall your sales; evaluate your current workflow today. Whether you choose to refine your skills or hire a professional retouching service, take action now to ensure your inventory stands out in a crowded market.